


A card is an enduring gift, one that can be cherished for decades or even a lifetime. When a teacher receives and opens a card, they’re not just reading words on a page – they’re experiencing a flood of emotions and memories. Your card becomes a token of your appreciation and a reminder of the impact they’ve had on you as their student, which is something that material gifts often fail to achieve.
So, if you’re thinking of showing your teacher some gratitude, don’t underestimate the power of a simple, yet thoughtfully written card. Accompany it with your heartfelt wishes, and you’ll have created a gift that your teacher will truly treasure.
Reference: 14 Meaningful Ways to Celebrate Teacher’s Day
1 Easy-to-Make Greeting Card Ideas for Teacher’s Day
Crafting a special greeting card for your teacher might seem daunting, but with these ideas, you’ll be able to create beautiful and unique cards with just a few simple steps and materials.
Materials Needed
- A5-sized colored construction paper (choose your favorite color)
- Double-sided tape for easy attachment
- A glue stick for precise adhesion
- Glue gun and wax stick for extra security
- Scissors for cutting paper
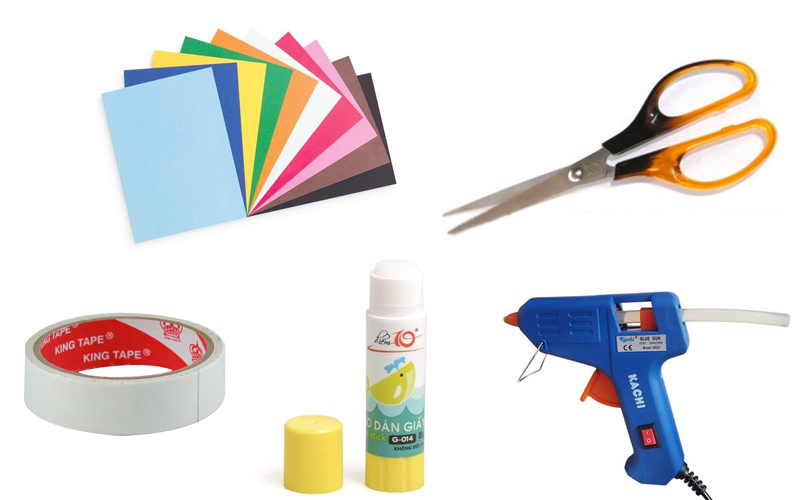 Gather your materials to craft a thoughtful Teacher’s Day card
Instructions
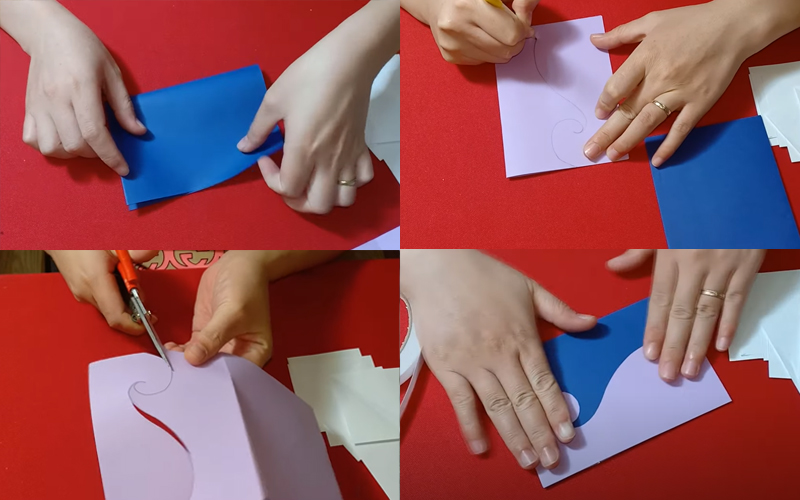 Cut and shape the colored paper to your liking for your unique card
 Create a decorative strip for your card with this simple technique
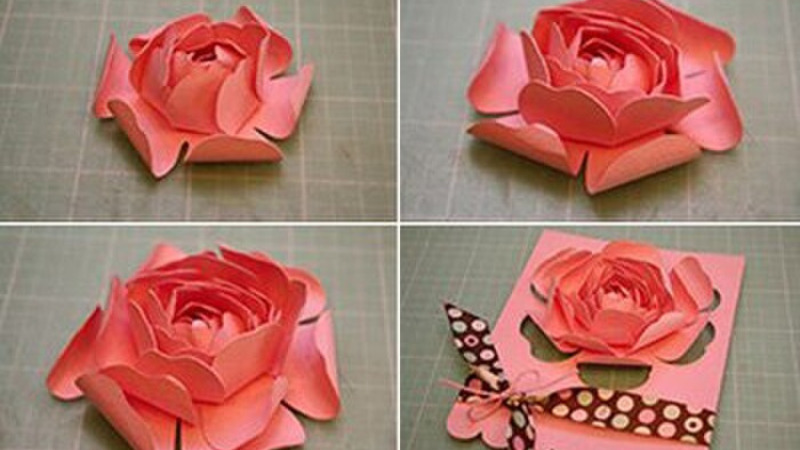
 Create beautiful flowers to adorn your card with this simple technique
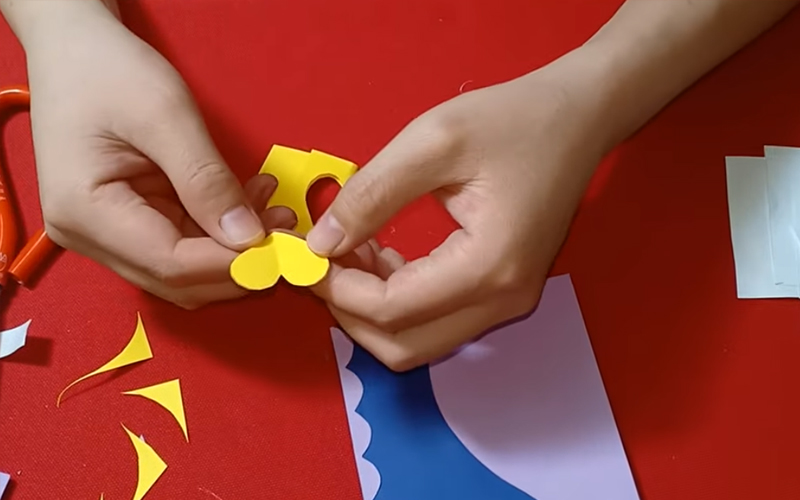 Cut out heart shapes to add a touch of love to your design
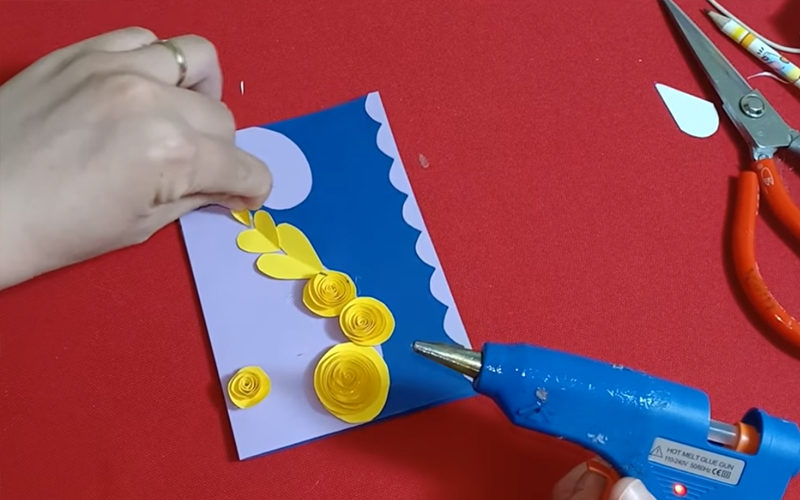 Bring your card to life with these beautiful embellishments
Final Product
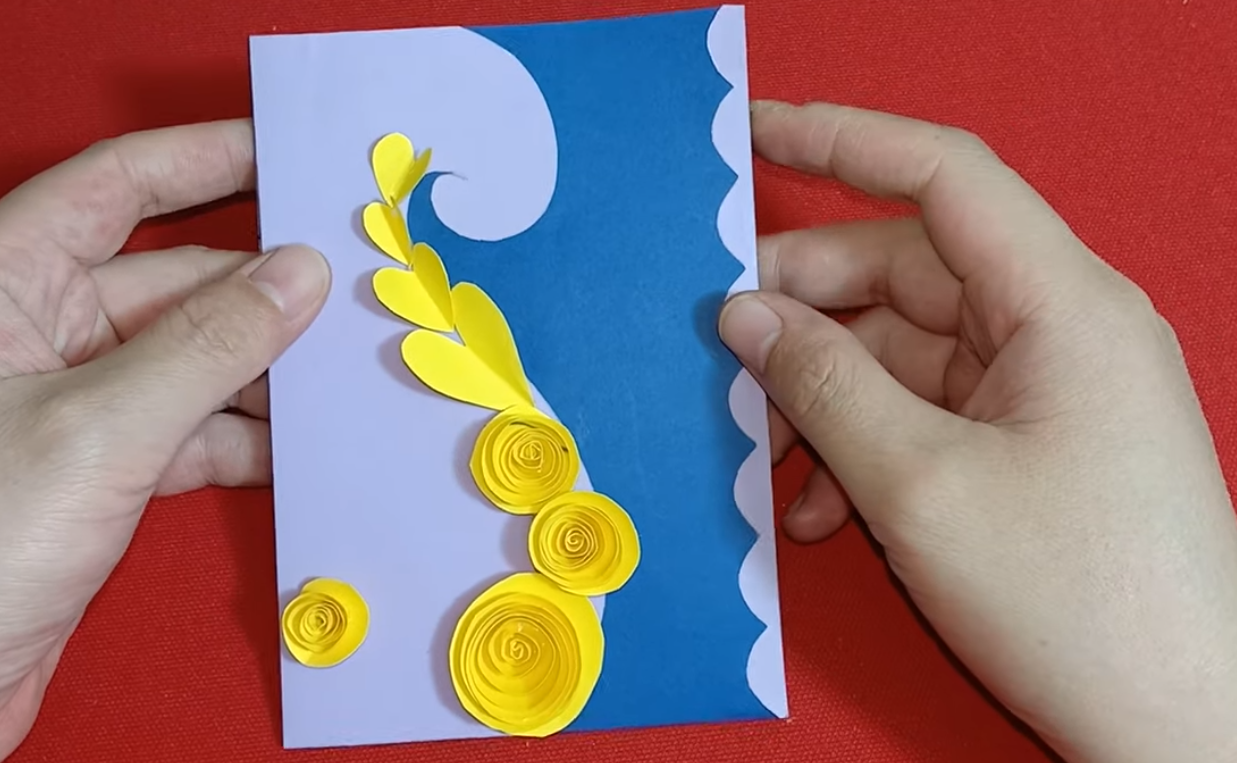 Behold your beautiful handmade Teacher’s Day card
With just a few simple materials and easy-to-follow steps, you’ve created a heartfelt card to give to your teacher on a special day. It’s an incredibly rewarding feeling, isn’t it? Feel free to experiment with different materials and add more intricate details to make your card even more captivating.
Don’t forget to include meaningful and sincere wishes for your teacher inside the card, letting them know how much you appreciate them.
Explore more creative ideas:
2 How to Make a Beautiful Teacher’s Day Card with Ribbons
Materials Needed
- White, green, and yellow ribbons in various widths.
- Cardstock in your desired color.
- Scissors for cutting.
- Double-sided tape, glue, and a wax stick for adhesion.
Instructions
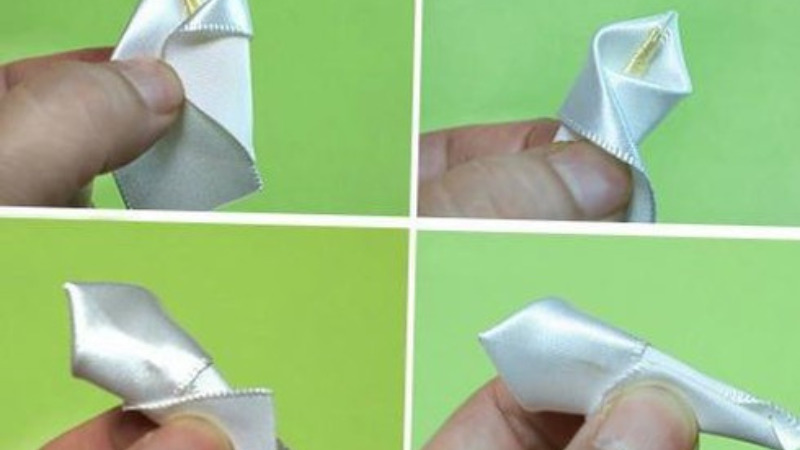 Create an elegant flower stamen with this simple technique
Note: Ensure that the excess ribbon is neatly folded and secured to the back of the flower.
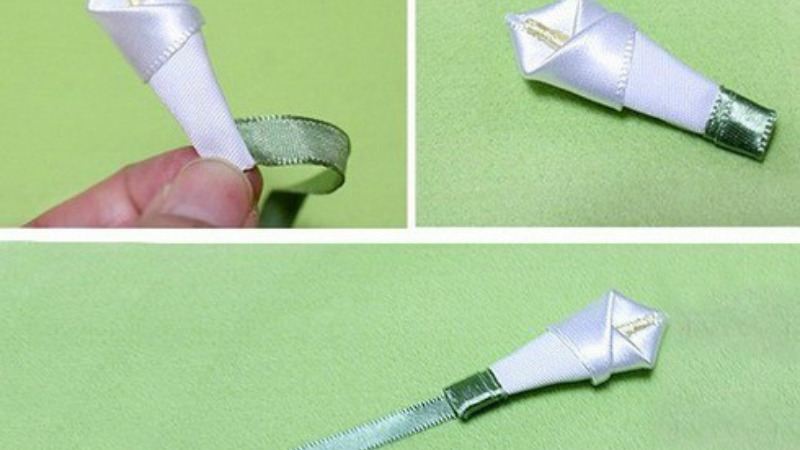 Create the flower’s sepals and stem with this simple ribbon technique
Explore more creative ideas: 12 Meaningful and Practical Ways to Celebrate Teacher’s Day
 Your elegant card is now complete and ready to be filled with heartfelt words
Explore more creative ideas: Heartfelt Wishes for Teacher’s Day
3 How to Make a 3D Pop-Up Card for Teacher’s Day
Materials Needed
- Pink and white paper for a soft and elegant look.
- Scissors, paper knife, and a pen for cutting and drawing.
- Glue to secure your design.
Instructions
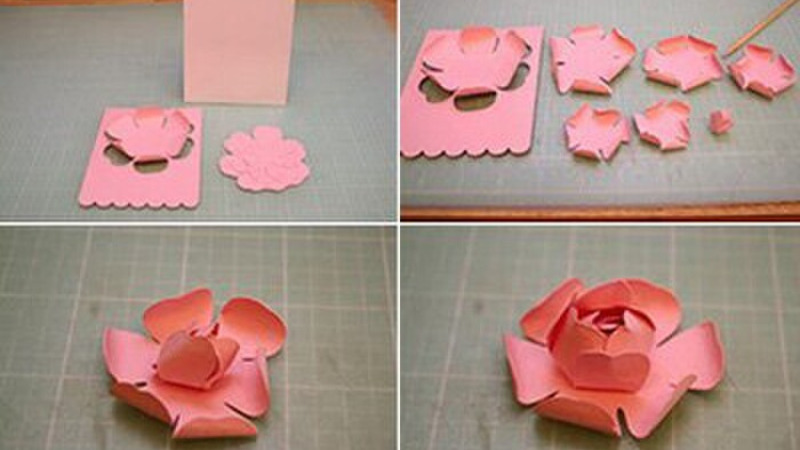 Create a stunning floral design with this simple technique
 Your stunning 3D pop-up card is now complete and ready to be filled with kind words
Explore more creative ideas: Teacher’s Day Gift Ideas
4 Quick and Easy Card Idea Using Crayons and Cardstock
This idea is simple and perfect for those short on time. All you need is a box of crayons in various colors and a piece of white cardstock, cut to your desired size.
Fold the cardstock in half to create a card, and then let your creativity flow! Use the crayons to draw unique and colorful designs on the front of the card. You can draw flowers, books, pens, or anything else that symbolizes Teacher’s Day to you.
On the inside of the card, write your wishes and words of gratitude to your beloved teacher. Let them know how much you appreciate their hard work and dedication.
Explore more creative ideas: 4 Meaningful Ways to Express Your Gratitude and Respect to Your Teachers
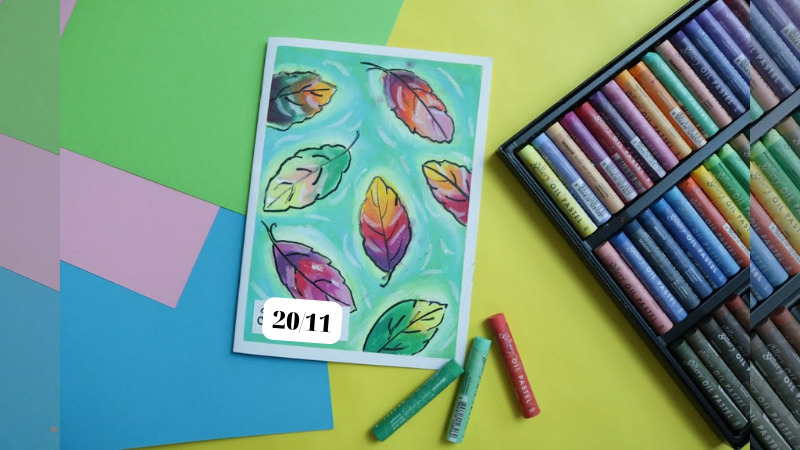 A quick and easy card idea using crayons and cardstock
5 Beautiful Card Designs to Celebrate Teacher’s Day
Here are some stunning card designs to inspire you:
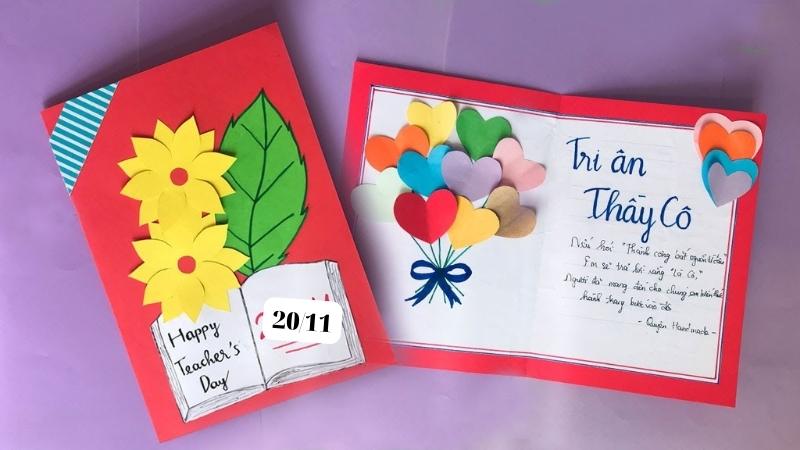 Balloon-themed card to celebrate Teacher’s Day
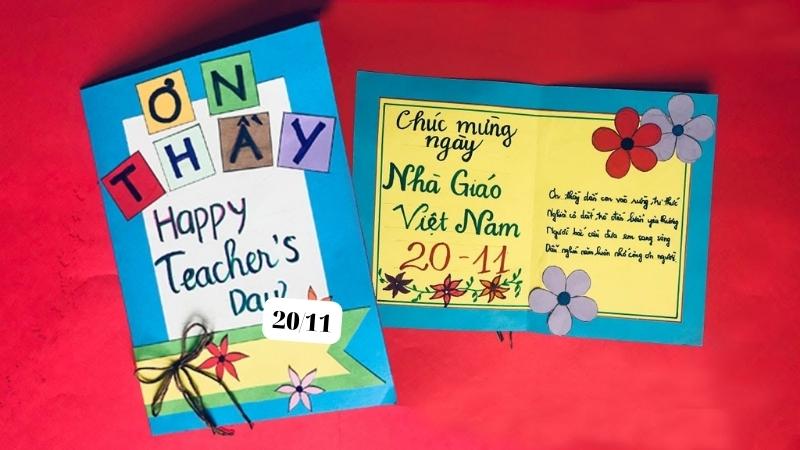 Green-themed card with
5 Creative Ways to Craft Heartwarming Greeting Cards for Vietnamese Family Day

Celebrating Vietnamese Family Day on June 28th is a wonderful opportunity to express your love and gratitude to your family. This year, go beyond just gifts – craft your sentiments into words with beautifully designed greeting cards. It’s a heartfelt way to celebrate this special day and shower your loved ones with warmth and blessings.


