Unlock the Secret to Mastering Basic Contouring Techniques for Various Face Shapes
Unlock the secrets to a radiant, contoured look with these easy-to-follow tips and tricks. It's time to enhance your natural features and define your facial structure effortlessly. Get ready to glow up and turn heads with these simple hacks!
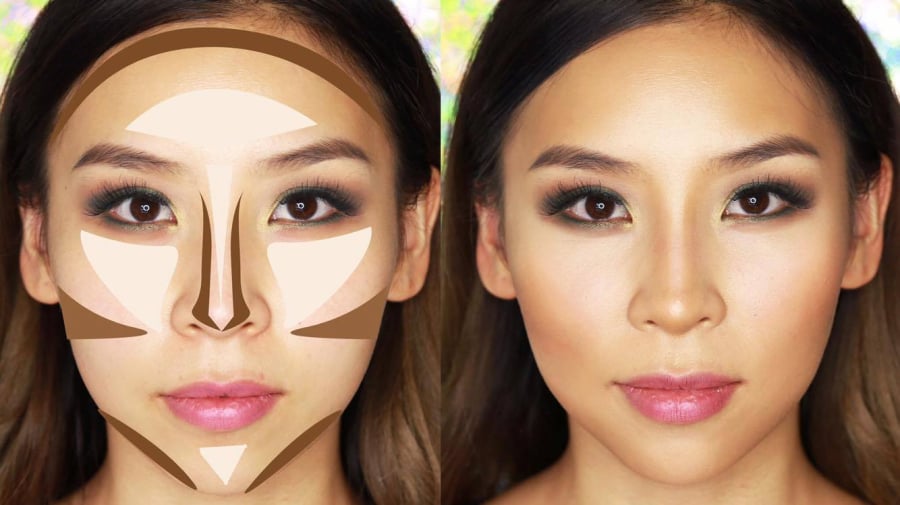
Contouring is a makeup technique that many women swear by to define and enhance their facial features. It creates the illusion of a slimmer and more defined face, both in person and in photographs.
Contouring – A Game-changer for Many Women
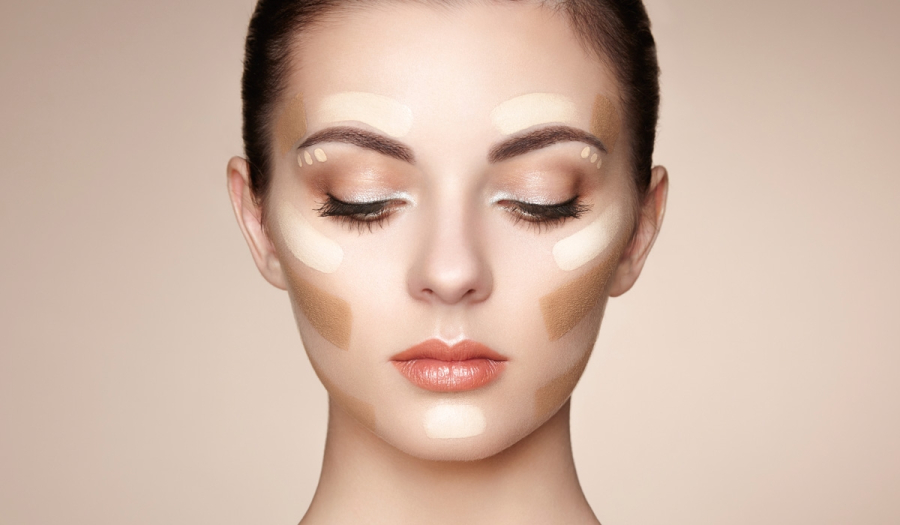
Nose Contouring
Use a brush to apply contour powder from the start of your eyebrows, following the bridge of your nose, and ending at the tip of your nose. You can also contour the hollows of your eyes to add depth to your eye area.
Jawline and Forehead Contouring
The technique for these areas will vary depending on your face shape.
Cheek Contouring
Suck in your cheeks and apply contour powder to the hollows, following your cheekbones. You can also contour your chin and philtrum to add depth to your face.
Suck in Your Cheeks for a More Defined Look
Contouring for Different Face Shapes
Contouring for an Oval Face
Apply contour to the sides of your forehead to narrow it and create balance with the rest of your face. You can also contour from your ears to the middle of your cheekbones to enhance your bone structure. When highlighting, focus on the center of your chin, forehead, and brow bone to add a subtle glow.
Contouring for a Heart-shaped Face
Pay attention to the area below your cheekbones, sweeping upwards towards your temples, as well as your temples and jawline. Apply contour from the bottom up to create a shadow effect, softening the width of your forehead and jaw. Add a touch of highlight between your lips and chin to enhance your cupid’s bow.
Contouring for a Square Face
Focus your contouring on the center of your forehead and along your hairline to soften the angles of your face. Blend contour from your cheeks to your ears and along your jawline for a harmonious look. Highlight the area under your eyes, following your brow bone, and the center of your chin to make your features pop.
A little highlight in these areas goes a long way!
Highlighting and Contouring for a Square Face
Contouring for a Round Face
To slim down a round face, contour from the sides of your forehead, along your temples, and down to your jawline. This defines your features and gives the illusion of a slimmer face.
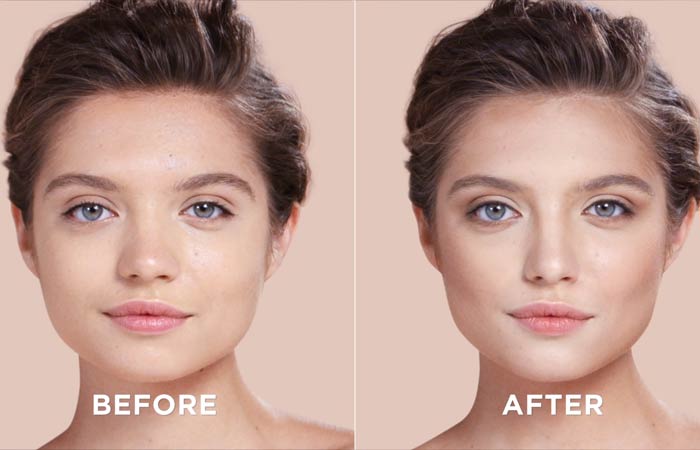
Now you know the secrets to contouring! Use these tips to define your features and always look your best.
Frequently asked questions
Contouring is a makeup technique that uses shadows and highlights to define and enhance the features of the face. It is important as it can create the illusion of a more defined bone structure, making the face appear slimmer and more sculpted. By using darker shades to recede certain areas and lighter shades to bring forward others, you can manipulate the perception of your face shape, emphasizing your best features.
Determining your face shape is crucial before attempting contouring. The most common face shapes are oval, round, heart, square, and diamond. To find yours, pull your hair back and study the shape of your face in the mirror, identifying the widest areas and the general shape. You can also trace the outline of your face on a mirror with a lipstick and then compare it to the different face shape categories.
For oval face shapes, focus on contouring the forehead and jawline to create a more balanced look. With round faces, contour the sides of the forehead, cheeks, and jawline to create definition and make the face appear slimmer. Heart-shaped faces should contour the temples and the sides of the jawline to soften the shape. Square faces benefit from contouring the sides of the forehead and the angles of the jaw to soften the angles. Finally, for diamond-shaped faces, contour the sides of the forehead and the chin to minimize the width of these areas.
You will need a contouring palette or individual products, including a cream or powder foundation that is 1-2 shades darker than your natural skin tone, and a highlighter that is 1-2 shades lighter. Additionally, you’ll need brushes specifically designed for contouring, including an angled brush for precise application and a blending brush to soften any harsh lines. Sponges can also be useful for blending.
Start with a light hand and build up the intensity gradually. It’s easier to add more product than to remove excess. Practice makes perfect, so experiment with different techniques and products to find what works best for your face shape and skin tone. Remember to blend, blend, blend! Poorly blended contour lines can look unnatural and take away from the overall effect. Finally, don’t be afraid to seek inspiration and tutorials online, there are countless resources available to help you master this skill.


