Daikin offers a wide range of air conditioners, and with that comes a variety of remote controls, each with its unique functions. This can be confusing for users, especially when it comes to setting the timer. So, if you’re struggling to figure out how to set the timer on your Daikin air conditioner, this guide is for you!
1 Benefits of Using the Timer Function
- Save on electricity costs.
- Ensure the well-being of users, especially the elderly and children.
- Promote a good night’s sleep without interruptions to turn off the air conditioner.
If you’re unsure how to set the timer on your Daikin air conditioner, follow the methods outlined below.
2 How to Set the Timer on Older Daikin Air Conditioners (Pre-2017)
An Introduction to the Remote Controls of Older Daikin Air Conditioners (Pre-2017)
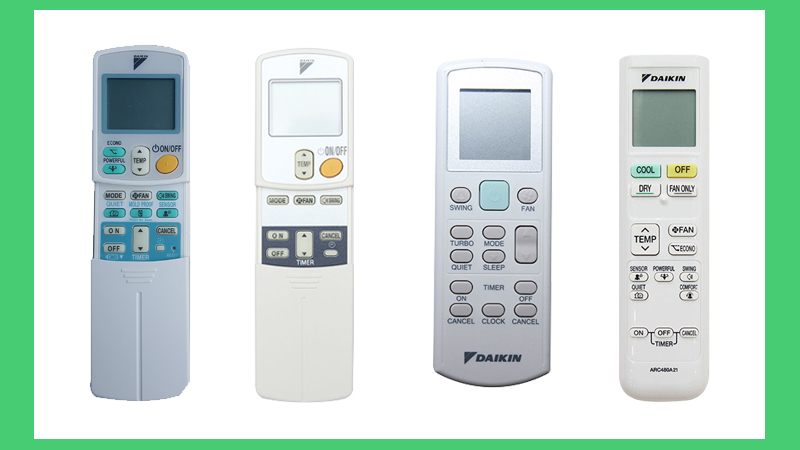 Different remote controls from Daikin
The remote controls for older Daikin air conditioners feature a sliding cover for the keypad. However, the functions and operations on the control panel are similar across all Daikin air conditioner models.
Setting the Timer to Turn On the Air Conditioner
* For remotes with arrow buttons:
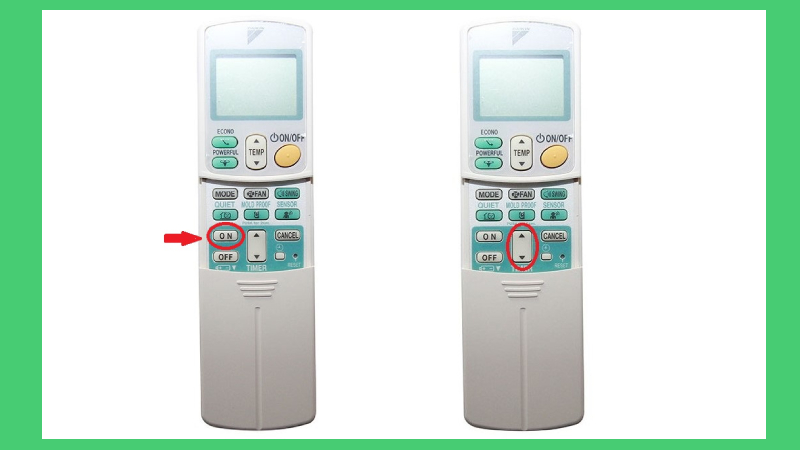 The ON button for timer settings is located under the sliding cover
* For remotes without arrow buttons:
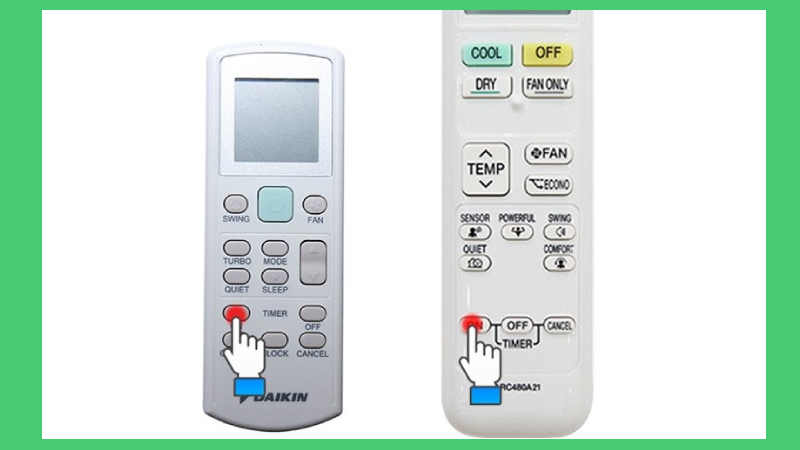 Press carefully to avoid missing your desired time!
For remotes without arrow buttons, after opening the remote control, press the ON button within the TIMER frame multiple times, with the number of presses corresponding to the desired duration.
Setting the Timer to Turn Off the Air Conditioner
 Press the OFF button to set the timer to turn off the air conditioner
To set the timer to turn off the air conditioner, use the OFF button within the TIMER frame, following the same process as for setting the timer to turn on the air conditioner.
Note: The time to activate the timer on the remote control is a countdown timer and is displayed relative to the current time (e.g., the air conditioner will turn on at 10 am).
Disabling the Timer
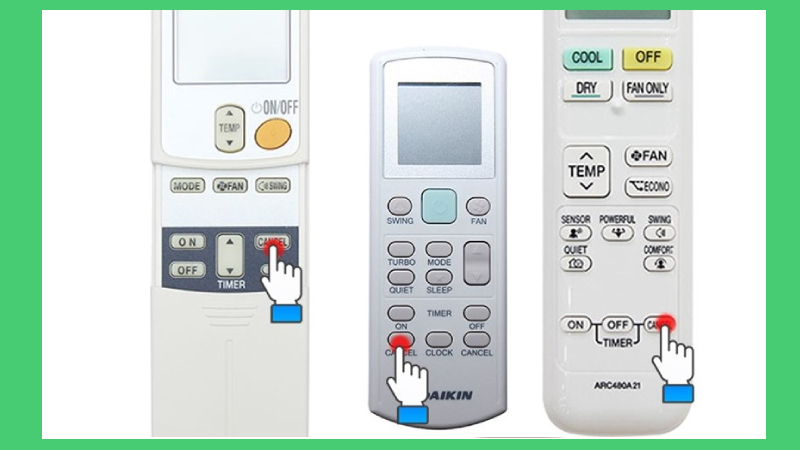 Press the CANCEL button to disable the timer
If you want to cancel the timer to turn on (or off) the air conditioner, press the ON (or OFF) button within the TIMER frame, followed by the CANCEL button.
3 How to Set the Timer on Newer Daikin Air Conditioners (2017 and Later)
The newer Daikin air conditioners (from 2017 onwards) feature a sleek and compact design, eliminating the sliding cover for the keypad and the ON button to open the remote control.
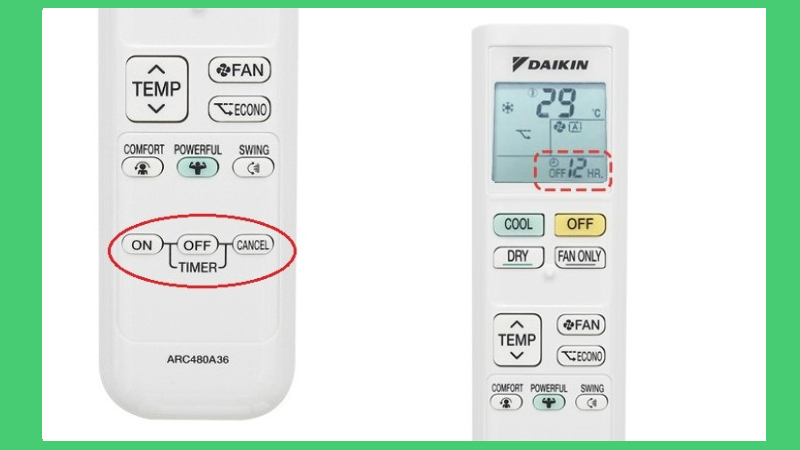 The newer models offer simpler and more convenient timer settings.
Additionally, when setting the timer, the displayed time is relative to the current time, unlike the older models, which showed an absolute time (e.g., the timer will activate after two hours from the time of setting).
Setting the Timer to Turn On the Air Conditioner
Press and hold the ON TIMER button until your desired time appears on the remote control’s screen.
Setting the Timer to Turn Off the Air Conditioner
Follow the same process as for setting the timer to turn on the air conditioner, but use the OFF TIMER button instead of the ON TIMER button.
Disabling the Timer
Press the CANCEL button to disable any timer settings.
Try out these timer settings on your Daikin air conditioner, and don’t forget to follow us for more helpful tips and tricks!
You may also like:
First, press the ‘Timer’ button on the remote. Then, use the ‘Mode’ button to select between cooling, heating, or fan-only modes. Once you’ve made your selection, press the ‘Timer’ button again.
Next, set the desired temperature using the up and down arrows. After that, use the ‘Hour’ and ‘Minute’ buttons to set the timer for your desired start time.
Finally, press the ‘Enter’ button to confirm your settings. Your Daikin air conditioner will now turn on and off automatically according to the timer schedule you set.


