


Even the latest iPhone models like the iPhone 12, iPhone 11, and XS Max can be disabled. Here’s a detailed guide on how to fix a disabled iPhone and find out why this happens.
Why is my iPhone disabled?
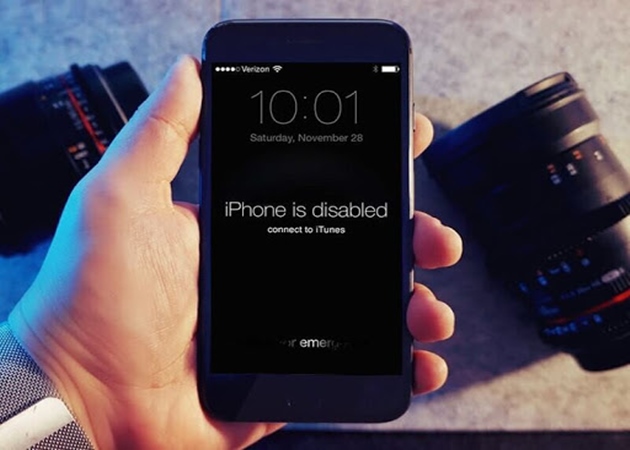
The reason your iPhone is disabled is that you’ve entered the wrong passcode too many times. Specifically:
– Your iPhone will be disabled for 1 minute after 6 consecutive unsuccessful passcode attempts.
– The 7th incorrect passcode entry will disable it for 5 minutes.
– The 8th attempt will disable it for 15 minutes, and the 9th wrong guess will result in a 1-hour disablement.
– If you exceed 10 unsuccessful attempts, you’ll receive a message saying “iPhone is Disabled – Connect to iTunes.” (Kết nối với iTunes)
Additionally, if you set it up, after 10 failed passcode attempts, all data on your iPhone will be erased.
How to fix a disabled iPhone
1. Restore a disabled iPhone without a computer
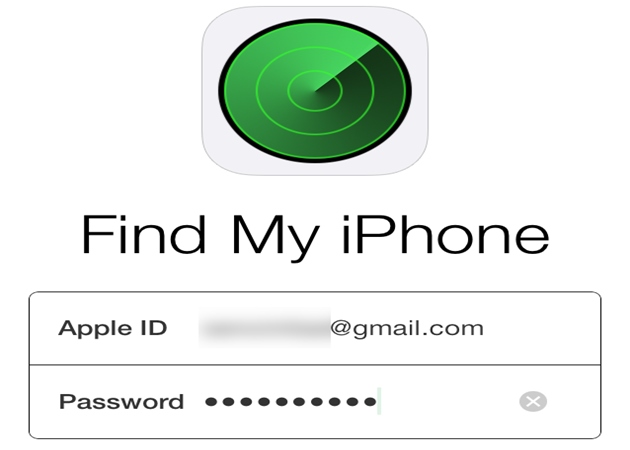
One way to unlock a disabled iPhone or iPad without a computer is to use Apple’s Find My iPhone service. This service allows you to perform actions on your iOS device remotely. This method will only work if you have enabled the Find My iPhone feature on your iPhone.
Step 1: On another phone, open a web browser and go to: https://www.icloud.com.
Step 2: Log in to your iCloud account using your Apple ID and password to access the Find My iPhone feature.
Step 3: After logging in, you’ll see all your Apple devices that are using the same iCloud account.
Step 4: Click on your disabled iPhone in the list >> choose Erase iPhone (Xóa iPhone) in the bottom-right corner of the screen to erase the passcode and all data on this phone to get out of the disabled state >> Click Continue.
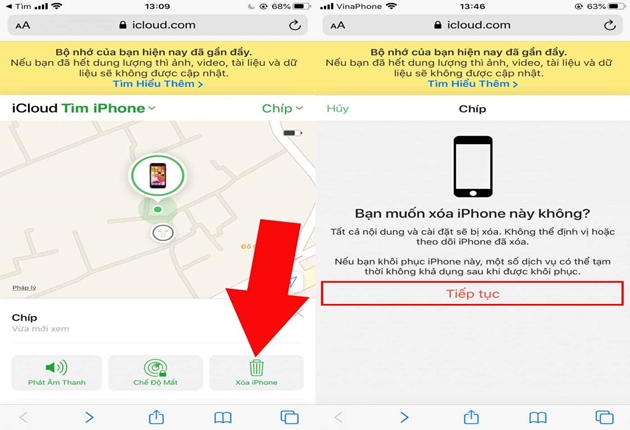
Step 5: Choose the most recent backup from iCloud to restore and set up your iPhone again for normal use.
2. Fix a disabled iPhone with iTunes
Case 1: Your iPhone has never been synced with iTunes on a computer
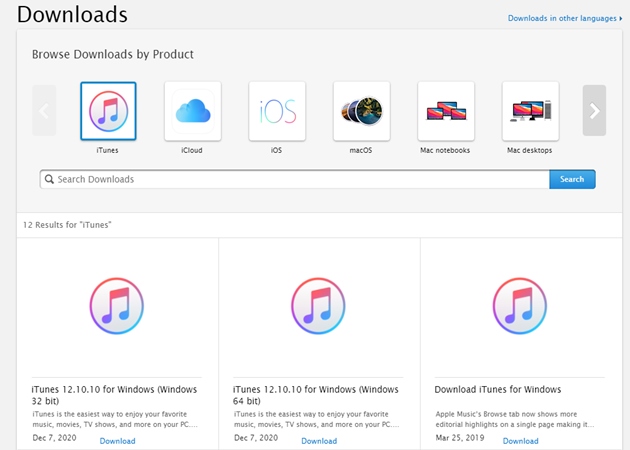
Step 1: Download iTunes from: https://support.apple.com/downloads/itunes Then install and launch iTunes.
Step 2: Put your iPhone into DFU mode and restore it by following these steps:
– For iPhone 8, 8 Plus, and newer models: Press and hold the Side button + either Volume button until the screen turns black (not the lock screen) >> Release the Side button, continue holding the Volume button until your iPhone enters DFU mode and is restored.
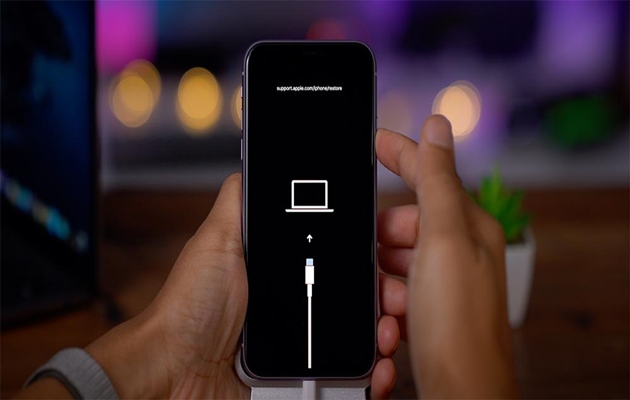
– For iPhone 7 and 7 Plus: Press and hold the Side button + Volume Down button until the screen turns off, then release the Side button, keep holding the Volume Down button until you see the “Connect to iTunes” screen.
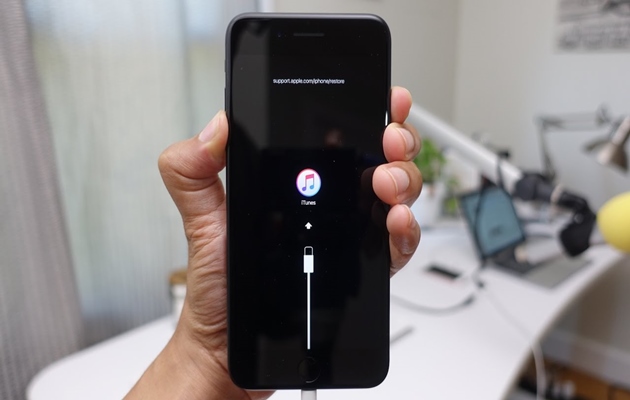
Step 3: Connect your iPhone to your computer using a Lightning or Type C cable.
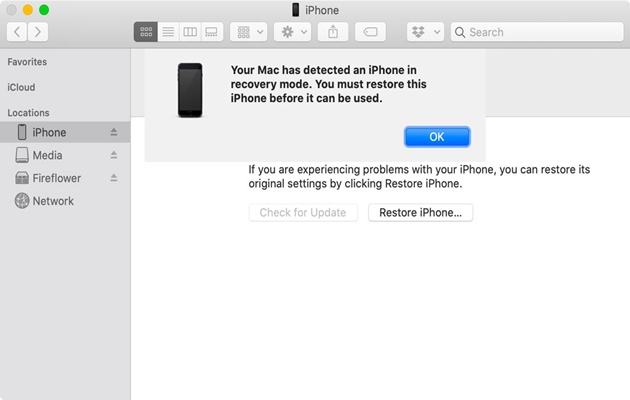
Step 4: Your computer will now display a message saying, “iTunes has detected an iPhone in recovery mode. You must restore this iPhone before it can be used with iTunes.” Click OK to continue.
Case 2: Your iPhone has been backed up with iTunes before
Step 1: Connect your iPhone to the computer you usually sync it with using a Lightning or Type C cable.
Step 2: Open iTunes, click on the Back Up Now button to back up all the information on your iPhone. Choose where to save the backup file: This computer or iCloud.
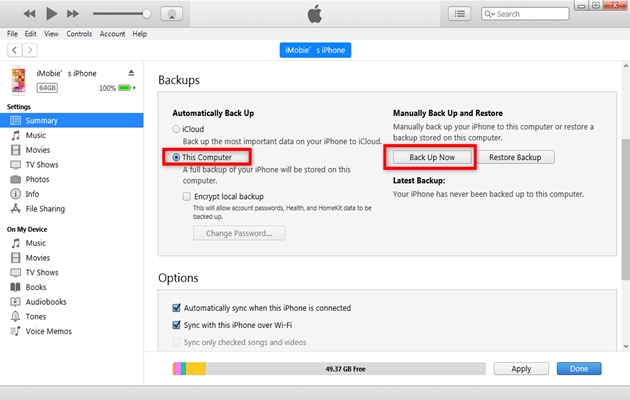
Step 3: When the backup is complete, click on Restore Backup and select the most recent backup.
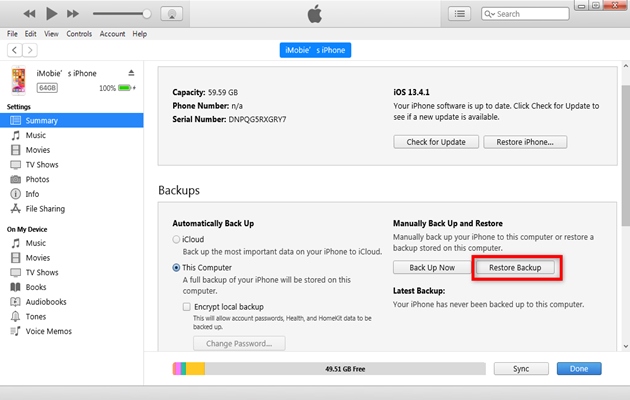
– After that, wait for the Restore process to finish, and you can use your iPhone without needing the passcode.
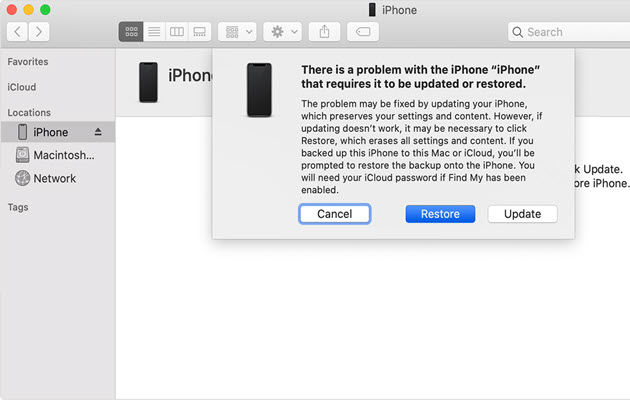
3. Use the Recovery feature to restore your iPhone
If your iPhone has been backed up, you can use this method if it becomes disabled. Connect your iPhone to iTunes on your computer and put it into DFU mode.
With your iPhone now in Recovery mode, you can choose to Restore or Update. Select Restore iPhone to proceed with the restoration or Update to update to the latest iOS version.
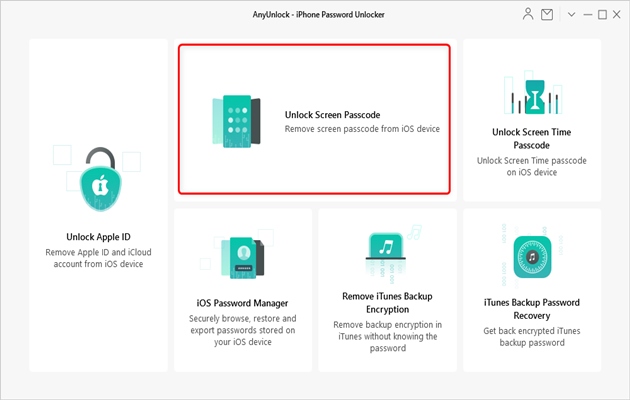
4. Unlock a disabled iPhone using Any Unlock software
Step 1: Download and install Any Unlock software on your computer.
Step 2: Connect your iPhone to your computer using a cable. Wait for AnyUnlock to detect your iPhone, then click on “Unlock Screen Passcode” (Mở khóa điện thoại).
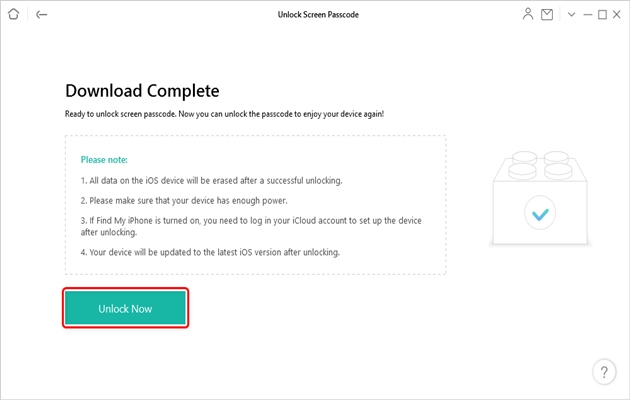
Step 3: Click on Start (Bắt đầu) >> Download and wait for the software to download the latest iOS version compatible with your iPhone.
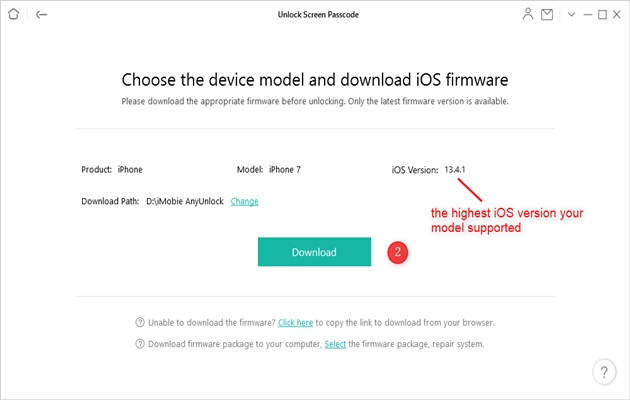
Step 4: Once the download is complete, click Unlock Now (Mở khóa ngay). Any Unlock will then automatically unlock your screen passcode.
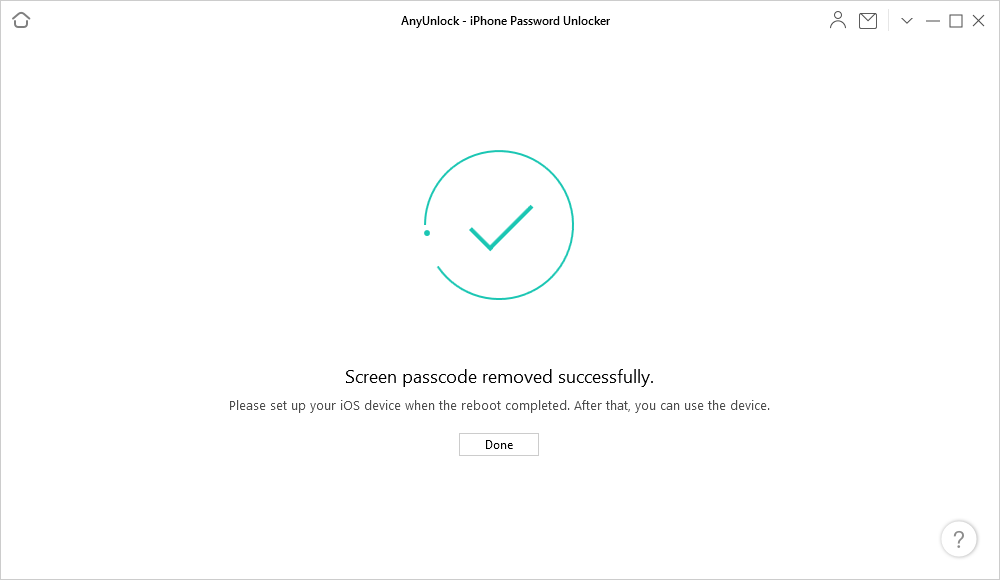
Step 5: When the restoration is complete, the software will notify you that “The screen passcode has been removed.” Proceed with the setup after your iPhone restarts. Your iPhone has now exited the disabled state and can be used normally.

Note:
– All existing content and settings on your device will be erased after the erase process is complete, so make sure to back up before restoring.
– After unlocking, your iOS system version will be updated to the latest version.
– If Find My iPhone is enabled on your device, you’ll need to enter your iCloud account password to set up your phone after unlocking.
How to prevent your iPhone from being disabled
– Use Facebook or Touch ID: Reduce the chances of forgetting or mistyping your iPhone unlock passcode, and avoid the annoyance of a disabled iPhone. You can always use Touch ID or Face ID to unlock instead of entering a passcode.
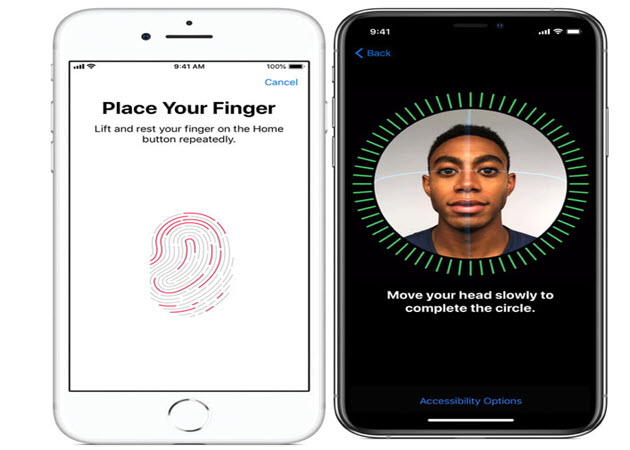
Use Touch ID or Face ID, depending on the iPhone generation you own. From iPhone 5S to iPhone 8, you have the Touch ID option. If you have an iPhone X, XS, or XR, you don’t have the Touch ID option, and you must use Face ID instead.
– Set a new, easier-to-remember passcode: Consider setting a simple passcode that’s easy to recall and is associated with a memorable event.
– Turn off the Raise to Wake feature: To prevent accidental passcode entries when your phone is in your pocket, disable the Raise to Wake feature.
Tips for Fixing Serious Security Flaw on iPhone

All data on the iPhone is accessed using a phone unlock code, but users can enhance phone security with this simple trick.


: 3 Zodiac Signs Blessed by the Heavens, Becoming Rich Overnight, Especially the Second One")


