


Made from durable materials with a certain grip and elasticity, paracord is often used in outdoor activities, exploration, mountain sports, or household tasks such as tying things up, crafting, or repairing. However, not everyone knows how to tie paracord securely and effectively.
Ways to Tie Paracord Super Securely and Effectively
With the following secure and convenient ways to tie paracord, you will no longer feel confused when facing situations that require certainty and safety.
How to Tie a Basic Knot (Square Knot)
The basic knot, also known as the “double knot”, is one of the easiest ways to tie paracord and is commonly used to join two ends of a rope together. This knot is very secure when done correctly and rarely slips.
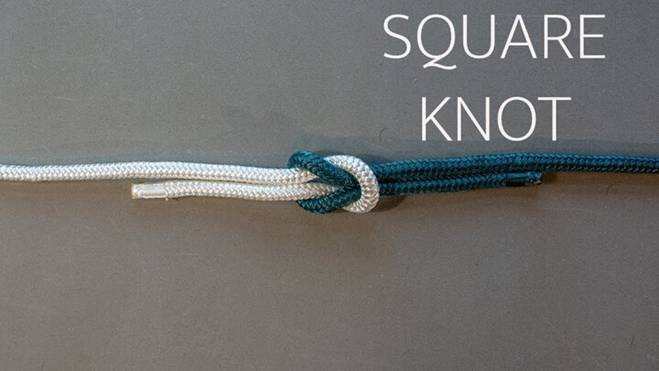
The Square Knot is a very secure way to tie paracord and rarely slips. (Image: Pinterest)
Simply place the two ends of the rope opposite and diagonal to each other. Hold the two ends of the rope with both hands. The left end of the rope will go under the right side of the rope and then up. Then, just cross the two ends of the rope and thread the left end under the right end, pull up, and tighten to form a knot.
The basic knot is a useful rope-tying technique in many situations that require high certainty and safety. Designed to create two secure loops, the double knot helps you effectively tie down and secure objects. Especially, this knot is very suitable for activities such as mountain climbing, camping, tying shoelaces, or tying bandages and transporting goods, where the rope needs to be tight and not loose.
How to Tie a Bowline Knot
The bowline knot is an extremely useful knot in many situations, especially when you need to create a fixed loop without worrying about the knot slipping or coming undone.
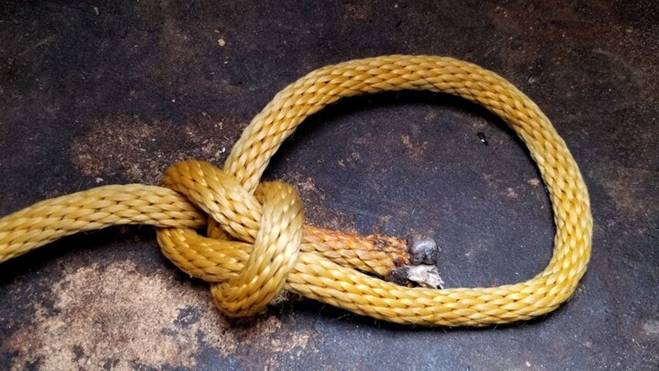
The Bowline Knot – a super secure and effective way to tie paracord, often used in exploration, mountain climbing, and rescue. (Image: Boatsetter)
To tie a bowline knot, create a small loop near the end of the rope, making sure to keep the main rope under the loop. Thread the end of the rope through the loop from the bottom up, then go around the back of the main rope, and thread it back into the loop in the opposite direction. Pull both ends of the rope tight to complete the knot.
The bowline knot is often used in exploration, mountain climbing, rescue, or as a secure lasso.
How to Tie a Clove Hitch Knot
The clove hitch knot is one of the most important knots when you need to tie paracord to a stake, tree, or any fixed object. It is simple, easy to do, and does not slip even under heavy load.
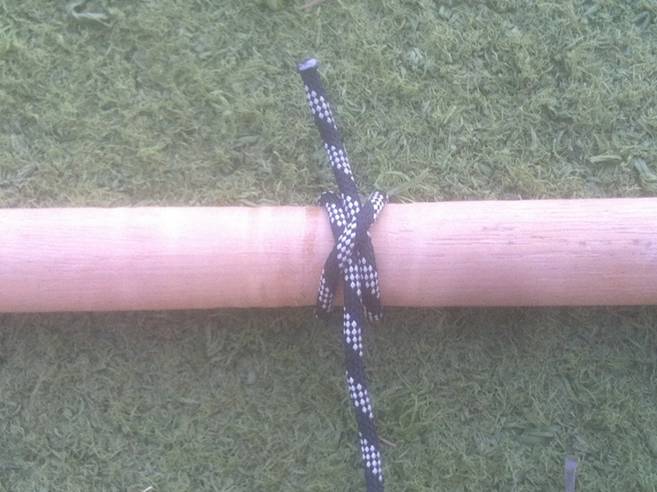
The Clove Hitch is a simple and effective way to tie paracord that doesn’t slip even under heavy load. (Image: Just Knots)
To tie this knot, simply wrap the rope around the pole or stake once. Wrap it again and thread it under the first wrap, then pull the end of the rope to tighten the knot.
The clove hitch is very useful in many fields, especially in the maritime and fishing industries. With its unique tying method, this knot creates a secure loop that is easily adjustable in size while securely fastening objects without slipping.
This knot-tying method is also widely used in daily life, such as tying up household items, tying the ends of a hammock, securing a tent when camping, or in outdoor activities that require stability and safety.
How to Tie a Double Fisherman’s Knot
The double fisherman’s knot is used to securely join two pieces of rope together without slipping, even under heavy load. This is an important knot in mountain climbing or fishing activities.

The Double Fisherman’s Knot – a super secure and effective way to tie paracord. (Image: MasterClass)
To tie the double fisherman’s knot, join the two ends of the rope so that they overlap. Hold one end of the rope tightly in your fist, with your thumb on the rope, then wrap the other end of the rope around your thumb and the first rope, bringing it down and wrapping it completely again to form an X.
Gently slide your thumb out and thread the rope through the X you just created.
Tighten the knot. You will see an X on one side and two parallel ropes on the other, with the remaining rope inside the knot. Now, pull the remaining rope through to give yourself enough slack to work with, and repeat the process. The rope you pull through will be your new working end.
Create an X over your thumb and push the end of the rope through the X. You will have two knots with two ropes in between.
Tighten the knots by pulling them tight, then pull the outside ropes to bring the knots together to finish.
The double fisherman’s knot is used when connecting two pieces of rope when you don’t have enough length. It is also used in outdoor activities such as mountain climbing, fishing, and exploration.
Tips for Tying Paracord Securely
In addition to the basic knot-tying techniques, here are some tips to help you tie paracord more securely and effectively:
– Choose the right type of paracord: Paracord comes in various types, from soft to stiff, with different levels of elasticity. Depending on your purpose, choose the appropriate type to ensure durability and security.
– Practice knot-tying regularly: Knots will become more secure and easier to tie with regular practice. Try tying different knots with different types of ropes in various situations to familiarize yourself with each type.
– Check the security of the knot: After tying, always check by gently pulling on the ends of the rope to ensure the knot doesn’t loosen or slip.
– Keep your paracord clean: Paracord is prone to dust and mildew. To extend its lifespan, regularly clean your paracord and avoid prolonged exposure to water or moisture.
According to VTCnews
The Ultimate Guide to Tying the Perfect Knot: Tips and Tricks for Every Occasion

From a young age, our parents teach us those fundamental rope-tying skills for basic tasks. As we grow older, we learn more complex knots for a variety of purposes, such as pitching a tent for a camping trip.
The Ultimate DIY: Craft an Auto-Closing Door with a Simple Water Bottle Hack

Have you ever heard of an automatic door closer made from a plastic bottle? In this introduction, we will guide you through an incredibly simple way to create one.


