How to Apply a Screen Protector Without Bubbles: A Comprehensive Guide
Why Do Bubbles Appear Under Screen Protectors?
Applying a screen protector may seem straightforward, but it can be tricky for first-timers. Without proper technique, bubbles can easily form between the screen protector and the device’s display. These bubbles arise when air becomes trapped between the two surfaces.
The most common culprit is dust particles on the screen. Even microscopic debris invisible to the naked eye can interfere with the adhesive bond.
Incorrect application methods can also cause bubbles. Applying the protector directly to the screen without gliding it down from one end can create air pockets.
How to Apply a Bubble-Free Screen Protector
If you’ve accidentally trapped bubbles under your screen protector, follow these steps to rectify the situation:
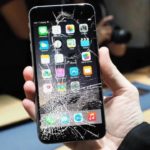
1. **Remove the Protector:** Carefully pry the protector off the phone using a sharp knife or razor blade. Exercise caution to avoid scratching the screen or injuring yourself. Start at a corner and gently slide the blade to detach the protector.
/fptshop.com.vn/uploads/images/tin-tuc/178994/Originals/batch_cach-dan-kinh-cuong-luc-khong-bi-bong-bong.jpg)
2. **Clean the Screen:** Wipe the screen with a soft microfiber cloth to remove dirt, smudges, and lint. For stubborn stains, use an alcohol-based cleaning solution. Afterward, use a dry cloth to remove any remaining moisture.
/fptshop.com.vn/uploads/images/tin-tuc/178994/Originals/batch_cach-dan-kinh-cuong-luc-khong-bi-bong-bong-1.jpg)
3. **Remove Dust:** Use a piece of tape to pick up any lingering dust particles. Roll the tape over the screen, pressing gently to attract the dust and lint.
4. **Align the Protector:** Before applying the screen protector, carefully align it with the edges of the screen. Once properly positioned, gently place one edge of the protector onto the screen. Then, slowly glide the protector down, allowing the adhesive to bond to the screen. To minimize bubble formation, apply the protector in a humid environment such as a bathroom.
/fptshop.com.vn/uploads/images/tin-tuc/178994/Originals/batch_cach-dan-kinh-cuong-luc-khong-bi-bong-bong-3.jpg)
5. **Smooth Out Bubbles:** Use your fingers or a rigid card to press out any remaining bubbles. Start from the center of the protector and work your way towards the edges, smoothly gliding the tool over the surface.
/fptshop.com.vn/uploads/images/tin-tuc/178994/Originals/batch_cach-dan-kinh-cuong-luc-khong-bi-bong-bong-4.jpg)
Removing Bubbles from the Curved Edges
If bubbles form along the curved edges of the screen, try the following method:
1. **Prepare the Solution:** In a small bowl, add about 5-10 ml of olive oil or coconut oil. Dip the tip of a cotton swab into the oil.
/fptshop.com.vn/uploads/images/tin-tuc/178994/Originals/batch_cach-dan-kinh-cuong-luc-khong-bi-bong-bong-4.jpg)
2. **Apply the Oil:** Gently run the cotton swab along the edge where the bubble is located. Wipe the excess oil off the swab and apply it to the surrounding area of the screen protector. The oil will seep into the gap and help push out the bubble, enhancing the bond between the protector and the screen.
/fptshop.com.vn/uploads/images/tin-tuc/178994/Originals/batch_cach-dan-kinh-cuong-luc-khong-bi-bong-bong-5.jpg)
3. **Reposition the Protector:** Align the screen protector back to its original position and wipe away any excess oil. Ensure that there are no bubbles remaining. Press the protector down firmly to seal it in place. Wipe the edges of the protector with a clean cloth and check for any oil residue.
FPT Shop: Your Source for Quality Screen Protectors
If you’re looking for a reliable and high-quality screen protector, look no further than FPT Shop. We offer a wide range of screen protectors compatible with various phone models, so you’re sure to find the perfect fit for your device.
With our diverse payment options and exclusive discounts, you can save even more on your purchase.
Conclusion
This comprehensive guide provides you with step-by-step instructions on how to apply a screen protector without bubbles. By following these techniques, you can ensure a bubble-free application, protecting your device’s screen from scratches and damage.


