The Enchanting Christmas Tree DIY Handbook: Crafting 10 Whimsical Designs for a Magical Holiday Season.
The Christmas tree is an iconic symbol of the festive season, and with good reason. This magical centerpiece brings cheer and wonder to all who behold it. With its twinkling lights and festive trimmings, it transforms any space into a winter wonderland. But did you know that you can create your own unique Christmas tree using simple materials like paper and cardboard? Imagine crafting a stunning tree that not only captivates your family and friends but also becomes a cherished tradition. Discover 10 creative ways to make a Christmas tree that will spark joy and become the centerpiece of your holiday celebrations.
With Christmas just around the corner, it’s time to spread some holiday cheer and deck the halls with festive decorations. Get your creative juices flowing with these 10 unique and simple DIY Christmas tree ideas that are easy to create at home, adding a personal touch to your celebrations.
10 Whimsical and Easy DIY Christmas Tree Ideas to Elevate Your Holiday Decor
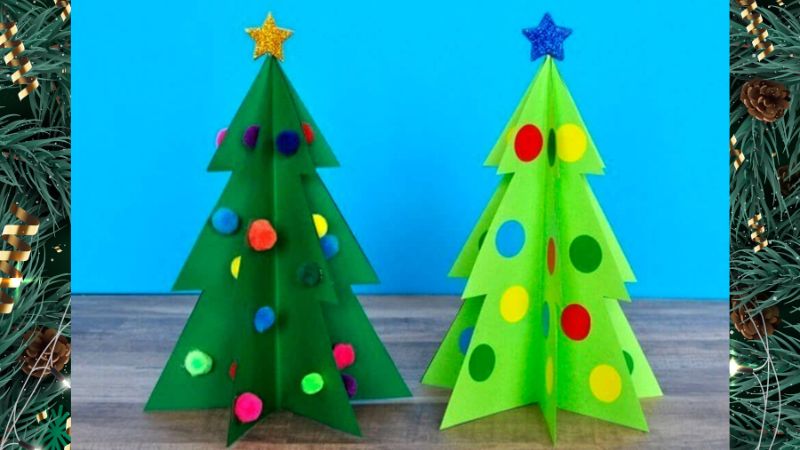
1. Cardboard Christmas Tree
Materials:
Green cardboard (A4 size)
Color pens and markers
Scissors
Tape
Wrapping paper or colorful newspaper
Instructions:
Step 1 Start by folding an A4-sized green cardboard sheet in half and cutting along the fold. Place the two halves on top of each other and fold again, creating four layers.
Step 2 Draw a symmetrical Christmas tree outline on the folded cardboard. Carefully cut out the tree shape along the drawn lines.
Step 3 To create a 3D structure, fold the tree cutout in half to mark the center. This will guide you in cutting and assembling the tree.
Step 4 Cut along the bottom half of one tree and the top half of the other. Interlock the two halves to form a standing 3D tree. Embellish with tinsel or colorful paper for a festive touch.
Cardboard Christmas Cheer
Tip: Add personalized place cards with adorable designs to your holiday table setting for that extra festive touch.
2. Wire Christmas Tree
Materials Needed:
8 pieces of steel wire (30cm each)
Colorful bells
Small ceramic pot (3cm diameter)
12cm wooden skewer
Fabric bow
Scissors, glue, and silicone adhesive
Let’s Get Crafting:
Step 1 Begin by using the wooden skewer as the tree trunk. Wrap the steel wire tightly around the skewer, leaving a 4cm section at the bottom that will be inserted into the pot.
Step 2 Cut three 10cm pieces of wire for the main branches, and twelve 4cm pieces for the secondary branches. Fold each wire in half and wrap it securely around the trunk to form the main branches.
Step 3 Divide the branches evenly, resembling a six-petaled flower. Then, carefully wrap two secondary branches around each main branch to add volume and shape to your tree.
Step 4 For a layered effect, cut wire pieces for subsequent layers. For the third layer, use three 8cm wires for main branches and twelve 3cm wires for secondary branches. For the second layer, use three 6cm wires and six 2cm wires, attaching only one secondary branch to each main branch. For the first layer, use three 4cm wires with no secondary branches.
Step 5 Insert the tree into the pot and secure it with glue. Finish it off with a fabric bow and some tinsel for a whimsical touch.
Twisted Wire Tree
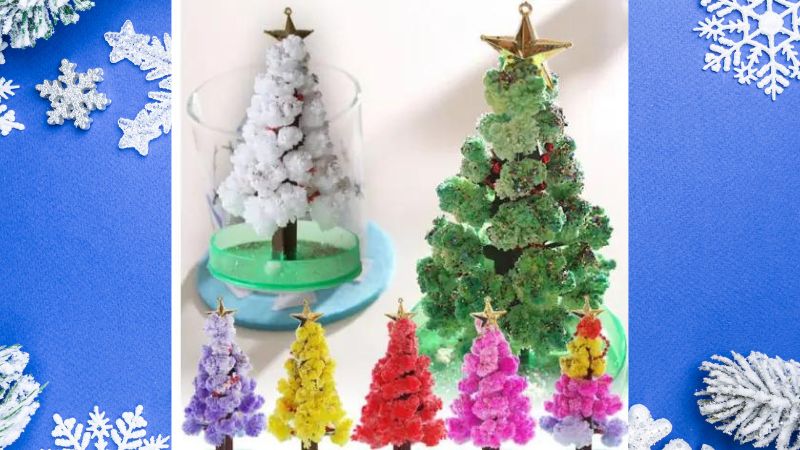
3. Salt Crystal Christmas Tree
Materials Checklist:
Cardboard
Food coloring
Bells, stars, and tinsel for decoration
Mixture of salt, ammonia, water, and laundry bleach
Crafting Instructions:
Step 1 Draw a Christmas tree outline on the cardboard and fill it with your chosen food coloring. Get creative and mix colors if you’d like!
Step 2 Place the colorful cardboard tree onto a plate containing the salt mixture. Watch the magic happen as a chemical reaction creates a stunning snowflake-like effect on your tree.
Salt Crystal Creation
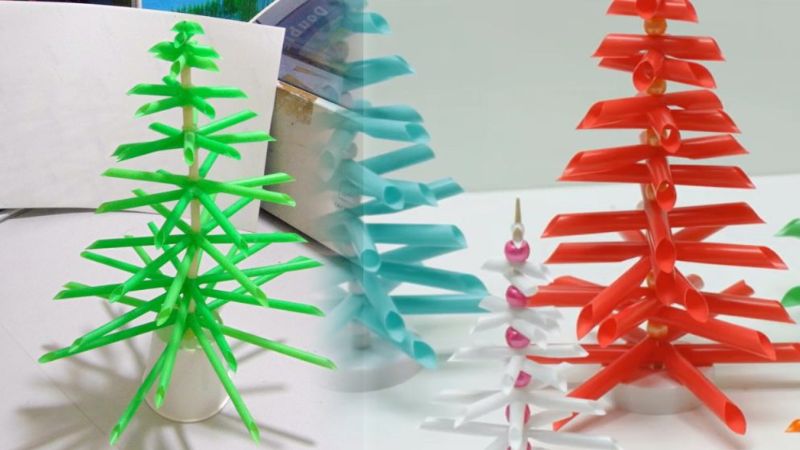
4. Straw Christmas Tree
Gather the Following:
Drinking straws
White glue
Wooden skewers
Scissors and adhesive
Craft Away:
Step 1 Cut three drinking straws to varying lengths, with the longest being 9cm and the shortest 2cm.
Step 2 Take two straws and divide them into three equal sections. Cut a semi-circle in the middle of each section without completely detaching them. For the remaining straws, cut a small hole in the middle to thread the wooden skewer through.
Step 3 Repeat the process for groups of straws with decreasing lengths. For a finished look, cut the ends of the straws at an angle.
Step 4 Thread the wooden skewer through the group of straws, starting with the largest length first. Ensure you thread the uncut straws first, followed by the semi-cut straws. After completing each group of equal lengths, thread a bead onto the skewer for added detail.
Step 5 Finish off your straw tree with tinsel or a star topper.
Straw Tree Delight
5. Tinsel Christmas Tree
Materials Required:
Cardboard
Glue and scissors
Tinsel
Stars and ornaments for decoration
Crafting Fun:
Step 1 Create a cone-shaped tree trunk using cardboard, securing it with glue.
Step 2 Starting from the top of the tree, wrap the tinsel tightly around the cone in circular layers. Use glue to secure the tinsel and prevent it from unraveling.
Step 3 Decorate your tinsel tree with stars and ornaments of your choice.
Tinsel Tree Magic
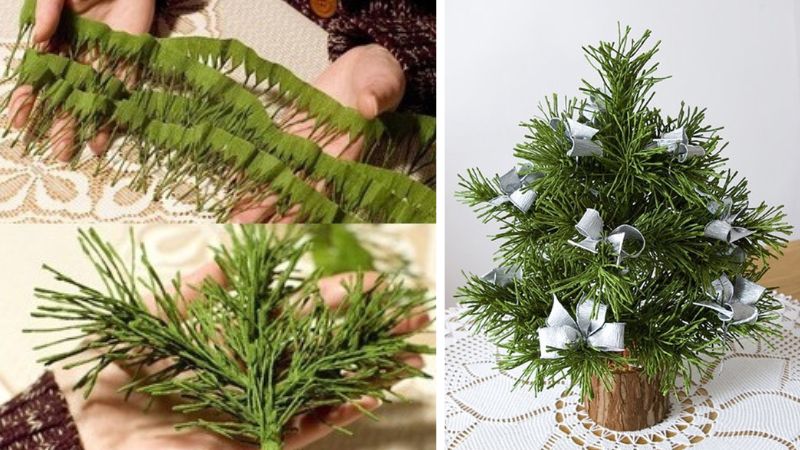
6. Crepe Paper Christmas Tree
Materials Checklist:
Green crepe paper
Scissors and glue
Thin wire
Crafting Steps:
Step 1 Fold the crepe paper into multiple layers, then cut it into strips measuring 4-6cm in width and the desired length for your tree’s leaves. Cut small fringes with a 1cm base, then gently separate the layers of paper.
Step 2 Twist each fringe to create the illusion of pine needles on the tree’s branches. Continue until you’ve transformed all the paper strips into pine needle clusters.
Step 3 Attach the wire to the top of each paper strip with glue. Then, carefully wrap the paper strip around the wire, twisting it to form a branch. Repeat this process to create multiple branches, and then assemble them together to form a full tree.
Crepe Paper Pine
7. Felt Christmas Tree
Materials Needed:
Felt fabric
Thread and needle
Pencil and scissors
Cotton stuffing
Ribbon and buttons for decoration
Crafting Guide:
Step 1 Draw a Christmas tree outline on the felt fabric and cut out two pieces, as you’ll need two layers to create one tree. Cut out additional shapes like stars or ornaments for extra detail.
Step 2 Place the two tree-shaped felt pieces together and sew along the edges, leaving a small opening for stuffing.
Step 3 Stuff the tree with cotton to give it a fluffy, 3D effect. Sew the opening closed, and embellish your felt tree with ribbon, buttons, or any other decorations of your choice.
Felted Fir
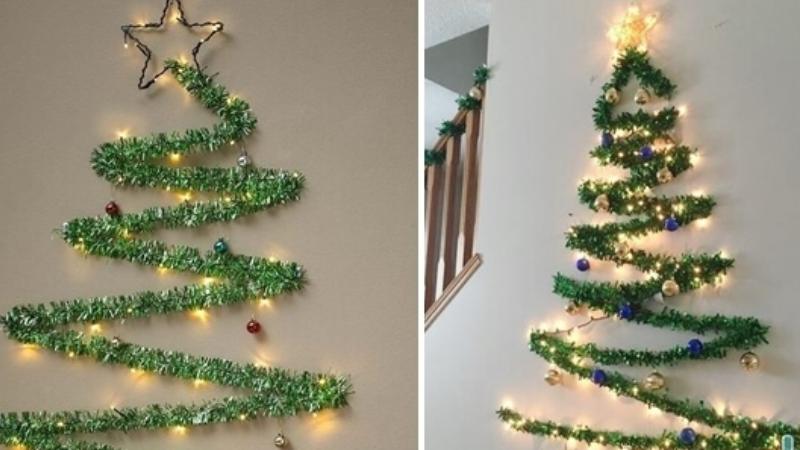
8. Wall-Mounted Christmas Tree
Materials Required:
Green tinsel
Ornaments, stars, and string lights
Tape
Crafting Steps:
Step 1 Attach the green tinsel to the wall in the shape of a tree, using tape to secure it in place.
Step 2 Decorate your wall-mounted tree with string lights, ornaments, and stars to your heart’s content.
Wall-Mounted Wonder
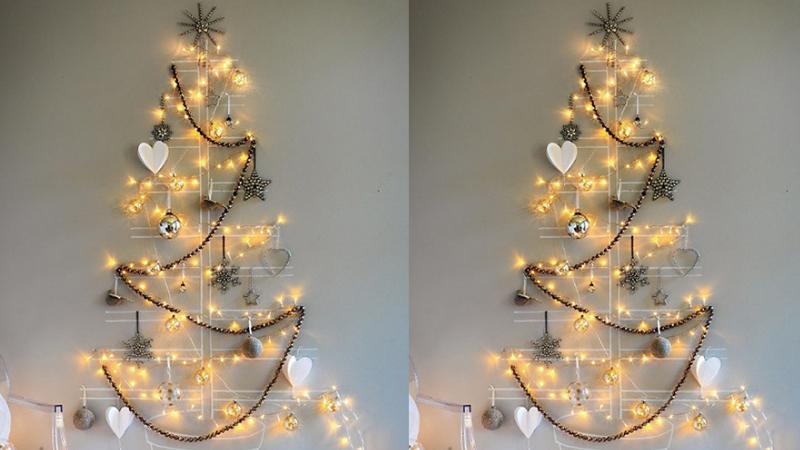
9. LED Lights Christmas Tree
Materials Checklist:
LED lights
Ornaments and stars
Crafting Guide:
Step 1 Sketch a symmetrical Christmas tree outline on the wall. Attach simple decorations along the outline to create a foundation for your LED tree.
Step 2 Install the LED lights along the tree’s outline, or crisscross them on the tree’s trunk and branches for a unique lighting effect.
LED Lights Extravaganza
10. Dried Branches Christmas Tree
Materials Needed:
Dried branches of varying lengths
Ornaments, lights, snowflakes, and stars for decoration
Crafting Steps:
Step 1 Select dried branches of different lengths and attach them together in a circular pattern to form a simple tree shape.
Step 2 Decorate your branch tree with ornaments, lights, snowflakes, and stars to your heart’s content. Get creative and make it your own!


 Cardboard Christmas Cheer
 Twisted Wire Tree
 Salt Crystal Creation
 Straw Tree Delight
 Tinsel Tree Magic
 Crepe Paper Pine
 Felted Fir
 Wall-Mounted Wonder
 LED Lights Extravaganza


