


Repurpose plastic bottles into toys for your children, not only will you provide them with unique and fun playthings, but you’ll also reduce the amount of plastic waste released into the environment. Try out these creative and crafty upcycling ideas!
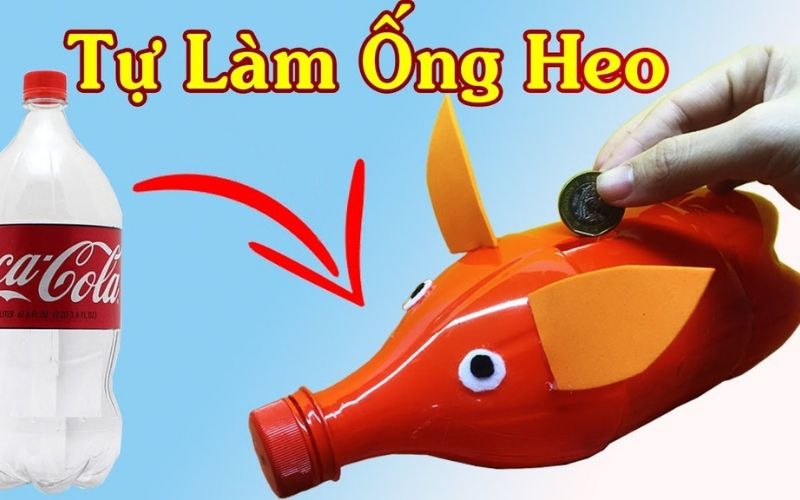
1 Adorable Piggy Bank
This piggy bank made from a plastic bottle will not only give your child a unique and cute place to save their money, but it will also help teach them about environmental protection.
Materials Needed:
– Large soda bottle
– Scissors
– Craft knife
– Plastic glue
– Paintbrushes
– Black marker
– Paper
– Red and white acrylic paint
Instructions:
Step 1: Cut out two leaf shapes from the paper to create the pig’s ears. Using the black marker, draw two lines on the soda bottle – one dividing the bottle in half, and the other dividing the bottom part of the bottle.
Step 2: Cut along the lines and remove the middle section. Take the bottom part and attach it to the top using plastic glue.
Step 3: Once the glue is dry, use the craft knife to cut a small rectangle on the body of the piggy bank, just big enough to insert coins.
Step 4: Mix the red and white paint to create the desired shade of pink. Paint the piggy bank and let it dry. Use the black marker to draw eyes and a nose, and don’t forget to glue on the ears!
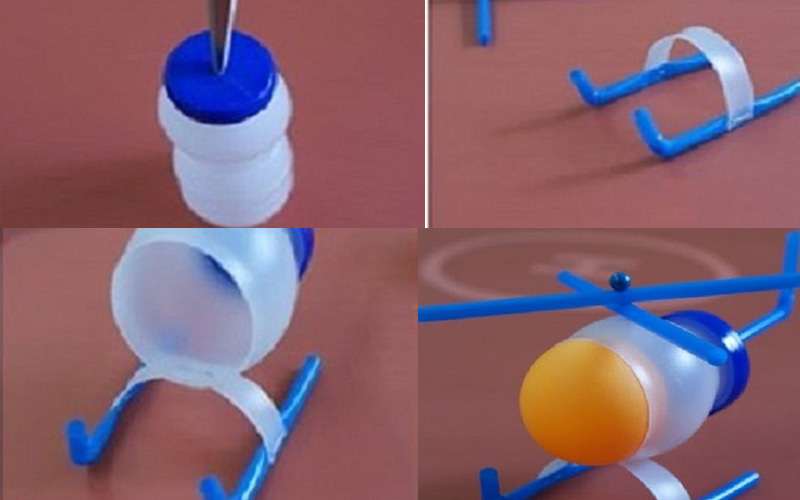
2 Helicopter
With just a few household items, you can create a familiar yet unique toy that both boys and girls will love!
Materials Needed:
– 1 baby bottle (or plastic yogurt jar)
– 1 ping-pong ball
– 4 straws
– 1 thumbtack
– Plastic glue
– Craft knife
– Scissors
Instructions:
Step 1: Use the craft knife to cut a hole in the bottle cap, just big enough for a straw to fit through. Cut a 3-4cm piece of straw and insert it into the hole.
Step 2: Cut the body of the bottle in half. Cut the bottom part into a semi-circle, about 0.5cm wide, and glue it onto two straws as shown in the picture.
Step 3: To make the helicopter’s rotors and landing gear, use the thumbtack to pierce two straws diagonally and attach them to the back of the bottle cap. Finally, assemble all the parts together and secure them with glue.
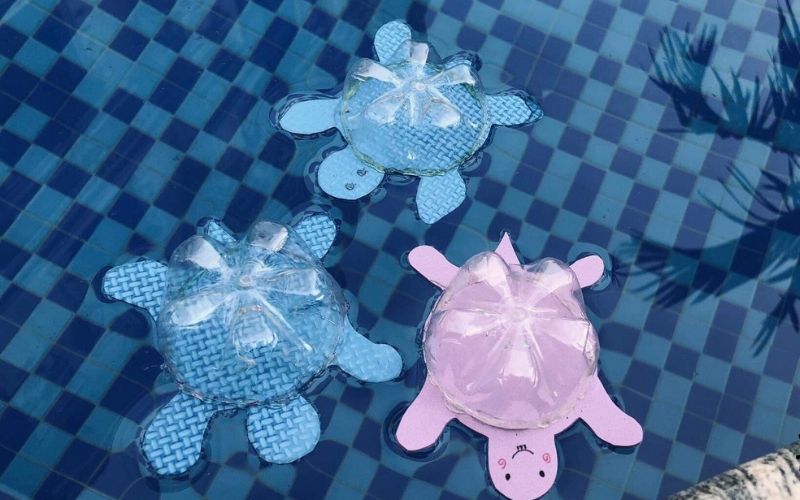
3 Cute Turtle
This turtle can be both a toy for your child and a cute home decoration. It’s a fun and eye-catching craft!
Materials Needed:
– Large water bottle
– Hot glue gun
– Scissors
– Craft knife
– Pen
– Black marker
– Thick colored paper
Instructions:
Step 1: Place the bottle on the paper and trace around the bottom to create the turtle’s body. From this circle, draw the head, tail, and four legs.
Step 2: Cut the bottom of the bottle about 7cm up to create the turtle’s shell. Neaten the edges with scissors. Use the hot glue gun to attach the shell to the paper body.
Step 3: Once the glue is dry, use the black marker to draw eyes and decorate the turtle as you like.
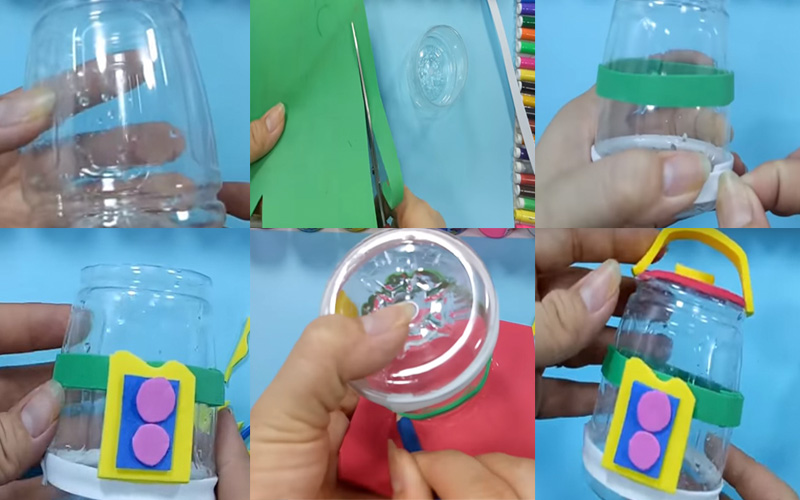
4 Mini Rice Cooker
Materials Needed:
– Plastic bottle (small Coca-Cola or C2 bottle)
– Green, red, yellow, and purple foam sheets
– Strong glue
– Scissors
– Pen
Instructions:
Step 1: Cut the green and white foam sheets into long strips and glue them together.
Step 2: Cut a small square from the yellow foam sheet and glue it on top of the green and white strips. Once dry, cut a smaller square from the green foam sheet and glue it on top of the yellow square.
Step 3: Cut two small circles from the purple foam sheet and glue them onto the green square to create the cooker’s switches. Next, trace around the top of the bottle onto the red foam sheet, cut it out, and glue it onto the bottle.
Step 4: Finally, cut a 5cm strip of foam and glue it to the sides to create a handle.
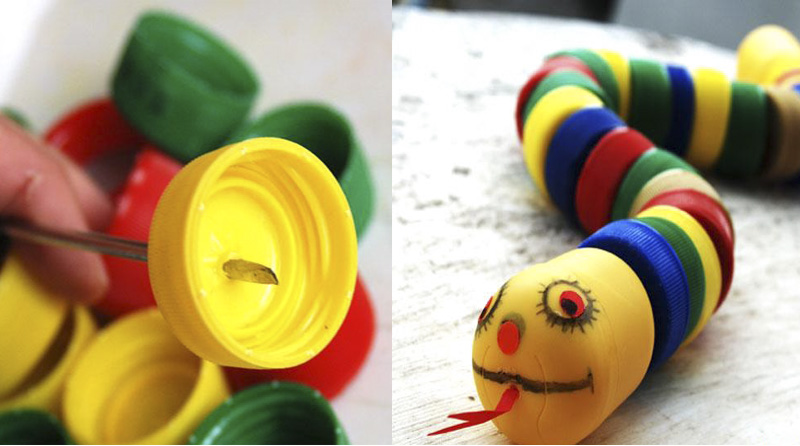
5 Colorful Snake
Snakes are often seen as dangerous and ugly, but with a few simple materials, you can create a cute and friendly snake at home. Give it a try!
Materials Needed:
– Colorful bottle caps
– 2 round bottle caps for the head and tail
– Screwdriver
– Piece of string
– Paper
– Pen
– Glue
Instructions:
Step 1: Use the screwdriver to poke a hole in the center of each bottle cap. You can heat the tip of the screwdriver slightly to make it easier.
Step 2: Thread the string through one of the round bottle caps and tie a knot to create the snake’s head. Then, thread the remaining bottle caps onto the string, alternating colors to create a pattern.
Step 3: Thread the other end of the string through the second round bottle cap and tie a knot. Cut a small triangle from the paper to create the snake’s tongue and glue it onto the first bottle cap. Use the black marker to draw eyes and decorate the snake as you like.
With just a few simple steps and easily accessible materials, you can create unique and fun toys for your children while also contributing to environmental protection. However, to ensure your child’s safety, remember to thoroughly clean the plastic bottles and caps before starting any of these projects. Give these crafts a try and let your creativity shine! Good luck!
Stay tuned for more handy tips and tricks in our .
You may also like:
7 Innovative Ways to Repurpose Plastic Bottles at Home That You Can’t Miss

Don’t discard used plastic bottles just yet, as they still have plenty of benefits for you and your family.
Intelligent individuals often insert an iron brush into a plastic bottle, knowing its benefits, so I followed suit

This method is suitable for every family, you can give it a try.
17 Creative Ways to Upcycle Beer and Soda Cans into Something Useful

Introducing: The Ultimate Guide to Upcycling Beer and Soda Cans: 17 Creative Ways to Transform Them into Something Useful.
With a growing awareness of environmental conservation, it’s time to rethink how we view waste. Instead of simply recycling, why not upcycle and give new life to those empty beer and soda cans? From creating unique home decor to functional everyday items, the possibilities are endless. Join us as we explore these fun and innovative ideas to reduce your carbon footprint and add a touch of creativity to your space.
Grow a Year-Round Supply of Vegetables at Home with Upcycled Materials

“Turn your unwanted items into a thriving, healthy garden. With a few simple steps, you can enjoy fresh, organic produce all year round without breaking the bank.”
Transform Old Tissue Box Lids into 7 Useful Household Items

Introducing the ultimate guide to upcycling toilet roll tubes into handy household items! Keep those cardboard cylinders from going to waste and get creative with our fun and practical ideas. From organizing your desk to crafting unique decorations, there’s something for everyone. So, save those tubes and get ready to transform them into something amazing. Stay tuned for the full reveal!


