


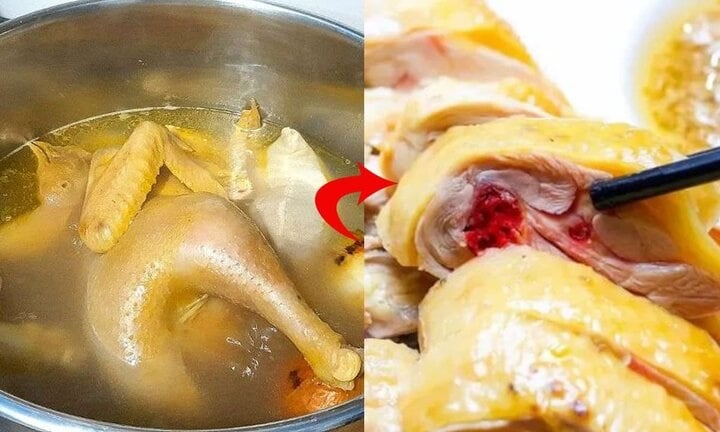
One common misconception when it comes to boiling chicken is that if the bones appear red or if there is red liquid seeping out, it means the chicken hasn’t been cooked long enough. However, there are times when the chicken remains red even after prolonged boiling, leaving the cook confused and unsure of their culinary skills.
Mistakes to Avoid When Boiling Chicken: Why Your Meat Turns Red and Smelly
Selecting and Preparing the Chicken
Washing and scrubbing the chicken too vigorously can cause the skin to tear after boiling. Rubbing it with salt excessively thins out the skin, making it more prone to tearing. Additionally, not drying the chicken after washing can result in dry meat.
It is best to gently clean the chicken and let it air dry, or pat it dry before boiling to maintain a plump appearance and tender meat.
Avoid boiling large chickens, factory-farmed chickens, or those injected with growth hormones and plumped with water. Chickens with flabby skin, emaciated bodies, bony breasts, and scruffy feathers are not suitable for boiling. This cooking method demands high-quality chicken, preferably free-range or organic.
For a perfect boiled chicken, both in terms of appearance and taste, opt for a young free-range chicken weighing between 1.5 and 1.8 kg. Look for one with a vibrant red comb, yellow feet, glossy feathers, and firm meat.
Choosing the Right Pot
The reason why some people end up with burnt or charred chicken after boiling is often due to using a pot that is too small, not adding enough water, or using a pot with a thin base that heats unevenly.
It is recommended to use a deep pot with a thick base and wide walls. This way, you can ensure that the chicken is fully submerged in the water or, at the very least, covered by two-thirds of the liquid.
Positioning the Chicken in the Pot
When we place the chicken breast-side up in the pot, the legs and thighs are left above the water level, resulting in uneven cooking.
To avoid this, position the chicken with the legs facing down. This way, the meat will cook faster as it will be in direct contact with the heat source at the bottom of the pot.
Tips for Boiling Chicken: Ensuring Tender, Flavorful Meat
Tips to Prevent Chicken from Turning Red During Boiling
While not harmful, the red color can be off-putting to some diners. To avoid this, you can alter the pH of the environment by adding a bit of vinegar or lemon juice. Rubbing the chicken with lemon and salt during preparation helps eliminate odors and reduces the chances of the meat turning red.
Another trick is to marinate the chicken in lemon juice or vinegar. This not only helps crisp the skin but also prevents myoglobin from oxidizing and turning red during boiling.
Additionally, removing the bones before boiling will prevent the meat from turning red. Without the bones and the surrounding myoglobin, the meat will retain its natural color.
How Long Should You Boil a Chicken?
The key to delicious boiled chicken is to cook it just right. Temperature and timing are crucial.
If you’re starting with cold water, place the chicken in the pot, add enough water to cover it, and put it on the stove. Start with medium heat, and once the water starts to simmer, skim off any foam and turn the heat down low. Let the chicken boil for about 10 minutes, then turn off the heat, cover the pot, and let it sit for another 20 minutes to ensure even cooking without tearing the skin or turning the bones red.
For larger chickens, you may need to boil for an additional 5 to 10 minutes before turning off the heat and letting it sit covered.
If you’re using hot water, avoid dropping the chicken into a pot of boiling water as this can cause the skin to tear. Instead, dip the chicken into the hot water a few times to acclimate it to the temperature, then place it gently in the pot, cover, and bring the water back to a boil. Reduce the heat to a gentle simmer, skimming off any foam that rises to the surface.
For a chicken weighing between 1.5 and 1.8 kg, boil it for 10 to 15 minutes. For larger chickens, between 2 and 2.5 kg, boil for 15 to 20 minutes. Then, turn off the heat, cover the pot, and let it sit for an additional 10 to 15 minutes to ensure even cooking and prevent red bones.
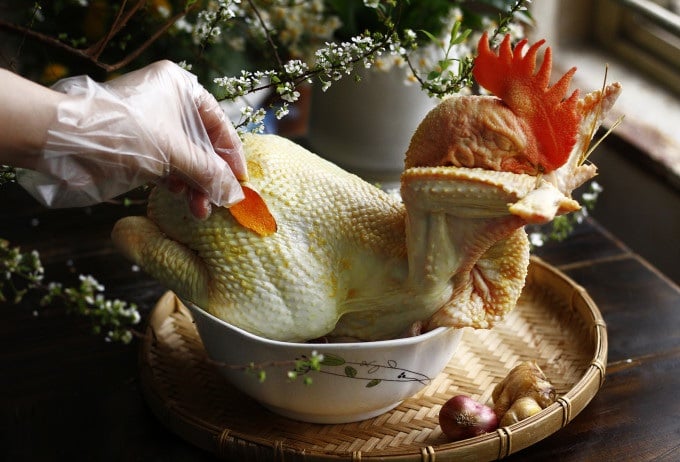
After boiling, plunge the chicken into a bowl of ice water to crisp the skin. Once it has cooled, pat it dry and let it rest before carving.
Note that you should not carve the chicken while it’s still hot, as this will cause the meat to release juices, making it less juicy and flavorful. Additionally, the skin and meat fibers can tear, affecting the presentation.
3 Chicken Boiling Blunders: Why Your Meat is Bland and Falling Apart

The art of boiling chicken to perfection is a culinary essential for all home cooks. By mastering this simple technique, you unlock a world of delicious and nutritious chicken dishes that will impress and satisfy. It’s a sure-fire way to elevate your everyday meals and ensure your family or guests are treated to a flavorful and healthy feast.
The Ultimate Guide to Washing Produce: Avoid These 3 Common Mistakes That May Do More Harm Than Good

“Rinsing vegetables with these three common habits can do more harm than good. In fact, these washing methods can cause a deeper penetration of toxins, putting your health at risk. Discover the three wrong ways to wash your veggies, as revealed by Dr. Tan Dunci from Taiwan’s Chang Geng Memorial Hospital, and learn how to effectively rid your produce of harmful pesticides.”
The Ultimate Guide to Grease Removal: A Hassle-Free, No-Scrub Solution for Sparkling Clean Plastic Surfaces

“Greasy stains on plastic items can be a real challenge to remove if you don’t know the right techniques. Our expert team has crafted this guide to share their top tips and tricks to effortlessly remove those stubborn stains and leave your plastics looking brand new.”
The Ultimate Guide to Removing Calcium Deposits from Your Shower Glass

Here are 5 simple ways to remove those unsightly calcium deposits and cloudy stains from your glassware. Discover how everyday household items can bring back the sparkle to your glassware and make them look brand new!
The Ultimate Guide to Preparing Eel and Catfish: A Step-by-Step Approach to Removing the Slime.

To get rid of the slime on an eel or catfish is a simple process, contrary to popular belief.


