


Growing cantaloupe at home ensures a steady supply of clean, nutritious fruit while saving on grocery costs.
Utilize your empty balcony or rooftop and follow this guide to create a thriving cantaloupe patch for your family.
1. Best Time to Plant Cantaloupe
As cantaloupe thrives in warm weather and is sensitive to cold, there are two ideal planting windows:
– Start in February-March, harvesting in late April or May.
– Alternatively, plant in August-September and harvest in November-December.
Since we’re using containers, it’s possible to plant in between these periods.
Note: Avoid planting during cold weather, as it stunts growth and reduces yield. Cold conditions also increase the risk of pest infestations and decrease fruit quality.
2. Choosing a Suitable Location
A spacious front yard, rooftop, balcony, or patio can be ideal for cantaloupe cultivation, provided it receives ample sunlight. Cantaloupe thrives in sunny conditions, so avoid cramped, shaded areas that may hinder fruit quality.
3. Selecting Cantaloupe Seeds
Cantaloupe seeds come in two main types: domestic and foreign. Opt for high-quality seeds suitable for your region. Purebred seeds tend to have higher germination rates and produce larger, sweeter fruits.
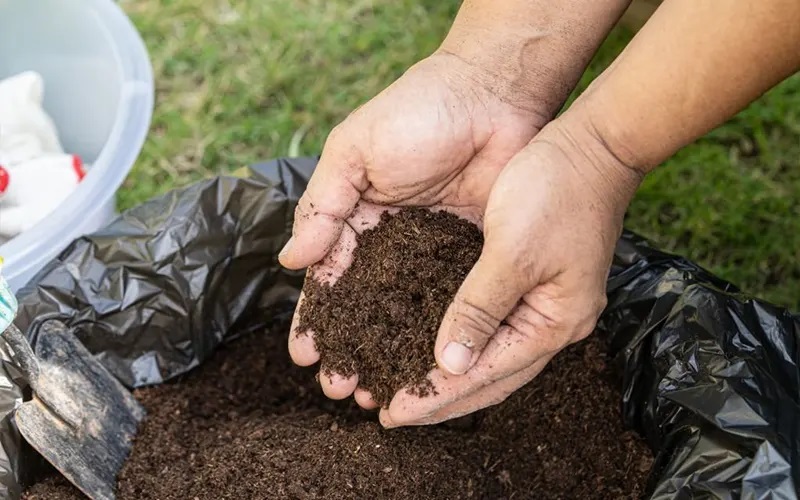
4. Preparing the Right Soil
Cantaloupe prefers well-drained, nutrient-rich, and airy soil. A mix of clean soil, worm castings, worm extract, and coconut coir works well. You can purchase these from gardening stores to ensure quality and effectiveness.
If you’re crafting your soil mix:
Soak honeycomb charcoal briquettes in water for a day, changing the water every few hours to remove impurities. Crush the soaked briquettes and mix with soil and husk at a 40:40:20 ratio. Enhance nutrition with well-rotted cow or chicken manure.
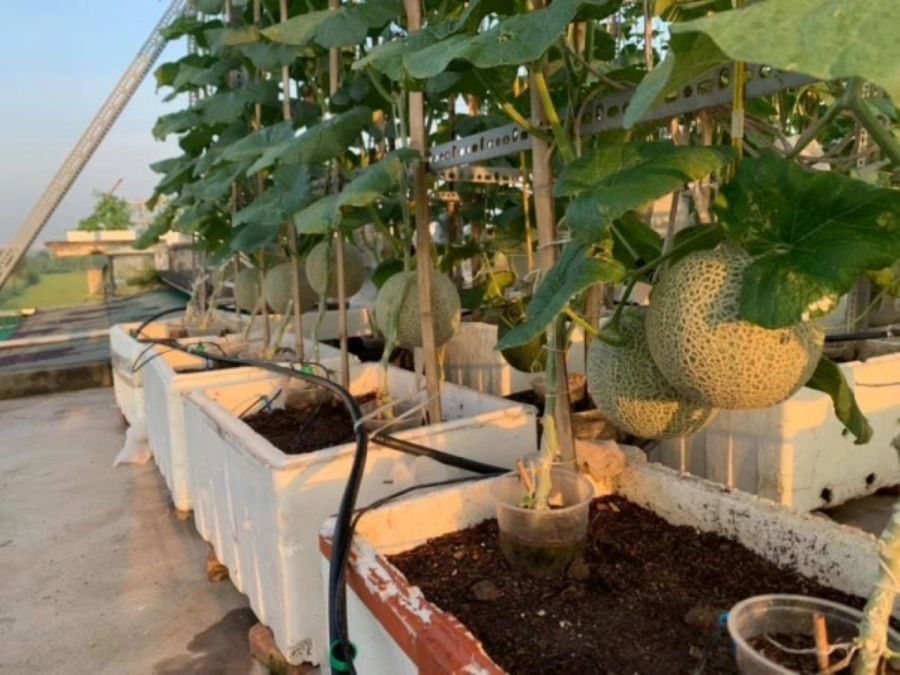
5. Choosing Containers for Cantaloupe
Select large containers, buckets, or plastic tubs for cantaloupe, as they develop extensive root systems. Cantaloupe requires ample root space to support a productive vine.
Improve drainage by drilling multiple holes in the container’s base. This prevents waterlogging and promotes oxygen exchange, benefiting the plant’s overall health.
6. Step-by-Step Cantaloupe Planting Guide
Seeding and Transplanting Cantaloupe
With your soil, seeds, and location ready, it’s time to germinate seeds and transplant seedlings:
– Germinate Cantaloupe Seeds
– Soak seeds in warm water (ratio: 2 parts boiling to 3 parts cold) for 4-5 hours. Wrap them in a damp cloth and wait for the seeds to slightly split before sowing.
Note: If using F1 seeds, you can sow them directly.
Place the seeds in prepared seedling pots. Lightly cover with soil and maintain moisture. Mix worm castings or well-rotted manure into the seedling soil to boost nutrition. Keep the pots in a cool, shaded area, avoiding direct sunlight.
Within 2-3 days, the seeds will sprout. Water regularly to keep the soil moist. Use a spray bottle for even watering without disturbing the seeds. The seedlings will develop two leaves in about 7-10 days.
Transplanting Cantaloupe Seedlings
Once the seedlings have two true leaves (after about 10-12 days), it’s time to transplant them into their permanent containers.
Gently dig a small hole in the container and carefully remove the seedling from its pot, taking care not to damage the roots. Place the seedling in the new container, fill the gap with soil, and gently compress the soil around the base. Water the plant and keep it in a shaded area, avoiding direct sunlight. Water twice daily, using a spray bottle to maintain moisture without overwatering.
6. Cantaloupe Care Techniques
At this stage, focus on proper watering, fertilization, and trellising your cantaloupe plants.
Watering Cantaloupe Plants
Cantaloupes are relatively low-maintenance and don’t require excessive watering. When the plants are young, water each with 0.5 to 0.7 liters per day once they’ve developed 3-4 leaves.
Maintain moist soil throughout the plant’s growth. Increase watering during hot, dry spells and reduce it on rainy days to prevent waterlogging and root rot.
Fertilizing Cantaloupe Plants
Fertilization is crucial for sweet, crisp fruit and abundant yields.
The type and amount of fertilizer depend on the growth stage. Young plants need more nitrogen, while flowering plants require more phosphorus, and fruiting plants benefit from extra potassium.
– When your plants have 3-4 leaves, fertilize with ½ cup of nitrogen fertilizer (use a tea cup as a measure) mixed with 7-8 liters of water. Apply this every other day to promote leaf growth and vine extension.
– As the plants develop more leaves and flower buds, mix ½ cup of nitrogen, phosphorus, and potassium fertilizer in a 3:1:2 ratio and dilute it in 7-8 liters of water. Apply this solution every other day to provide adequate nutrition for flower and fruit development.
– When the fruits start to form, increase the phosphorus ratio to ⅔ cup to encourage fruit set.
Building a Trellis for Cantaloupe
Construct a trellis when your plants have 5-6 leaves. Use small bamboo stakes or wooden poles to create a support system. If you have a balcony railing, you can train the vines to climb it. Simply tie the vines to the railing.
For long-term cantaloupe cultivation, invest in a sturdy iron trellis. This permanent structure will enhance fruit production and make harvesting easier.
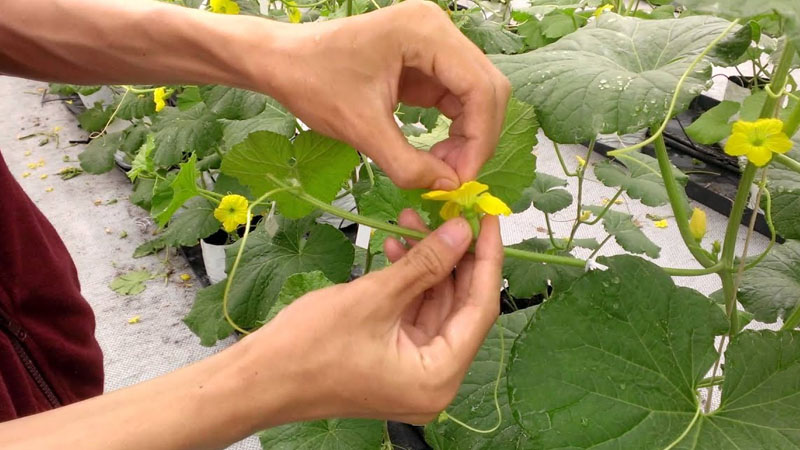
Pollinating Cantaloupe Flowers
If your area has bees and butterflies, natural pollination is likely. However, to increase fruit set, consider hand-pollinating the flowers.
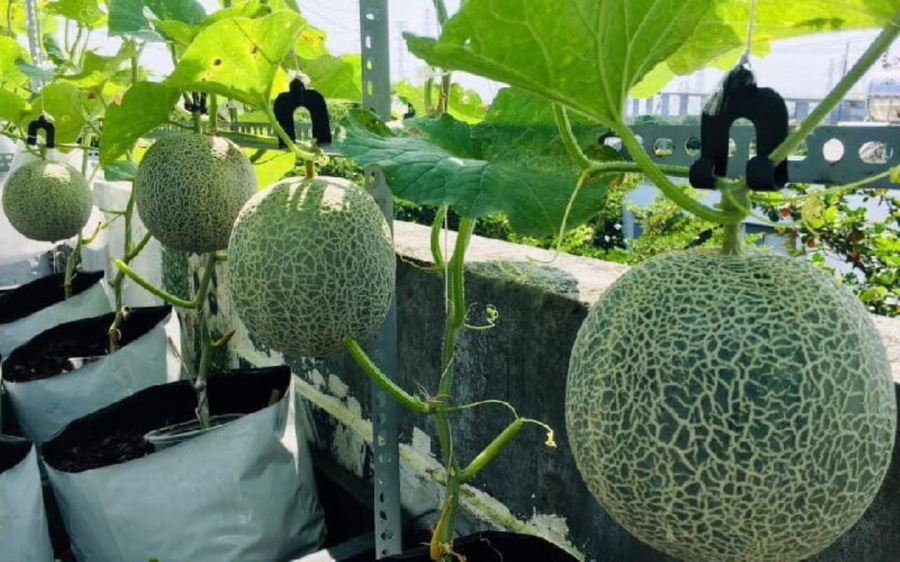
Harvesting and Storing Cantaloupe
After three months of care, your cantaloupes will be ready for harvest.
Ripe cantaloupes turn ivory-colored, with distinct netting and cracks around the stem. Stop watering 5-7 days before harvesting to enhance sweetness and crispness.
The Green Thumb Dad: $3,200 and a Green Oasis on the Rooftop

“A lush and vibrant oasis, Anh Quoc’s garden is a sight to behold. With an abundance of vibrant vegetables and fruits, it’s a true feast for the senses. The carefully tended beds showcase a rainbow of colors, from the deep greens of leafy vegetables to the vibrant reds and oranges of ripe tomatoes and peppers. This garden is a testament to the owner’s dedication and passion, leaving all who behold it in envy.”
6 Tips to Grow Succulent and Sweet Watermelons on Your Rooftop Garden

Have you ever tried growing watermelon on your rooftop garden? Believe it or not, with the right techniques, you can harvest the sweetest, most delicious watermelons you’ve ever tasted. Today, we’ll be delving into the secrets of successful rooftop watermelon cultivation, so get ready to be amazed!
“The Ultimate Guide to Growing Chinese Leaf Mustard at Home”

Pickled mustard greens are a common side dish and an easy-to-grow vegetable. Many people assume that they are difficult to cultivate, but in reality, they are quite simple to grow and can be a great addition to your garden.
9 Things You Need to Know Before Starting Your Own Home-Grown Veggie Garden

“Unleash the green thumb within and discover the secrets to growing a vibrant and healthy home garden! At Bach Hoa XANH, we’re here to share our expert tips and tricks so you can enjoy the freshest and most delicious produce right from your own backyard. Imagine biting into crisp lettuce, savory herbs, and sweet cherry tomatoes, all grown with your very own hands. With our guidance, you’ll be well on your way to a thriving and abundant green oasis.”
The Ultimate Guide to Growing Macca Trees in Vietnam: A Step-by-Step Technique

Macadamia nuts are a nutritional powerhouse, packed with a wide range of essential nutrients that offer an array of health benefits. But where do these wondrous nuts come from? Join us as we delve into the origins of the macadamia tree and explore the regions in Vietnam where it thrives. Uncover the secrets of its cultivation and learn the intricate techniques required to grow these delicious and healthy treats.


