


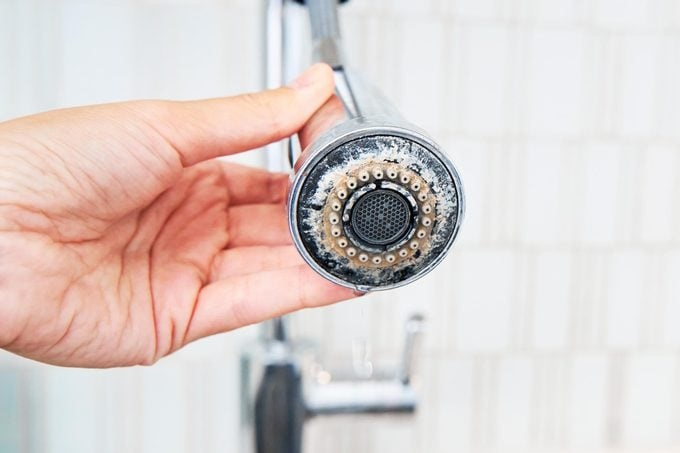
Faucet aerators, whether in the bathroom or kitchen, are prone to mineral deposits, calcium buildup, and grime accumulation. Without regular cleaning, mold can develop. However, cleaning faucet aerators is incredibly straightforward. Here’s a detailed guide.
Simple Guide to Cleaning Faucet Aerators
Essential Supplies for Cleaning Faucet Aerators
- Water
- Distilled white vinegar
- Bowl or ziplock bag
- Clamp or rubber band
- Soft-bristle brush (e.g., old toothbrush) or non-abrasive sponge
- Microfiber cloth
- Rubber jar opener (optional)
Step-by-Step Cleaning Instructions
Step 1: Remove Debris
For spray nozzles (like those on kitchen sinks or showerheads), periodically rub your thumb over the nozzle to remove any debris that might obstruct water flow. Clearing larger debris allows the cleaning solution to focus on more stubborn buildup.
Step 2: Detach the Aerator if Possible
If the nozzle has a removable aerator, detaching it can simplify cleaning. (If your aerator is fixed, proceed to Step 3.)
Here’s how to remove the aerator:
- Pull the nozzle from the faucet.
- Clamp the nozzle to prevent it from retracting.
-
Unscrew the Aerator.
Step 3: Prepare the Cleaning Solution
Mix equal parts water (any temperature) and distilled white vinegar. If the aerator is detached, place it in a bowl or cup and add enough solution to cover the underside where water exits.
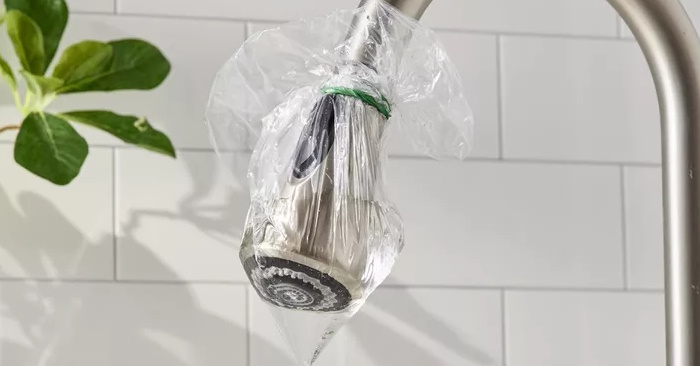
For fixed aerators, pour 2 tablespoons of the solution into a ziplock bag and secure it over the aerator with a rubber band or clamp. Ensure the solution covers the aerator’s underside.
Step 4: Soak the Aerator
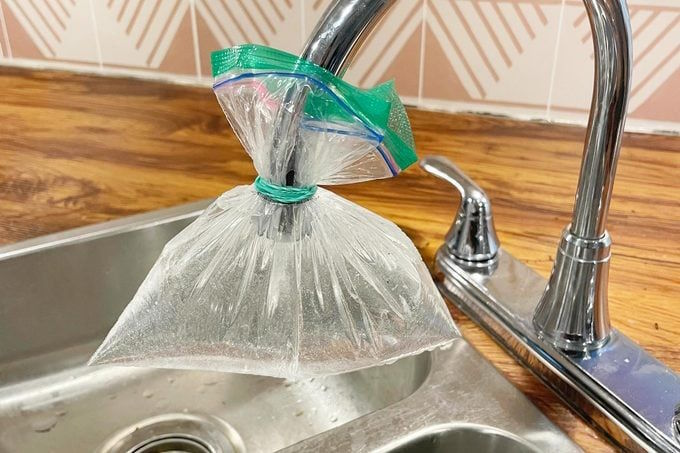
Let the aerator soak for at least 30 minutes. For particularly stubborn stains, leave it overnight.
Step 5: Scrub the Aerator
Check the aerator every 30 minutes, using a soft-bristle brush or non-abrasive sponge to remove buildup. For showerheads, use a toothpick and brush to clear clogged nozzles.
Step 6: Repeat if Necessary
If buildup persists, continue soaking the aerator in the vinegar solution.
Step 7: Rinse and Reassemble

Some prefer adding baking soda for extra scrubbing power, but vinegar alone is often effective. Remove the aerator from the bowl or bag, rinse it with water, and dry it with a microfiber cloth. Reattach it if it was detached.
Cleaning Clogged Faucets
Required Materials
- Dish towel
- Rubber jar opener, wrench, pliers with electrical tape, or aerator tool if the faucet has a hidden aerator.
- Bowl or cup
- Water
- Distilled white vinegar
- Soft-bristle brush (e.g., old toothbrush)
Cleaning Steps
Step 1: Remove the Aerator
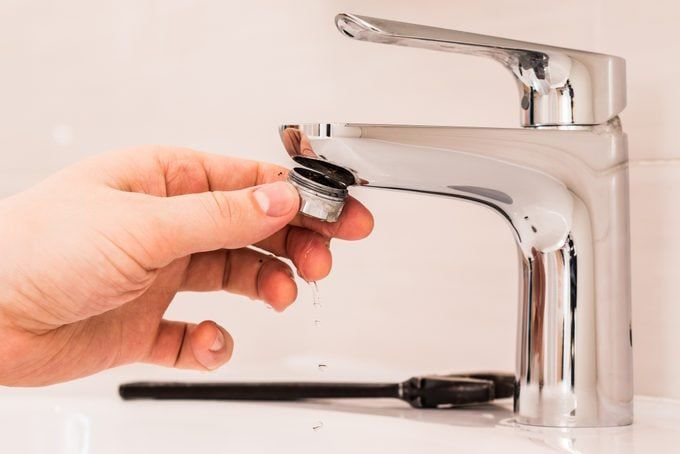
First, locate the aerator. Next, line the sink with a dish towel to cover the drain and catch any debris. Then, remove the aerator by hand or with a rubber jar opener or wrench,” Schopp advises. Typically, it loosens to the left, but you’ll work from above, turning it right to loosen.
If the aerator is hidden, the faucet comes with a tool to remove it.
Regardless of the aerator type, handle it carefully to avoid altering its shape.
Step 2: Clean the Aerator
In a cup or bowl, mix equal parts distilled white vinegar and water. Prepare enough solution to cover the aerator. Soak it for 30 minutes, periodically scrubbing with a toothbrush to remove buildup.
Step 3: Repeat if Necessary
Repeat the process if significant buildup remains.
Step 4: Rinse and Reassemble
Rinse the aerator with clean water and reattach it to the faucet.
Why Are More People Switching from Liquid Detergent to Laundry Powder? Here Are 3 Compelling Reasons

What once caused laundry detergent to fall out of favor is now making a remarkable comeback, as more and more people are rediscovering its trusted effectiveness. Let’s delve deeper into why this classic staple is regaining its place in households.
Revitalize Hard-to-Reach Spots: Creative Uses for Old Toothbrushes in Home Cleaning

Don’t toss out your old toothbrushes just yet—they’re surprisingly handy for cleaning hard-to-reach spots and intricate items around your home.
Revitalize Your Laundry: Baking Soda Hacks for Fresh, Clean Clothes and Odor Elimination

Baking soda is a natural, safe, and cost-effective cleaning and deodorizing powerhouse. If you haven’t yet discovered its laundry-enhancing magic, you’ll be eager to start after reading this.
“A Tiny ‘Organ’ on Your Gas Stove: How a Simple Toothpick Hack Can Save You Hundreds on Gas Bills Every Year”

“Save a pretty penny on your monthly gas bills with this simple yet effective tip. This hack is a game-changer when it comes to cutting down those daunting energy expenses.”
“Unveiling the Surprising Items Your Dishwasher Can Clean”

The best dishwashers save you time and effort, but they also go beyond that. These efficient machines also conserve water and energy, making them a more sustainable choice for your home. With features such as automatic detergent dispensing and Microban-treated components, they ensure your dishes are not only sparkling clean but also that your machine remains hygienically pristine.

: Double fortune for 3-year-olds, financial struggles for 1-year-olds")

: Four Lucky Zodiac Signs to Reap Exceptional Success")


