Microsoft Word is one of the most widely used office tools. Word has numerous built-in features that support the learning and working process, such as automatic table of contents creation, page numbering, label making, and logo insertion. Today’s article will guide you through the process of inserting a logo into your Word documents.
Why Insert a Logo into Word?
Logos can be inserted into Word documents as watermarks or images. Watermarks are usually adjusted to be lighter in color than the content and are typically placed in the background so that readers can still easily follow the text. Logos can be positioned in the center of the Word page or placed diagonally or horizontally, depending on your preference.
.jpg)
Inserting a logo into your Word document not only makes your document look more polished and professional but also helps prevent others from plagiarizing your work. Additionally, when readers see a watermarked document, they will instantly recognize the author or the organization it belongs to.
See also:
- A detailed guide to creating headers in Word quickly and simply in 2023
- A simple three-step process to add a new page in Word, applicable to all versions
How to Insert a Logo into Word
You can insert a logo into Word either as text or as an image file. The following two methods will guide you through the process.
Inserting a Pre-made Logo (Image)
This method is straightforward and will only take a few minutes, even for documents that are dozens or even hundreds of pages long. Follow the steps outlined below.
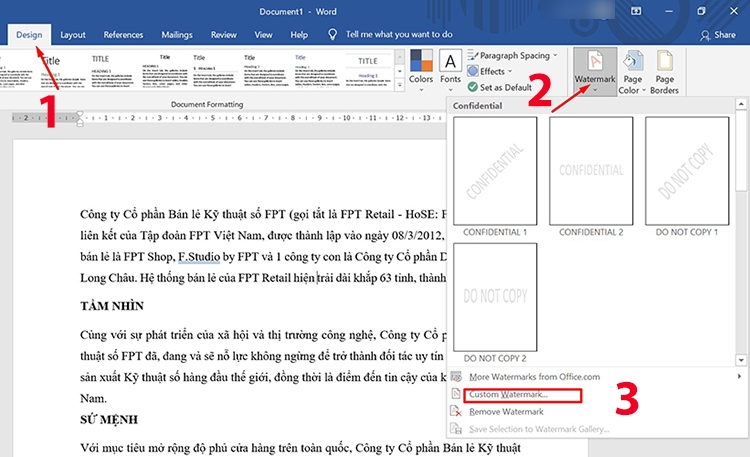
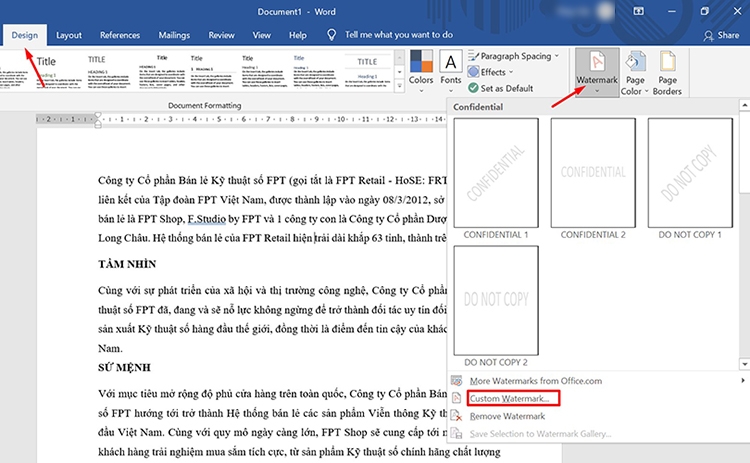
Step 1: Open the Word file where you want to insert the logo > Go to the Design tab > Select Watermark in the Page Background section > Choose Custom Watermark.
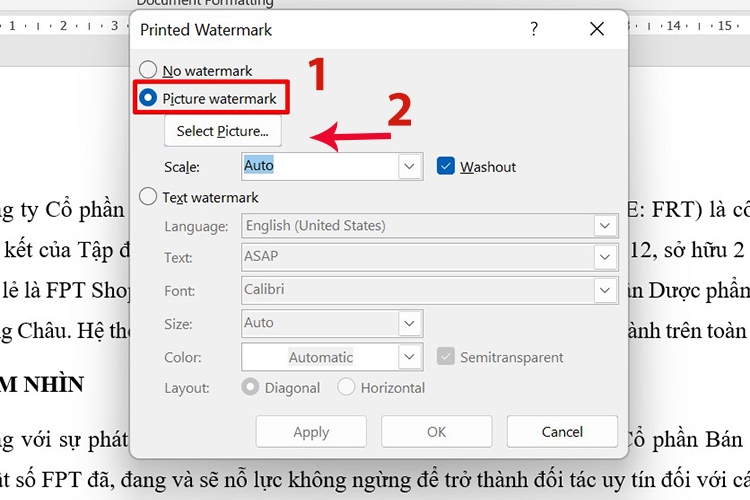
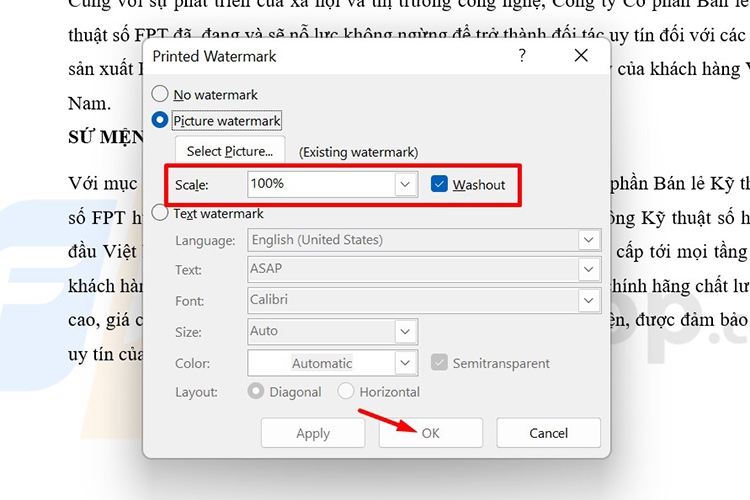
Step 2: Since we are inserting a pre-made logo image, select Picture Watermark > Click on Select Picture to choose your logo image.
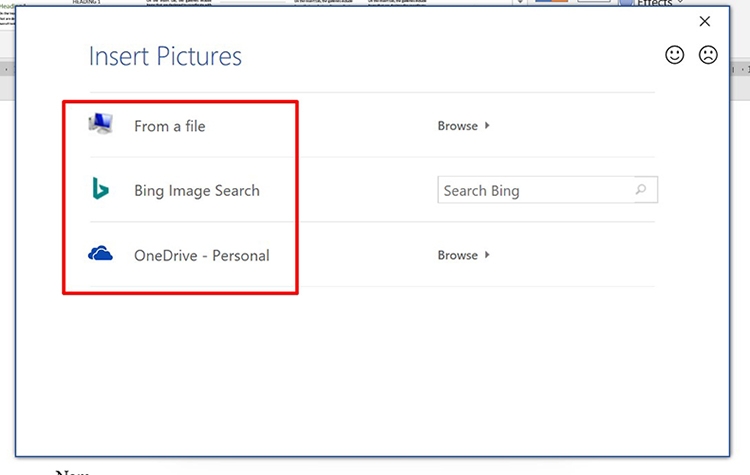
Step 3: Choose the source for uploading your image by clicking on one of the three options: From a file, Bing Image Search, or OneDrive – Personal.
In this example, I will choose From a file to select an image saved on my computer.
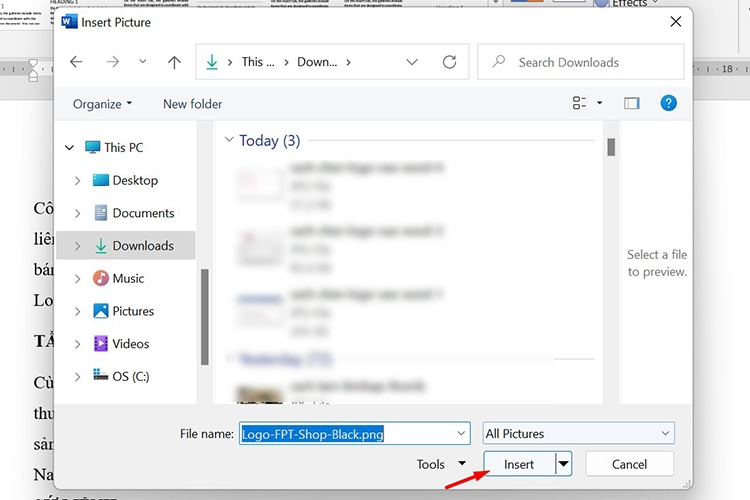
Step 4: Select the logo image you want to insert > Click Insert.
Step 5: Once the logo is selected, you can adjust its size by clicking on the arrow in the Scale section. You can choose to Washout the logo to make it lighter and less noticeable, or leave it as it is for a bolder look.
After making your adjustments, click OK for Word to automatically insert the logo into your document.
Word will automatically center the logo on the page, and you will get a result similar to the one shown below:

Inserting a Logo Using Custom Text
For organizations or businesses, it is common to insert their official logo into documents. However, if you are an individual without a specific logo or if you don’t have the organization’s logo readily available, you can insert custom text as a watermark following these steps:
Step 1: Open the Word file where you want to insert the logo > Go to the Design tab > Select Watermark > Choose Custom Watermark.
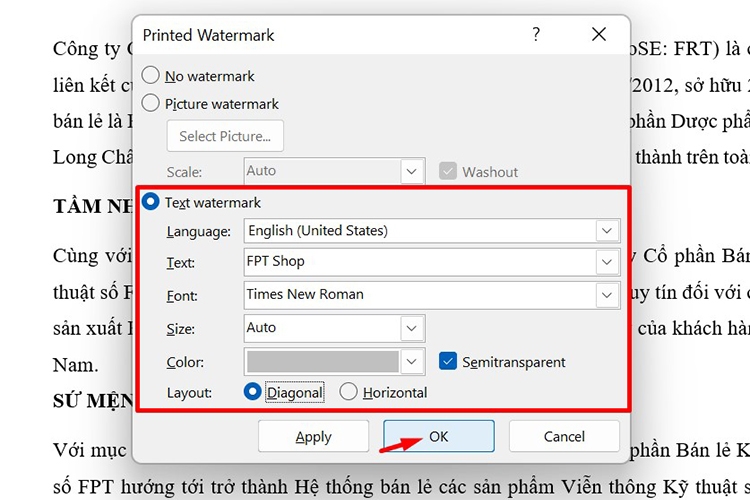
Step 2: To insert a text-based logo, select Text Watermark and then configure the settings, including:
- Language: Choose the language for your logo (English, Vietnamese, Arabic, Basque, etc.).
- Text: Enter the content for your logo.
- Font: Select the font for your logo.
- Size: Set the size of the logo (it is recommended to leave it at Auto).
- Color: Choose the color of your logo.
- Layout: Decide whether you want the logo to be placed Diagonally or Horizontally.
Once you have made your selections, click OK to insert the logo into your Word document.
And that’s it! You should now see the custom text logo in your document, as shown below:

How to Remove a Logo from Word
If you need to remove a logo from your Word document for any reason, the process is just as simple and will take less than a minute. Here’s what you need to do:
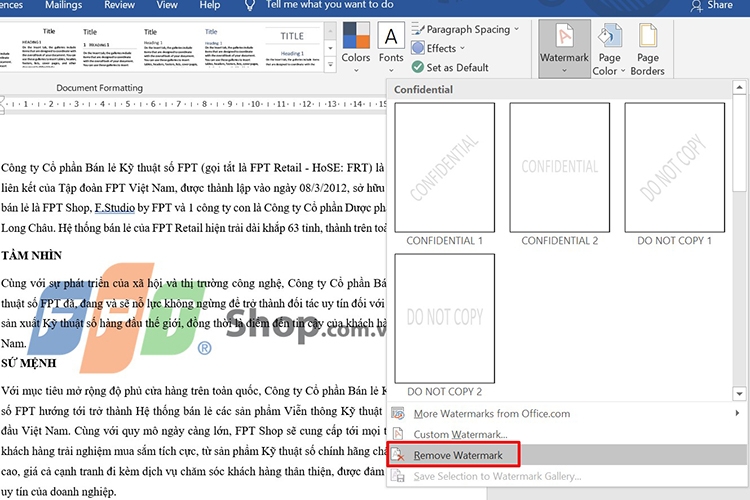
Open the Word file from which you want to remove the logo > Go to the Design tab > Select Watermark > Choose Remove Watermark.
That’s it! The logo will be instantly removed from your document.
Note: The instructions provided above for inserting and removing logos in Word were created using Microsoft Word 2019. Other versions of Microsoft Word may have slightly different steps. Instead of selecting the Design tab, you may need to go to the Page Layout tab and look for the Watermark section.
This article has provided you with a comprehensive guide on how to insert a logo into Word, whether it is an image or custom text. The process is simple and easy to remember, yet it helps ensure that your documents are protected and that your authorship is recognized.
See also:
- Simplify your tasks by learning how to open two Word files simultaneously on your computer
- Troubleshooting guide for fixing the “File Conversion” error when opening Word files


