Google Forms is a web-based application that allows users to create free forms for data collection through surveys and user feedback. As a product of Google, Google Forms is easily accessible and can be shared via links, emails, or embedded in websites and blog posts.
When to Use Google Forms
– When you need to collect data for your spreadsheet.
– To conduct surveys for improving, upgrading, and changing management, teaching, and production processes.
– When you need to ask multiple questions, make requests, conduct tests or evaluations, and provide various options for feedback.
How to Access Google Forms
To use Google Forms, you must first sign in with your email or phone number. Once you have successfully signed in to your Google account, you can access the Google Forms app in the following ways:
Method 1: Access the link: https://docs.google.com/forms or select Forms in the Google app suite, as shown in the image below.
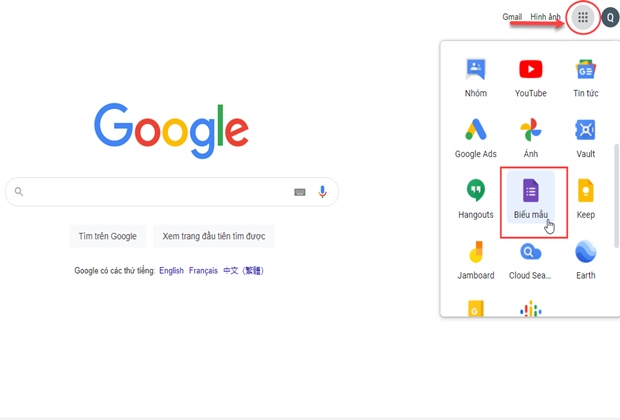
The interface displayed when accessing Google Forms.
Method 2: Access Google Drive, select New >> Choose Blank Form or From Template (pre-made templates).
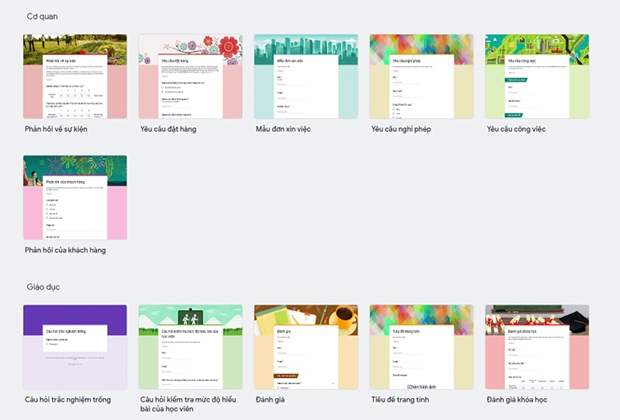
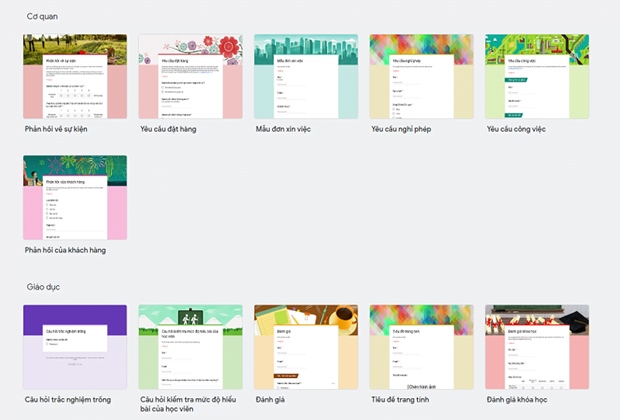
These are pre-made templates that you can choose from and edit the attributes within.
Method 3: Access Google Forms on your mobile phone by opening a mobile web browser and going to forms.google.com. A new form will automatically open.
Detailed Guide to Creating a Google Form
Once you have accessed Google Forms, you have two options: create a new form or use a pre-made template.
1. Create a New Google Form
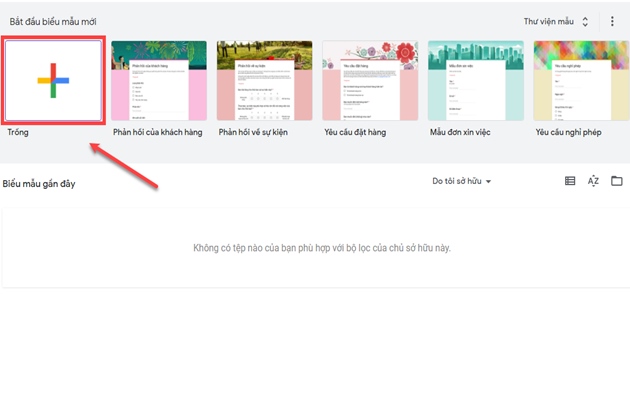
Step 1: Click on the + sign to create a new form.
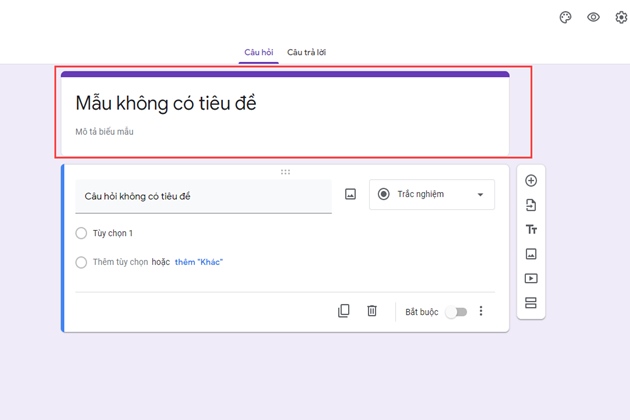
Step 2: Enter a title and description for your Google Form in the first two rows.
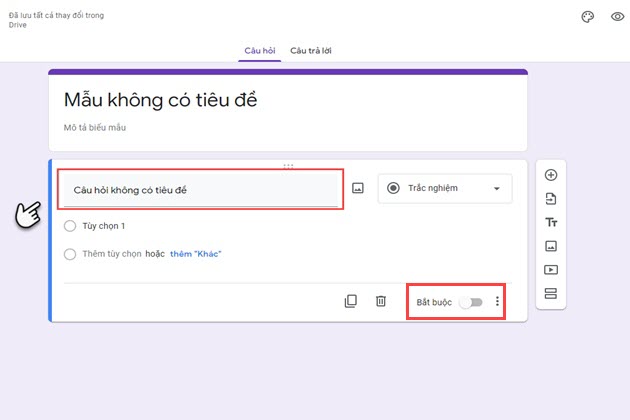
Step 3: Enter the title of your question and choose whether it is required or optional.
Step 4: Below the question title, enter the options for the answers.
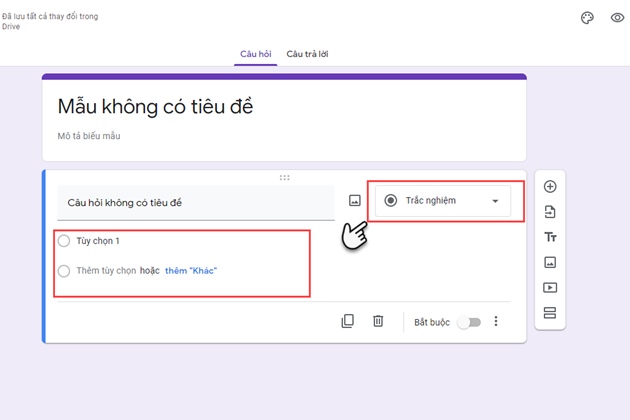
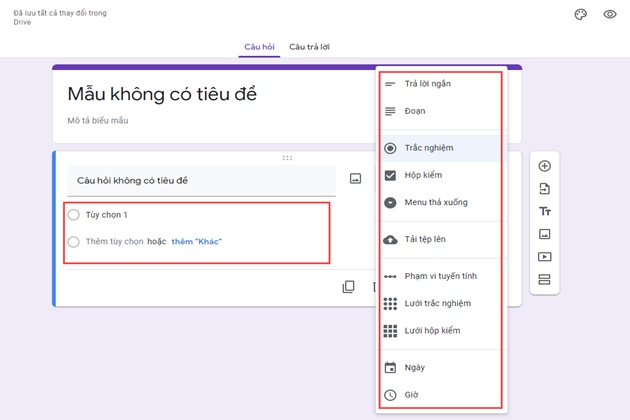
In the rectangular box, you have the following choices for answer formats:
– Short answer
– Paragraph
– Multiple choice
– Checkboxes
– Drop-down menu
– Allow users to upload files
– Linear scale
– Grid
– Checkboxes grid
– Date, time
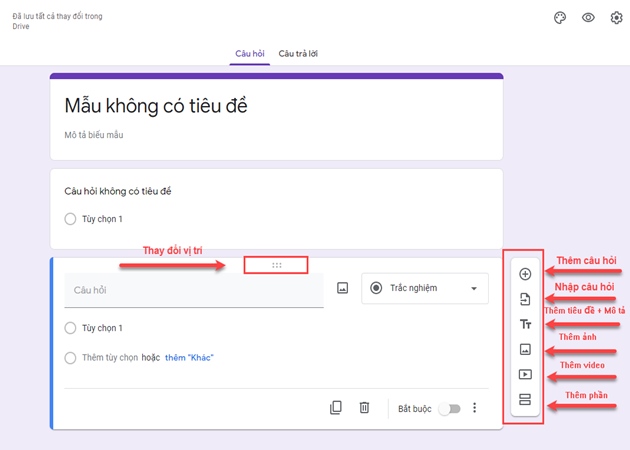
Step 5: If your form has multiple questions, you can add more by clicking on the + sign on the right sidebar. This sidebar also allows you to add titles, images, and captions to your form.
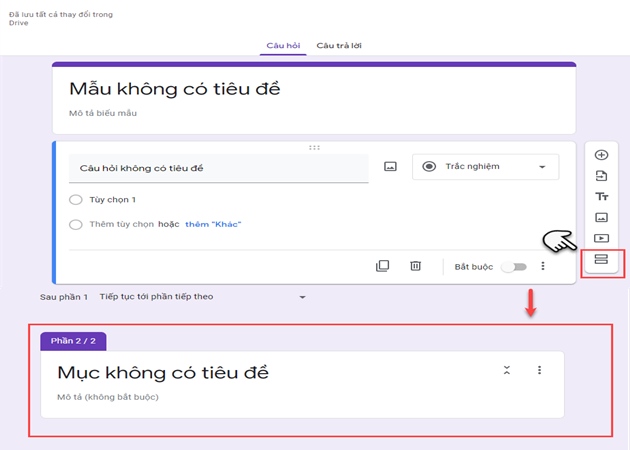
Step 6: If your form has multiple sections, such as Part 1 and Part 2, click on the two rectangle icon on the top right corner to divide the form into sections.
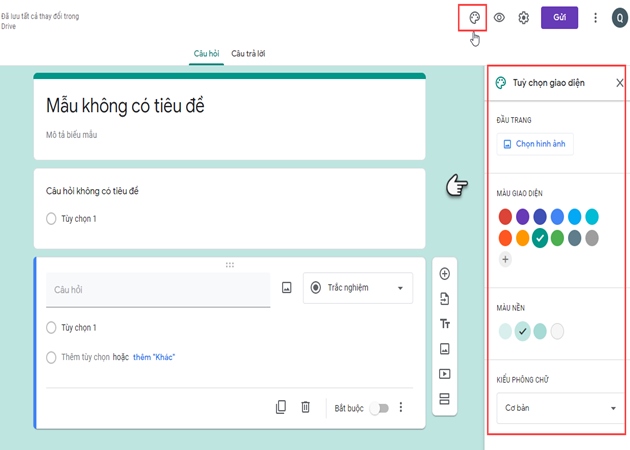
Step 7: Customize the form’s appearance (top right corner) to add a header image (upload or choose from the gallery), change color themes, background color, and font style.
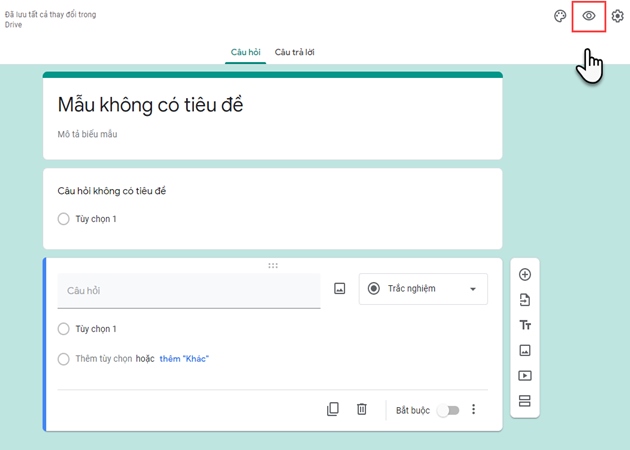
Step 8: Once your form is complete, click on the eye icon to preview and check if the Google Form is correct and complete.
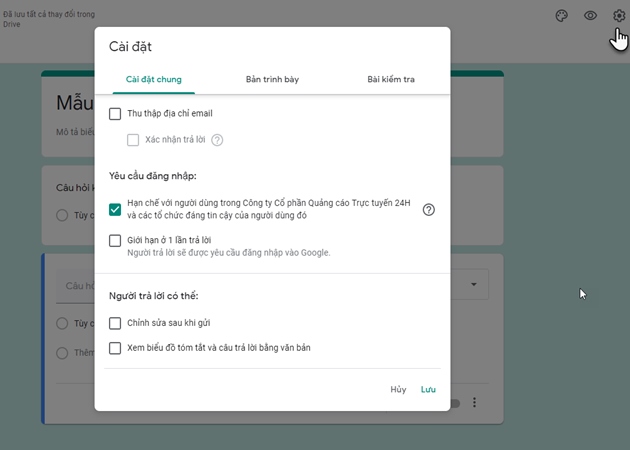
Step 9: Click on the gear icon to review the settings for General, Presentation, and Quizzes. Then, save your settings.
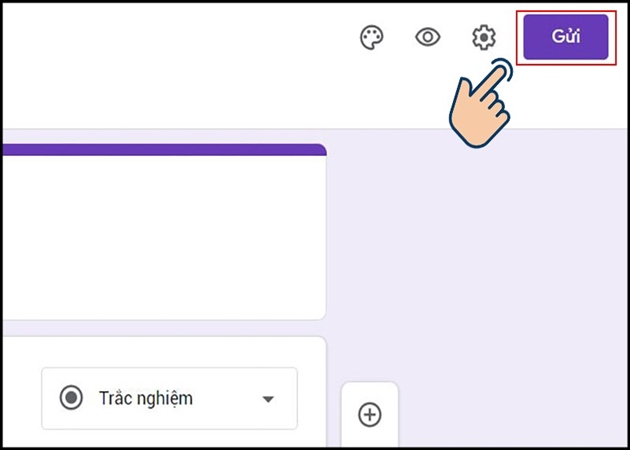
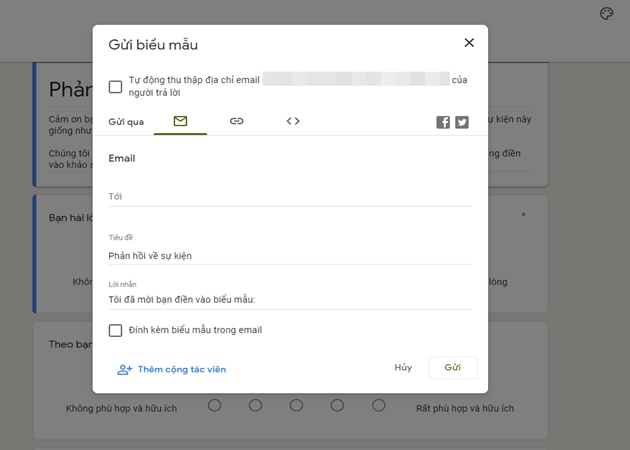
Step 10: After finalizing your Google Form, click Send to share the form via email, Facebook, Twitter, or copy the URL link to send directly to people you want to fill out the form.
2. Create a Google Form Using a Pre-made Template
Step 1: After accessing Google Forms, select the Template Gallery. Here, you will find various pre-made templates that you can use and edit, including:
– Customer feedback form
– Event feedback
– Order request
– Job application
– Leave request
– Contact information
– T-shirt sign-up
– Evaluations, etc.
Step 2: Edit the attributes that do not fit your requirements. Add images, videos, edit titles, descriptions, and add new sections if the pre-made template is insufficient.
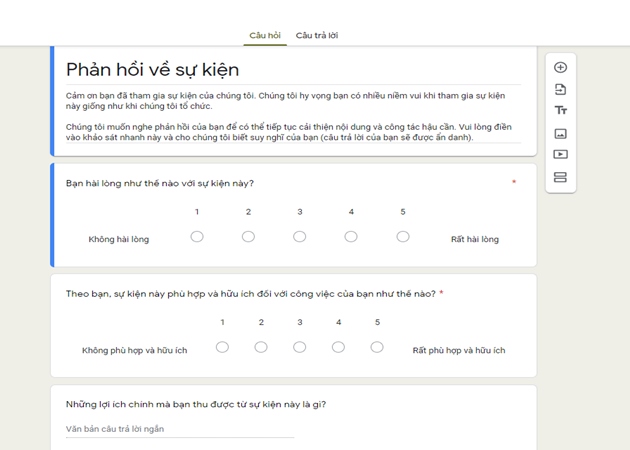
Step 3: Proceed to edit the form’s appearance if desired, then share the link with others to participate in the survey or provide answers to your questions.
Before sending, fill in the required information, including email address, title, message, and tick the box to attach the form to the email. Then, send the Google Form.
3. Checking Form Responses
To see who has participated in your survey or answered your form, and to stop receiving responses, follow these steps:
Step 1: Access your Google Form and select the Responses tab.
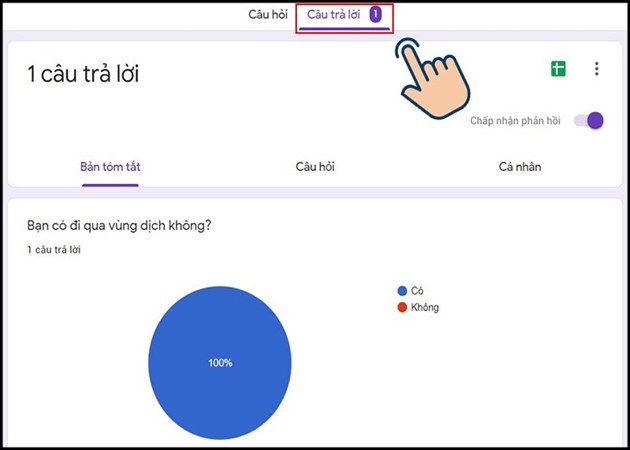
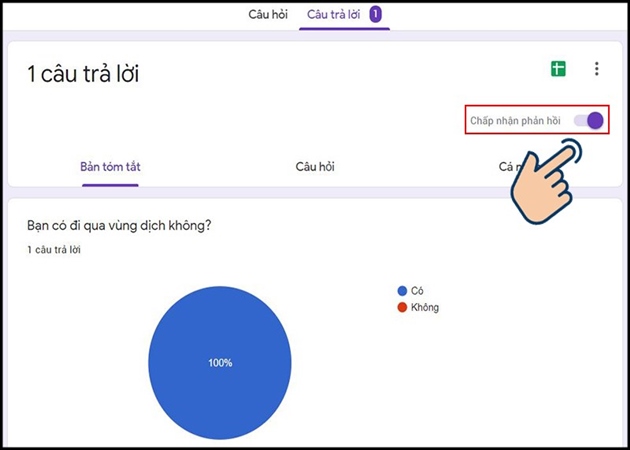
Step 2: To stop receiving responses, slide the “Accepting Responses” bar to the left. No one will be able to submit responses to your form anymore.
