


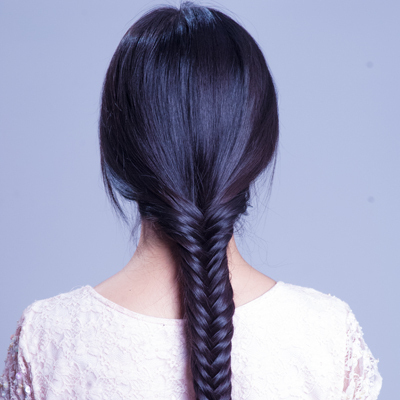
With its simple, easy-to-follow steps, this fishbone braid hair tutorial is a must-try for a fun and effortless look. Let’s get started!
The fishbone braid is a classic hairstyle that many girls love. It’s a popular choice for students, especially when paired with the traditional white ao dai. Follow these steps to create this beautiful braid:
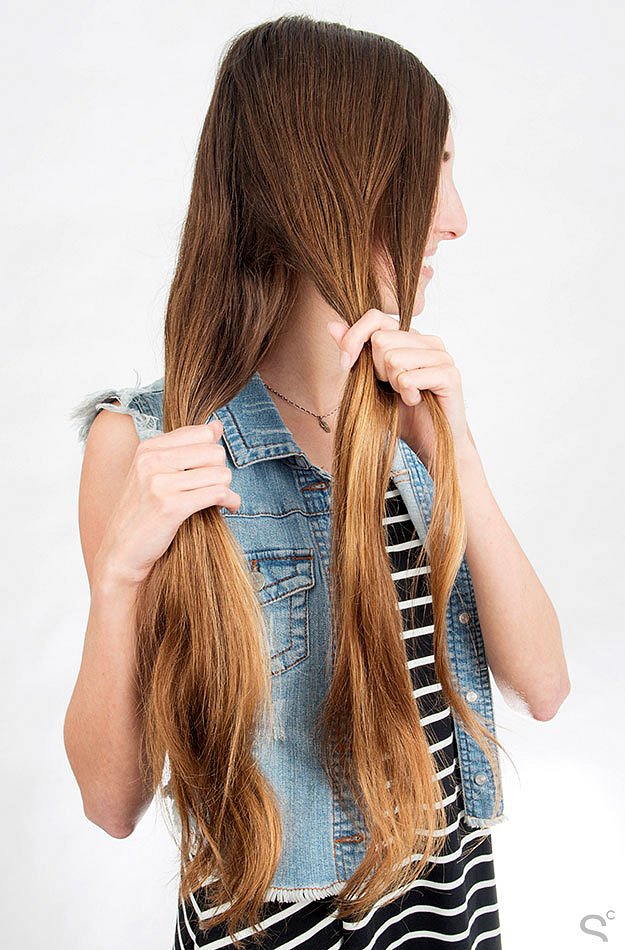
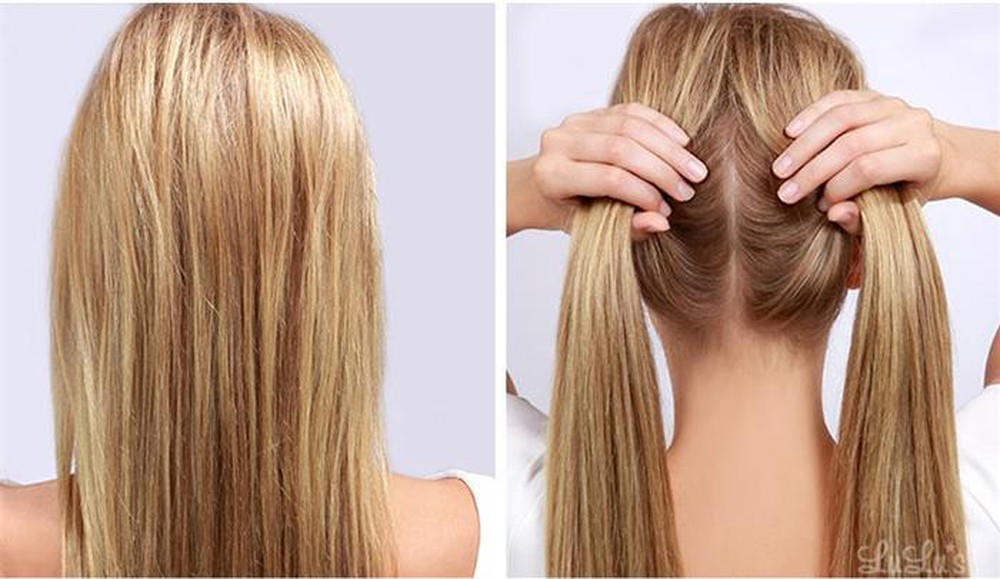
Step 1: Part Your Hair
- Start by parting your hair into two equal sections.
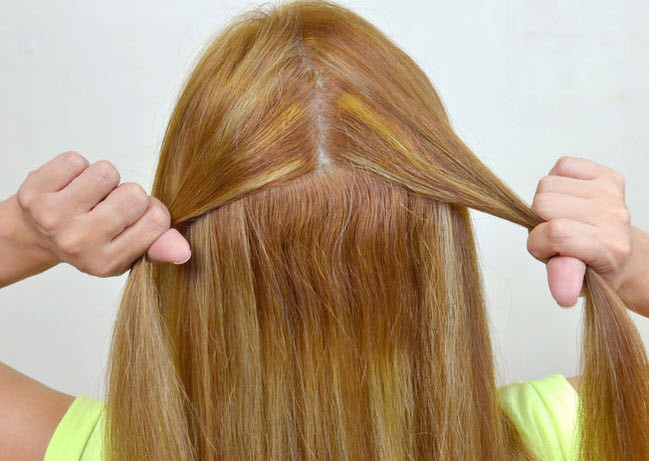
A little tip before you start braiding: if you have time, try adding some light curls to your hair. This will give your braid a natural and bouncy look.
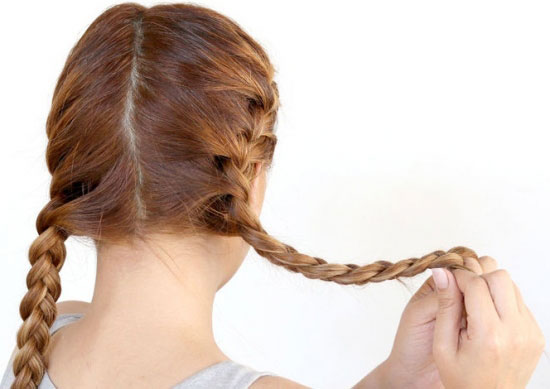
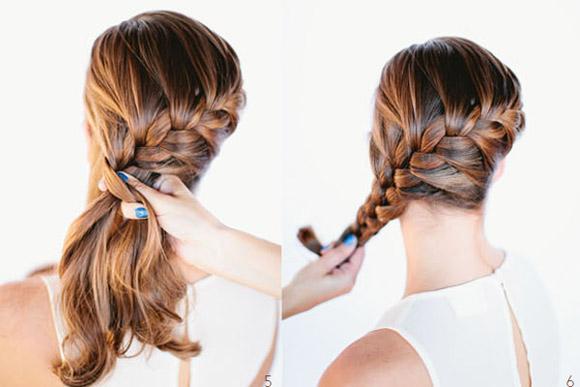
Step 2: Begin Braiding at the Nape
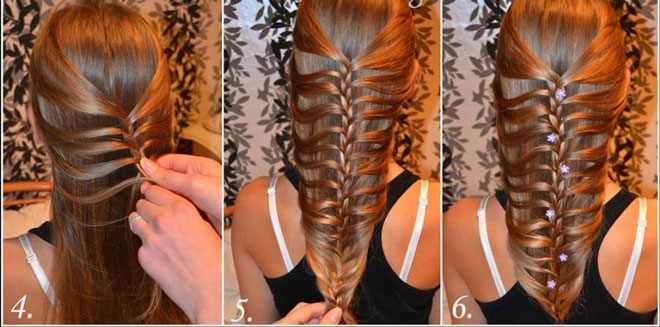
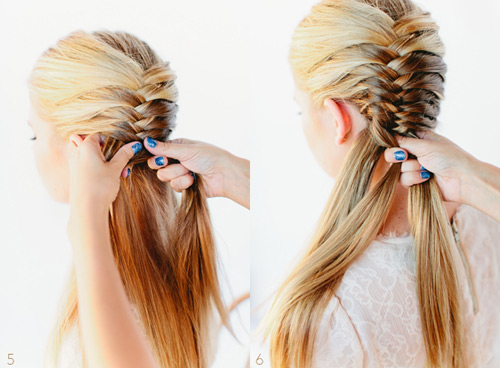
Take a small section of hair from the left side near the nape and cross it over to the right. Continue by taking a new section of hair from the left and crossing it over to the right, incorporating it into the braid. Make sure to keep the sections equal in thickness as you work down the hair.
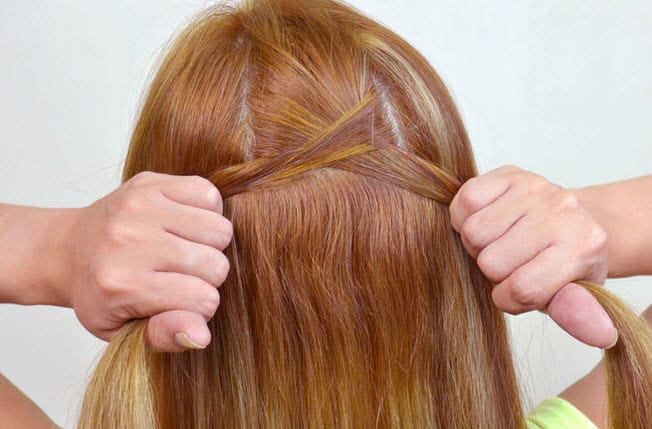
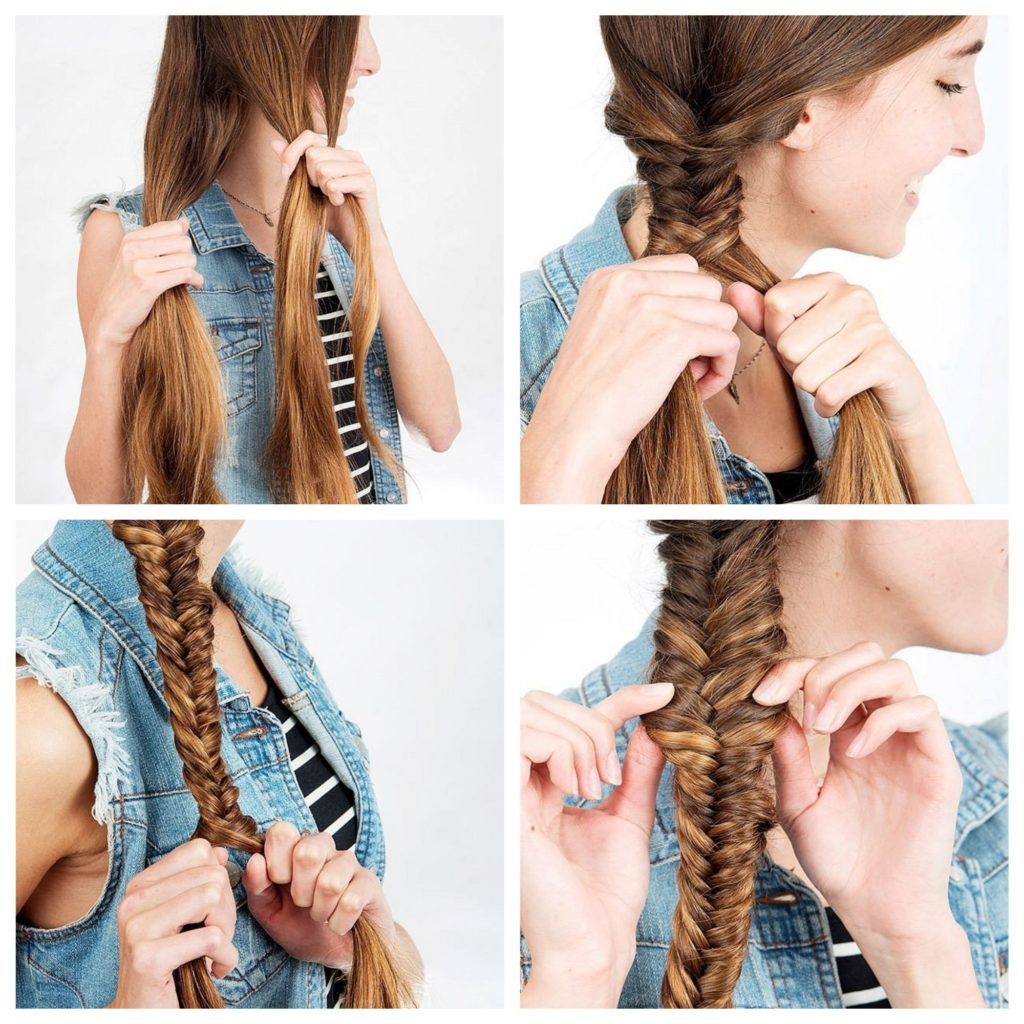
Step 3: Cross the third section of hair over to the right and then cross the middle section over to the left. At this point, you should have three sections of hair, with the middle section now being the leftmost one. Combine the left and middle sections into one.
Step 4: Take a new section of hair from the right side near the nape and cross it over to the left, placing it over the first section and combining it with the second section. Now your left hand should be holding the newly combined section, and your right hand should be holding the middle section.
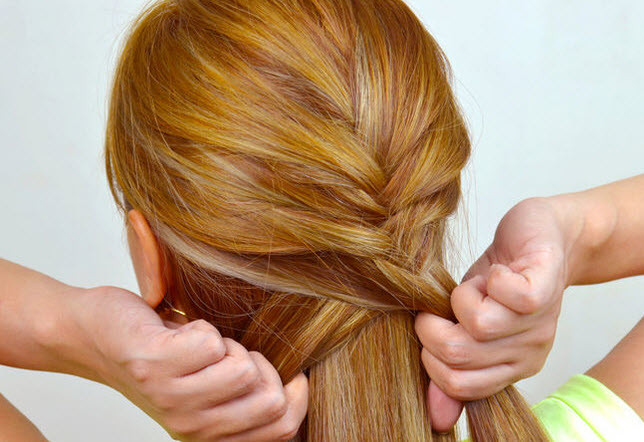
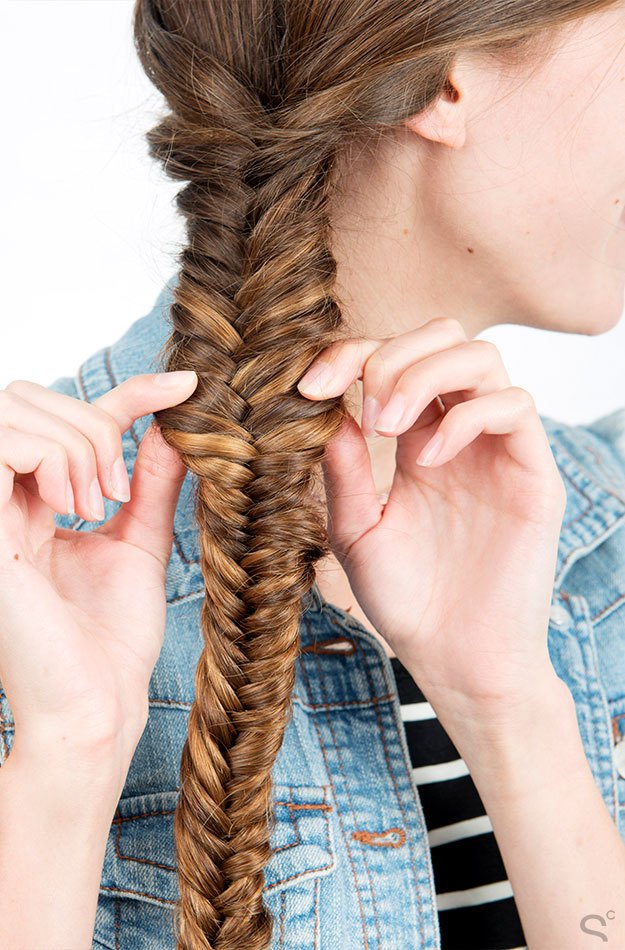
Step 5: Continue this pattern by taking hair from the left side, then the right, alternating sides as you work down the hair. Remember to keep the sections equal in thickness.
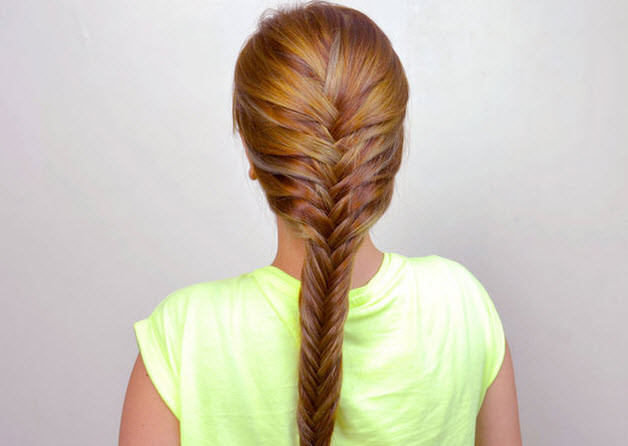
Step 6: Secure the end of the braid with an elastic band. If your braid feels loose, you can use bobby pins to secure it in place.
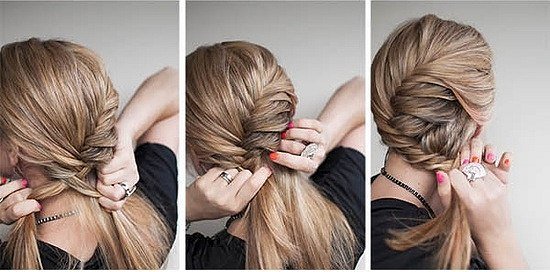
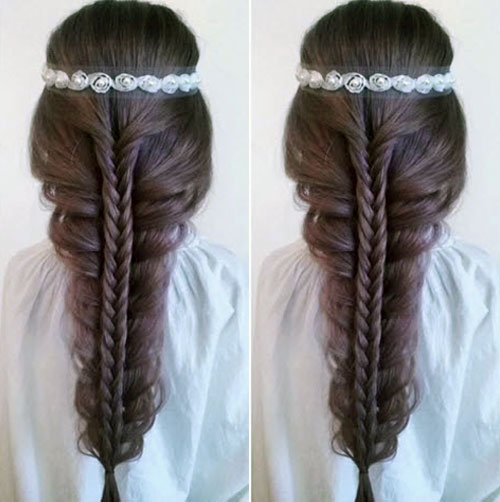
2. Side Fishbone Braid
This variation of the classic fishbone braid adds a stylish twist. Instead of the braid hanging straight down, it’s swept to the side, combining tradition with creativity. Here’s how to achieve this look:
Step 1: Part Your Hair to the Side
- Start by sweeping all your hair to one side, either left or right, depending on your preference.
- Then, part your hair into two equal sections.
Step 2: Create the Fishbone Braid
- Begin braiding as you would for the traditional style, taking a small section of hair from the left and crossing it over to the right, and vice versa.
Step 3: Finish the Look
- Continue braiding to the end of your hair and secure it with an elastic band.
- For a more natural and effortless look, gently loosen the braid with your fingers.
3. Double Fishbone Braids
If you’re looking for something a little different, try this adorable double fishbone braid style. Here’s how to create this look:
Step 1: Part Your Hair in the Middle
- Create a center part and divide your hair into two equal sections, sweeping them over your shoulders.
Step 2: Braid Each Side
- Divide each section into two equal parts and create a fishbone braid on each side as usual.
Step 3: Finish the Look
- Secure the ends of the braids with elastic bands.
- Loosen the braids slightly to create a more natural and playful look.

This hairstyle will give you a youthful and vibrant appearance.
4. Zig-Zag Fishbone Braid
This unique take on the fishbone braid is definitely a head-turner. Here’s how to create this edgy look:
Step 1: Start Braiding at the Top
- Take three small sections of hair from the left or right side, near the top of your head.
Step 2: Continue Braiding in a Zig-Zag Pattern
- Braid diagonally towards your ear, crossing the side sections over the middle section and picking up new hair as you go.
- When you reach your ear, change the direction of the braid by crossing the side sections under the middle section and continuing down towards the nape.
Step 3: Finish the Look
- Secure the end of the braid with an elastic band.
If your hair is on the shorter side, you can hide the elastic by tucking the end of the braid into the nape of your neck and securing it with bobby pins.
5. Fishbone Braid for Short Hair
Girls with short hair, don’t fret! You can also rock a fishbone braid. Here’s how to create this cute style:
Step 1: Gather Your Supplies
- You’ll need 8-10 small elastic bands for this style, so make sure you have enough on hand before you start. Begin with smooth, brushed hair.
Step 2: Start Braiding
- Take two sections of hair from each side of your head, about 7-15 cm apart. Combine these sections and secure them with an elastic band at the middle point.
- Take two new sections of hair from each side, combining them and securing them with another elastic band below the first one. Make sure the second set of sections is slightly narrower than the first.
- Continue this process, working your way down your hair until you’re happy with the length of the braid or have reached the end of your hair.
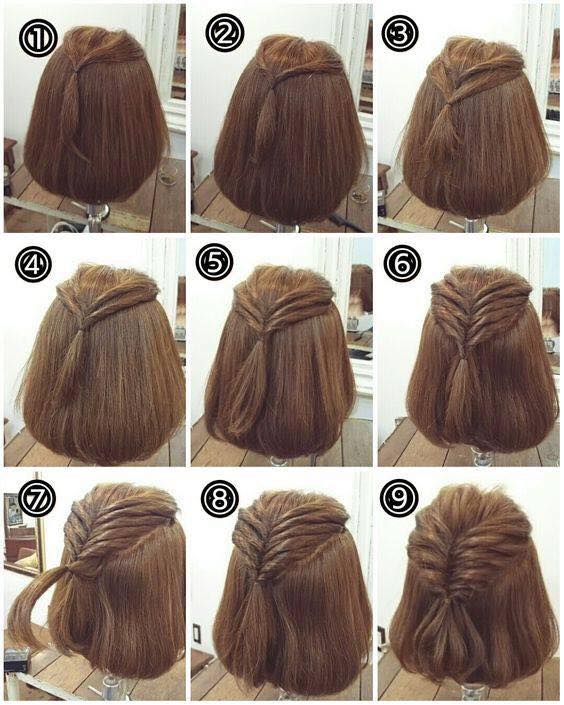
Tip: For a prettier look, gently twist each section of hair before securing it with an elastic band. Also, make each subsequent section slightly narrower than the previous one.
Step 3: Finish the Look
- Tuck the ends of the braid and the elastic bands under the last section of hair to create a seamless look.
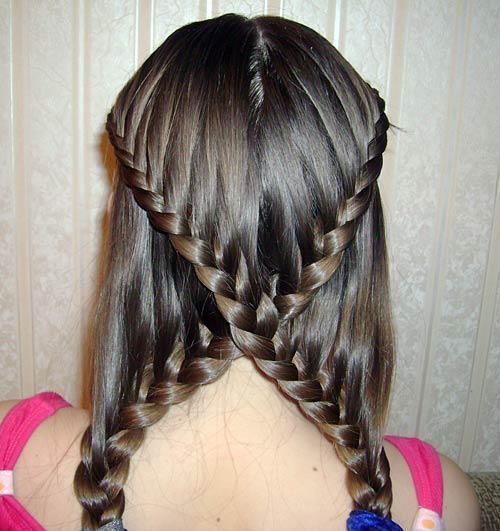
6. Heart-Shaped Fishbone Braid
Get creative with your fishbone braid by shaping it into a heart. Here’s how to do it:
Braid a section of hair from each side of your head in a curved motion, starting at the top and working towards your ear and then down towards the ends. Braid a small section straight down from the top of your head and combine it with the other two braids, securing them with bobby pins.
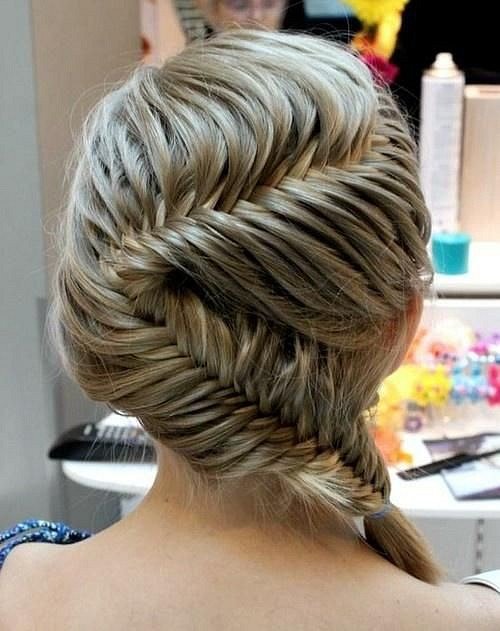
Check out these additional fishbone braid styles for more inspiration:
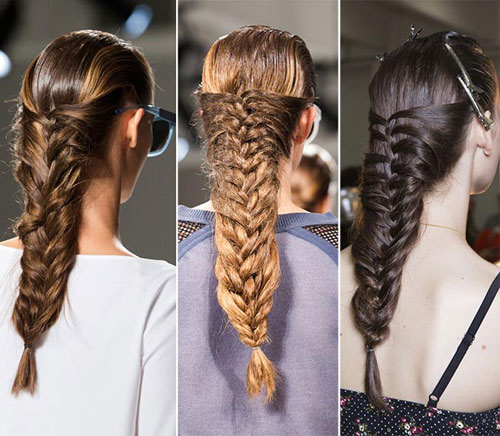

Remember, there’s no limit to the styles you can create. Embrace your creativity and always strive to enhance your natural beauty!
Stay gorgeous!

Web design and development expert with over 15 years of experience. I’ve helped hundreds of businesses develop comprehensive web strategies, resulting in sustainable growth and increased profitability.


