Mastering Line Creation in Word: Discover 3 Time-saving Techniques
Are you seeking ways to efficiently create lines in your Word documents? Look no further! Instead of manually drawing lines, explore these three methods to quickly and professionally insert lines in your Word documents.
Types of Lines in Word
For those who frequently work with Word, especially when creating reports, lines are essential elements. There are five commonly used types of lines in Word documents:
- Bold lines
- Double lines
- Triple lines
- Dotted lines for filling in content
- Zigzag lines
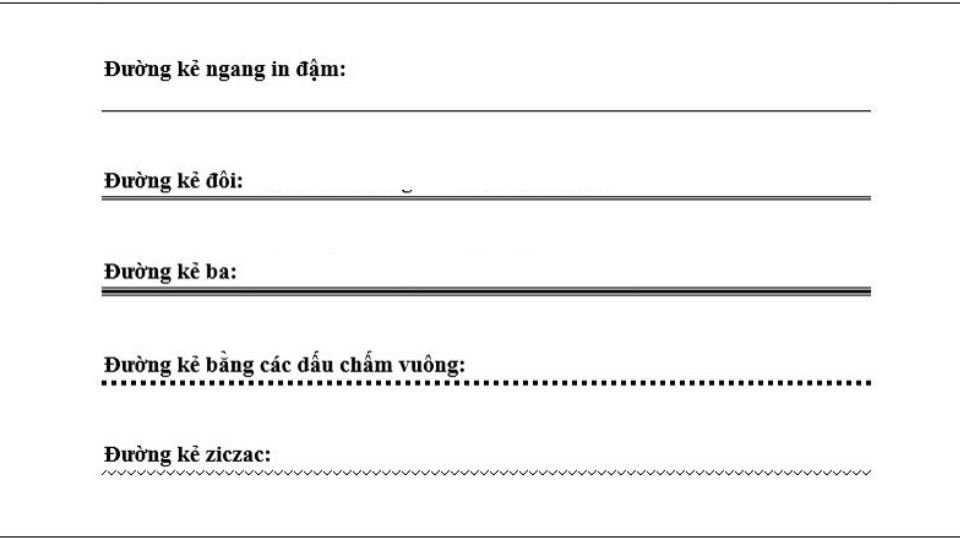
Regardless of the method used to create lines, they play a crucial role in establishing the structure and appearance of your document:
- Lines separate paragraphs and sections, enhancing readability.
- They can be used as dividers or to mark the end of a section, adding a professional touch.
- Dotted lines are perfect for creating fillable forms, surveys, and invoices.
- Create notebook-style pages or documents with horizontal lines.
- Highlight important headings, subheadings, or sections to improve the overall structure and readability of lengthy documents.
3 Efficient Ways to Create Lines in Word
Creating lines manually can be time-consuming and tedious. With these three methods, you’ll be able to generate multiple lines with just a few clicks, ensuring a seamless workflow.
Using Keyboard Shortcuts
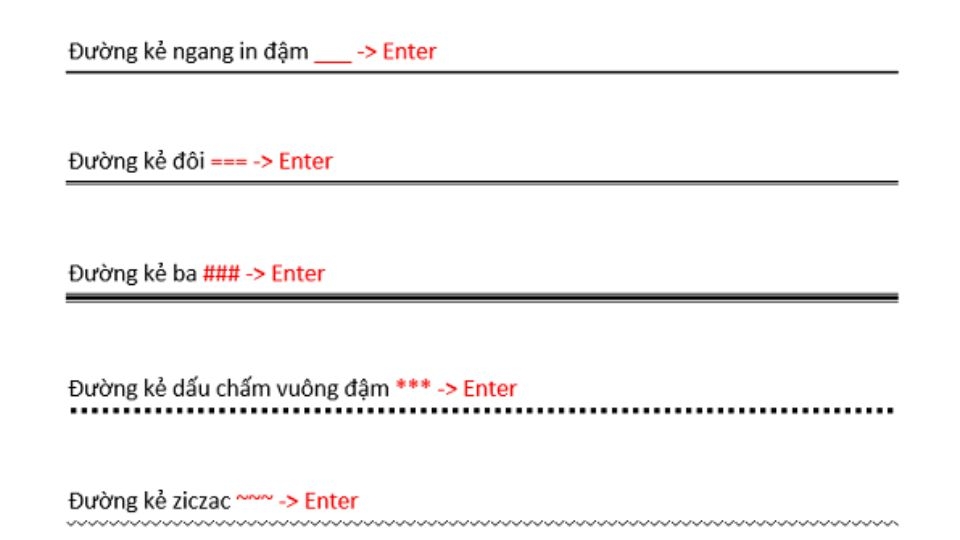
This is one of the fastest and most popular ways to create lines in Word. Simply use the following keyboard shortcuts:
- Bold line: Type three underscores “_” and press Enter
- Double line: Type three equal signs “=” and press Enter
- Triple line: Type three hashes “#” and press Enter
- Dotted line: Type three asterisks “*” and press Enter
- Zigzag line: Type three tildes “~” and press Enter
With these simple shortcuts, Word will automatically generate the corresponding line in your document.
Using the Tab Key
Another common method is to use the Tab key to create lines in Word. Here’s how to do it:
Step 1: Open your Word document and click on the Home tab. Locate the Underline button and click on the arrow next to it to reveal a menu of line styles.
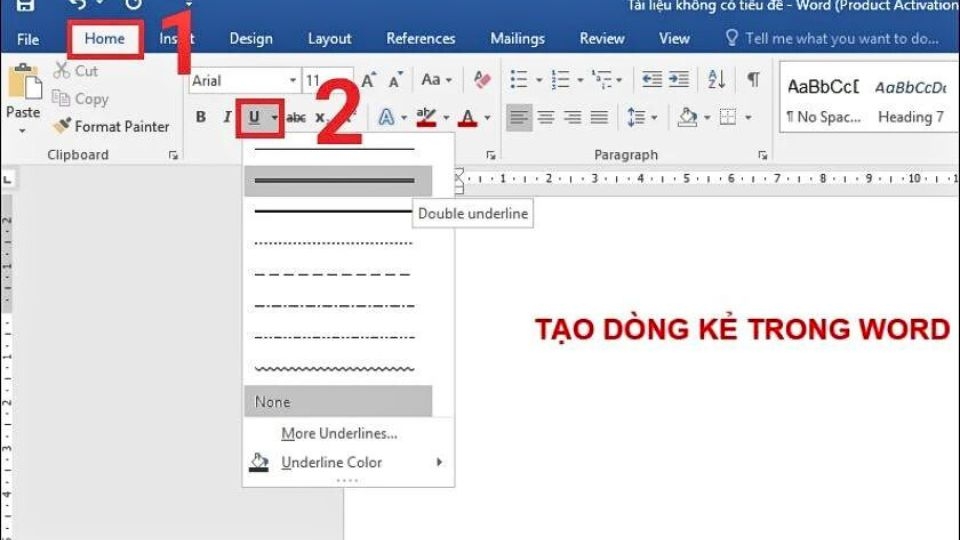
Step 2: Move your cursor to the desired location and press the Tab key to insert a horizontal line.
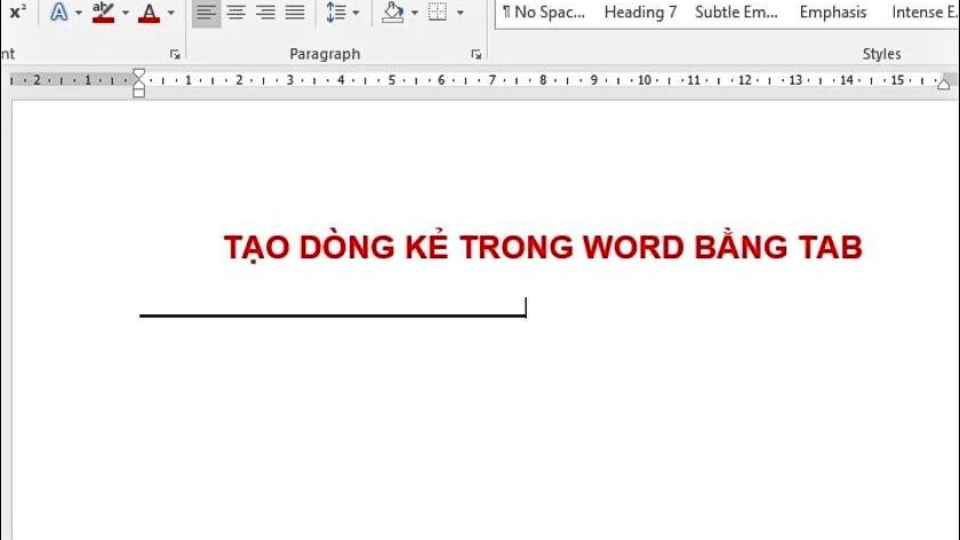
Note: After creating lines, remember to turn off the Underline feature before typing regular text to avoid formatting issues.
Using Borders
The third method involves using borders to create lines in Word. Here’s a step-by-step guide:
Step 1: Open your Word document and go to the Design tab. Click on Page Background and then select Page Borders. In the Borders and Shading dialog box, go to the Borders tab and select None in the Setting menu.
Step 2: Choose your desired line style from the Style menu. You can also select a color and adjust the line width using the Color and Width options.
Step 3: In the Preview section, select the bottom border icon and click OK to apply the changes.
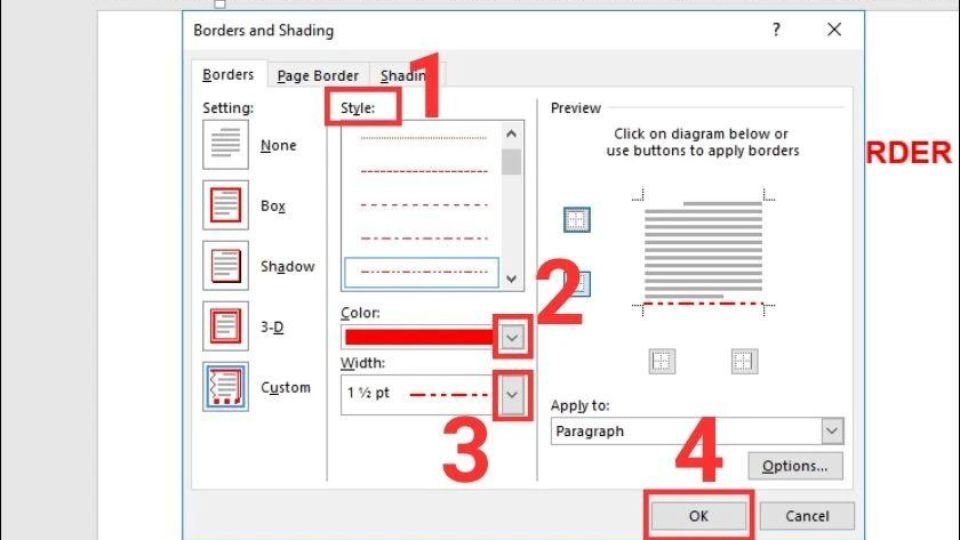
Depending on your document’s requirements, you can choose any of these three methods to efficiently create lines in Word.
Removing Horizontal Lines in Word
Mistakes happen, and sometimes you may need to remove lines that don’t fit your document’s format or layout. Here are three simple ways to delete unwanted horizontal lines in Word:
Using Tab, Backspace, or Delete Keys
The quickest way to remove a horizontal line in Word is by using the Tab, Backspace, or Delete keys:
Method 1: Select the entire line and press the Delete key.
Method 2: Place your cursor after the line and press the Backspace key to delete it.
Using Clear All Formatting
You can also remove lines by using the Clear All Formatting option:
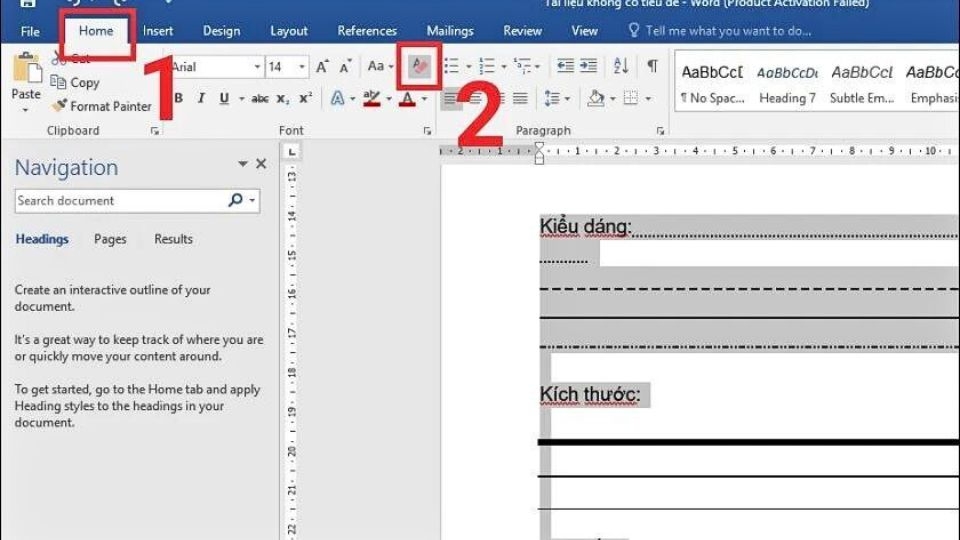
Step 1: Select the line or highlight the text containing the line.
Step 2: Go to the Home tab and click on Clear All Formatting to remove the line.
Removing Lines Created with Borders
If you’ve created lines using borders, here’s how to quickly remove them:
Step 1: Select the text containing the line you want to delete.
Step 2: Go to the Design tab and click on Page Borders. In the Borders and Shading dialog box, go to the Borders tab, select None, and click OK.
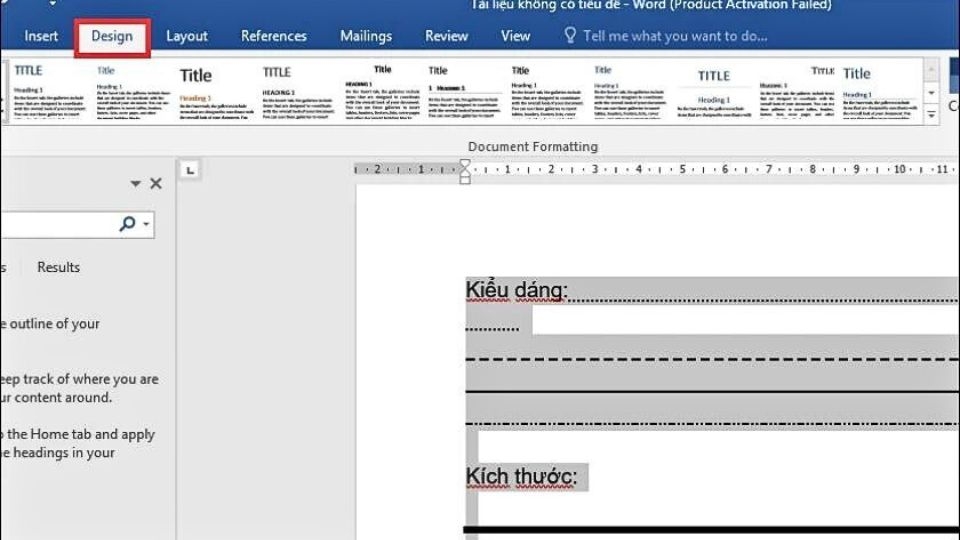
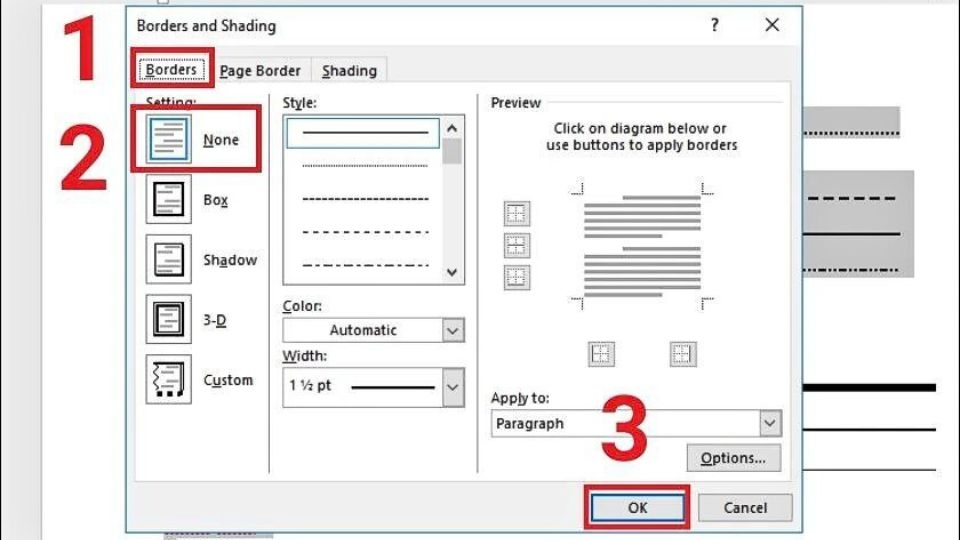
With these three simple methods, you can easily get rid of unwanted lines in your Word document.
Conclusion
Now you know three efficient ways to create lines in Word, saving you time and effort compared to manual drawing. We hope that with these techniques, you can enhance the appearance and professionalism of your documents. Stay tuned to FPT Shop for more informative tips and tricks!
If you’re looking for a reliable source for Microsoft Office software to boost your productivity, look no further than FPT Shop. We offer a diverse range of software products, ensuring quality and competitive prices.
Get your hands on the latest Microsoft Office software at FPT Shop today.
You may also like:
- A Quick Guide to Adding Columns in Word: Easy as One, Two, Three
- Master the Art of Indentation in Word: 3 Simple Methods to Enhance Your Document’s Layout


