


When working with Microsoft Word, knowing how to organize and format pages is essential for creating well-structured and neat documents. Sometimes, you may need to fit more content on a page, or conversely, break content away from the current page to start a new one. This not only makes your document look more professional and readable but also saves paper when printing.
Learning how to condense pages in Word will equip you with the tricks to optimize page space while maintaining a clean and clear document structure. Let’s explore the basic steps and important considerations when applying this technique.
Why You Need to Condense Pages in Word

In today’s digital world, document optimization is crucial, and “condensing pages in Word” is an indispensable technique. But why is it necessary to condense pages in Word?
First and foremost, condensing pages makes your document neater and more professional. Sometimes, a page may contain only a few lines of text or a short paragraph, making the document look disjointed and hard to follow. By condensing pages, you can focus the content, making it easier for readers to grasp the information and follow the main ideas of the document.
Additionally, from an economic and environmental perspective, condensing pages helps save paper when printing. This not only reduces costs for businesses and individuals but also contributes to environmental protection by reducing waste and conserving valuable resources.
Furthermore, when creating a summary or a concise report, knowing how to condense pages in Word allows you to efficiently optimize information, retaining the most important content without losing the relevance and coherence of the document.
Lastly, condensing pages enhances flexibility during the editing process. You can easily adjust, rearrange content, or even create a new version of the document without starting from scratch.
Thus, condensing pages in Word is not just a formatting technique but also an effective document management strategy. For those who strive for professional, neat, and readable documents, mastering this skill is a must.
Guide to Condensing Pages in Word
Word is a widely used word-processing software across various fields. During document creation, you may need to condense pages to achieve a logical layout or save paper when printing. Here are some methods to condense pages in Word that you can try:
Using the Shrink One Page Feature
The “Shrink One Page” feature automatically reduces content size to fit the current number of pages. Follow these steps to easily condense pages using the Customize Quick Access Toolbar:
Step 1: Launch Microsoft Word and open the document you want to edit.
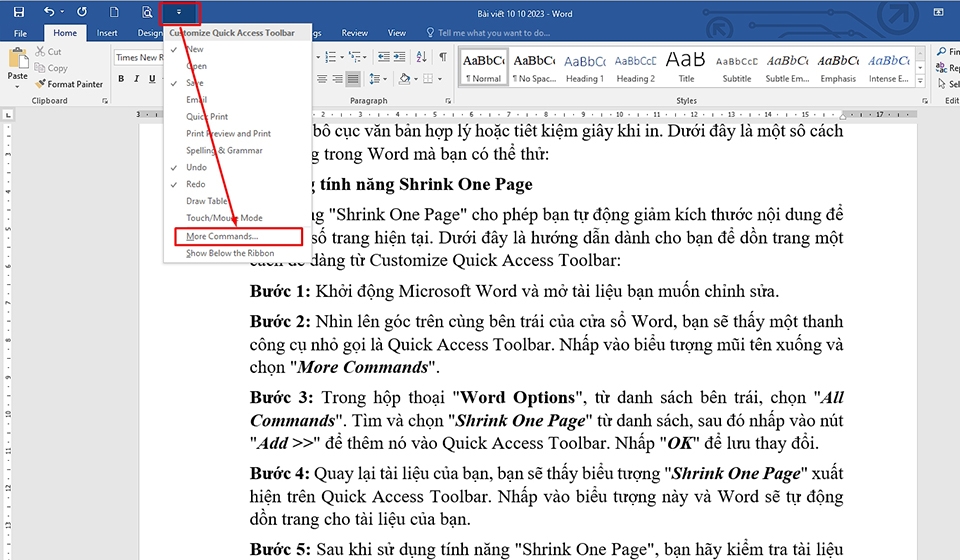
Step 2: Look at the top-left corner of the Word window, and you’ll see a small toolbar called the Quick Access Toolbar. Click the downward arrow icon and select More Commands.
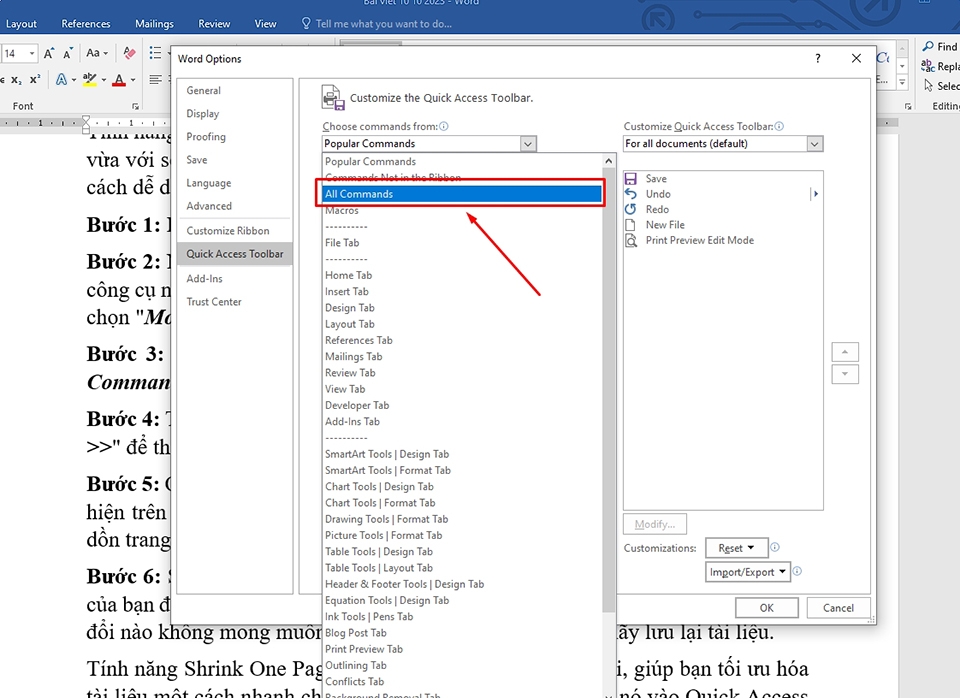
Step 3: In the Word Options dialog box, from the left-hand list, select All Commands.
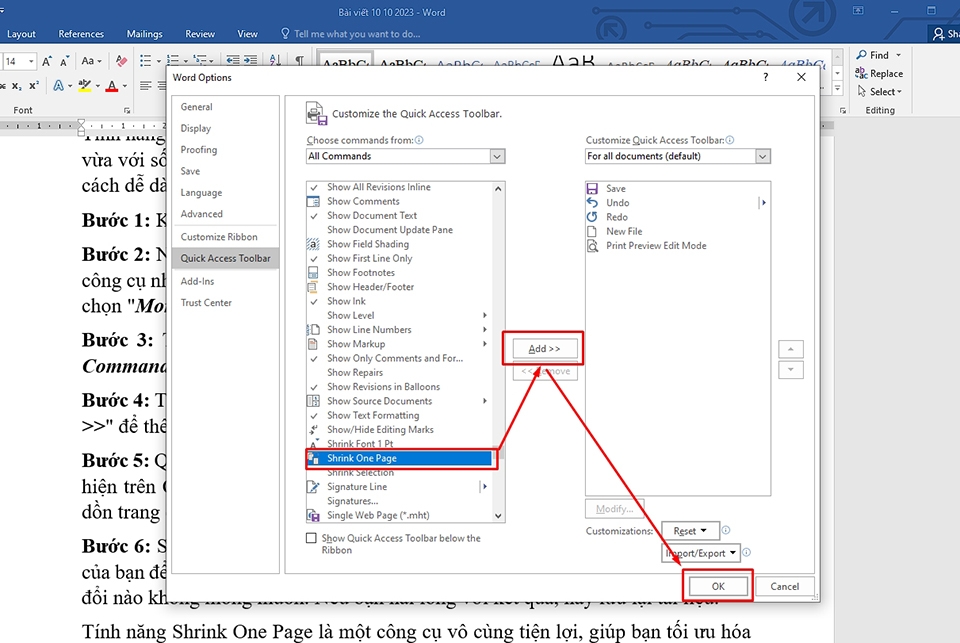
Step 4: Find and select Shrink One Page from the list, then click the Add >> button to add it to the Quick Access Toolbar. Click OK to save the changes.
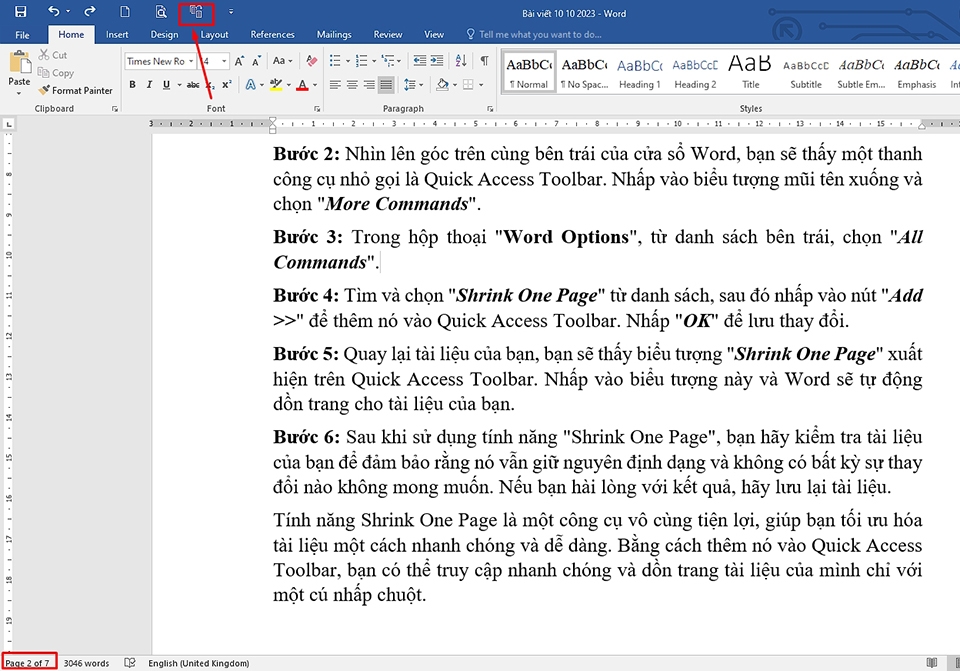
Step 5: Back in your document, you’ll see the Shrink One Page icon on the Quick Access Toolbar. Click this icon, and Word will automatically condense the pages of your document.
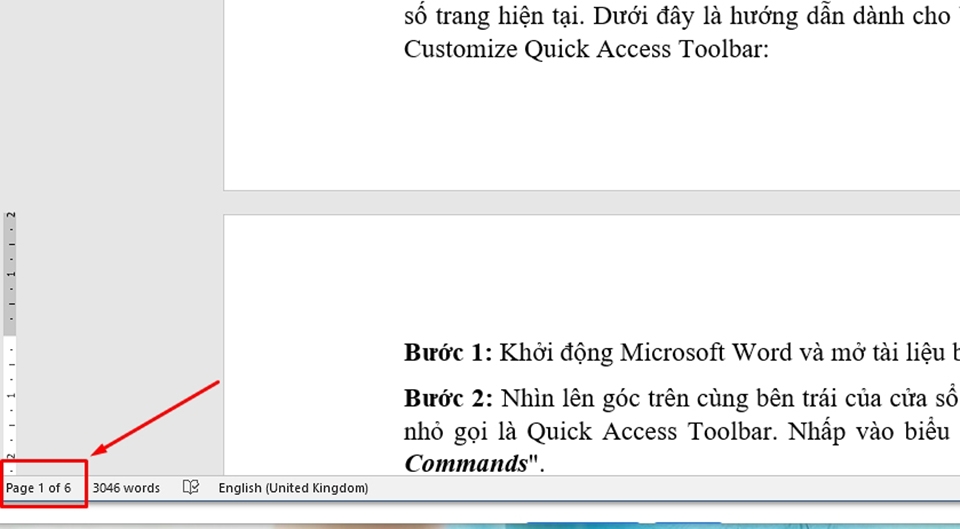
Step 6: After using the “Shrink One Page” feature, review your document to ensure that the formatting remains intact and there are no unwanted changes. If you’re satisfied with the result, save your document. In this example, you can see that the Shrink One Page feature condensed a 7-page document to 6 pages with just one click.
The Shrink One Page feature is incredibly convenient, allowing you to optimize your document quickly and effortlessly. By adding it to the Quick Access Toolbar, you can easily access and condense your document with a single click.
Adjusting Line and Paragraph Spacing
When working with Microsoft Word, adjusting the spacing between lines and paragraphs makes your document neater, more readable, and compliant with specific formatting requirements. Additionally, this trick helps condense pages within the text. Here’s a guide on how to do it:
Step 1: Open your Word document. To apply changes to the entire document, press Ctrl + A to select all the text. If you only want to edit a specific portion, drag your mouse over that section to select it.

Step 2: Look at the top of the Word window, and you’ll see the Ribbon toolbar. Here, select the Home tab to access text formatting options.
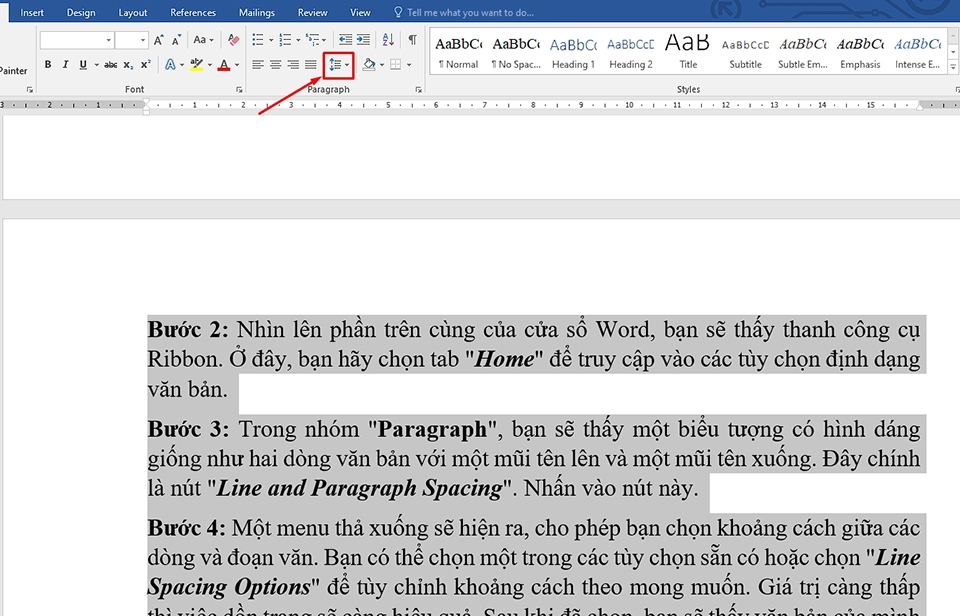
Step 3: In the Paragraph group, you’ll see an icon resembling two lines of text with an upward arrow and a downward arrow. This is the Line and Paragraph Spacing button. Click on it.
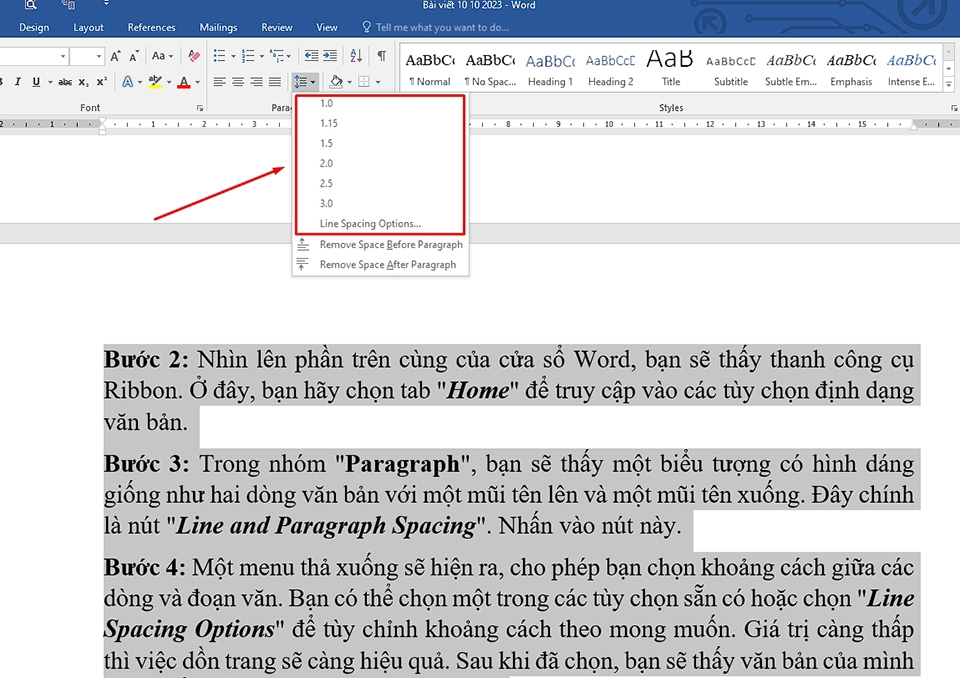
Step 4: A menu will appear, allowing you to choose the spacing between lines and paragraphs. You can select from the preset options or choose Line Spacing Options to customize the spacing to your liking. Lower values will result in more effective page condensing.
After making your selection, your text will be adjusted according to the new spacing. However, always remember to review your document after making changes to ensure that it maintains the desired formatting.
Adjusting Font Size
During document creation in Microsoft Word, adjusting the font size also allows you to condense pages. Here are the steps to follow.

Step 1: Open your Word document. To change the font size for the entire document, simply press Ctrl + A. If you only want to change a specific portion of the text, drag your mouse over that part.
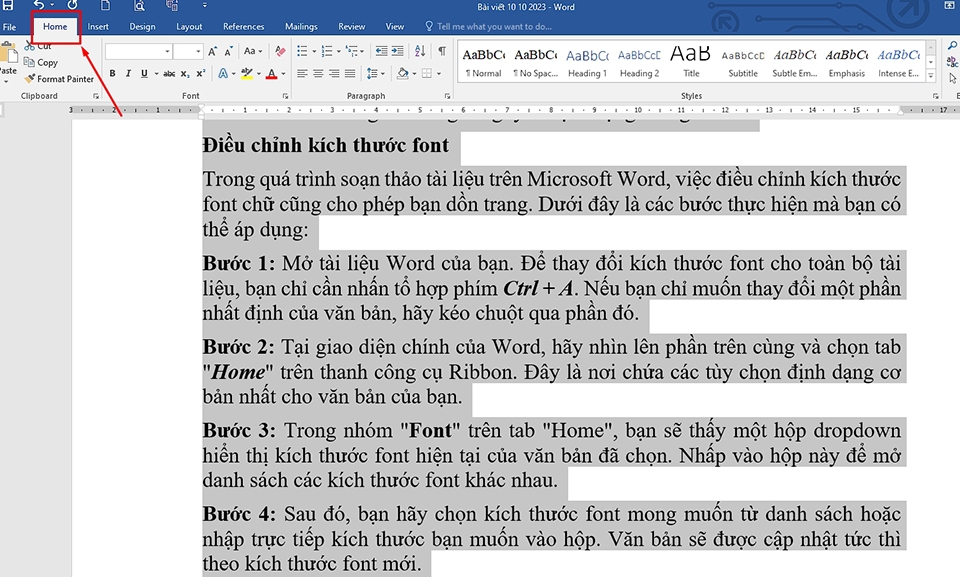
Step 2: At the main Word interface, look at the top and select the Home tab on the Ribbon toolbar. This is where you’ll find the most basic text formatting options.
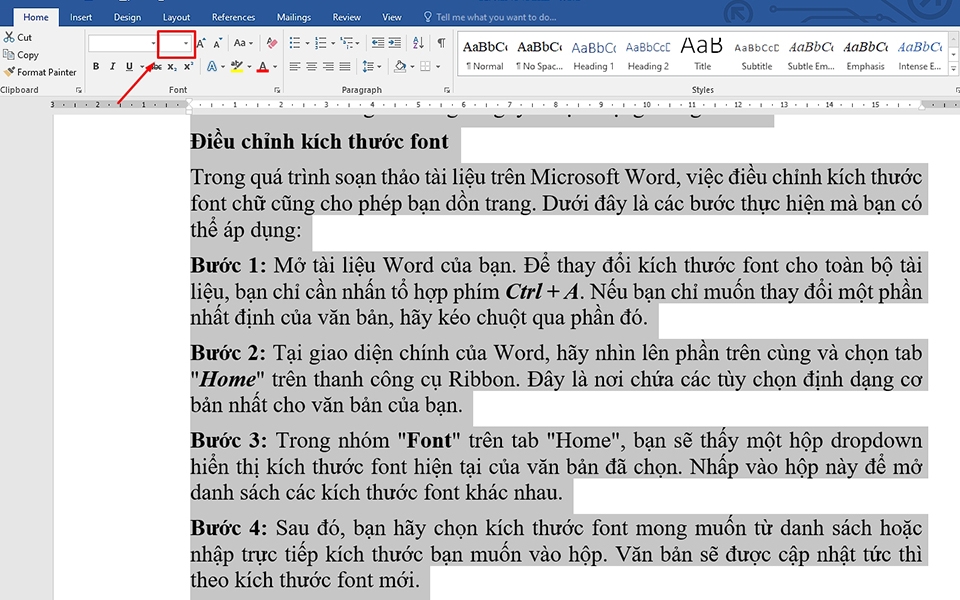
Step 3: In the Font group on the Home tab, you’ll see a dropdown box displaying the current font size of the selected text. Click on this box to open a list of various font sizes.

Step 4: Next, choose your desired font size from the list or directly type in the size you want in the box. The text will be updated instantly with the new font size.
Note: Using smaller fonts will make the page condensing process more effective.
Deleting Blank Pages
When working with Microsoft Word, unwanted blank pages often appear, especially when performing tasks such as copying, pasting, or editing text. These blank pages not only reduce the professionalism of your document but also increase file size and printing costs. Here’s a detailed guide to help you get rid of those unwanted blank pages:
Step 1: Open your Word document and scroll to find the blank page. Place your cursor at the beginning of the blank page. This ensures that you’ll only delete the blank page without affecting other content.

Step 2: With the cursor at the beginning of the blank page, press the Delete key on your keyboard. Word will automatically remove spaces, hard returns, and other unnecessary characters, condensing the pages and eliminating the blank page.
Note: Sometimes, you may need to press the Delete key multiple times to completely remove the blank page, depending on the amount of unnecessary characters on that page.
Adjusting Margin Size
When creating a document in Microsoft Word, adjusting the margin size helps you create a well-structured and readable page with a professional appearance. Margins not only influence text layout but also optimize page space for printing. Here are the steps to perform this trick:
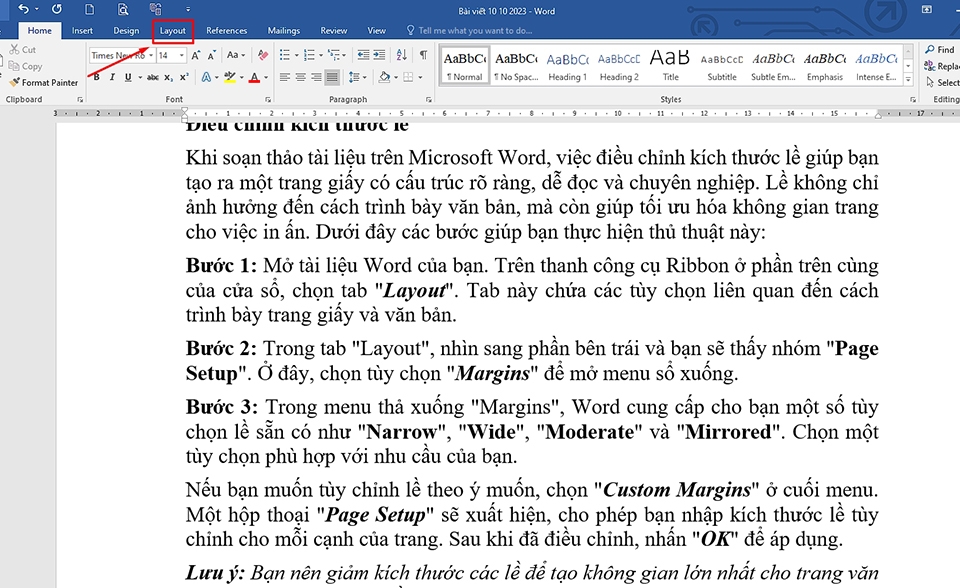
Step 1: Open your Word document. On the Ribbon toolbar at the top of the window, select the Layout tab. This tab contains options related to page and text layout.
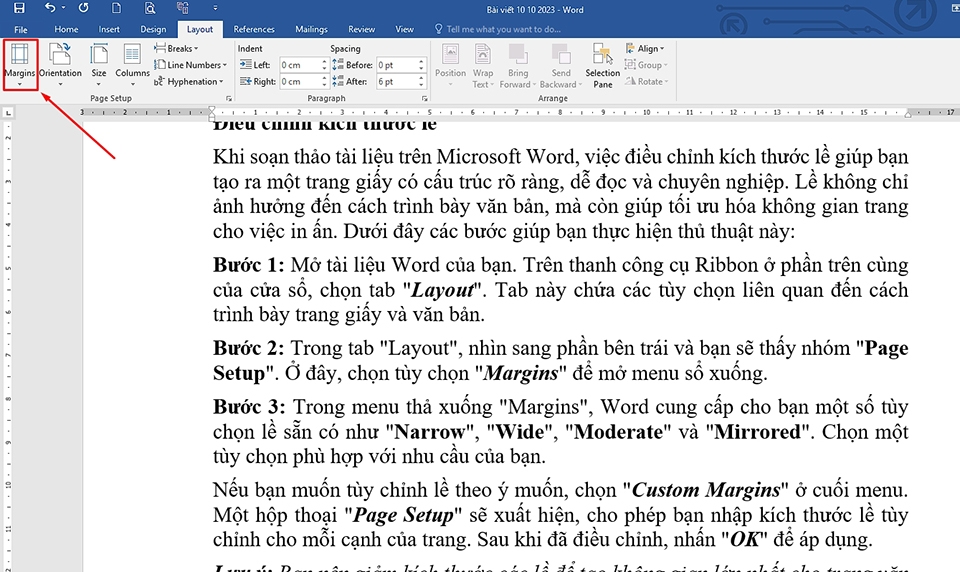
Step 2: In the Layout tab, look to the left, and you’ll find the Page Setup group. Here, select the Margins option to open the drop-down menu.
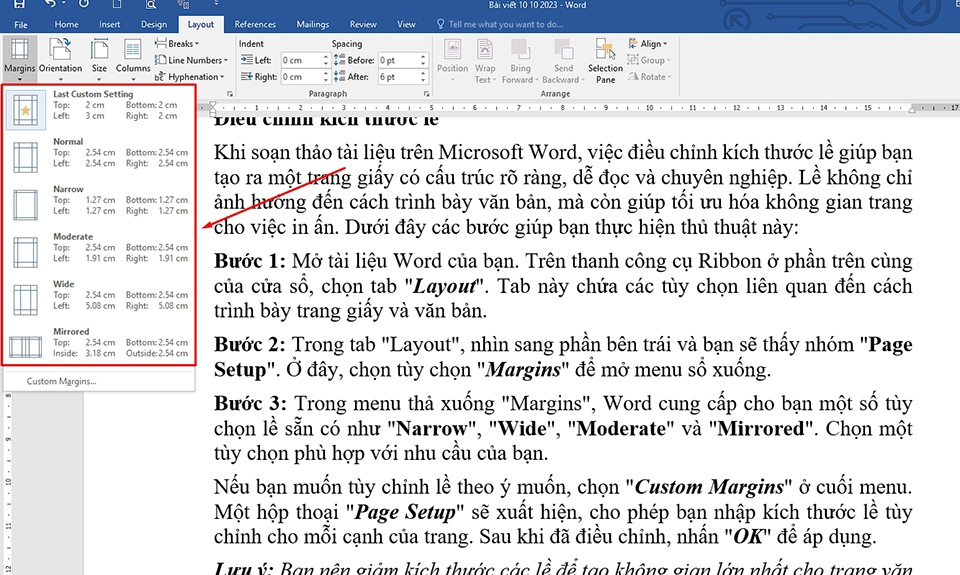
Step 3: In the Margins drop-down menu, Word provides you with some preset margin options like Narrow, Wide, Moderate, and Mirrored. Choose the one that suits your needs.
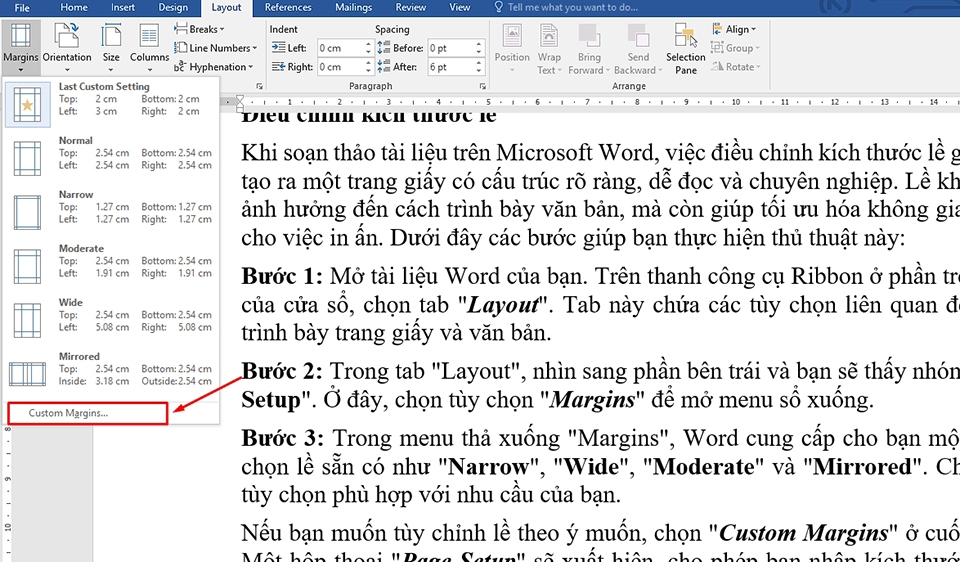
If you want to customize the margins to your liking, select Custom Margins at the end of the menu. A Page Setup dialog box will appear, allowing you to enter custom margin sizes for each edge of the page. After making adjustments, click OK to save them.
Note: It’s recommended to reduce the margin sizes to create the most space for your text. This will make the page condensing process more efficient.
In Conclusion
In the course of work and study, knowing how to condense pages in Word is a necessary skill that makes your documents neater and more professional. Not only does it optimize document space, but it also saves time and printing costs. From adjusting font sizes, line and paragraph spacing, to utilizing handy features like “Shrink One Page” and removing blank pages, each method has its advantages and suits different situations.
The most important thing is to understand your goals when condensing pages and choose the appropriate method accordingly. By skillfully combining and effectively utilizing these techniques, you’ll effortlessly create high-quality, impressive, and reliable Word documents.
Detailed Guide to Deleting Lines in Word Accurately and Professionally
Guide to Renaming Word Files: Tips for More Efficient Document Management


