Windows 10 updates are crucial as they bring the latest features along with timely bug fixes and improvements from Microsoft. However, your patience may wear thin over time as these updates consume a significant amount of your computer’s processing power, sometimes causing conflicts and unwanted issues, especially impacting your work time.
However, there are times when you feel annoyed when your computer keeps updating or tired of waiting for your computer to shut down or restart. Today, FPT Shop will show you how to permanently disable Windows 10 updates on your computer.
Microsoft typically divides Windows updates into the following three parts:
- Security updates to fix and patches vulnerabilities that cannot be delayed, such as these security updates.
- Updates for new features and existing features. Update features will not be downloaded for 60 days. However, you can change the maximum Update Win 10 shutdown period to 180 days.
- Quality updates like regular system updates include minor security fixes, important fixes, and driver updates. When you turn off Windows Updates, the quality update process will be delayed by default for 35 days. But if you perform the following steps, you can turn off Windows Update on Windows 10 for 30 days at any time.
How to turn off Win 10 updates by disabling the update service:
To turn off Win 10 Update, you can disable the Windows Update service that automatically downloads and installs Windows 10 updates over the internet. Follow the instructions below to learn how to permanently stop Windows 10 updates.
Step 1: Open the Service window
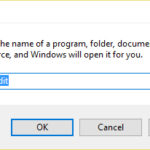
- Press the Windows key and the R key together to open the Run dialog box.
- Type services.msc in the Open box.
/fptshop.com.vn/uploads/images/tin-tuc/48209/Originals/Disable-windows-10-update-permanently-1.jpg)
- Click OK or press Enter on the keyboard to continue.
Step 2: Disable the Windows Update service
- In the displayed Services window, from the right pane, scroll down to the bottom and locate the Windows Update service, then double-click on this service.
- In the displayed Windows Update Properties window, in the Startup type section, change the option to Disabled. Then change the Service status to Stop.
/fptshop.com.vn/uploads/images/tin-tuc/48209/Originals/Disable-windows-10-update-permanently-2.jpg)
- Click Apply > OK to close the Windows Update Properties dialog box and apply the changes.
After completing all of the above steps, you can restart your computer to effectively turn off Win 10 updates.
Turn off Win 10 updates through Group Policy
The next way to permanently turn off Windows 10 updates is through the Group Policy option. The following steps will guide you through detailed instructions on how to change Group Policy to disable Win 10 updates.
Step 1: Open the Local Group Policy Editor
- Press the Windows key and the R key together to open the Run dialog box, and type gpedit.msc in the Open box.
/fptshop.com.vn/uploads/images/tin-tuc/48209/Originals/Disable-windows-10-update-permanently-3.jpg)
- Click OK to continue.
Step 2: Activate Configure Automatic Updates
- In the left pane of the Local Group Policy Editor window, navigate to the Windows Update folder using the path: Computer Configuration > Administrator Templates > Windows Components > Windows Update.
/fptshop.com.vn/uploads/images/tin-tuc/48209/Originals/Disable-windows-10-update-permanently-4.jpg)
- In the right pane, locate the option Configure Automatic Updates and double-click on it.
Step 3: Configure automatic updates
- In the displayed Configure Automatic Updates window, select the Enabled option to continue.
/fptshop.com.vn/uploads/images/tin-tuc/48209/Originals/Disable-windows-10-update-permanently-5.jpg)
- Select the Notify for download and auto install option from the drop-down menu of the Configure automatic updating section just below.
- Click OK to apply the changes.
After completing all of the above steps, you can restart your computer to disable Win 10 updates.
Turn off Win 10 updates through Registry
The third solution below will guide you on how to permanently stop Windows 10 updates. However, you need to know that changing the Registry is risky as it can cause irreparable damage to your computer if you make a mistake. Therefore, it is best to back up your system before proceeding.
Step 1: Open Registry Editor
- Press the Windows key and enter regedit in the Open box in the search window that
Turning Off Write Protection in Windows 11
If you ever encounter the error message “Disk is write protected” when trying to use a storage device, it can be quickly remedied with the help of FPT Shop. Follow their detailed guide to easily remove the write protection feature and get back to using your device.


