


When it comes to Email Marketing, you will definitely think of MailChimp first. In addition to its professional paid services, this provider also offers FREE support for small websites, blogs, and startups with a small number of email subscribers, with all the marketing features for beginners.
MailChimp is a tool used for collecting and managing email address lists, creating and sending bulk emails to recipients on the list. MailChimp also provides clear statistics and reports from the smallest details to the overall view of the results of the email marketing campaign. From there, it helps you have a basis to understand, modify, and improve the quality in the future.
Similar to many other email marketing tools, Mailchimp is used to:
- Collect email lists (Email List)
- Manage Email List
- Send emails to all or a group of customers in the email list at once
- Schedule automated emails.
- Handle a large number of emails: Up to 12,000 emails and manage 2,000 subscribers.
Furthermore, Mailchimp also allows for statistics and reports on the effectiveness of email campaigns such as click and open rates… Currently, Mailchimp is used by more than 10 million individuals and businesses worldwide.
Advantages of MailChimp
- User-friendly interface, lively, and intuitive.
- Flexible, can perform various tasks thanks to compatibility with multiple third-party software and services.
- Used a lot in the e-commerce and email marketing field.
- Supports A/B testing for email broadcasts.
- Design high-quality, professional email templates.
- Supports accurate reporting and data analysis.
- Large capacity, diverse service packages with different prices.
- Mailchimp’s Free package supports up to 2,000 subscribers.
- Collaborates with ISPs and company domain names to ensure your email is confirmed and approved securely.
Disadvantages of MailChimp
- Only supports sending emails to subscribers on the email list.
- Does not support tagging users.
- Cannot automate complex marketing strategies.
- Registration forms are not beautiful and professional.

Why should bloggers use Mailchimp?
First and foremost, not only bloggers but anyone who needs an email marketing tool should use it.
Mailchimp allows you to create an account and use the service for free, with a paid plan if you want to upgrade later. With Mailchimp’s free plan, you can build an email list of 2,000 addresses and send up to 10,000 emails per month for free (great for a new user).
When I started blogging, I also used Mailchimp for free and found that it had enough basic functions to perform email marketing activities without the need for an upgrade. Later, when the email list grew larger and I needed additional features, I switched to GetResponse.
How to use Mailchimp
In the limited scope of this article, meohay.vn will provide you with the most basic Mailchimp guide, such as creating a Mailchimp account, designing an email collection template, creating an email campaign, and sending it to customers…
1. Register a MailChimp account
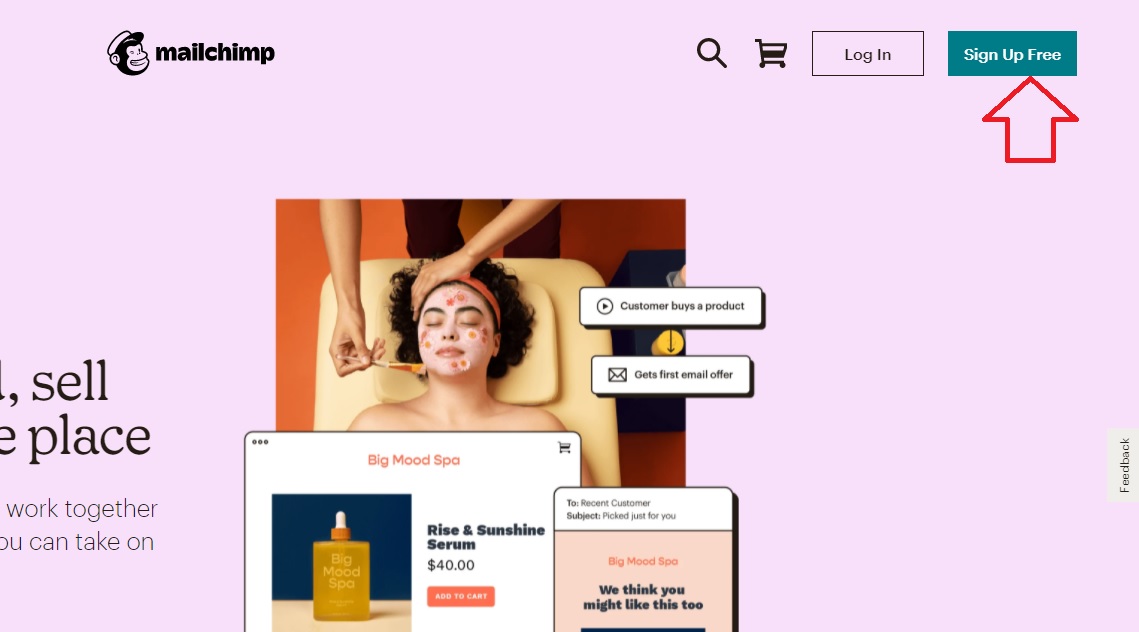
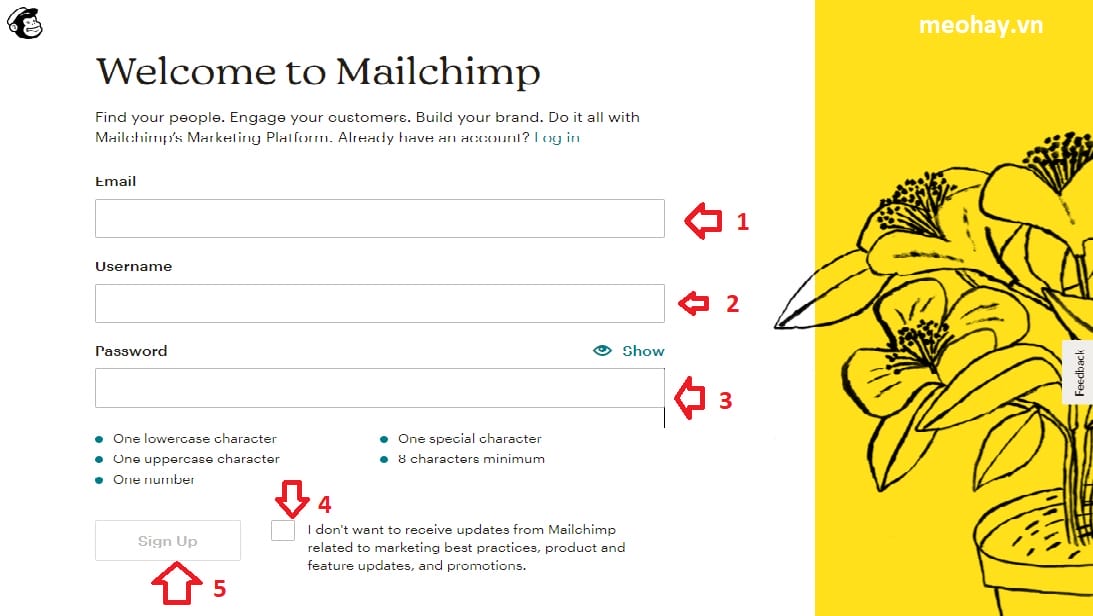
First, go to the Mailchimp homepage here https://mailchimp.com/ and click the “Sign Up Free” button in the top right corner to register your MailChimp account. Then, fill in all the required information to register. Note:
- Choose an email that you use frequently because you will receive an activation email.
- Username can only use letters and numbers or use your email directly.
- Password must meet the following requirements:
- One lowercase letter (a,b,c…)
- One uppercase letter (A,B,C…)
- One number (1,2,3…)
- One special character (!,$,%…)
- At least 8 characters
Next, check your email inbox where you registered and click the “Active Account” button to activate your MailChimp account. At this point, you will be taken to the interface to choose the service packages in MailChimp. Here, you should:
- Select the “Free” package to continue using it
- Fill in your personal information in the First name and Last name fields, your company name and website (if any), if not, just select “No”.
- Enter your address information in the ZIP section as 700000 if the Country field is Vietnam.
- Choose the quantity of emails in your list. This number can be adjusted to fit each email campaign.
Finally, select “Not right now” if you already know the basics and don’t need to review the initial instructions.
2. Add email list to the list (email list)
By default, with a free account on Mailchimp, you will only have one email list. This list will be automatically generated for you when you create an account in the above step on Mailchimp.
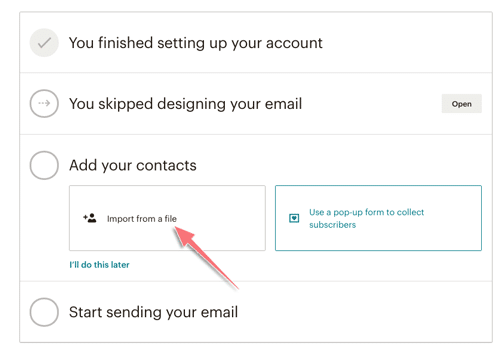
In the account creation step, Mailchip will take you to the “Add your contacts” location where you can click “import from a file” to add the customer’s email list. If you don’t want to add it at this step, you can simply skip it by clicking the “I’ll do this later” option.
If you want to add the email list immediately at this step, there are 3 ways:
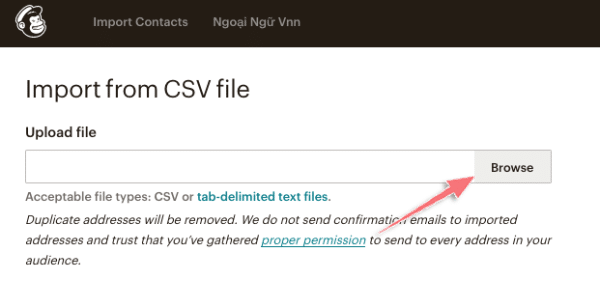
- Enter the list by uploading a CSV file
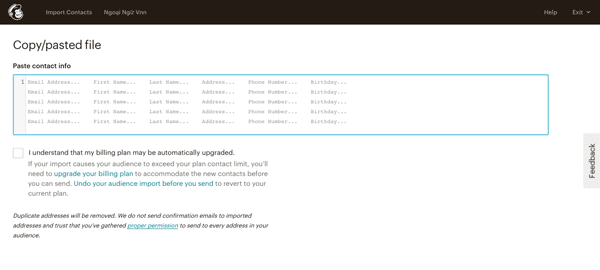
- Manually add by copy/pasting each email address
- Or import through other services like Google Drive, Zoho… (i.e., moving from another email service to Mailchimp)
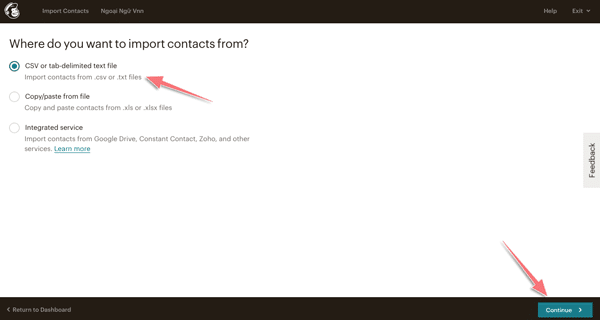
The image below shows how you can enter the email list by uploading a CSV file.
Alternatively, you can manually add the list as shown in the image below.
3. Authenticate domain with mailchimp
As mentioned above in the Mailchimp account creation section, when doing email marketing to increase effectiveness and ensure professionalism, we should use a custom domain email. When using a custom domain email and authenticating the domain with mailchimp, the emails you send will not be marked as spam, ensuring more effective email marketing.
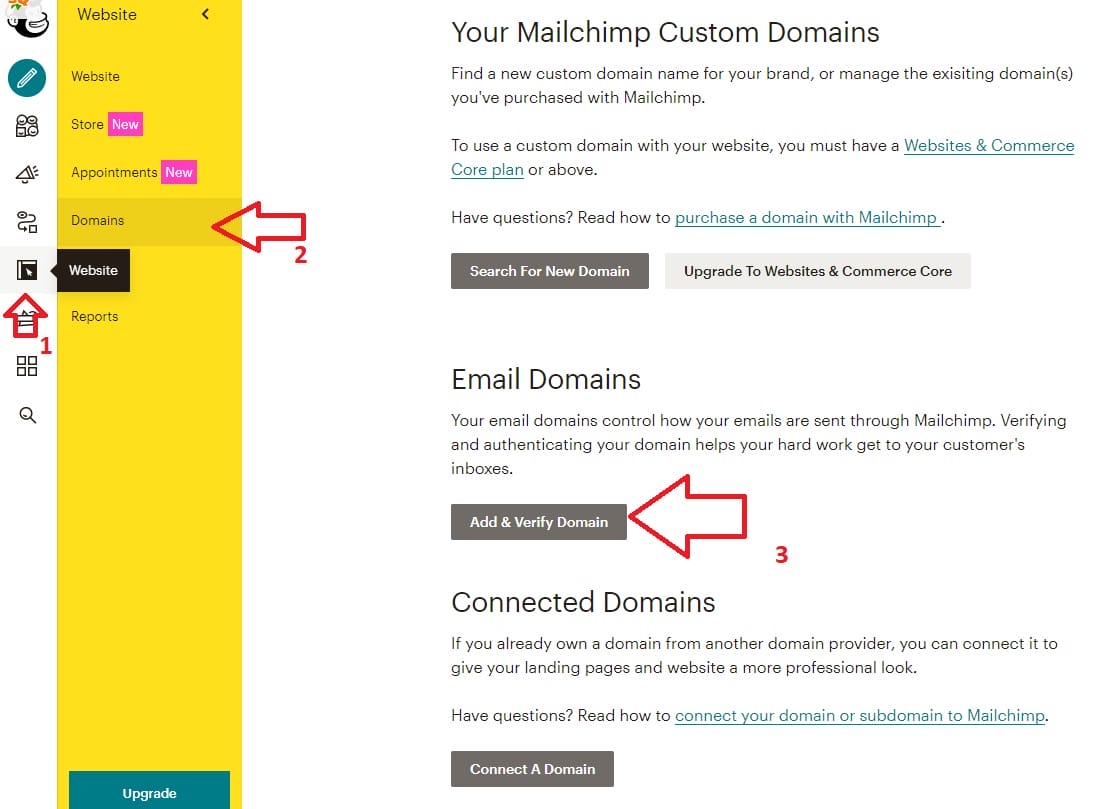
Mailchimp also encourages and requires you to verify your custom domain email. Here’s how to do it. First, go to the Mailchimp dashboard, select “Brand”-> “Manage Domains”
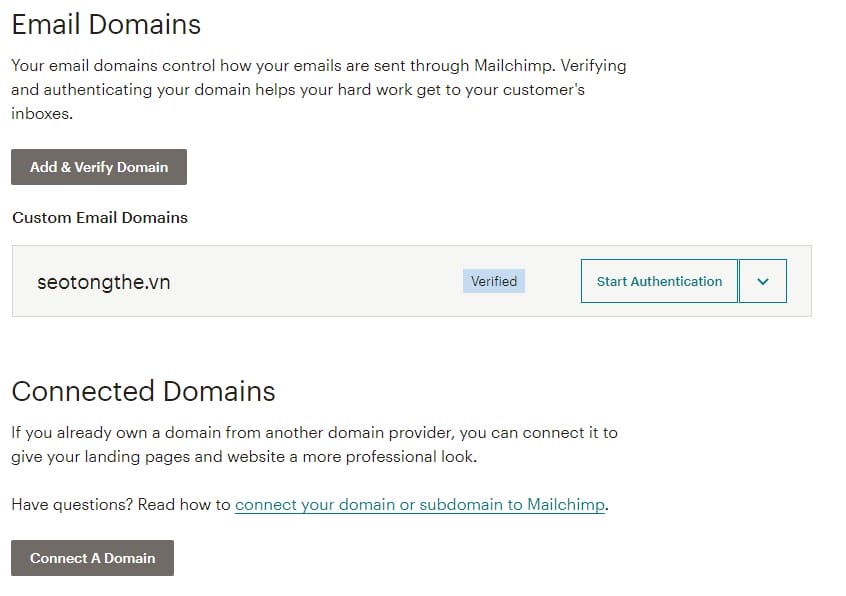
In the left menu, select “Website”-> Click the “Add & Verify Domain” button like the image below
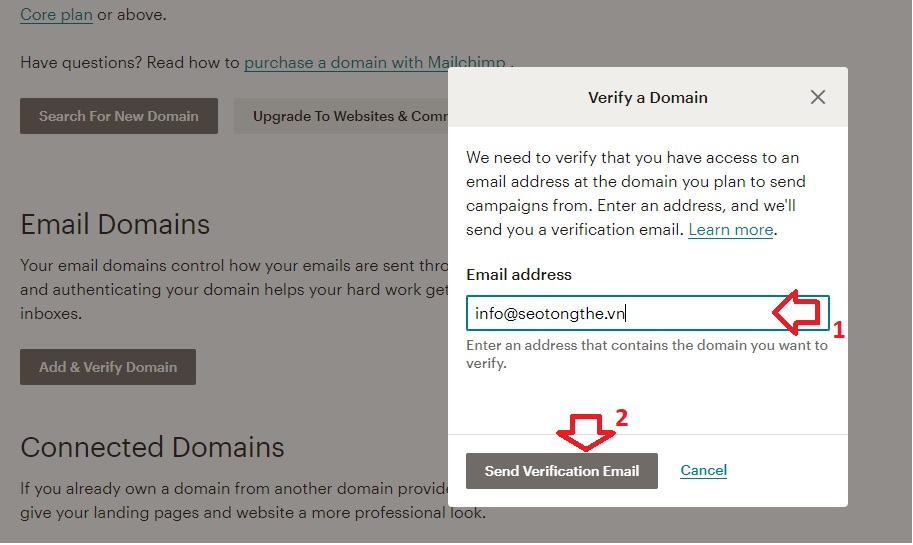
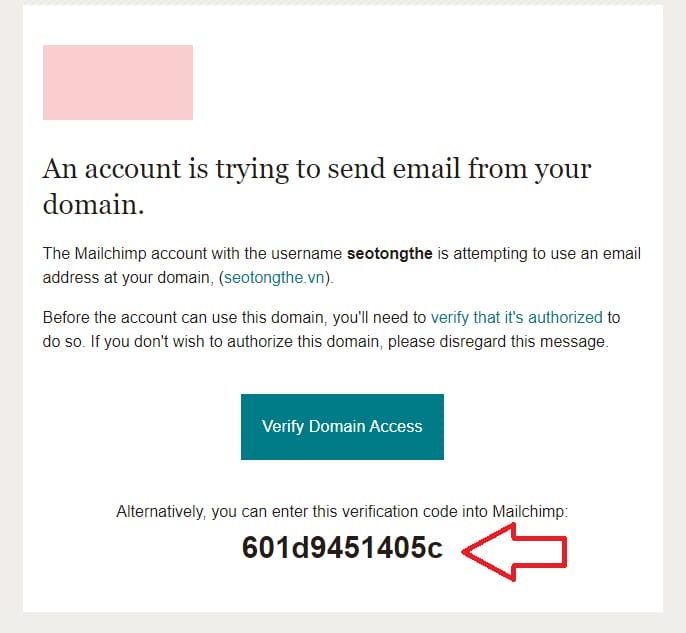
Now, enter your custom domain email address and click the “Send Verification Email” button
Immediately, you will receive a verification code sent to your email. Copy the code and enter it to confirm.
Go back to Mailchimp, paste the verification code, and click “Verify”
A successful verification message will appear as shown in the image below.

That’s it, you have verified the domain. However, to ensure more secure email sending, you should perform one more step: authenticate DKIM and SPF(in simple terms, to ensure that your email sent from a specific domain is not marked as spam by filters).
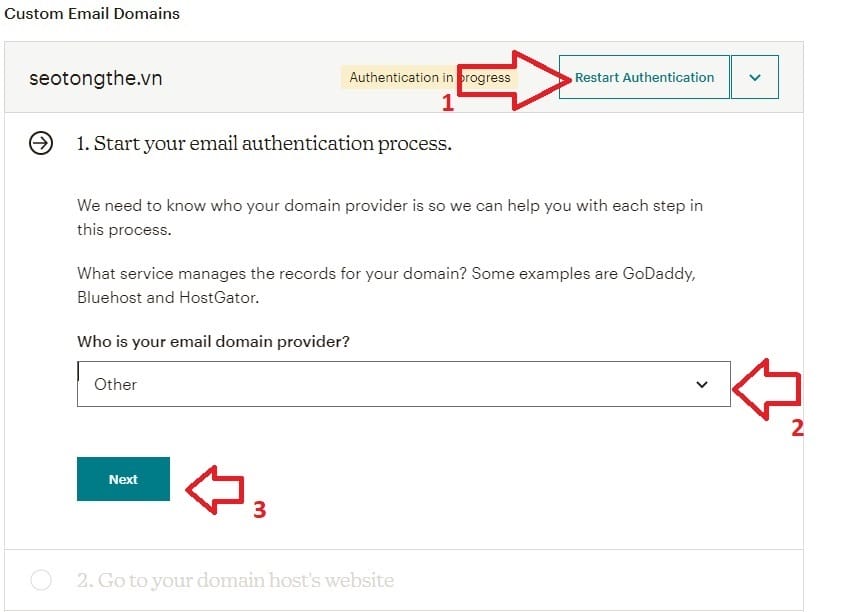
To authenticate DKIM and SPF, go to the left menu and select “Website”-> Click the “Restart Authentication” button as shown below and follow the steps one by one.
Continue clicking the Next button twice to go to the third step. Mailchimp will provide you with 2 CNAME record parameters (as shown in the image below)
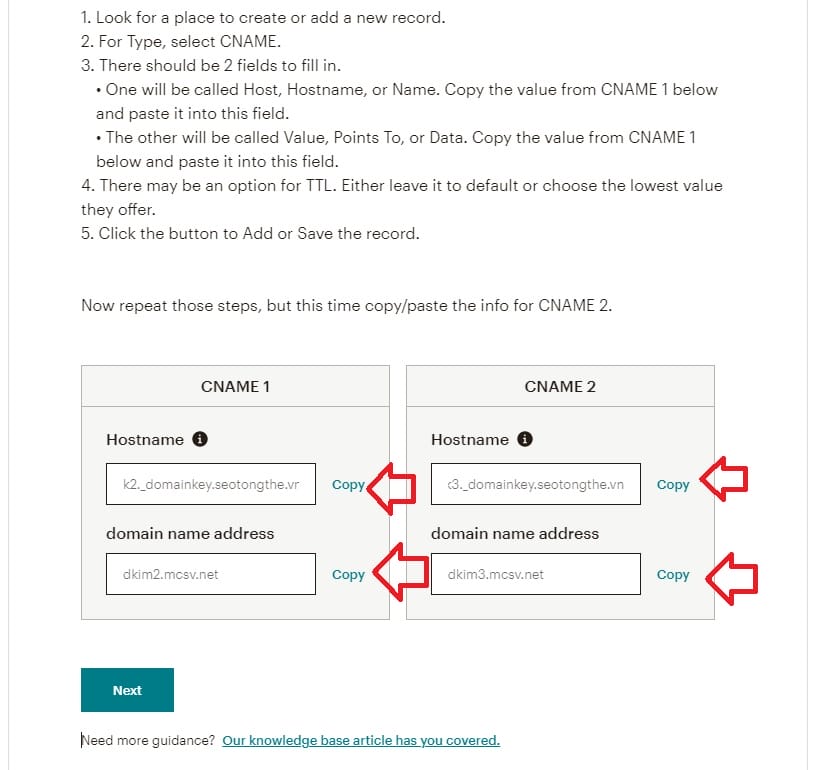
Copy these parameters and add them in the domain management page as guided below
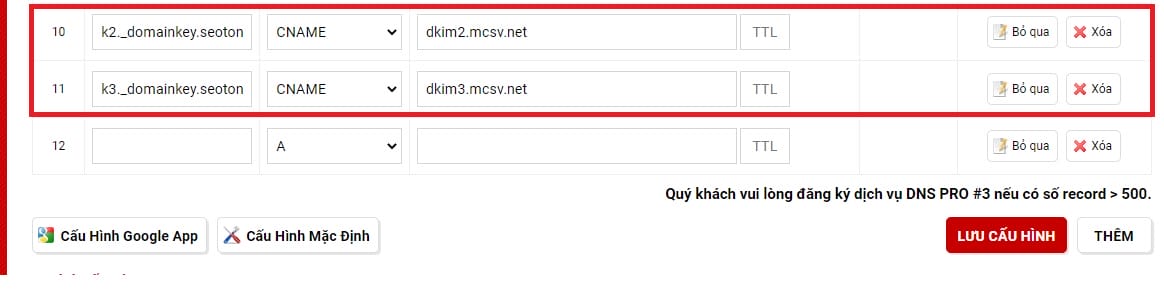
After adding, click the Save configuration button to complete adding the CNAME record. Then, go back to Mailchimp, click the Check Status button below to authenticate the domain.
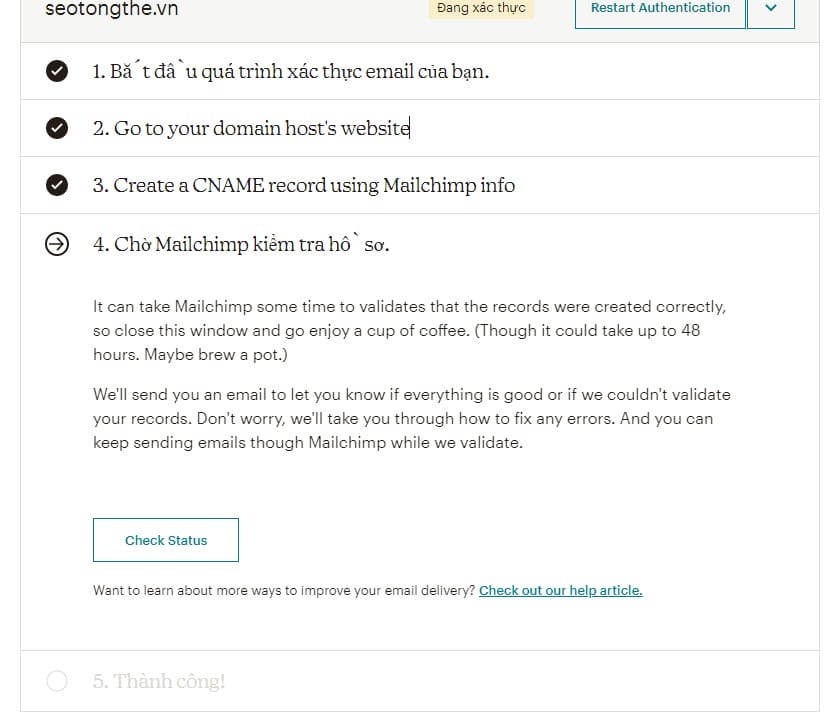
Note: It may take 24-48 hours for Mailchimp to collect DNS after adding the record, so you can leave it there and come back to click Authenticate!
That’s it, now in the next section when creating an email campaign, you can use your custom domain email to send emails.
4. Create an email list & signup form
When it comes to email marketing, having an email list is essential. An email list is where all the email addresses you have collected are stored. You can create different email lists for different purposes, such as a daily newsletter list and a short-term sales campaign list…
To add customer emails to the list, you will need a signup form (also called a Signup form). In simple terms, a signup form is a gateway for customers to enter their email addresses, and the email list is where the email addresses are stored.
In Mailchimp, to manage email lists, go to the “Audience” -> Audience Dashboard” -> “View audience” menu to see all existing email lists.
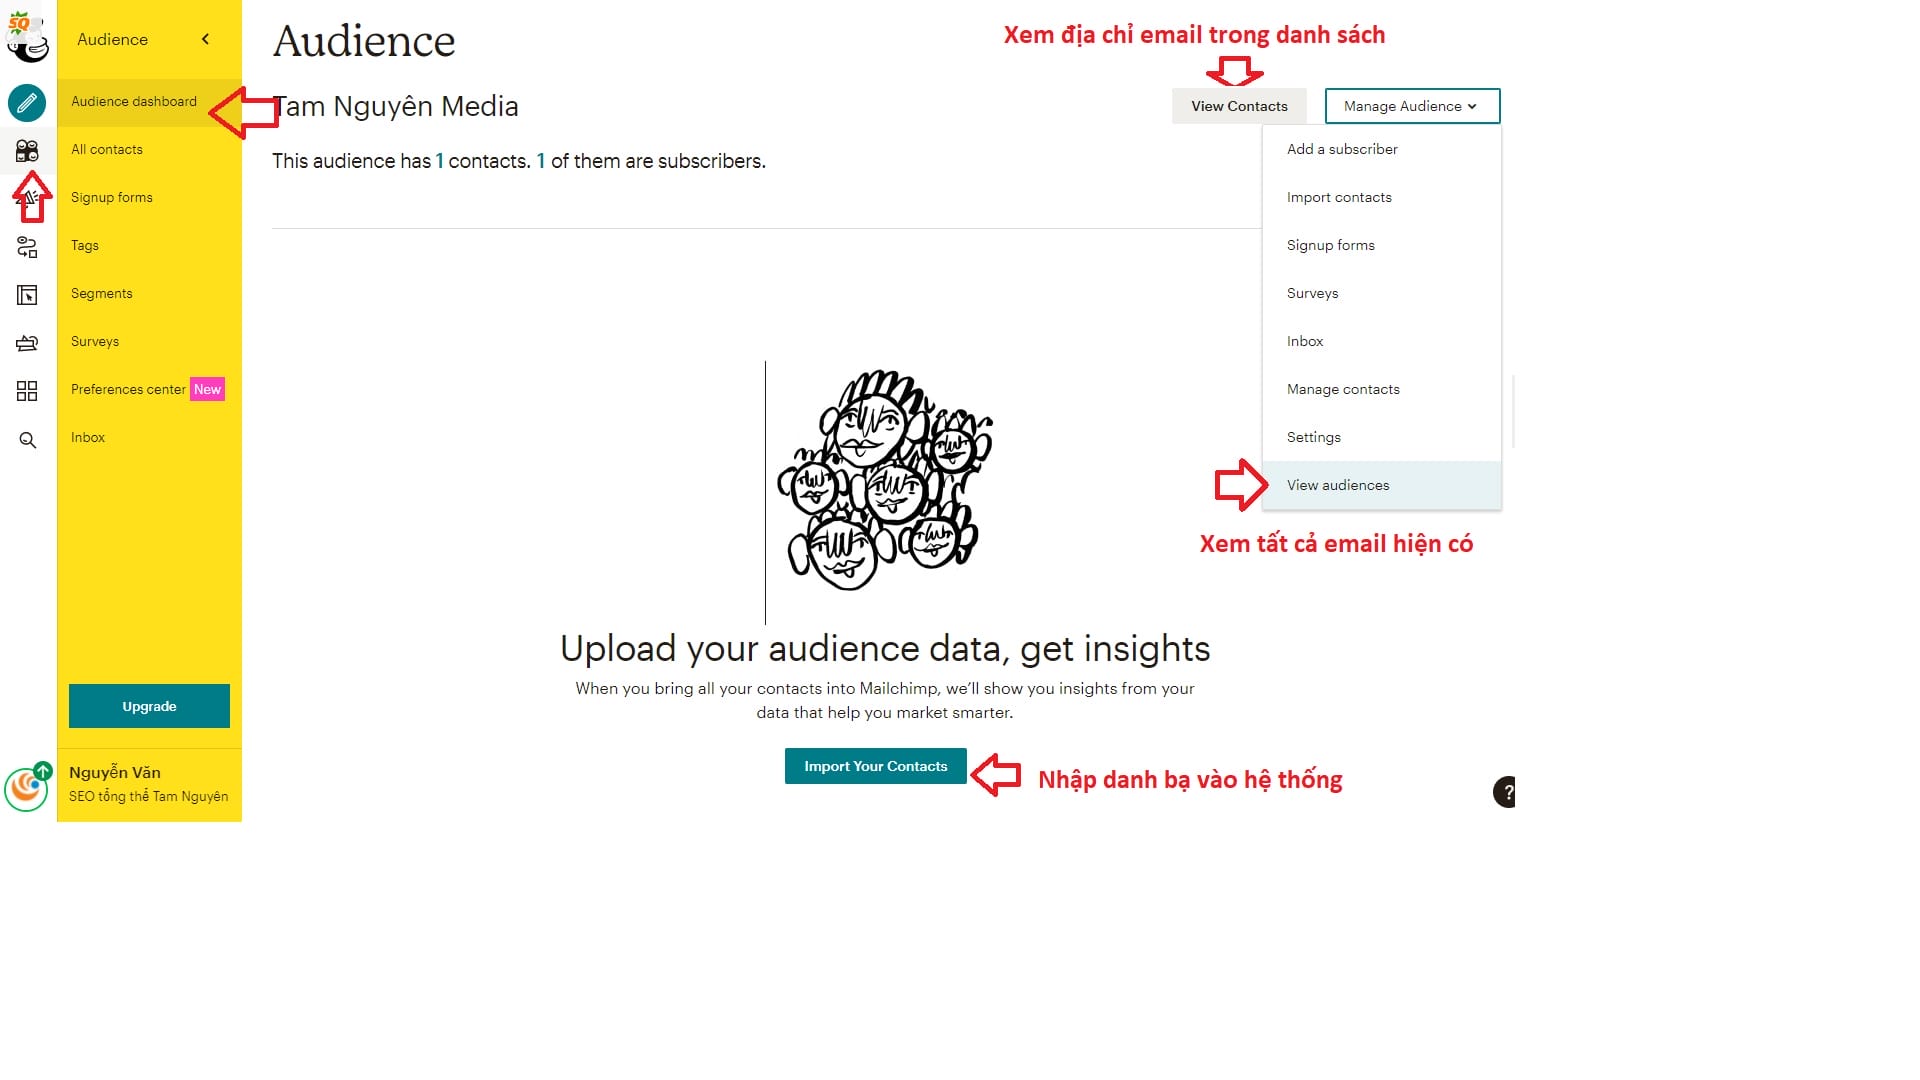
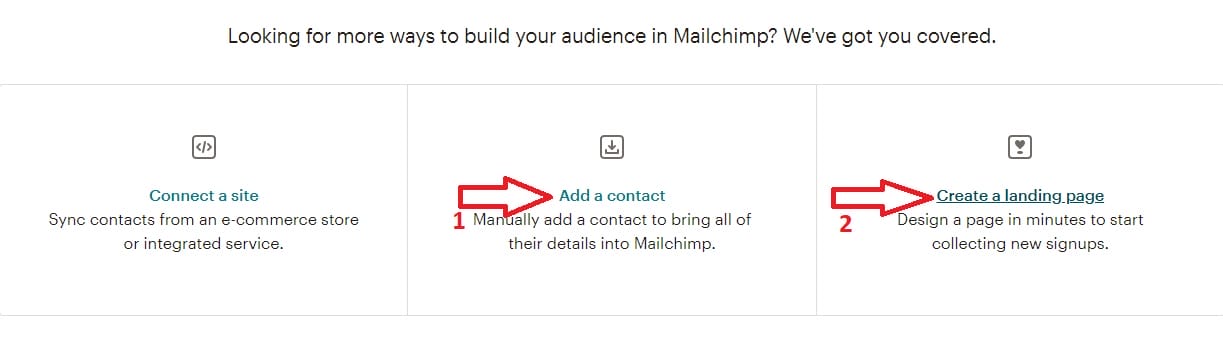
If you already have an email list, you can click on the blue button in the image above with the name Import Your contacts. If you don’t have a list and want to manually add each email, you can do so by clicking the Add a Contact button like the image below. If you don’t have a list and want to create a Landing page to collect emails, click the Create a landing page button to create the destination page for collecting emails.
5. How to create a landing page to collect emails
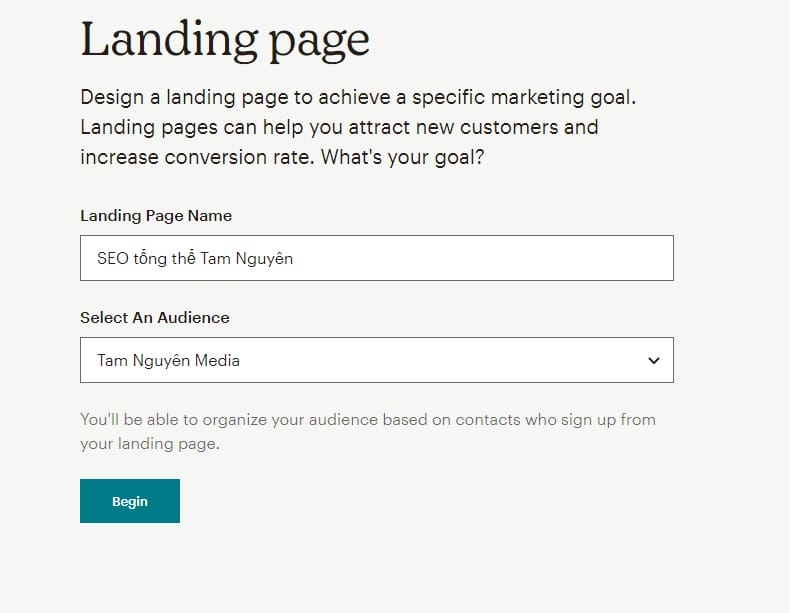
In the previous step, you clicked the Create a landing page button to create a landing page. The system will display a page for you to fill in the information. Enter the Landing Page Name, in the example below, I named it “SEO tổng thể Tam Nguyên” (Tam Nguyen’s comprehensive SEO).
A popup will appear, click the Accept button to select a template for the landing page

Currently, MailChimp provides many beautiful template options for free. Here, I choose the first template for the landing page, then you can drag and drop options and customize them in Vietnamese, as shown in the image below, and decorate it until it looks the best. Finally, click Save & Close
Here you can:
- Change the Logo
- Add additional fields
- Add a description below the form about the shared document
- …
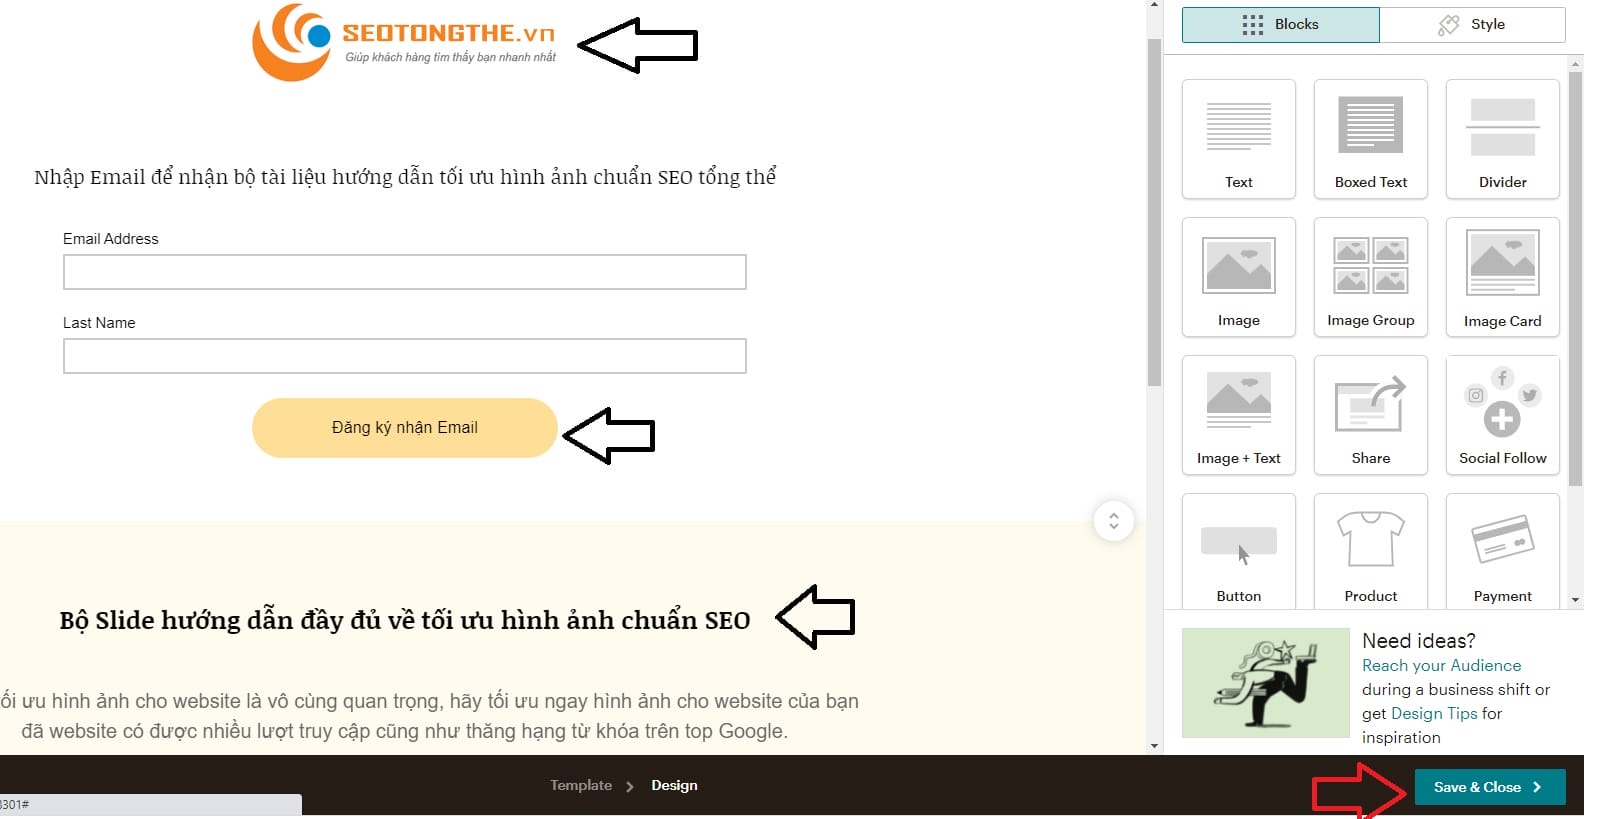
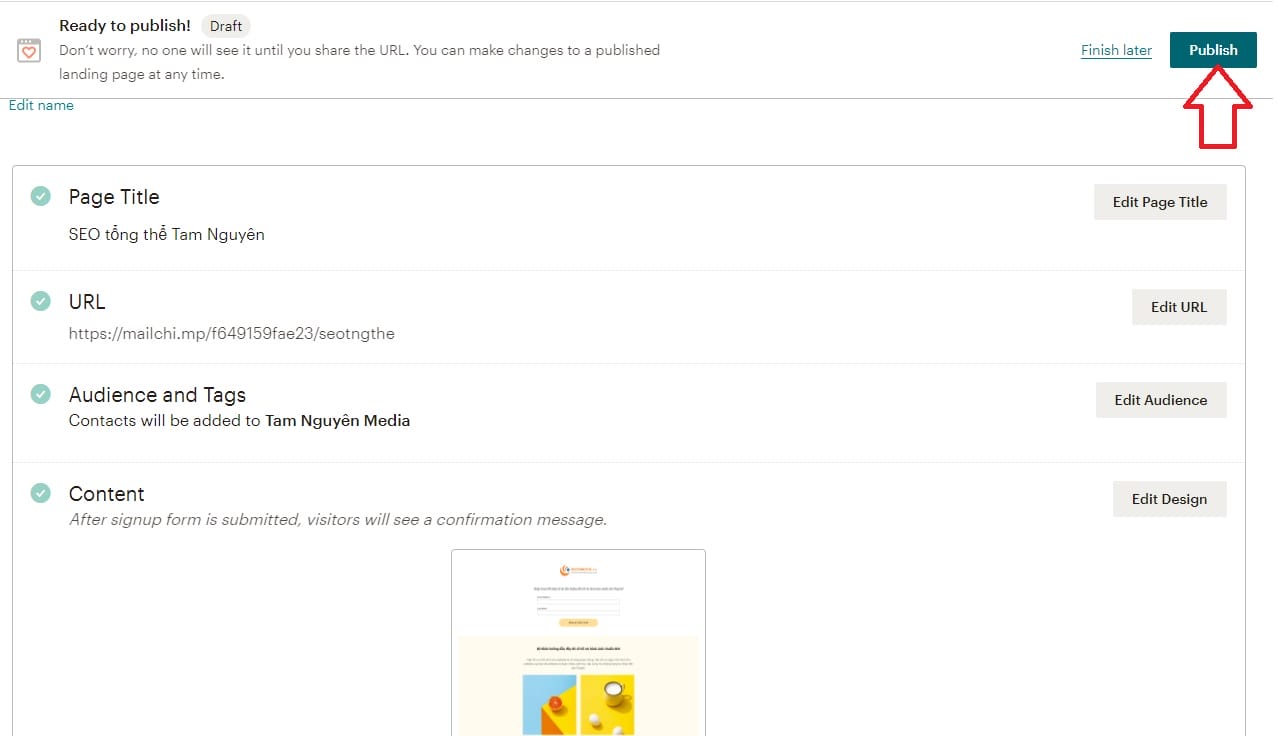
After finishing, click the Publish button as shown below
What is Mailchimp? Simplified step-by-step guide on how to sign up and use Mailchimp from A to Z quickly and easily.

What is Mailchimp? If you want to leverage the potential of Email Marketing and get started with this platform, then don’t miss the comprehensive guide on how to sign up for Mailchimp, and use Mailchimp by FPT Shop below. With Mailchimp, you can build and manage email campaigns in a professional manner.
Top 6 Email Filtering Software: Fast, Accurate, and Unmissable in 2023

Email filtering software is an invaluable tool for businesses looking to optimize their email marketing campaigns. There are numerous reputable software options available, and here are the top 6 fastest and most accurate email filtering software that you can consider.
What is Email Marketing? Do you know how to do email marketing effectively?

Email marketing plays a vital role in the online marketing strategy of many businesses. It not only helps connect with current customers but also provides opportunities to reach potential customers. Additionally, this marketing channel offers many other benefits.


")


