


There are no negative consequences for iPhone electronic devices when performing a Canadian region change. You can continue using your iPhone as usual without any worries. However, the language on the device will change when you switch to a new country.
Benefits of Region Change on iPhone
Changing the region to Canada on your iPhone has several advantages. You’ll be able to download and use region-restricted apps, and you’ll also get to explore fresh and exciting games on the Canadian App Store that might not be available in your current country’s store.
Additionally, region switching opens up opportunities to experience games that haven’t been officially released in your country yet. Many games are developed for the Canadian market before their global launch, and you can be among the first to play them as soon as they appear on the Canadian App Store. Region switching also grants you access to popular Canadian apps and services, keeping you updated and allowing you to enjoy new features without territorial restrictions.
Precautions Before Region Change
Before initiating the region change to Canada on your iPhone, there are a few important considerations to keep in mind for a smooth and efficient process:
- Cancel subscriptions: Ensure you cancel all subscriptions on iTunes, App Store, and related apps before the region change, including services like Apple Music, Apple Arcade, and Apple News.
- Leave Family Sharing groups: If you’re part of a Family Sharing group on Apple, make sure to leave the group before changing regions to avoid potential issues later on.
- Set up a suitable payment method: Confirm that you’ve set up a payment method compatible with the new region (Canada) to purchase apps and services from the App Store.
- Back up important data: Before changing regions, back up all critical data to another device, such as a computer, or a cloud storage service, to ensure data safety.
- Use up remaining Apple ID balance: If you have any remaining balance in your Apple ID account, use it up before the region change to avoid wasting it.

Guide to Region Change to Canada
Quick Guide
To change your region to Canada on your iOS device, follow these steps:
Go to App Store > Select avatar > Choose user information > Country/Region > Change Country or Region > Select Canada > Tap Agree > Payment Method > Choose None > Enter Information > Tap Next.
Detailed Guide
Here are the detailed steps to easily change your iPhone’s region to Canada:
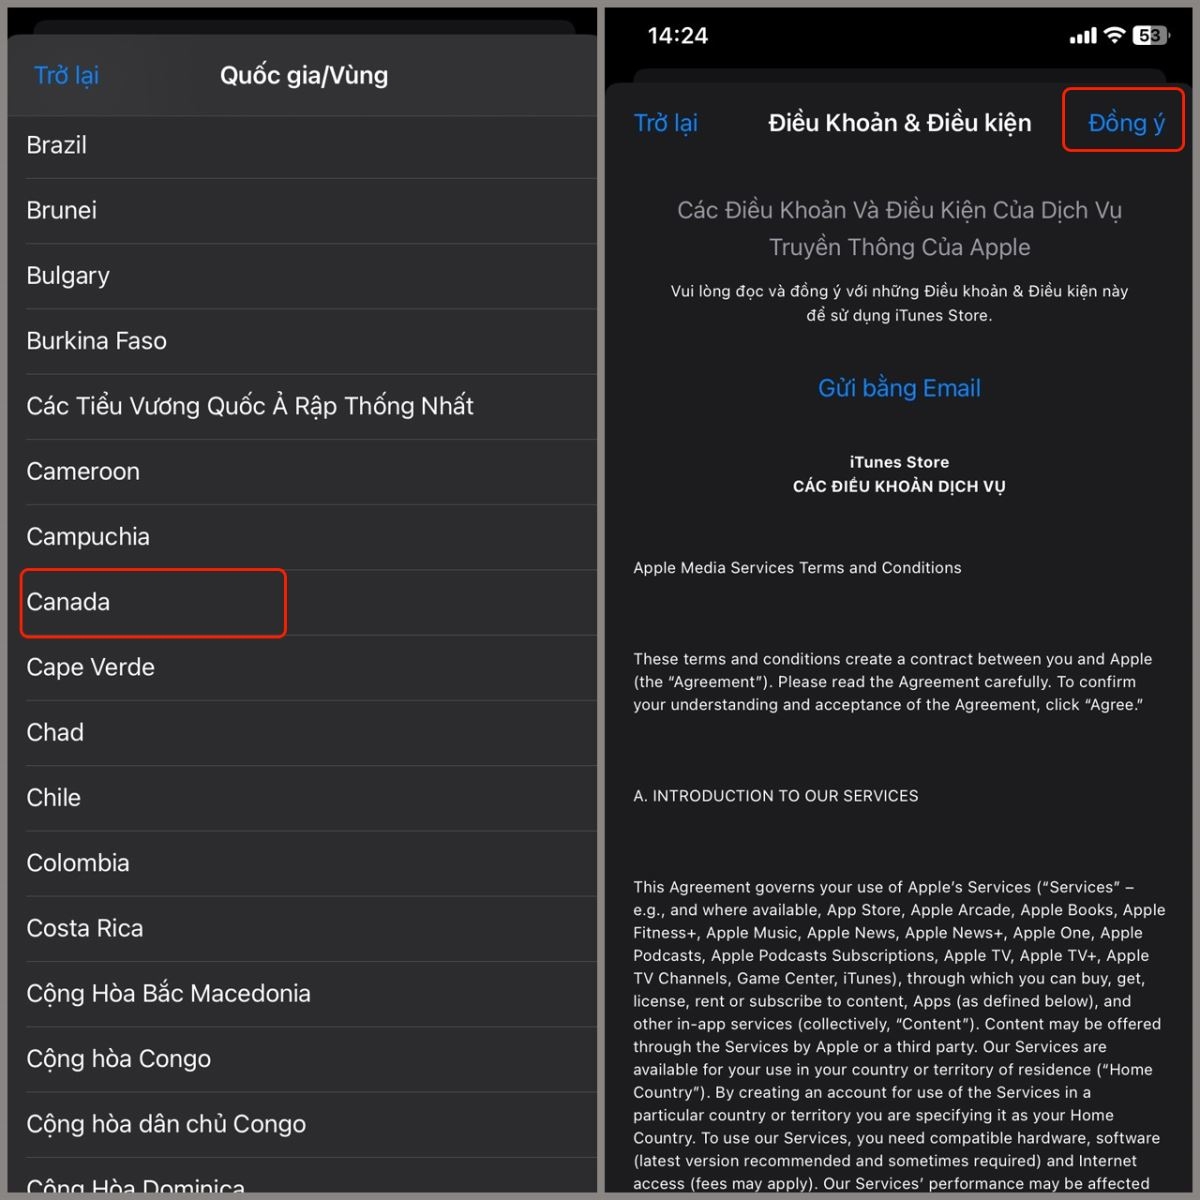
Step 1: Open the App Store on your iPhone. Select your profile picture. Then, choose User Information from the displayed menu.
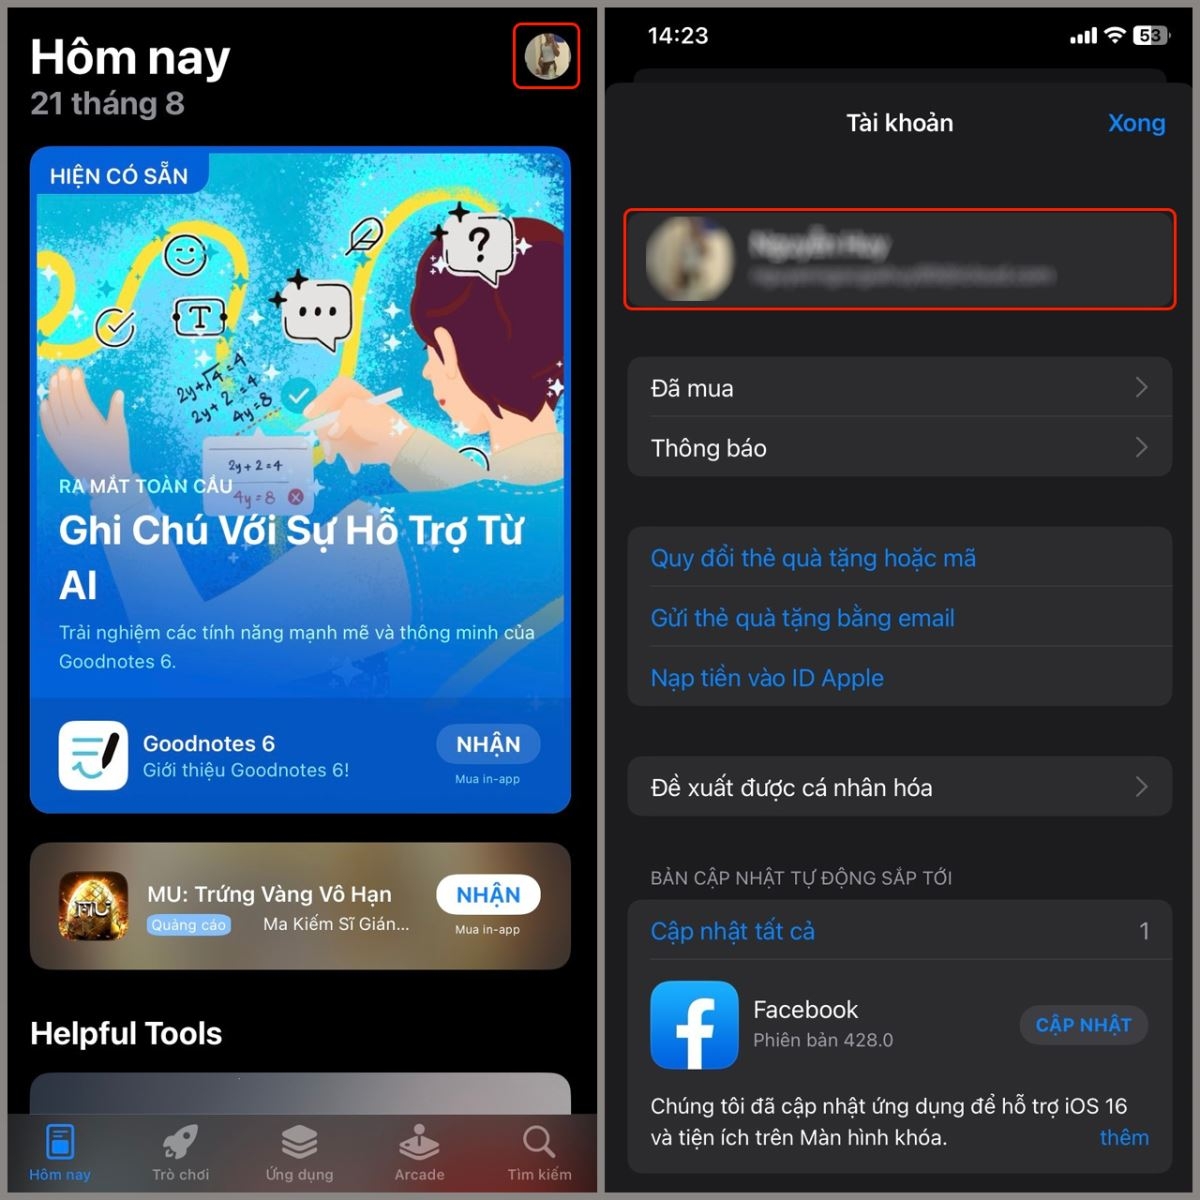
Step 2: In the User Information section, select Country/Region. Tap Change Country or Region from the options.
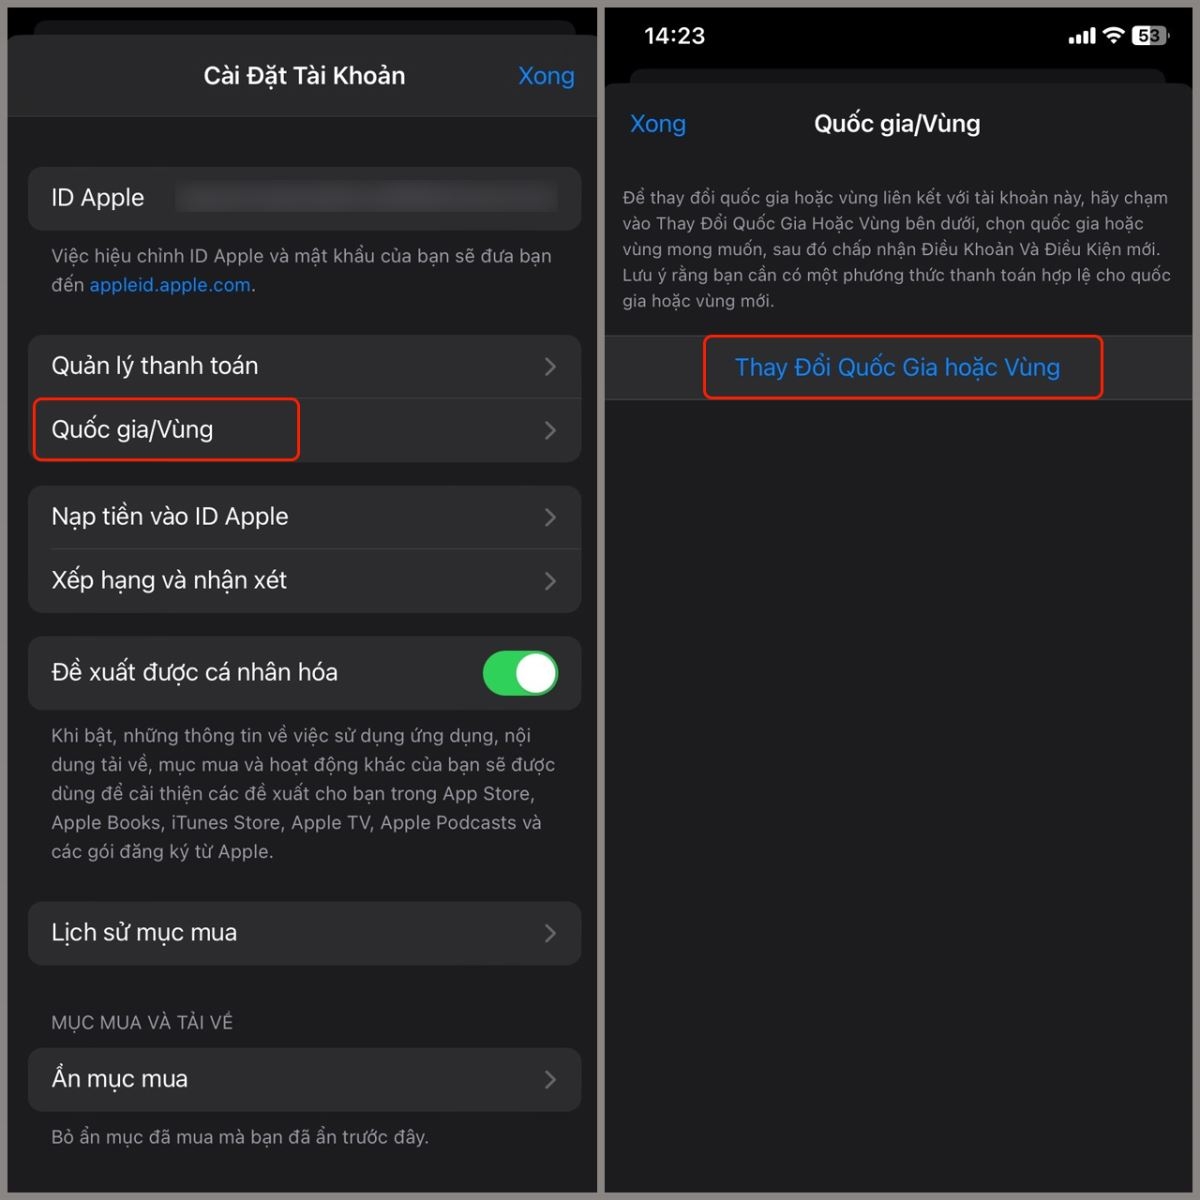
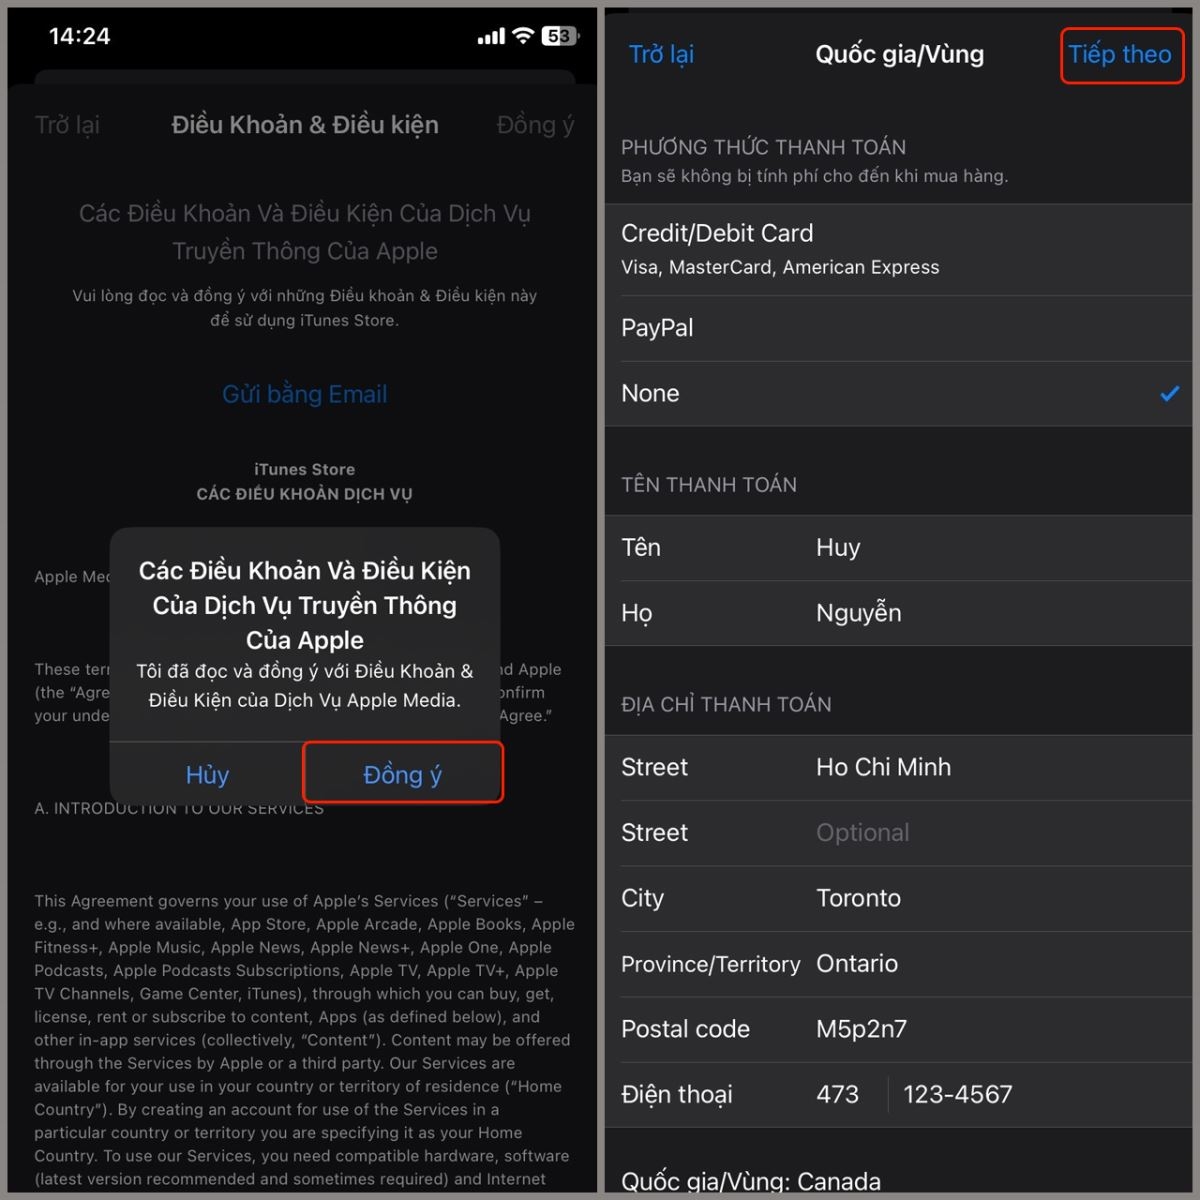
Step 3: Find and select Canada from the list of countries or regions. Confirm your choice by tapping Agree when prompted.
Step 4: After selecting Agree, you may be asked to enter new information. In the Payment Method section, choose None if you don’t want to associate a specific payment method. Provide the following information:
- Address (required): Ho Chi Minh.
- City: Enter the Canadian city you reside in, e.g., Toronto.
- Province/State: Enter the province/territory you’re in, e.g., Ontario.
- Postal Code: M5p2n7.
- Phone Number: Add the Canadian country code (473) followed by your phone number, e.g., 473 123-4567.
Step 5: Tap Next to finalize the region change. Once completed, your iPhone will be switched to the Canadian region, and you’ll be able to enjoy apps and services distributed there.
With these steps, you can quickly and easily change your iPhone’s region to Canada without much hassle.
Conclusion
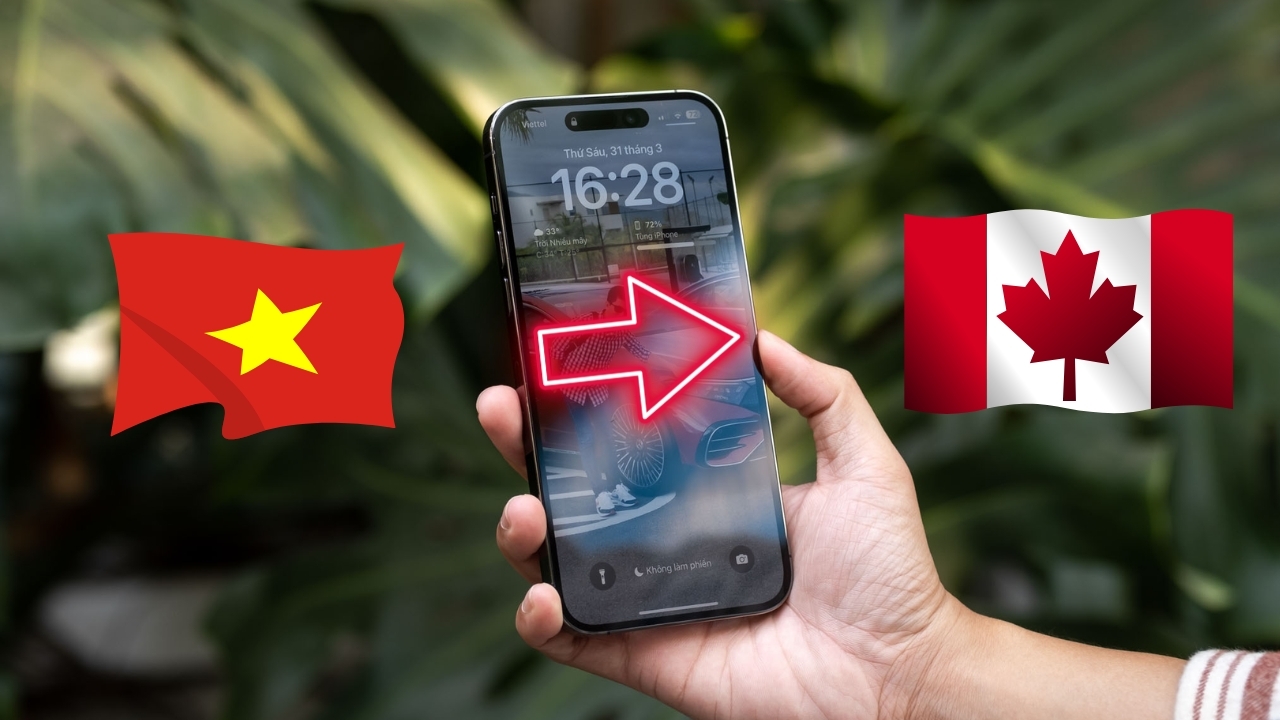
Changing the region to Canada on your iPhone enables you to access and experience applications and online services specific to Canada. This process is essential if you’re traveling or working in Canada.
FPT Shop offers a range of premium home appliances, laptops, TVs, PCs, and other advanced technology products with a diverse range of models and very reasonable prices. You can learn more about our best-selling tablets by following this link:
See also:
3 Suggested Methods to Cut Videos on Your Phone Quickly and Easily
How to Fix a Blurred or Grayed-Out iPhone Screen: A Solution You May Not Know
How to Change App Store Region to China Effortlessly and Swiftly with Comprehensive Instructions

Looking to switch your App Store region to China can be very useful, especially for users who want to purchase apps, games, or digital content from the country’s App Store. This article from FPT Shop will show you how to change regions on the App Store from Vietnam to China in the simplest way!


