


1. Taro
Make use of leftover or damaged taro roots by planting them in water. Submerge the roots in about 3-5cm of water, and within a week, you’ll see sprouts emerging.
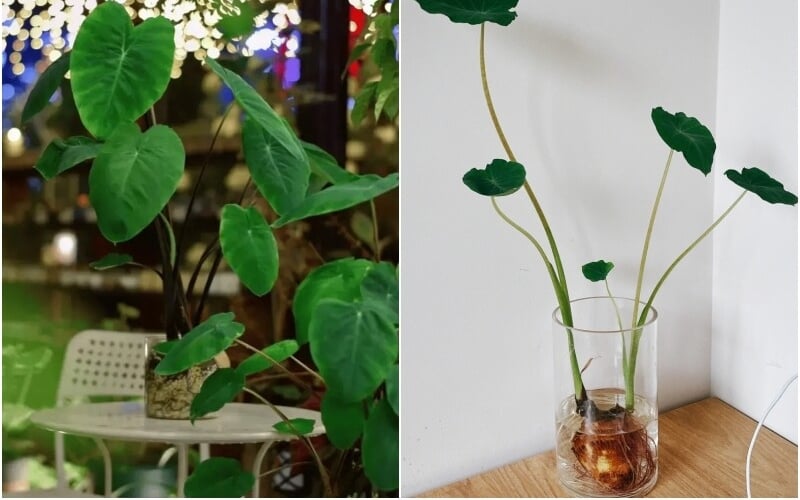
Taro Plant
Place the pot in a sunny location to promote healthy growth. Change the water every 15 days. As the plant grows, it will become an attractive houseplant.
With a bit of patience, you’ll have a thriving taro plant that adds a touch of greenery to your space.
2. Napa Cabbage
After enjoying the leaves, retain the base of the napa cabbage, including the roots. Submerge this base in a glass or jar of water, ensuring that the roots are in contact with the water by about 1cm.
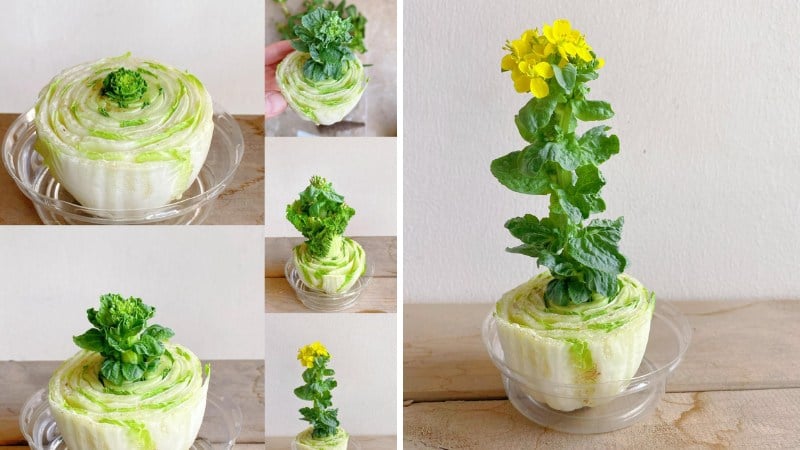
Napa Cabbage Plant
Place the glass in a cool, well-lit area. Within 5-7 days, you’ll notice young leaves sprouting from the base. Change the water every 7 days to keep it fresh. After about 20 days, adorable little yellow flowers will appear.
With this method, you’re not only recycling the base but also creating a mini hydroponic vegetable garden that’s both aesthetically pleasing and practical.
You can place this vegetable pot on your desk, windowsill, or anywhere you desire.
3. Carrot
First, cut off the carrot root, leaving about 2-3cm of the top with the sprout. Then, place this top into a glass of water, making sure it’s not submerged too deeply.
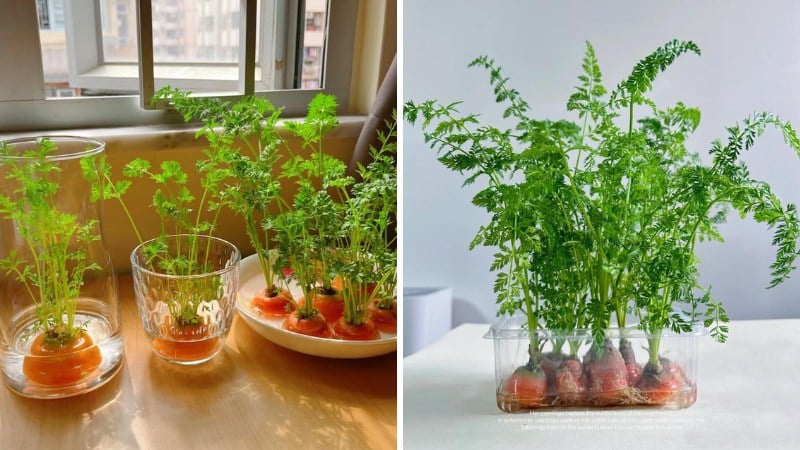
Beautiful Carrot Plant
Position the glass in a location with gentle light, avoiding direct sunlight. Change the water every three days, and within a week, you’ll see lush green sprouts emerging.
With continued care, you’ll have a unique mini potted plant from the carrot top. The vibrant green leaves not only bring a touch of nature to your space but also freshen up your living environment.
4. Ginger
Did you know that even spoiled ginger roots can be transformed into a vibrant, unique houseplant?
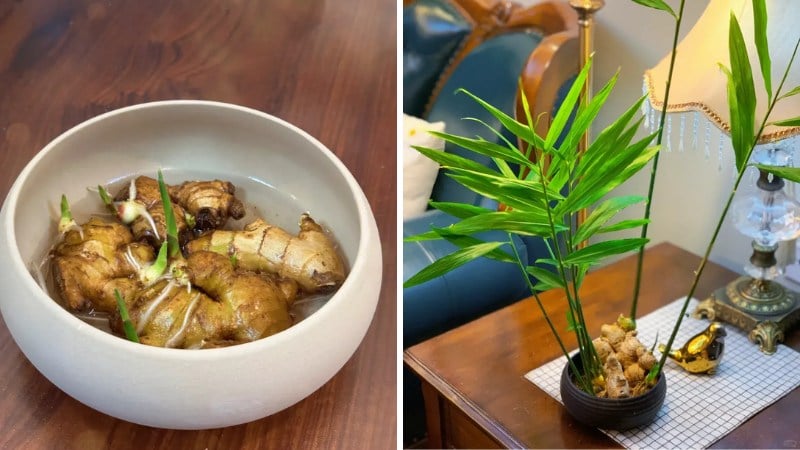
Ginger Plant
Instead of discarding them, try turning them into a living work of art using hydroponics.
Simply place a sprouted ginger root into a glass jar filled with water, and watch as lush green leaves emerge, creating a refreshing sight.
This method is not only simple and cost-effective, but it also allows you to make the most of the ingredients you already have at home.
5. Celery
Similar to the previous examples, retain the base of the celery, including the roots and the lower stem. Place this into a bowl of warm water, ensuring that the roots are submerged while the stem points upward.
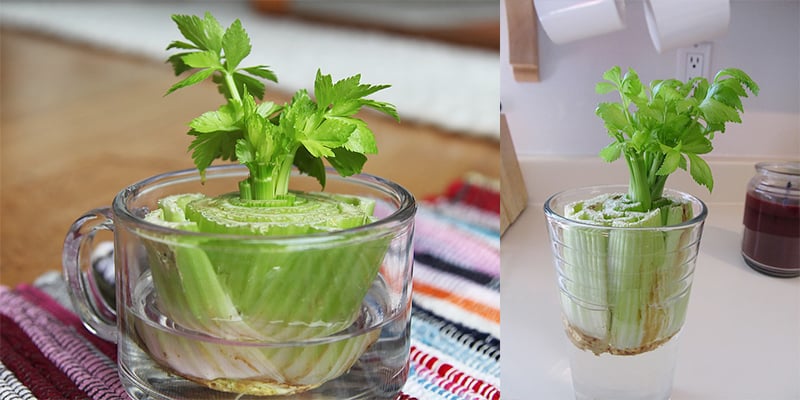
Celery Plant
After about 5-7 days in the water, transfer the celery to a pot filled with soil or plant it directly into your garden.
Is It Better to Buy Heavy or Light Taro?

When it comes to choosing the best taro, there are two schools of thought. Some believe that heavier taros are superior in terms of taste and quality, while others prefer the lighter options. So, which side should you favor? Is there even a right or wrong choice here?
The Ultimate Guide to Seasonal Eating: Supercharge Your Health with These Affordable Foods (Just 1,000 VND!) That Many Vietnamese Overlook.
 That Many Vietnamese Overlook.")
The changing seasons bring about a need for a shift in our dietary habits. While there are numerous familiar foods that can boost our immunity during this transitional weather, they are often overlooked or underutilized, leading to a potential decline in our overall health.
3 Ginger Beauty Hacks to Fix All Your Skin Problems

Ginger extract, when combined with turmeric powder, creates a powerful face mask that targets scars and promotes skin whitening. This dynamic duo of natural ingredients works in harmony to fade away scars and even out skin tone, revealing a radiant and youthful complexion. The anti-inflammatory properties of ginger and the potent antioxidants in turmeric come together to soothe and heal the skin, leaving it refreshed and rejuvenated. This natural remedy is a gentle yet effective approach to achieving clear and glowing skin.
The Ultimate Guide to Cooking Escargot: From Boiling to Stir-Frying for a Delicious and Appetizing Dish

In just a few simple steps, you can create a delicious and slightly spicy stir-fried snail dish to enjoy with steamed rice.
The Secret to Making Restaurant-Quality Braised Squid at Home

The following fresh squid stew recipe will ensure your dish is not only delicious but also tender and crispy. This mouth-watering dish is a must-try for all food enthusiasts.


