


")


Delicious, Crispy, and White Boiled Pigs’ Ears
1. Cleaning Pigs’ Ears
Using Salt:
First, rinse the pigs’ ears in water to remove any dirt. Then, vigorously rub salt onto the entire surface of the ears to get rid of stubborn impurities.
Next, soak the ears in a mixture of vinegar, lemon juice, and white alcohol to neutralize any foul smell. After soaking, rinse them again in clean water and let them dry.
Using Ginger, Alcohol, and Lemon:
After giving the ears a quick rinse, soak them in warm water mixed with white alcohol, crushed ginger, and lemon juice for about 15 minutes. The alcohol and ginger will help eliminate any unpleasant odors and enhance the flavor. Rinse the ears again in clean water after soaking.
Using Baking Soda:
Apply baking soda all over the pigs’ ears and let it sit for about 10 minutes. Then, use a knife to scrape off any slime and dirt. Rinse with clean water. Baking soda not only helps in cleaning but also makes the ears whiter.
Using Rice Water:
Soak the pigs’ ears in rice water for 5-10 minutes, then use a knife to remove any dirt stuck on the surface. Afterward, rub half a lemon over the ears to completely eliminate any lingering odors.
Using Wheat or Tapioca Starch:
Sprinkle wheat or tapioca starch on the pigs’ ears and rub vigorously. When foam appears, use a knife to scrape it off, and repeat this process a few times before rinsing with clean water.
2. The Secret to Boiling Crispy White Pigs’ Ears
After cleaning, place the pigs’ ears in a pot and add water until it covers the ears. Put in crushed ginger, half an onion (or dry onion), vinegar, salt, and seasoning powder.
Bring the water to a boil, and when foam rises, skim it off and reduce the heat. Depending on the size and quantity of the ears, boil for about 15-20 minutes until they are evenly cooked.
As soon as the ears are cooked, remove them from the pot and immediately soak them in a bowl of cold water with a few slices of lemon. This step will make the ears crisper and whiter.
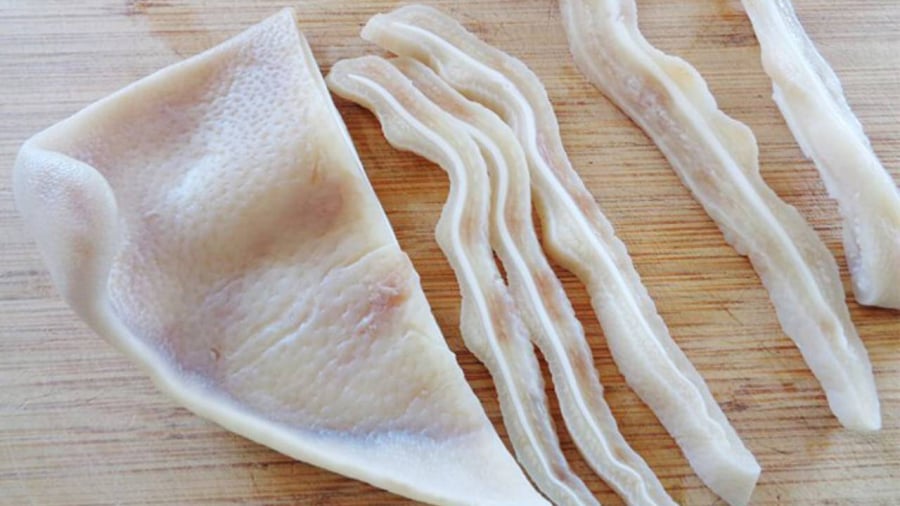
Once the ears have cooled down completely, take them out, and pat them dry. If you have the time, you can put the ears in an airtight container and leave them in the fridge for 1-2 hours to make them firmer, crispier, and easier to slice thinly.
3. Preparing the Pigs’ Ears
The boiled pigs’ ears can be thinly sliced and served immediately or used in various delicious dishes such as pickled pigs’ ears, pigs’ ear salad, or any other recipe of your choice.
3 Secret Tips to Fry Fish Like a Pro: Unveiling the Perfect, Non-Sticky, Intact, and Splash-Free Technique

Master the secrets of renowned chefs and guarantee a delicious, crispy, and non-stick feast.
The 3 Key Areas in Your Rice Cooker That Need Regular Cleaning to Avoid High Power Consumption and Malfunctions

It is imperative that you clean these three crucial areas of your electric rice cooker to ensure its longevity.
The Secret to Removing Oil and Grease From Your Air Fryer With a Common Household Item

Here’s a nifty trick for all the homemakers out there! You can now get rid of that stubborn grease and grime build-up in your air fryer with a familiar cleaning agent that’s readily available in most households.
How to Prevent Chicken Bones From Turning Red During Boiling: Unveiling the Mystery Behind This Common Cooking Phenomenon

Many people wonder if the presence of red liquid and bones in boiled chicken indicates undercooking. Here is the answer.
The Ultimate Guide to a Whiter Smile: A Simple Hack the Whole Family Will Love

Rice water and toothpaste: an unlikely duo for a spotless clean. You might be surprised to find that these simple household staples can be your secret weapon for tackling tough stains and reaching those tricky nooks and crannies.


