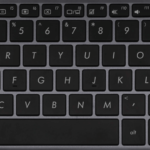
While using the Asus computer for study and work purposes, there will be times when you need to capture the computer screen. If you don’t know or only know one way to capture the Asus computer screen, then let’s refer to some other methods right here.
How to capture the Asus computer screen using the keyboard
Asus laptops are equipped with many function keys that support many useful features such as adjusting screen brightness, turning on the keyboard light, increasing/decreasing volume, capturing laptop screens, etc. Here are two ways to help you capture the Asus laptop screen using key combinations.
Use the Windows + Prt Sc key combination
The fastest way to capture the Asus computer screen is to use the key combination Windows + Prt Sc. After you perform this operation, the screen will blink as if you press the camera to take a picture. At the same time, the screen capture image will be saved immediately to your computer without the need for additional save operations.
/fptshop.com.vn/uploads/images/tin-tuc/162647/Originals/cach-chup-man-hinh-may-tinh-asus-1.jpg)
To find the captured screen image, you go to the This PC > Pictures > Screenshots section. All screen capture images using this method will be saved there.
/fptshop.com.vn/uploads/images/tin-tuc/162647/Originals/cach-chup-man-hinh-may-tinh-asus-2.jpg)
The advantage of this method is the fast speed with just one operation. However, the disadvantage is that the image will be saved immediately, and if you want to edit or rename it, you have to use other tools such as Paint, Photoshop, Canva, etc.
Use the Windows + Shift + S key combination
This method is also simple and similar to the one above. You just need to open the screen on the content page to be captured, then press the Windows + Shift + S key combination and then drag and drop the cursor to limit the area to be captured. With this method, you can capture the entire or a part of the screen as needed. In which:
- Rectangle Snip: Freely adjust the capture range according to the rectangular frame.
- Windows Snip: To capture the selected workspace window.
- Fullscreen Snip: To capture the entire screen, including the Taskbar.
/fptshop.com.vn/uploads/images/tin-tuc/162647/Originals/cach-chup-man-hinh-may-tinh-asus-3.jpg)
After capturing, there will be a notification at the bottom right corner of the screen that the captured image is taken. Similarly, to view the captured image, you also go to This PC > Pictures > Screenshots.
/fptshop.com.vn/uploads/images/tin-tuc/162647/Originals/cach-chup-man-hinh-may-tinh-asus-4.png)
Capture the Asus computer screen using Snipping Tool
The Snipping Tool is a tool available on Asus laptops and you can use it right away without downloading.
The steps to capture the Asus computer screen using the Snipping Tool are as follows:
Step 1: Enter the term Snipping Tool in the search bar on the Taskbar at the bottom of the screen of the computer > Click to open the Snipping Tool.
/fptshop.com.vn/uploads/images/tin-tuc/162647/Originals/cach-chup-man-hinh-may-tinh-asus-6.jpg)
Step 2: Go to the Mode section to select the capture mode. Here, you can also choose one of the modes including: Free Form Snip, Rectangle Snip, Window Snip, or Full Screen Snip.
/fptshop.com.vn/uploads/images/tin-tuc/162647/Originals/cach-chup-man-hinh-may-tinh-asus-7.jpg)
Step 3: The captured image will be displayed on a new window, and you can edit it using the tools on the menu bar. After finishing, click the Save icon to save the image to your computer.
Screenshots on Windows 8’>How to Capture Screenshots on Windows 8
Looking for the latest and greatest in technological and electronic products? Look no further than , an online platform specializing in offering customers a fantastic selection of items such as mobile phones, laptops, televisions, and much more. Not only do we offer competitive prices, but also a convenient delivery service to ensure you get what you want, when you want it. Shop now at for the best shopping experience.
11 Simple and Quick Ways to Take Screenshots on Windows 7 that You Should Know
Capturing a computer screen on Windows 7 can be extremely useful during work and study. However, many people still don’t know how to take a screenshot on this device. Therefore, in the following article, FPT Shop will reveal to you some very simple ways to capture the screen of a Windows 7 computer.


