You may not be aware that line spacing adjustment is consistent across Word versions 2007, 2010, 2013, and 2016. Understanding how to adjust line spacing in one version will allow you to effortlessly apply the same technique in the other versions. Let’s explore this now.
How to Edit Paragraphs with the Paragraph Icon
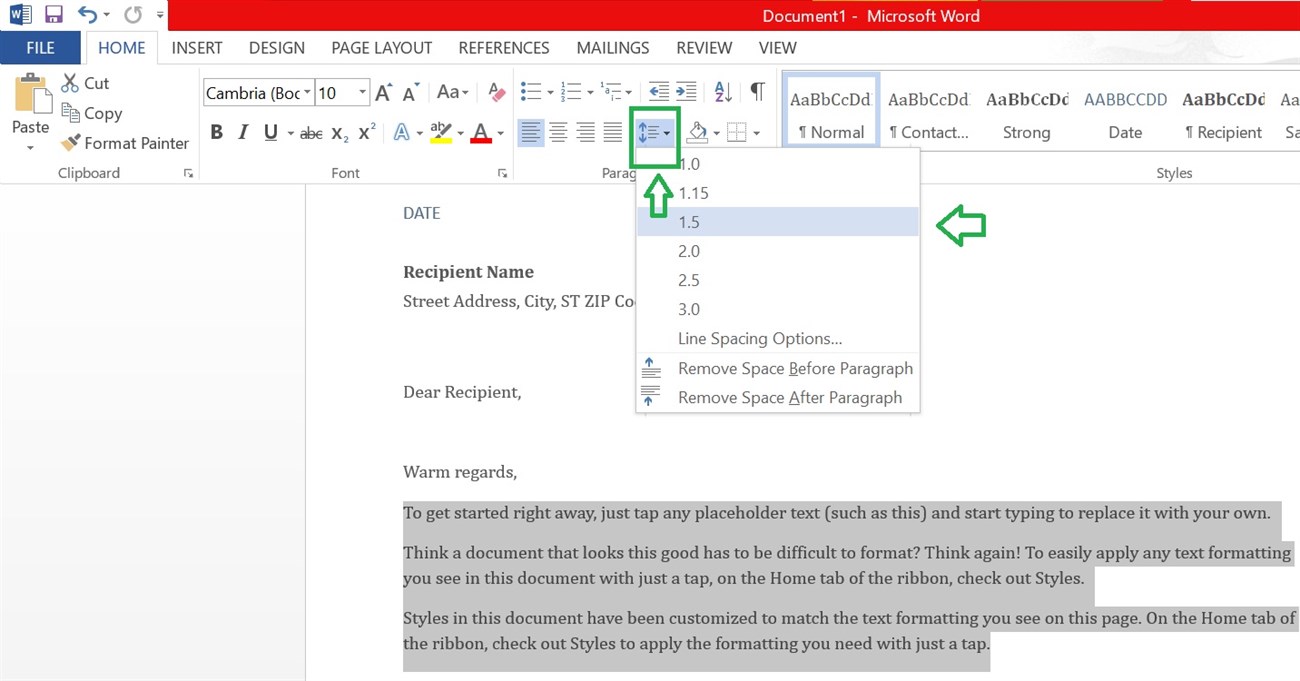
To adjust the line spacing in a piece of text, you can follow these steps:
1. If you haven’t already done so, select the paragraph you want to modify.
2. Go to the Home Tab and locate the Paragraph section.
3. Within this section, you will find the line spacing options.
4. Click on the line spacing parameter that suits your preference.
By following these steps, you will be able to set the desired line spacing for your text.

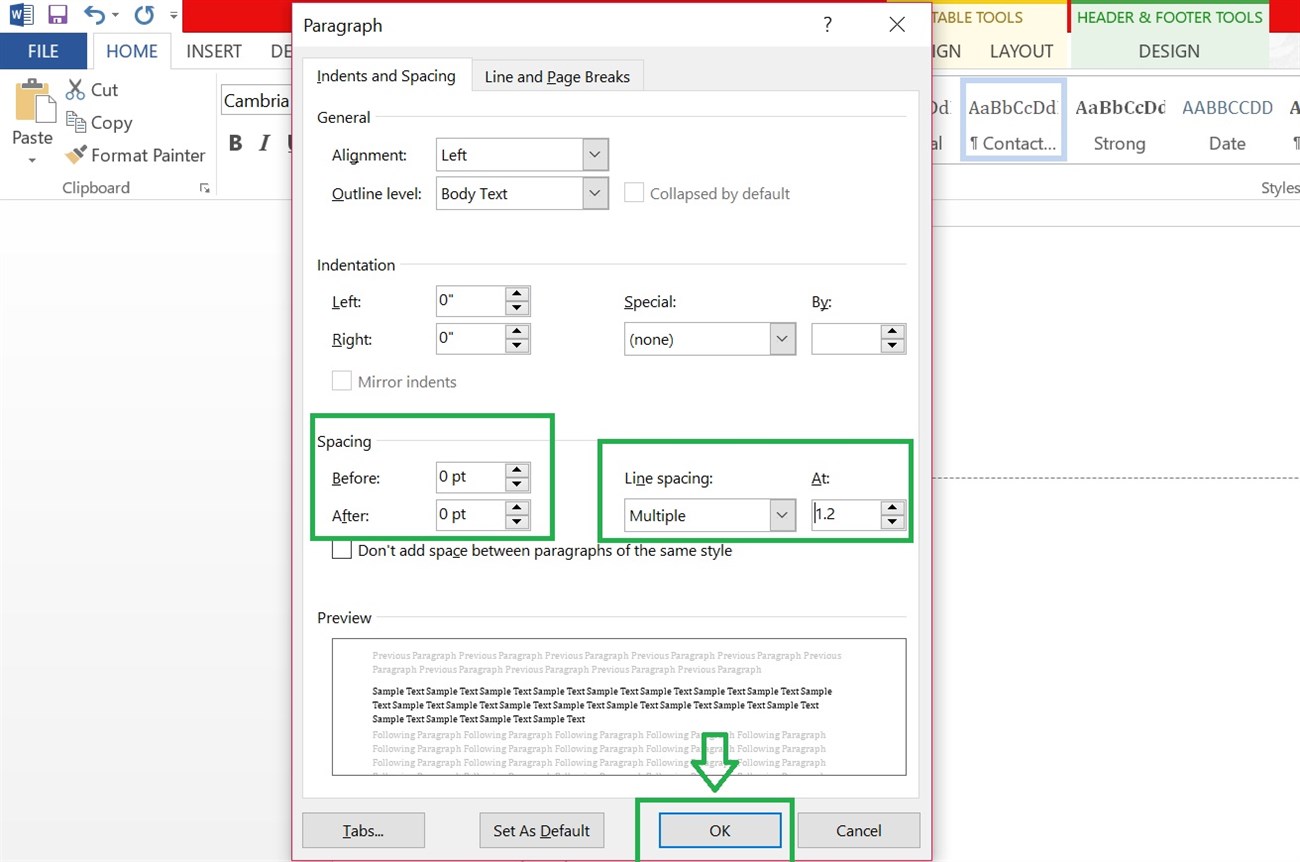
Please select a different number by choosing the “Line Spacing Options” below:
- Please input the desired number in the box labeled “Line Pacing” to evenly distribute the space above and below each line.
- Please enter a number in the Spacing section. Specify the “Before” value to stretch the upper part of the text and the “After” value to stretch the line below the text.
Please click “OK” to complete the line spacing adjustment.

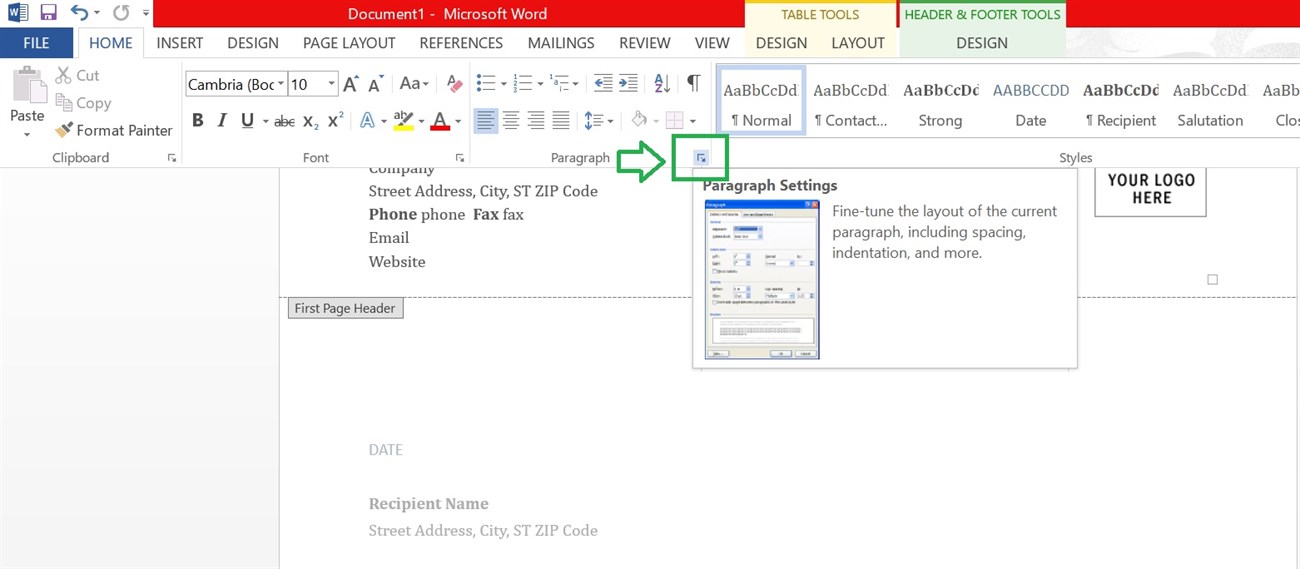
One alternative method to access the Paragraph table is by clicking on the arrow icon located next to the word Paragraph. This action will promptly display the Paragraph panel.

How to adjust Spacing on the Page Layout section
To customize the spacing of your document in Microsoft Word, follow these steps:
1. Click on the “Page Layout” item in the toolbar.
2. Select the “Spacing” section.
3. Use the up or down arrow to adjust the distance before or after the paragraph.
4. Alternatively, you can manually enter the desired amount of space to adjust the line spacing.


