


Pumpkins are essential decorations for Halloween, and in this article, we will guide you through three simple ways to make a pumpkin lantern out of paper. Let’s get creative!
1 How to Make a Pumpkin Lantern with Paper and a Spring
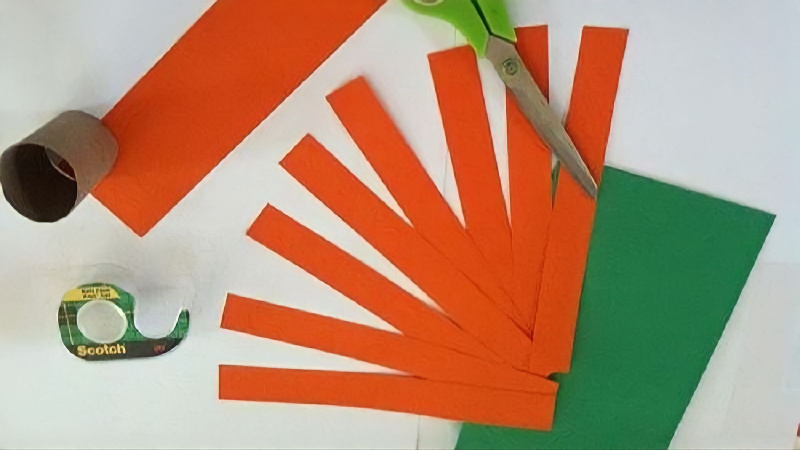
What You’ll Need:
- Orange, green, and black A4 cardboard
- Scissors
- A spring
- Double-sided tape
Let’s Get Crafting:
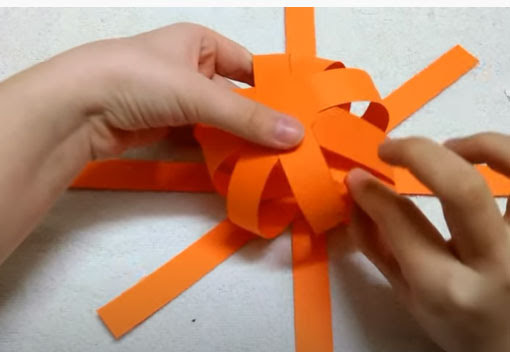
Use double-sided tape to join the ends of the strips together, forming a circle.
 Cut and join the paper strips
 Fan out and secure the strips
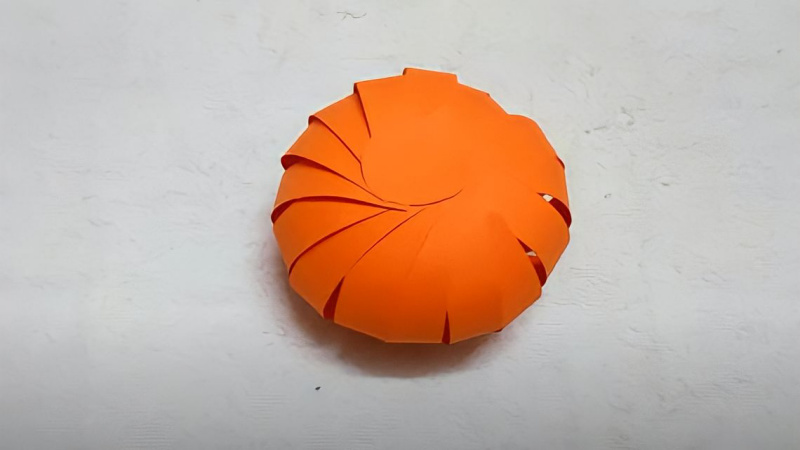
 Form the pumpkin shape
 Add the leaf
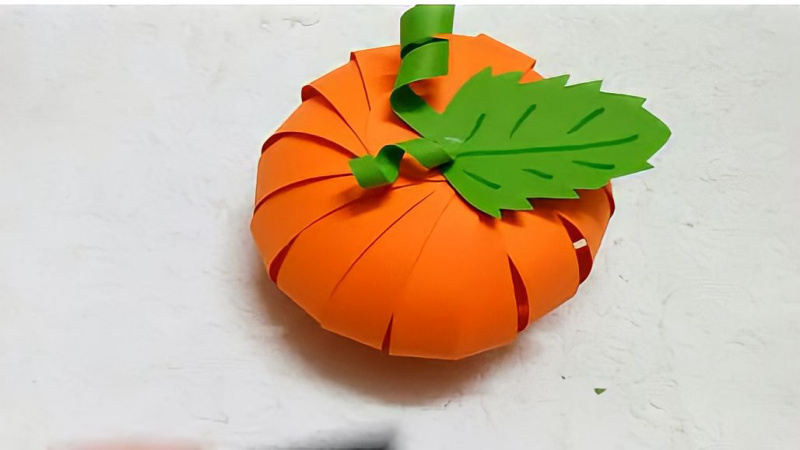 Create the stem
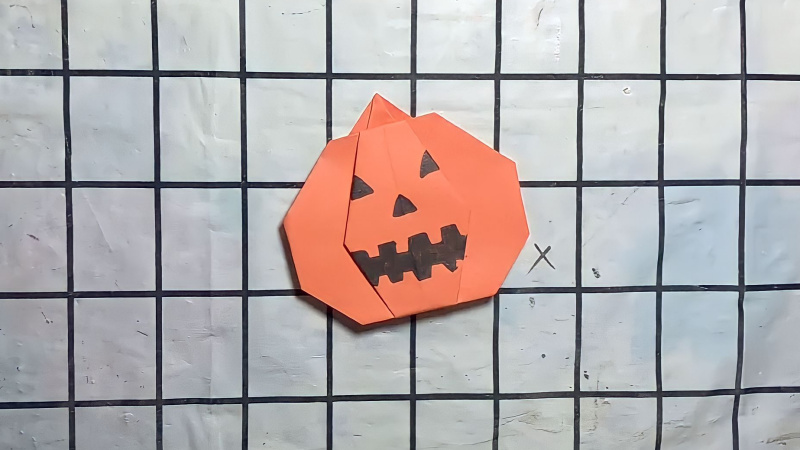
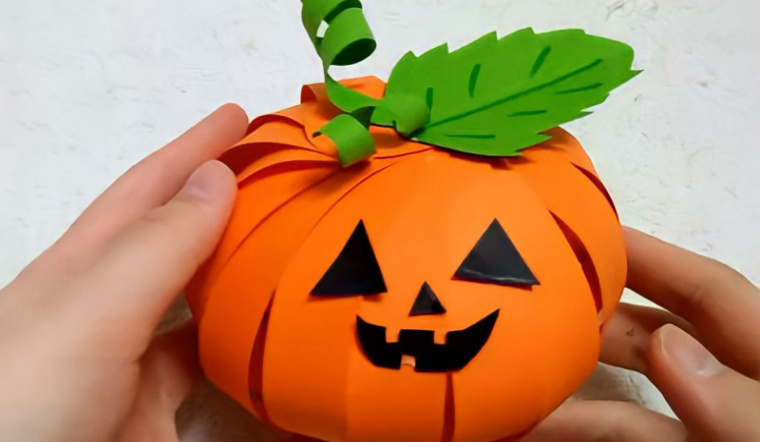 Add the facial features
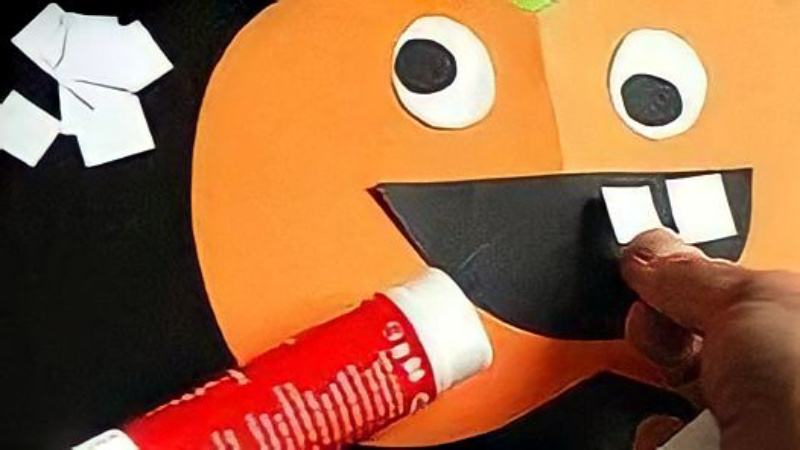
2 How to Make a Pumpkin Lantern with Paper and Glue
What You’ll Need:
- 2 sheets of orange A4 cardboard
- Scissors
- Glue
- A black pen
- A pencil and ruler
Let’s Get Crafting:
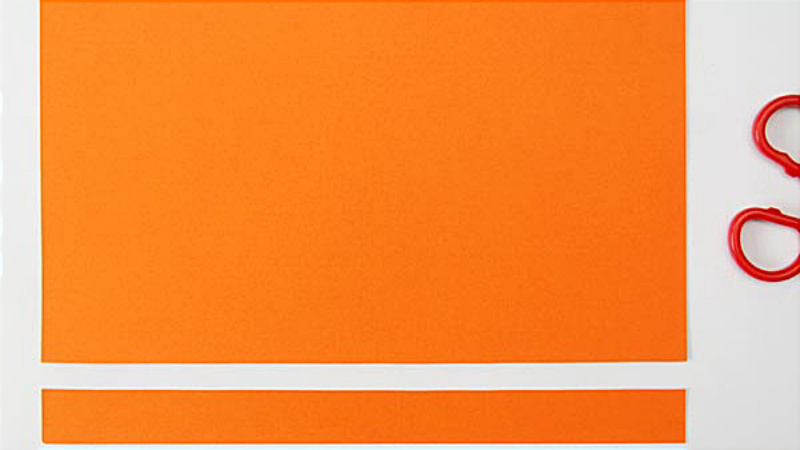 Create the handle
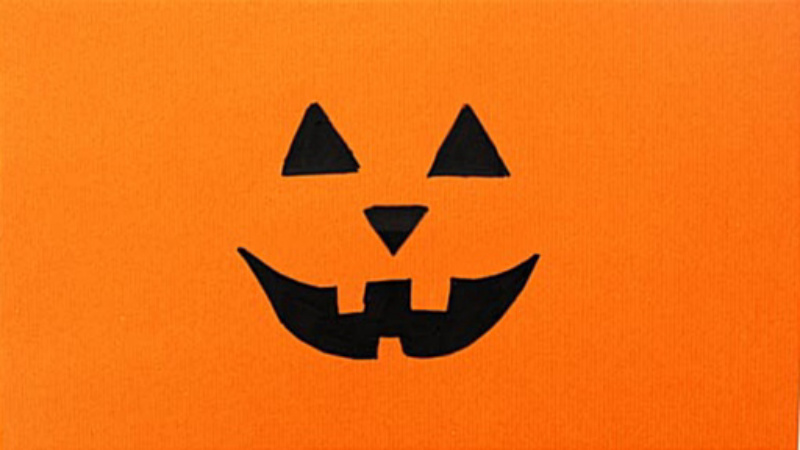 Draw and color the face
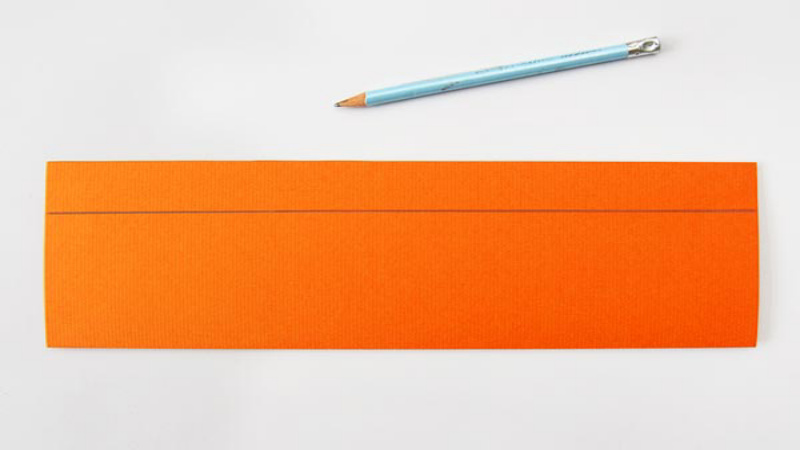 Fold and draw a cutting guide
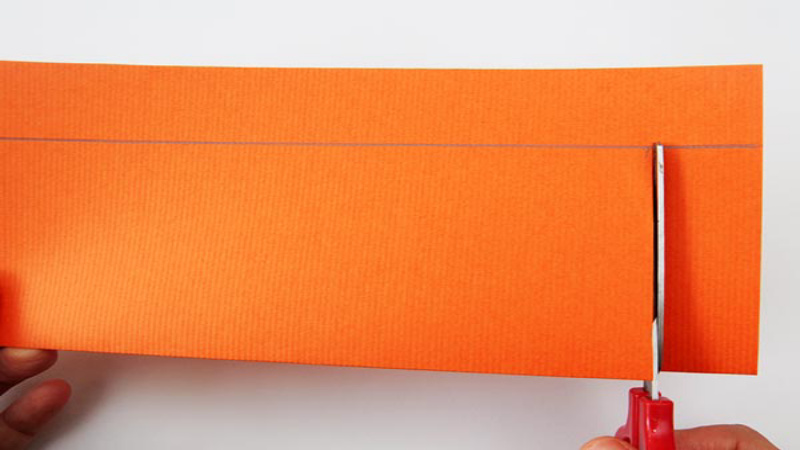 Cut straight lines
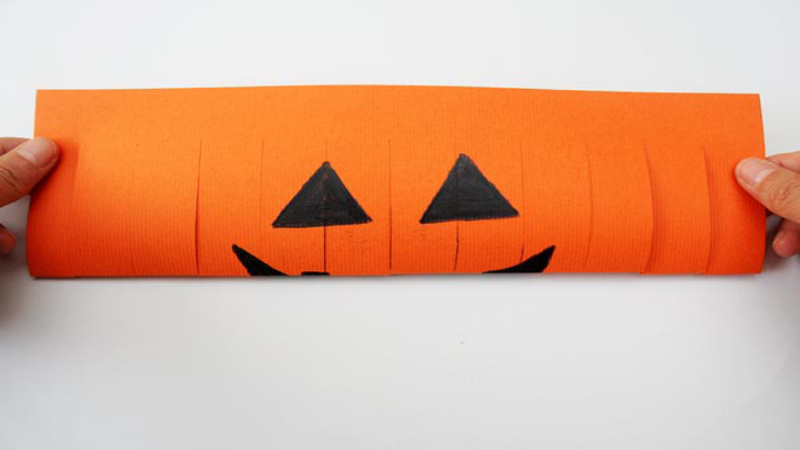 Fold in the opposite direction
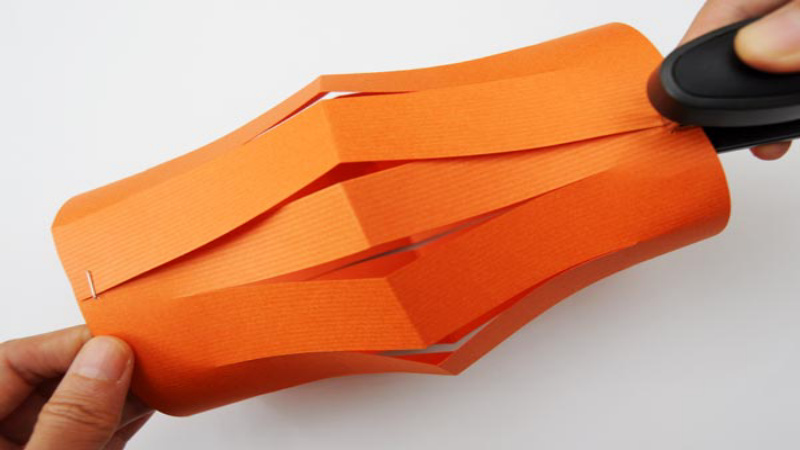 Form and secure the lantern
 Add the handle
3 How to Make a Pumpkin Lantern with Paper and Gold Ribbon
What You’ll Need:
- Orange, black, white, and green A4 cardboard
- Gold ribbon
- Glue
- Scissors
Let’s Get Crafting:
 Cut out teeth and eyes
 Cut out the stem
 Assemble the pumpkin lantern
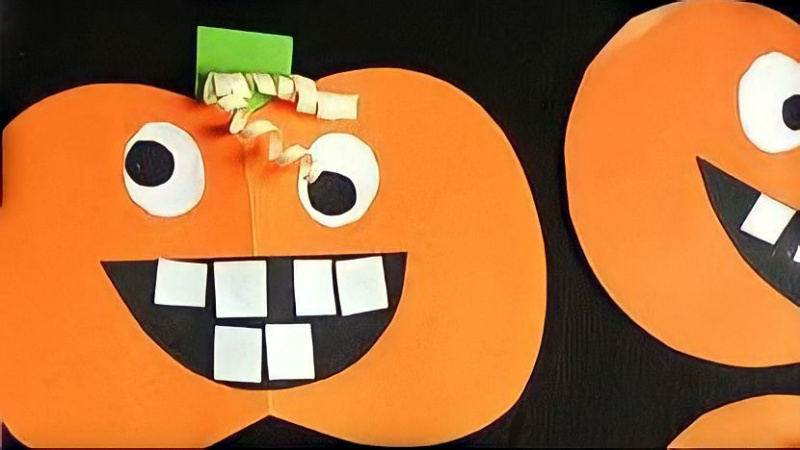
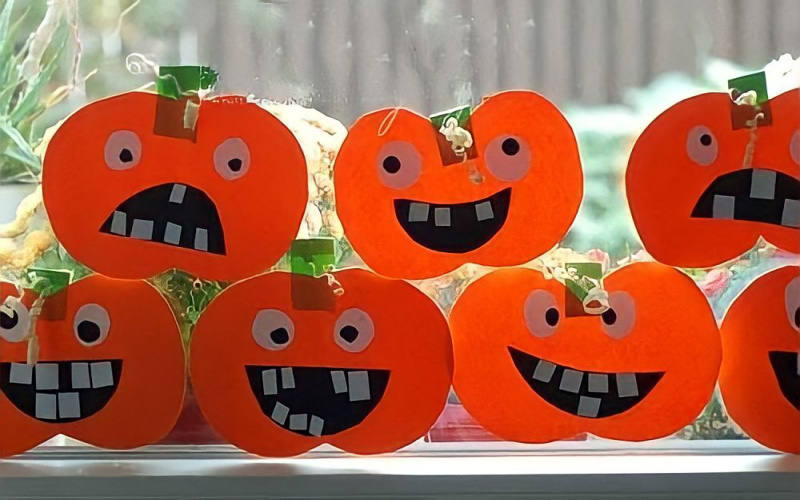
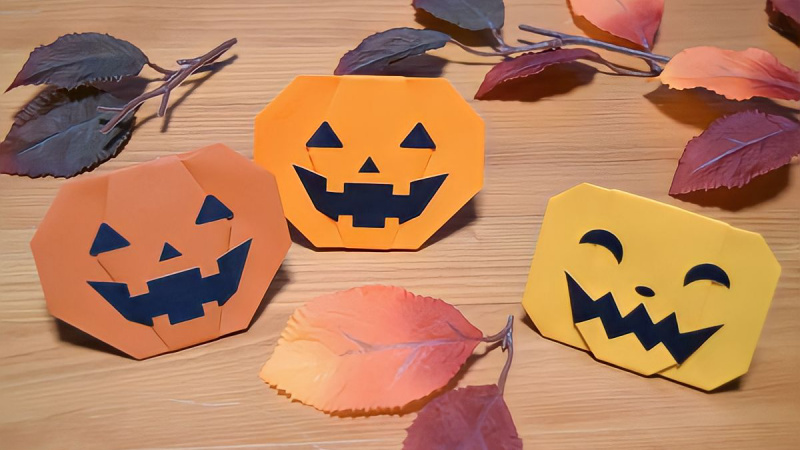
4 More Beautiful and Unique Pumpkin Lantern Designs
Get inspired by these beautiful and unique pumpkin lantern designs made with hard paper, origami paper, and more!
 Hard paper pumpkin lantern
 Pumpkin lantern with a handle
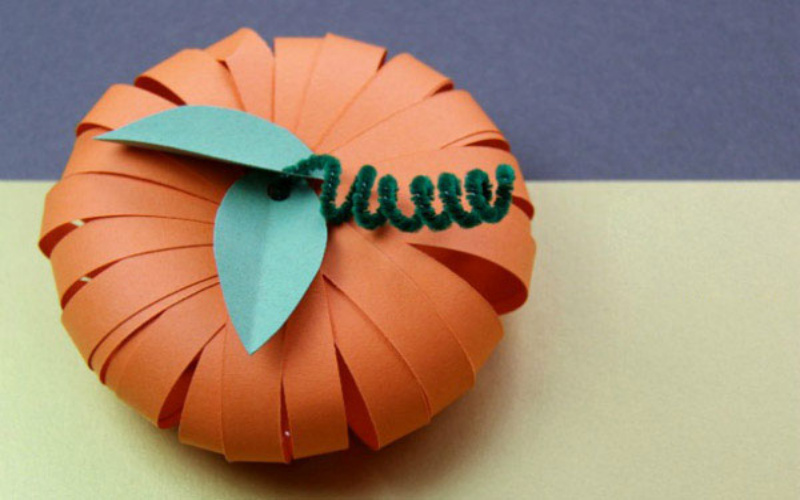
 Origami paper pumpkin lantern
 Another origami paper design
Check out more unique and beautiful designs to spark your creativity.
With just a few simple steps, you can create adorable paper pumpkins to decorate your Halloween. It’s easy, so give it a try and share your creations with us!
6 Easy Yet Spooky DIY Ways to Decorate Your Home for Halloween

With easily accessible materials such as colored paper and pumpkins, you can easily create a spooktacular Halloween setup at home. Get ready to unleash your creativity with these unique, simple, and aesthetically pleasing DIY ideas that will transform your space into a captivating Halloween wonderland, rivaling even the most enchanting cafe decorations.
10 Fun and Spooky Halloween Gift Ideas for Kids

Halloween is the time for parents to delight their little ones with fun treats. Discover the most impressive gifts for kids, from spooky masks to pumpkin lanterns, and create unforgettable memories this Halloween season.
7 Fun and Easy Halloween Ideas for Kids

This Halloween, preschool and elementary schools are bringing the spooky fun to life with exciting parties and activities for the children. From costume parades to art contests and trivia games, these events offer a thrilling experience for the little ones to celebrate the season. It’s a chance for them to embrace their creativity, imagination, and, most importantly, have a blast!
8 Unique and Easy Halloween Paper Decoration Ideas

Explore 8 unique and simple Halloween paper decoration ideas that you can easily make at home, while saving money.


