


Easiest Way to Grow Microgreens on Paper
During the quarantine, many families are growing microgreens together to have a productive activity and to have fresh and nutritious food. Microgreens have a short growth period and can be harvested in 5-7 days, making them easy to grow.
According to engineer Le Hoai Tran (Clean Eating and Drinking Services Joint Stock Company), there are many ways to grow microgreens at home, using materials such as coconut fiber, rice husk, and organic fertilizer to achieve high yield. Recently, many people have started growing microgreens on paper because it is easy to grow, guarantees cleanliness, is easy to move, and can be grown all year round. The lightweight baskets can be moved anywhere, but it is recommended to choose plastic ones with small holes.
Basket, plastic tray with paper can be used to grow microgreens. Illustration image.
The baskets have many holes, so it is necessary to cover the gaps in the body, sides, and bottom of the basket with plastic wrap (leaving some space for water to drain). Choose a well-ventilated and sunny space for the baskets to ensure healthy growth of the plants.
Paper is considered a clean medium for microgreens to root and grow. However, paper does not hold water well, so it is important to regularly check the dampness of the paper to prevent it from drying out, which can cause the microgreens to die. It is recommended to choose paper with a certain level of toughness so that it does not break when watering.
Choose dry food paper, new tissue paper, or wet tissue paper as the growing medium. To be safe, use clean paper that is soft, durable, and does not easily crumble. Place a layer of paper inside the basket as the medium (about 5-6 layers of paper to hold the seeds and provide anchoring for the microgreen roots), then spray water to moisten the paper.
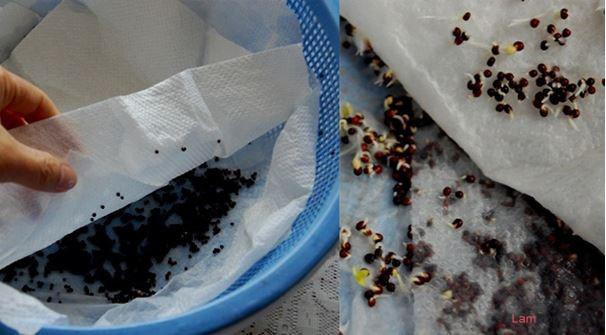
Soak the microgreen seeds until they sprout evenly, then uncover the paper. Illustration image.
The microgreen seeds can be a single type of seed or a mix of different seeds, but they must be microgreen seeds (not regular large vegetable seeds) with a clear origin and source. For beginners, it is recommended to use larger seeds and healthy plants (such as mung beans, red beans, white radishes, green radishes, water spinach, soybeans, black beans, peanuts) before moving on to smaller seeds such as lettuce, broccoli (which require more care).
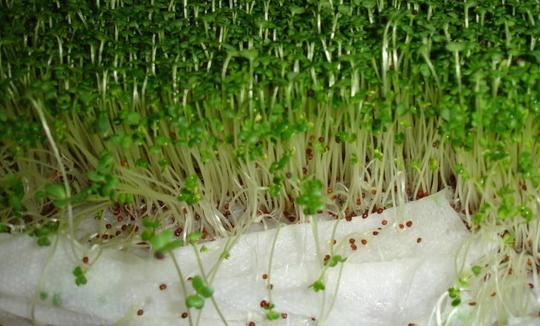
Microgreens grown on paper about 9-12cm in height are ready to be harvested.
How to Grow Microgreens Using Baskets at Home
Soak the microgreen seeds in water to stimulate germination by placing the seeds in water that is 2-3 times the volume of the seeds. The soaking time varies depending on the size of the seeds. Soak the seeds for 6-8 hours in water at a ratio of 2 boiling – 3 cold water, removing small and damaged seeds as they are difficult to germinate and can result in weak plants (make sure to rotate the seeds to ensure even contact with water). Do not soak the seeds for too long as it can reduce the germination rate. Remove any floating seeds as they will not germinate, even if they have sprouted.
Place a layer of paper inside the plastic basket as the medium for the microgreens to anchor and grow. Then, evenly spread the soaked seeds on the surface of the paper. Make sure to spread them sparsely to allow for germination (avoid overcrowding). Cover the seeds with another layer of paper to create a moist environment and then water the paper. Finally, cover the top of the basket with a piece of paper or stack multiple baskets to retain moisture and stimulate germination.
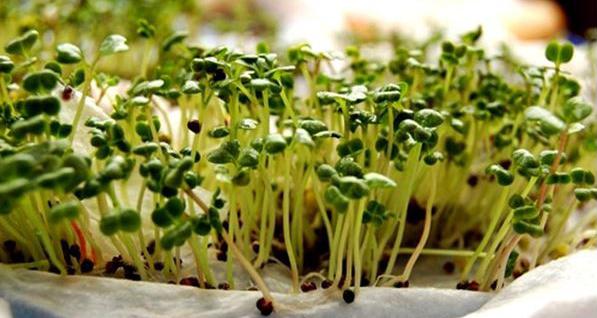
After 5-7 days, the microgreens are about 8-12cm in height. Illustration image.
Place the basket in a location with less sunlight. Water the microgreens 2-3 times a day (warm water is not necessary). After 1-1.5 days, the seeds will swell and the seed coat will crack, indicating the start of germination. The microgreen roots will attach to the paper and begin to grow. Water the microgreens twice a day, and regularly check the dampness of the paper to ensure it does not dry out.
Once the microgreens have grown taller, uncover the paper and water the microgreens evenly using a spray bottle (1-2 times per day). Continue to water the microgreens regularly. As the microgreens grow larger, they will require more water, but be cautious not to overwater as it can lead to root rot and damage to the plants. You can move the basket of microgreens to a location with more light to enhance the green color of the leaves. During the growth process, there is no need to add additional nutrients to the microgreens, as they will obtain enough nutrients from the seeds.
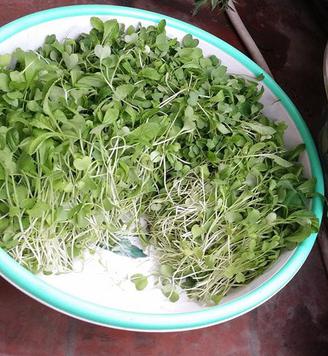
Microgreens can be used to create delicious, attractive, and nutritious dishes. Illustration image.
After 5-7 days, when the microgreens are about 8-12cm in height, they are ready to be harvested. Use scissors to cut the microgreens above the paper layer, about 2cm from the surface of the paper. Discard the root and rinse the microgreens before using them in various delicious and nutritious dishes for your family. It is advisable to harvest the microgreens promptly to prevent them from wilting.
Microgreens are rich in nutrients and fiber and are beneficial for health. They are gaining popularity due to their nutritional value, high levels of vitamins B, C, and E (which are five times higher than regular vegetables). Microgreens grown on paper are clean, easy to grow, rich in nutrients, and delicious for family meals.
There are many types of seeds that can be used to grow microgreens, and anyone can grow their own microgreens using just a piece of paper and without the need for soil or extensive care. Everyone can successfully grow microgreens, and the more you practice, the better you will become.
|
– Store the harvested microgreens in the refrigerator, ensuring that they are dry, so harvest them at least 8-12 hours after the last watering. – Use scissors to cut the microgreens just above the paper layer, about 2cm, removing the roots, and rinse the microgreens before using them in cooking. – If you don’t have food paper, you can use regular tissue paper, but make sure it is durable so that it does not break when watering. Do not eat the microgreen roots. If you want to eat them, make sure to thoroughly wash them. |
4 types of vegetables cheaper than meat, healthier than medicine: Precious as thousand-year-old ginseng, many people don’t know it’s a waste

Don’t miss out on these amazing and affordable vegetables at the market, as they are not only incredibly healthy but also budget-friendly.


