


The Mid-Autumn Festival is a time for celebration and gathering with loved ones. A beloved tradition during this festive season is the art of crafting and carrying lanterns. These lanterns become more than just decorations; they are meaningful gifts exchanged during this special holiday. For those with a creative spirit and a love for DIY projects, making your own lantern is a must!
With just a few simple tools and materials, you can create a stunning spinning lantern that will make your Mid-Autumn Festival celebration truly memorable. So, are you ready to get started?
1 Unraveling the History and Significance of the Spinning Lantern
The Legend of the Spinning Lantern
Folk tales tell of a king who, long ago, ordered his people to craft unique lanterns in preparation for the Mid-Autumn Festival. Despite their best efforts, none of the lanterns pleased the king.
Enter Luc Duc, a poor yet pious orphan. One night, Luc Duc dreamed of an old god named Thai Thuong Lao Quan, who revealed to him the secret of crafting a lantern that would captivate the king.
Following the god’s instructions, Luc Duc and his mother created a lantern like no other. They used bamboo stalks and vibrant, colorful paper. On the night of the full moon, they presented their lantern to the king, who was immediately delighted by its unusual design and vivid colors.
When the king inquired about the lantern’s meaning, Luc Duc, as instructed by the god, replied, “Your Majesty, the bamboo stalk at the center represents the axis of wisdom. The spinning wheel with six faces symbolizes the six human emotions: love, hate, anger, sadness, joy, and resentment. Its constant spinning reflects the ever-changing nature of humanity, guided by morality and illuminated by the lantern’s light. The six bright paper faces of the lantern represent the diverse personalities of individuals.”
Deeply impressed by the lantern and its profound symbolism, the king ordered his people to replicate it. Luc Duc and his mother were handsomely rewarded, and their creation has been immortalized as the “keo quan” lantern, a tribute to Luc Duc’s devotion.
 The Legend of the Spinning Lantern
The Significance of the Spinning Lantern’s Design
The original spinning lantern design served a dual purpose: to instill a sense of patriotism in children and to celebrate the diversity of human emotions. The images on the lantern’s faces initially depicted marching soldiers, giving it the name “keo quan,” which translates to “pulling soldiers.”
Over time, people began to embrace their creativity, adding new images to the lantern’s faces. These included the four blessings dancing in harmony, a hardworking farmer tilling the fields, a scholar returning to his hometown in glory, and even beloved cartoon characters like Doraemon and Sun Wukong. The spinning lantern became a canvas for self-expression and a celebration of life’s many facets.
2 Understanding the Intricate Mechanics of the Spinning Lantern
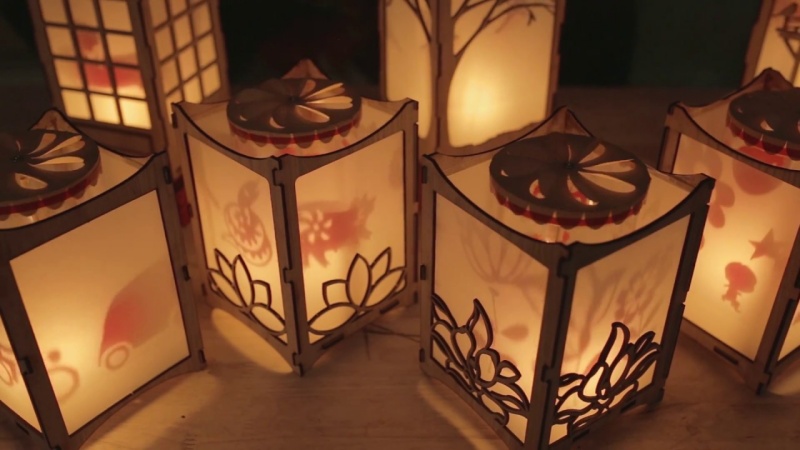
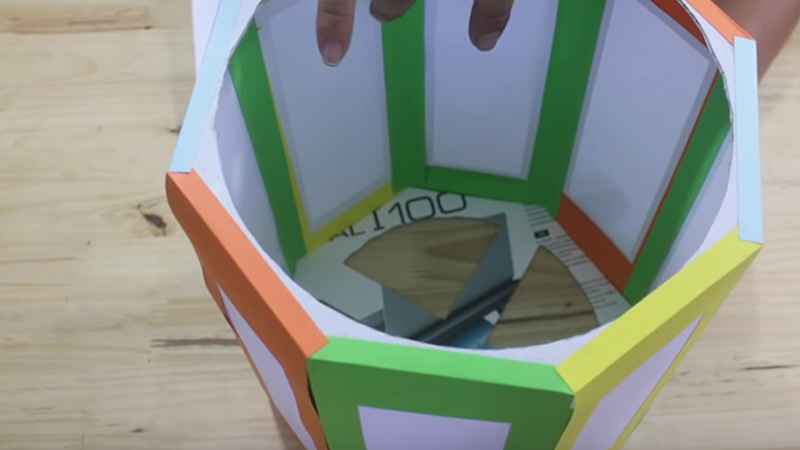
The spinning lantern is a marvel of simple mechanics. It features an outer square frame with an inner circular structure, resembling a miniature stage. The outer square is crafted from glossy paper, creating four reflective screens that capture and dance with light.
The inner circular structure is where the magic happens. It consists of a central axis formed by a straight, vertically positioned bamboo stalk, whittled to a point at both ends. Surrounding this axis are decorative paper rings, creating multiple layers that form intricate patterns when the lantern spins.
 Intricate Mechanics of the Spinning Lantern
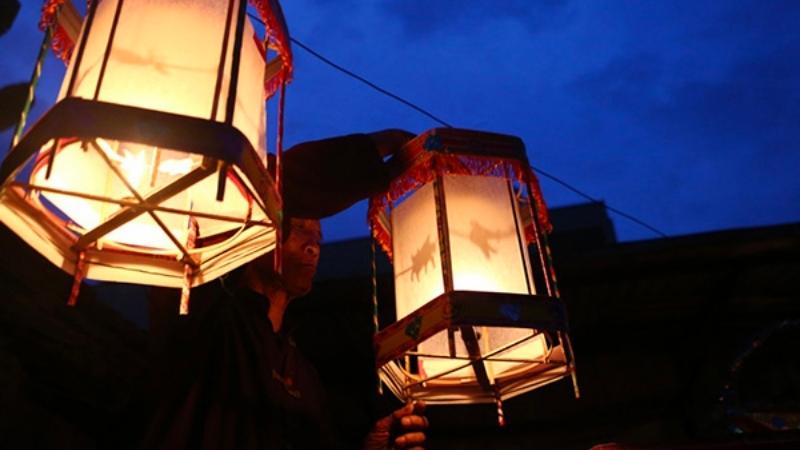
When the lantern is lit, the heat from the flame causes the air inside to expand and rise. This rising hot air collides with the paper rings, setting the lantern in motion. As the hot air escapes, cooler, denser air is drawn in, creating a continuous flow that keeps the lantern spinning gracefully.
The spinning lantern is a testament to the beauty of simplicity and the power of creativity. Now, let’s dive into the step-by-step process of bringing this enchanting lantern to life.
3 Crafting Your Own Spinning Lantern: A Step-by-Step Guide
Materials and Tools You’ll Need
- Adhesive
- Paper cutter
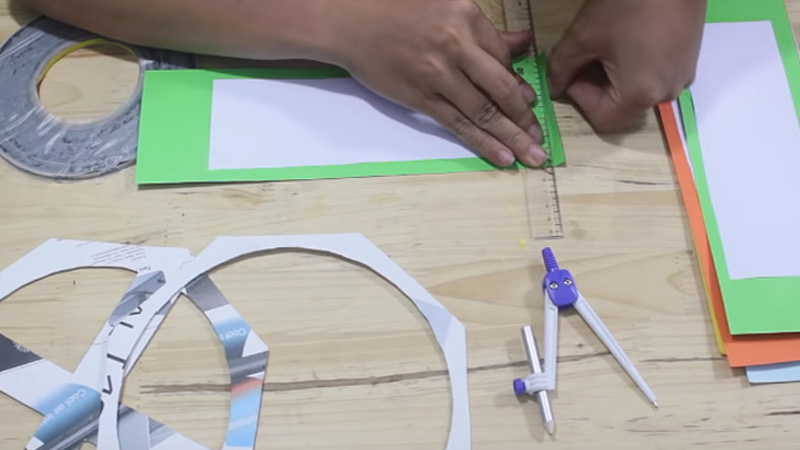
- Ruler
- Compass
- Approximately 6-7 sheets of A4-sized colored or white cardboard
- 3-4 sheets of thick paperboard
 Gather Your Materials
Step-by-Step Instructions for Creating Your Spinning Lantern
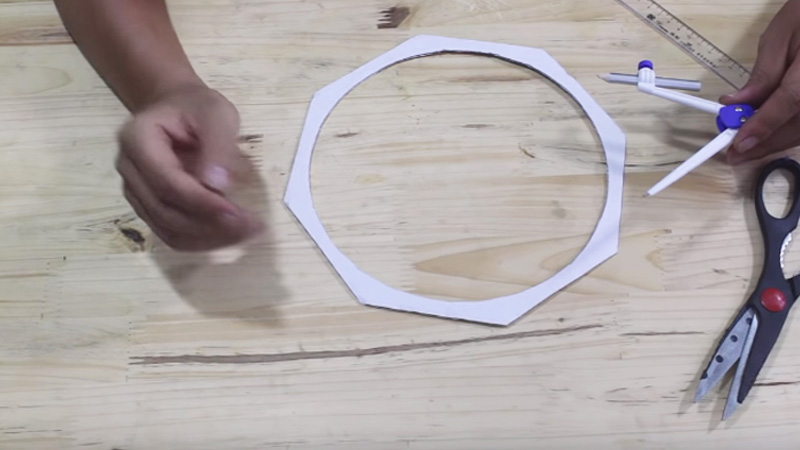
Using thick paperboard, cut out an octagon shape with each side measuring 9.5 cm. This will form the roof of your lantern, providing a sturdy base for the structure.
 Creating the Lantern Roof
Use another piece of thick paperboard to create a candle holder. It should also have a 9.5 cm side, matching the dimensions of the roof. Use a compass to find the center, and then measure and cut out a 1.5 cm triangle on each side to form the base of the candle holder.
 Crafting a Candle Holder
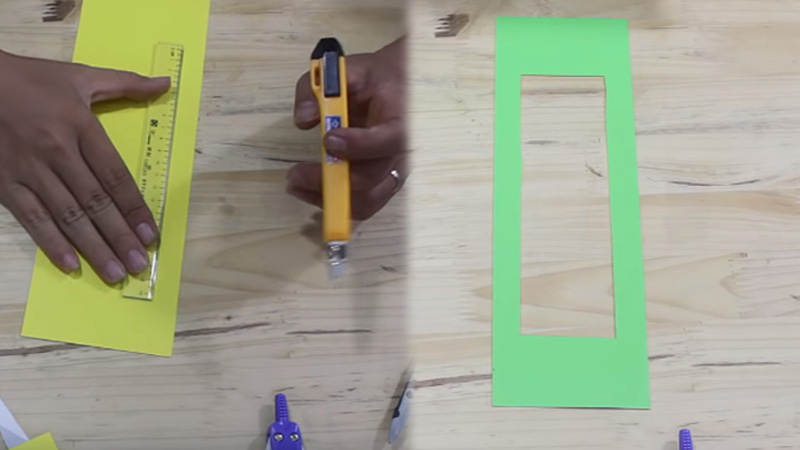
Cut the white A4 paper lengthwise into strips measuring 9.5 cm wide. You should get two strips from each sheet. Continue cutting until you have enough strips to create eight sides for your lantern. Feel free to experiment with different colors for a vibrant effect. Next, cut out the center of each strip to create a window-like opening.
 Building the Outer Shell
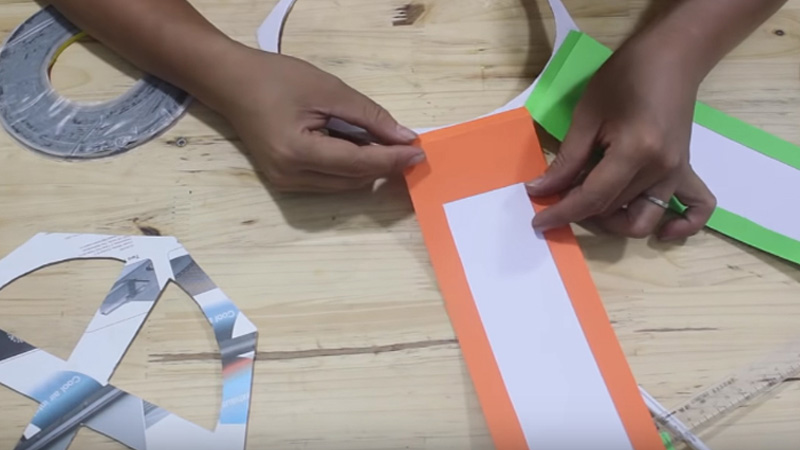
Measure and cut white paper to fit the window openings you created in Step 3. Use adhesive to carefully paste the paper onto the strips, creating neat white window frames. Repeat this step for all eight strips.
 Creating Window Frames
For each strip, carefully fold both ends inward by approximately 1 cm. This will create a neat finish and ensure the strips attach securely to the roof and base. Repeat this step for all the strips.
 Folding the Strips
Apply adhesive to the folded ends of the strips and carefully attach them to the lantern roof, ensuring one strip per side.
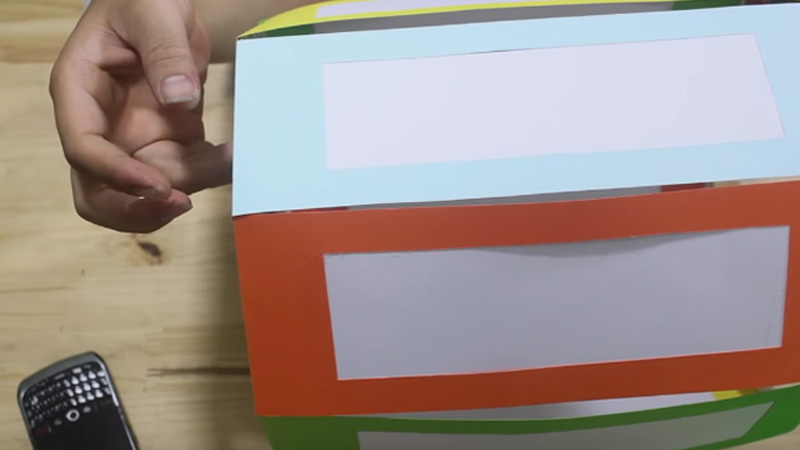 Attaching Strips to the Roof
Attach the other ends of the strips to the thick paperboard that will serve as the base for the candle holder. Your lantern structure should now be taking shape!
 Attaching Strips to the Candle Holder Base
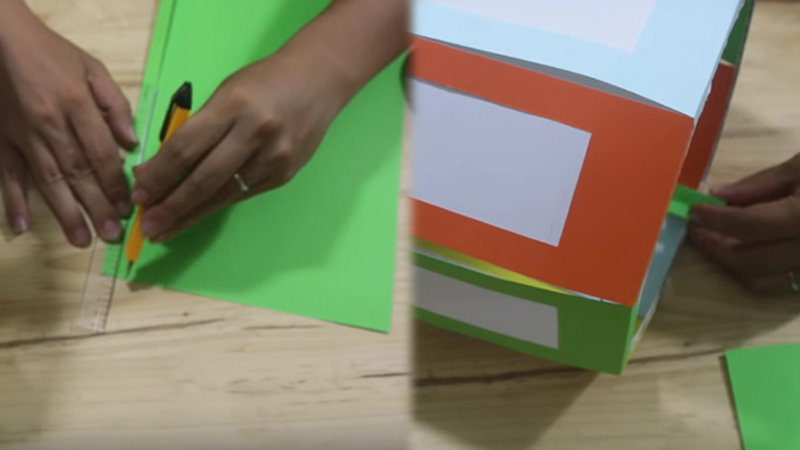
Cut additional strips of paperboard, measuring about 2-3 cm in width and the same length as the lantern’s height. Use these strips to secure the sides of the lantern together on the inside, adding stability to the structure.
 Securing the Sides
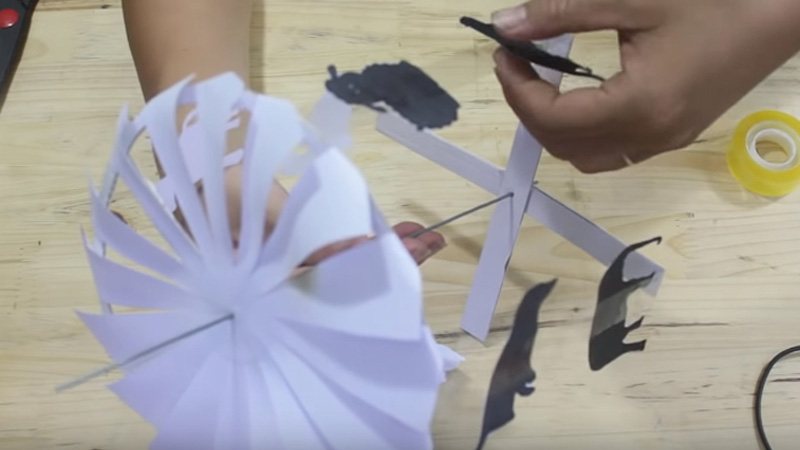
This step is all about bringing the lantern to life! You’ll be making the wind turbine fan, which will spin and cast enchanting shadows on the outer shell of the lantern. The fan should be slightly smaller than the size of the lantern.
Using a white sheet of paper, measure and cut out a circle that is smaller than the size of your lantern. Divide this circle into equal triangular segments using a pencil (aim for 8-16 triangles). Then, use a paper cutter to carefully cut along the pencil marks, leaving a 1 cm gap in the center. Next, fold each triangle towards the center by approximately 0.5 cm.
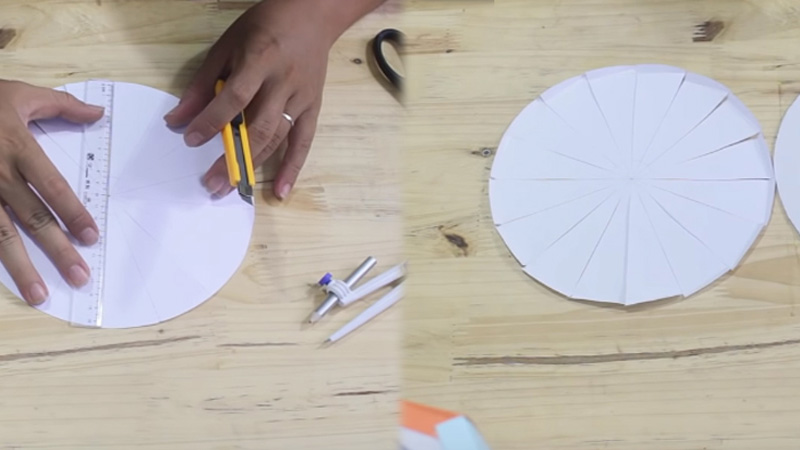 Creating the Wind Turbine Fan
Using another piece of thick paperboard, cut out a circle with the same diameter as the fan you just created. Cut out four triangles from this circle so that it fits snugly into the fan. Glue it to the center of the fan to secure it in place.
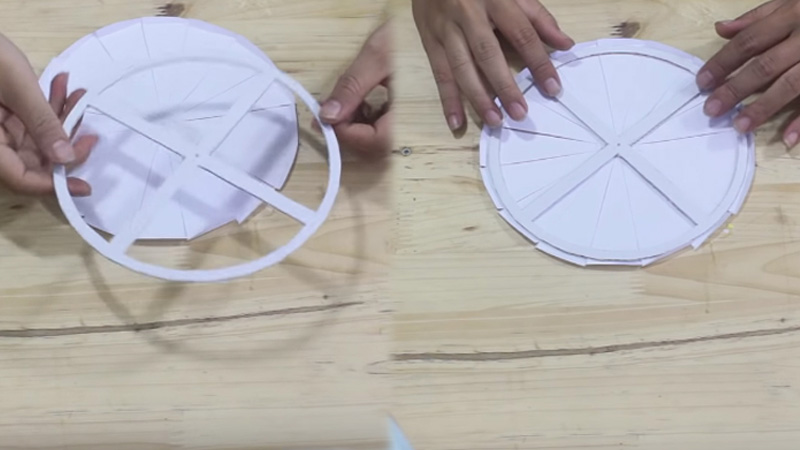 Securing the Fan
Continue gluing the remaining folded sections of the fan to the circle, as shown in the image. This will give your fan stability and ensure it spins smoothly.
 Gluing the Fan Sections
Once your fan is complete, punch a hole in its center. Attach a toothed axle to the fan, making sure it spins smoothly and doesn’t wobble.
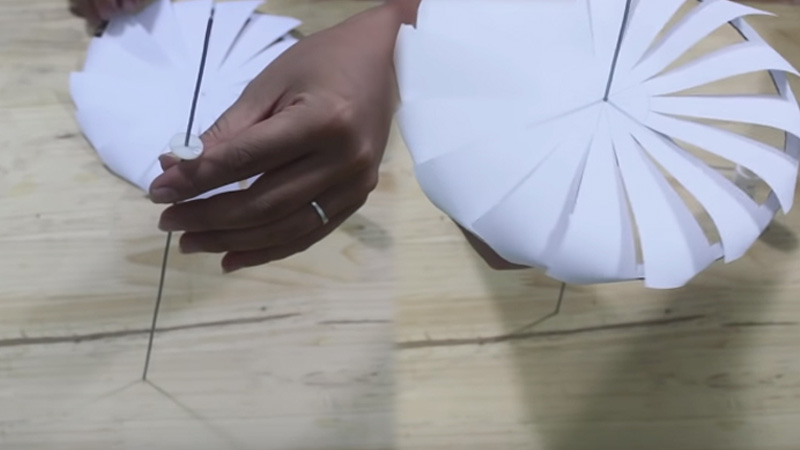 Attaching the Fan to the Central Axis
Use tape to attach images or decorations of your choice to the fan. Get creative and choose images that reflect your personality and interests!
 Decorating the Fan
Take a piece of iron wire and bend it into a U-shape. Punch two holes on either side of the lantern roof and insert the ends of the wire into them. This wire will provide support and stability for the central axis, ensuring your lantern spins smoothly.
 Securing the Central Axis
And there you have it! Your very own spinning lantern, crafted with care and creativity. Now, go ahead and light up your lantern, watch it spin, and enjoy the magic of the Mid-Autumn Festival with your loved ones.
Why Do We Use Green Bananas for the First and Fifteenth Day of the Lunar Month, but Ripe Bananas for the Mid-Autumn Festival?

The Mid-Autumn Festival, a unique cultural and spiritual event, holds a special place in the hearts of the Vietnamese. The moon worship and offerings made during this time are a beautiful tradition, a way to connect with nature and express gratitude for life’s blessings. It is a time-honored practice that brings communities together and adds a touch of magic to the already enchanting full moon night.
The Ancient Ritual: Understanding the Timing of Ancestral Worship on the 15th Day of the Eighth Lunar Month

The mid-autumn festival is an extra special full moon occasion, and it deserves your attention.
The Most Auspicious Time for Worship on the 15th Day of the 8th Lunar Month, Mid-Autumn Festival 2024 Brings Luck and Prosperity

“The significance of the mid-autumn festival’s evening rituals and their deep-rooted importance in both Feng Shui and cultural traditions is a fascinating topic. Let’s delve into why this evening holds such a special place in the hearts and practices of so many.”
The Golden Life: Those Born on This Auspicious Day Will Lead a Life of Wealth and Prosperity

In Eastern cultures, one’s birth date is believed to have a profound impact on their life path. But which birth dates are considered auspicious, bringing wealth, prosperity, and a life of fulfillment?
The Moon Festival: Revamping Your Wardrobe with Trendy Colors for a Youthful Vibe

This Mid-Autumn Festival, refresh your style and move away from the usual red. Try these trendy colors that are sure to make any woman look youthful, vibrant, and captivating.


