


Common Issues and Simple Solutions
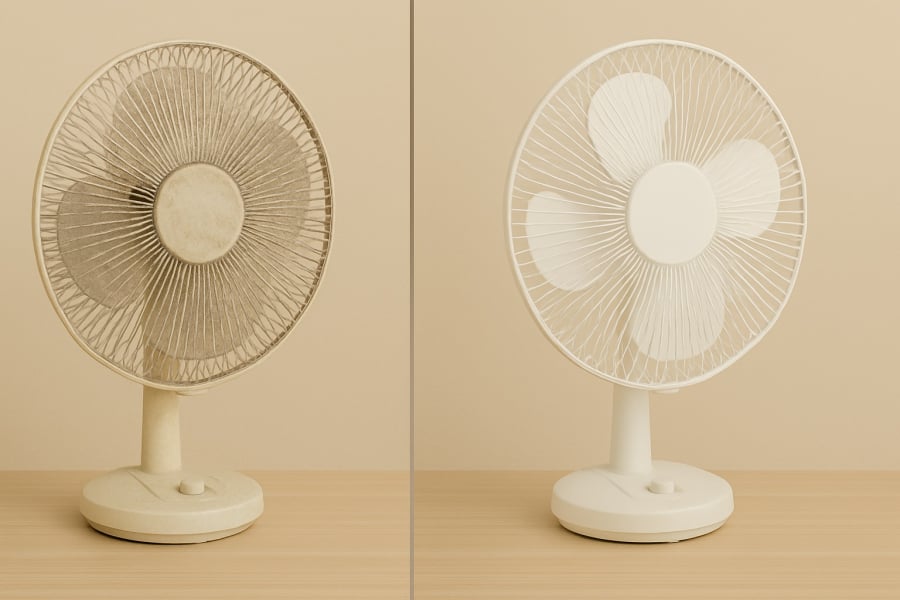
I’m sure we’ve all faced the issue of dusty electric fans after prolonged use. Not only does the dust reduce the cooling efficiency of the fan, but it also makes it look old and aesthetically unpleasing. Moreover, if left unattended for a long period, the accumulated dust can even affect your family’s health as it disperses into the air.
But worry not! Today, I’ll share an extremely quick and easy method to clean your electric fan without any complicated disassembly. In just 5 minutes, you’ll have a spotlessly clean fan ready to battle the scorching summer heat. The best part is that anyone can do it, from homemakers to those with limited experience in repairing household appliances.
Preparation: What You Need Before Getting Started
Before beginning the cleaning process, gather the following simple tools and supplies:
- Soft cloth: Used to gently wipe away dust and grime without scratching the fan’s surface.
- Spray bottle with water or diluted cleaning solution: Helps to loosen and remove stubborn dirt and stains.
- Small brush or old toothbrush: Ideal for reaching and cleaning tight spaces and small crevices.
- Diluted lemon juice (optional): If you prefer using a natural solution to eliminate odors.
Important note: Ensure that the fan is unplugged and switched off before you start cleaning. This basic yet crucial step guarantees your safety and prevents any accidental damage to the appliance.

Step-by-Step Guide: A 5-Minute Transformation
Step 1: Initial Dusting with a Dry Cloth
Use a soft, dry cloth to gently wipe down the exterior of the fan, including the fan cage and blades. This preliminary step helps remove loose dust and prevents it from flying everywhere when you spray water or cleaning solution.
Step 2: Lightly Spray with Water or Cleaning Solution
Apply a moderate amount of clean water or diluted cleaning solution to the fan blades and cage. Be cautious and avoid spraying directly onto the motor, as it may cause damage.
Step 3: Wipe Clean with a Damp Cloth
Using the damp cloth, thoroughly wipe away the dirt and grime. For tight spaces and small crevices, employ the small brush or old toothbrush to gently scrub away any remaining dirt. This method ensures a thorough cleaning without the need for disassembling the fan.
Step 4: Dry the Fan with a Soft Cloth
Once you’ve finished cleaning, use a dry cloth to wipe down the entire fan, ensuring no moisture is left behind. This step helps maintain the stability and functionality of the fan when it’s turned on again.
Step 5: Allow the Fan to Air Dry Completely
Finally, place the fan in a well-ventilated area and let it air dry completely before plugging it back in and using it. This step ensures that no residual moisture is left, which could potentially cause electrical issues or mold growth.
Advanced Tips for a Cleaner and Longer-Lasting Fan
- Natural Odor Eliminator: As suggested by expert Nguyễn Thị Thu Hương from VnExpress, you can create a safe and effective cleaning solution by mixing lemon juice with water in a 1:3 ratio. This mixture not only cleans but also eliminates unpleasant odors.
- Proper Fan Storage: After using the fan, cover it with a thin cloth to prevent dust accumulation. Additionally, perform regular monthly cleanings to maintain the fan’s performance and efficiency.
- Considerations for Different Fan Types:
- Ceiling Fans: When cleaning ceiling fans, use a sturdy ladder and proceed with caution. A mini vacuum cleaner can be handy for reaching tight spaces and small crevices.
- Evaporative Coolers: Don’t forget to clean the water tank to prevent bacterial growth.
Give It a Try and Share Your Experience!
With these 5 simple steps, you can easily clean your electric fan at home without any complicated disassembly. This method not only saves time but also ensures the safety of both you and your appliance. So, give it a try today and share your results with us! We’d love to hear your feedback and any additional tips you may have.
The Ultimate Guide to Cleaning Your Fan: A Hassle-Free Approach

“A dirty fan is an eyesore, but with these two simple tips, cleaning your fan will be a breeze. Get your fan looking brand new with minimal effort and maximum results.”
The Ultimate Guide to Cleaning Your Ceiling Fan Without Taking it Apart: Remove Stubborn Dirt in a Few Easy Steps

The buildup of dust on a fan is inevitable over time. Regular cleaning of this appliance is essential to protect your health and that of your family.
The Magic of a Plastic Bag: Revamping Your Fan for Surprising Benefits

Have you ever wondered about the trick of covering an electric fan with a plastic bag and turning it on? It may sound simple, but it has surprising effects that not everyone knows about.
“Keep Cool, Safe, and Energy-Efficient: The ‘5 Don’ts’ of Using Electric Fans in Summer”

An electric fan is a summer essential when the scorching heat takes over. While many rely on this appliance to stay cool, some users make fundamental mistakes that can affect their comfort and even their health.
The Magic Fan Cleaner: A Quick and Easy Solution for a Sparkling Fan

With just a few simple household items, you can easily clean your fan and have it looking and functioning like new.


