


“Growing Loofah in a Bucket: A Step-by-Step Guide”
For those with limited garden space, growing bitter melon and loofah in a bucket or container is a clever solution. This method is especially useful for loofah, as it thrives in warm, sunny conditions and can be grown successfully in a polystyrene box. By following these simple steps, you’ll be well on your way to harvesting your own loofah and enjoying its many benefits.
1 Tools and Materials for Growing Loofah at Home
- Loofah seeds: Look for F1 or high-yield varieties from reputable stores or seed suppliers.
- Potting soil: Nutrient-rich soil is key. Purchase from plant nurseries or create your own mix with garden soil, well-rotted manure, coconut coir, and organic humus.
- Large polystyrene box: Provides a spacious yet contained growing environment.
- Powdered lime and compost: Essential for healthy soil and plant growth.
Note: When preparing your soil, it’s best to sun-dry it for 5-10 days before planting to ensure any pathogens are eliminated.
2 Step-by-Step Guide to Growing Loofah in a Polystyrene Box
Step 1 Seed Preparation
Begin by soaking loofah seeds in warm water (a mix of 2 parts boiling water and 3 parts cold water) for 4-6 hours. Remove the seeds, rinse, and place them in a damp cloth to encourage germination. Within 36-48 hours, you should see the seeds beginning to crack.
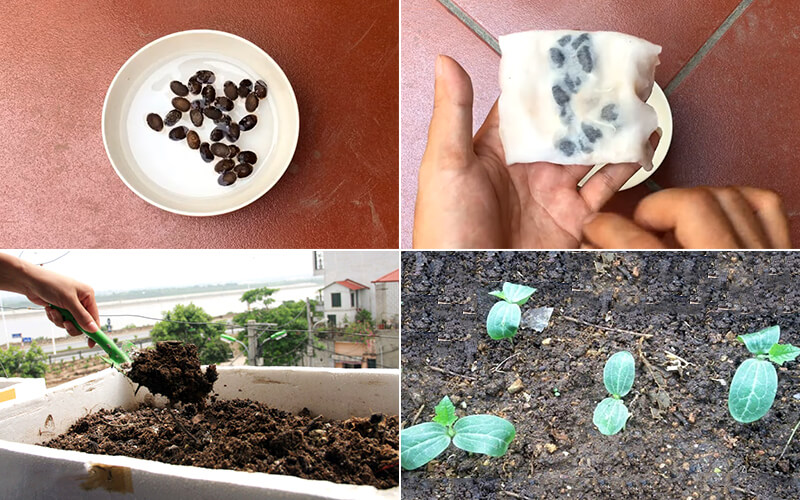 Soaking loofah seeds to initiate germination
Step 2 Planting the Loofah Seeds
Combine 1kg of powdered lime with 1-2kg of compost and mix it into your soil. Fill the polystyrene box with this mixture and sow your germinated loofah seeds. Cover them with a thin layer of soil, approximately 1cm thick. As the seeds sprout and develop 2-3 young leaves, thin the seedlings to maintain a distance of about 0.8-1m between each plant, arranged in double rows about 4-5m apart.
 Planting loofah seeds in the prepared polystyrene box
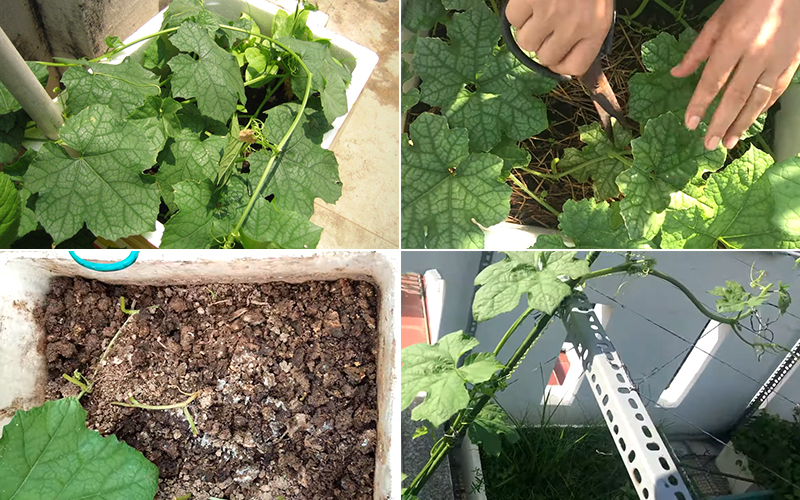
Step 3 Providing Support: The Trellis Method
As the loofah vines start to grow and droop, encourage their upward growth by guiding them onto a trellis. Once the vines reach a length of about 2m, gently loop them back down into the box so that 1m of the vine remains inside, while the remaining 1m continues to climb the trellis. This will stimulate root development at the nodes on the stem. Cover these newly developed roots with 5-10cm of soil.
 Using a trellis to support loofah vines and encourage root development
3 Caring for Your Loofah Plant
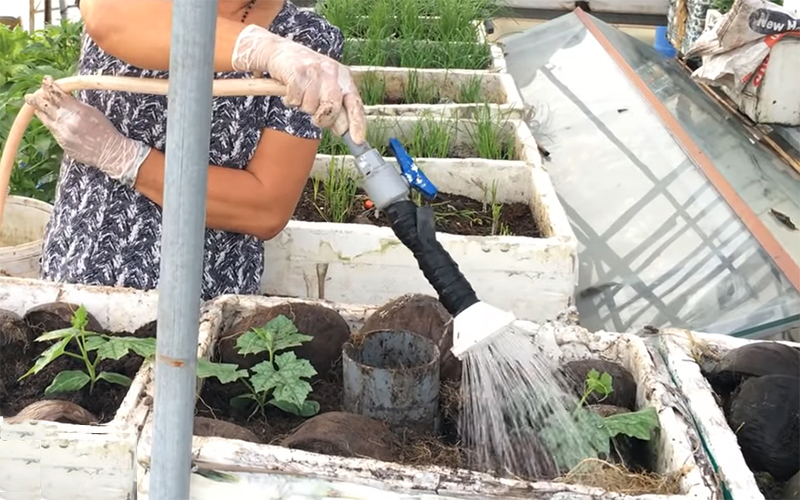 Watering loofah plants: twice daily in hot weather and once daily in cold weather
Watering is crucial for the health of your loofah plant. During hot weather, water the plants twice a day, once in the early morning and again in the late afternoon. In colder weather, once a day in the evening should suffice.
In addition to compost, supplement your plant’s nutrition with phosphate and potash fertilizers to increase fruit yield and prolong its life. To prevent pests and diseases, spray the plants with herbal solutions, starting 1-2 days after planting and continuing every 5 days. Mix 5ml of the solution with 1 liter of water for every 10m2 of plants.
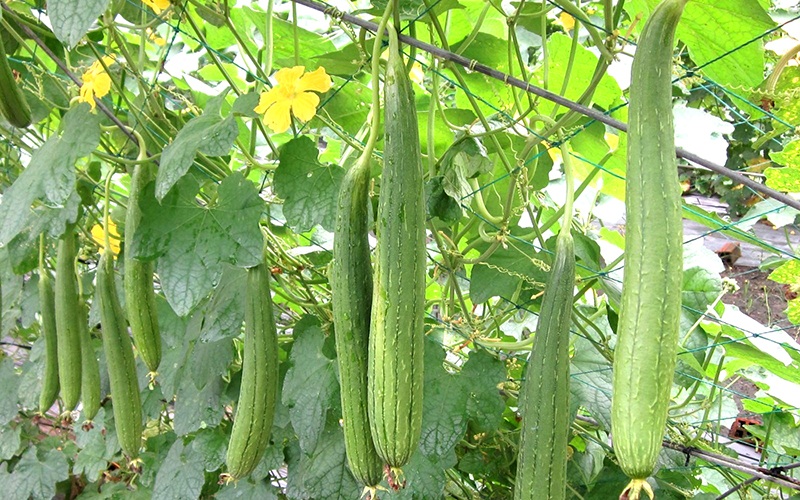 Loofah plants will bear fruit approximately 38-40 days after sowing
Your loofah plant will reward you with fruit in about 38-40 days. After each harvest, add earthworms to the soil, loosen it, and sun-dry for 2-3 days before planting a new loofah. With your very own homegrown loofah, you can create delicious and nutritious dishes for your family, such as Canh Kh? Qua N?u Th?t and Kh? Qua Xào Tr?ng.
Now you know the secrets to growing an abundant loofah vine at home. With this guide, you’ll be well on your way to a thriving loofah garden, providing shade and a plentiful harvest. Get growing!
The Safest Fruits: Two Low-Pesticide Options

In today’s health-conscious world, we’re always on the lookout for produce with minimal chemical interference. Discover two types of fruits that are not only tasty and affordable but also remarkably free of pesticides.
The Secret to Cooking Crisp and Tender Loofah: An Extra Step for the Perfect Dish

To grow lush, vibrant cucumbers that are a feast for the eyes and the taste buds, there are a few essential tips and tricks you need up your sleeve.
The Magic of Loofahs: Uncover the Ultimate Bath Time Companion

The humble sponge gourd, or luffa, is a wonder vegetable with a multitude of uses that you need to know about. From its fibrous flesh to its versatile seeds, this gourd is a powerhouse of benefits that are both practical and convenient. Discover the four amazing uses of sponge gourd that will leave you impressed and eager to incorporate it into your daily life.
6 Vegetables You Can Grow Pesticide-Free: A Healthy Harvest

This vegetable is a champion of the crop, thriving with minimal pesticides and offering a safe, healthy option for consumers.
The Safest Fruits: Two Low-Pesticide Options at the Market
The quest for pesticide-free produce is an important aspect of a healthy lifestyle. We’ve got two types of fruits that are not only delicious and affordable but also relatively free of chemicals.


