The Significance of Rose Colors
- Red: Romance and Love. Red roses are the ultimate symbol of romantic love and enduring passion.
- Deep Pink: Expresses gratitude and appreciation. A deep pink rose is a perfect way to say “thank you.”
- Light Pink: A symbol of joy and happiness. Light pink roses are often used to celebrate births, weddings, and other joyful occasions.
- Salmon Pink: Conveys sympathy or condolences. This soft, subtle shade of pink offers a gentle way to show you care.
- White: Represents purity, innocence, and new beginnings. White roses are popular in bridal bouquets and can also symbolize respect and remembrance.
- Yellow: Signifies friendship and caring. Yellow roses are a cheerful way to express your friendship and appreciation.
- Green: Rare and unique, green roses suggest mystery and opulence. They are often associated with abundance, prosperity, and good fortune.
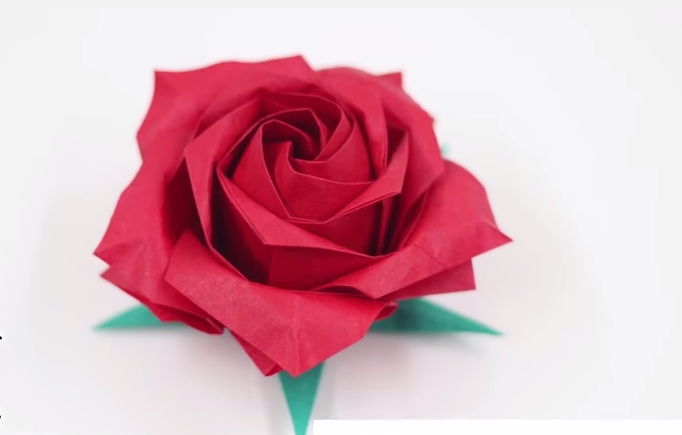
To create this beautiful origami rose, you’ll need the following:
- 1 square sheet of colored craft paper (30cm x 30cm)
- Paper cutter or scissors
- Pencil
- Toothpicks or skewers (for curling the petals)
- Ruler (optional) for making precise folds
Now, let’s learn how to make this stunning origami rose!
Step 1: Create Basic Folds and Structure
Start with a square sheet of origami paper.
Fold the paper diagonally to create a triangle.
Fold the triangle in half again to create a smaller triangle.
Open the paper and fold the sides into the center, creating a rectangle with four parallel folds. (Refer to the image for a clearer understanding.)
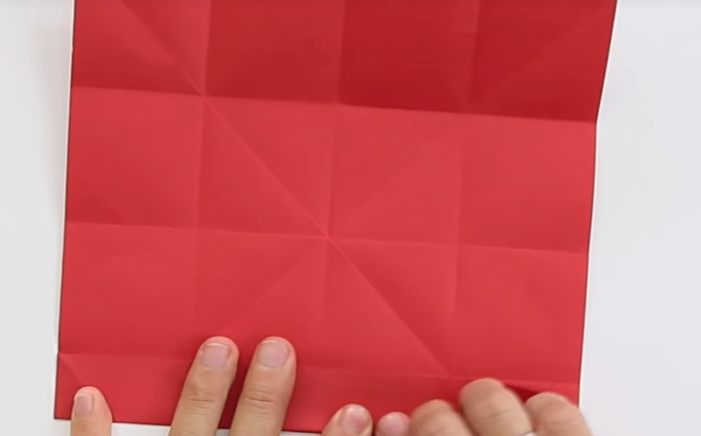
Continue making smaller, parallel folds, maintaining even spacing.
Step 2: Shape the Rose
Fold the four corners into the center, creating a smaller square with four new folds.
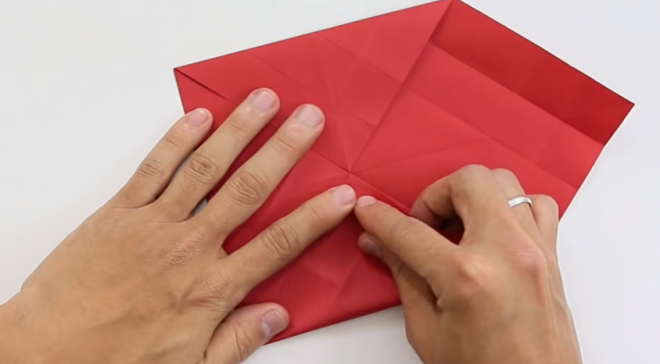
From the second parallel fold, fold each side towards the center, but do not crease. Repeat for all four sides.
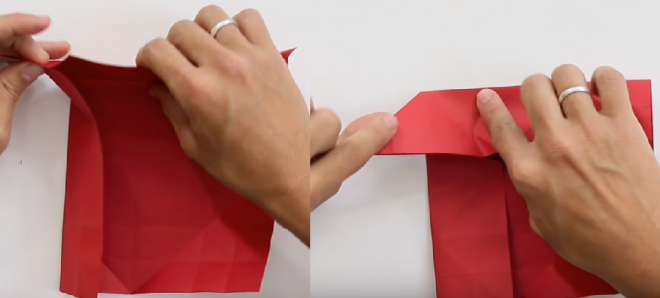
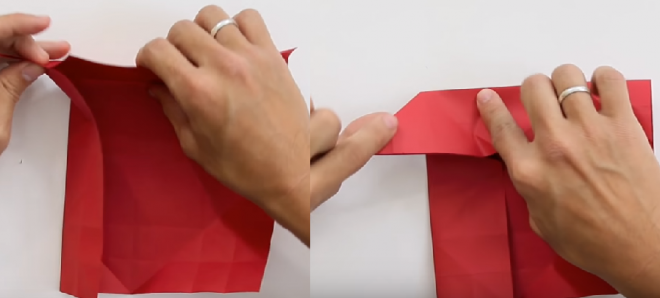
You will notice that the four corners now have diagonal folds. Fold each corner along its diagonal fold, alternating directions.
This will create a square with four “wings.”
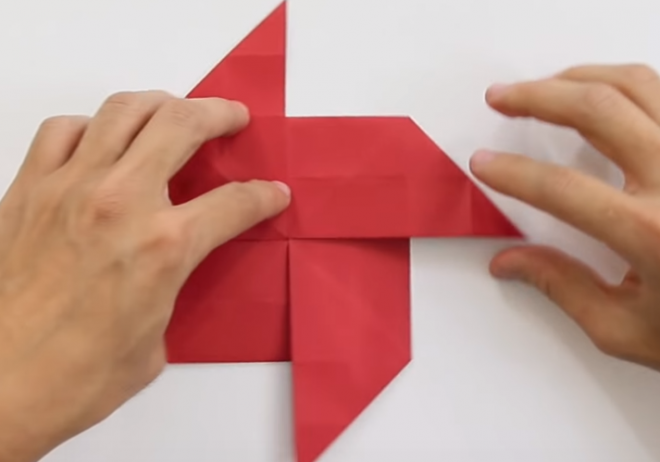
Each “wing” now has an outer fold. Open each wing along this fold to create a new, larger square.
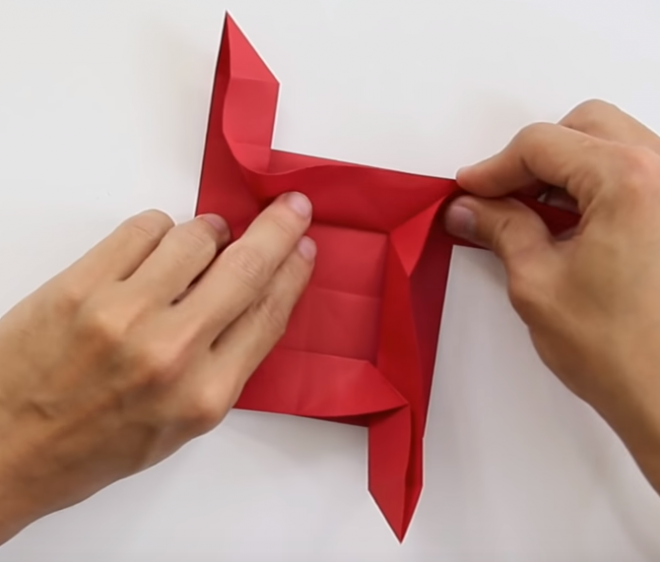
As you open the wings, you will see a new square with four partially opened “petals.”
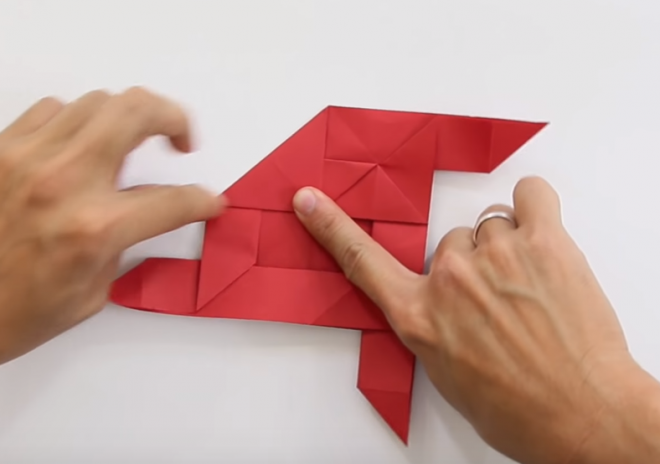
Near the base of each petal, you will see a diagonal crease. Fold each petal inward along this crease to form a triangular flap. Fold and crease the triangular flap to create a crisp edge.
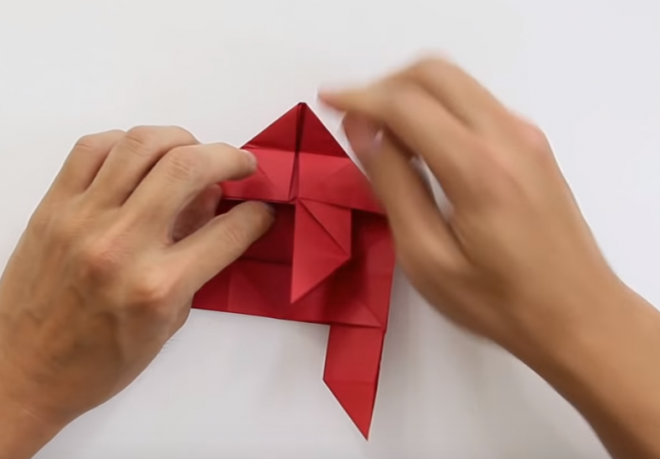
Tuck the first petal into the second, forming a small curve instead of a sharp crease. Hold it firmly to keep it in place.
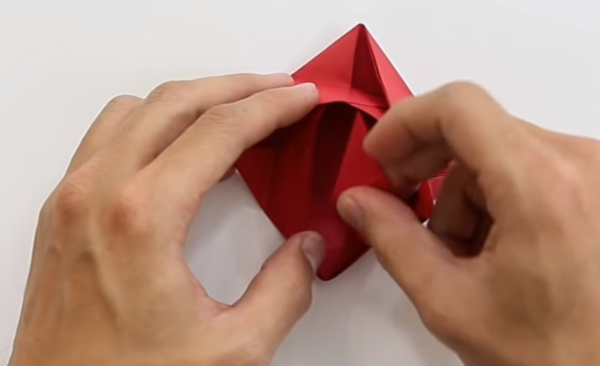
Repeat this process with the remaining petals.
You have now created the basic shape of the rose, with four petals wrapped around a square base.
Fold the four corners of the square base to create additional petal folds.
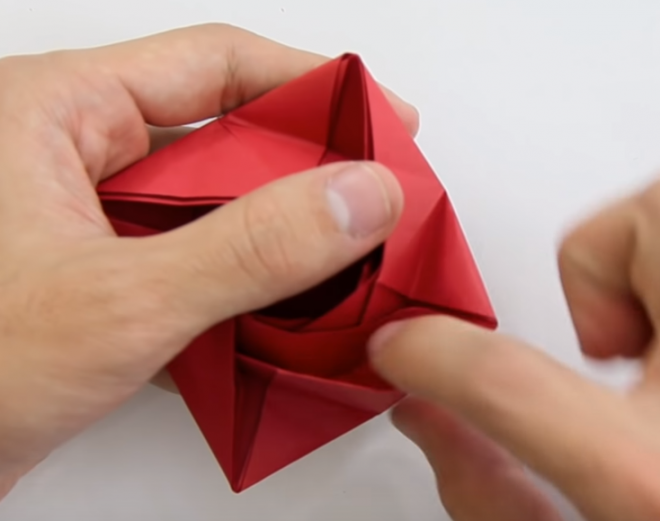
Reverse the folds of the triangular flaps to give the petals a curved shape.
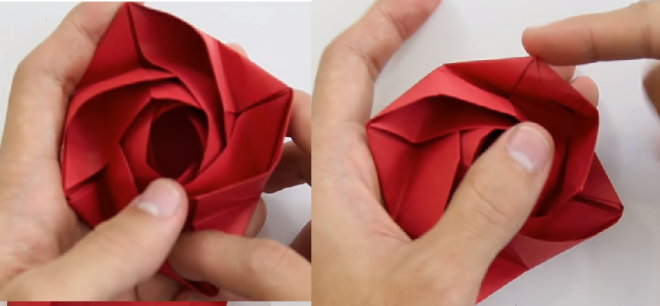
Step 3: Admire Your Creation
Your origami rose is now complete! You should have a beautiful rose with four petals tightly wound around a square base.
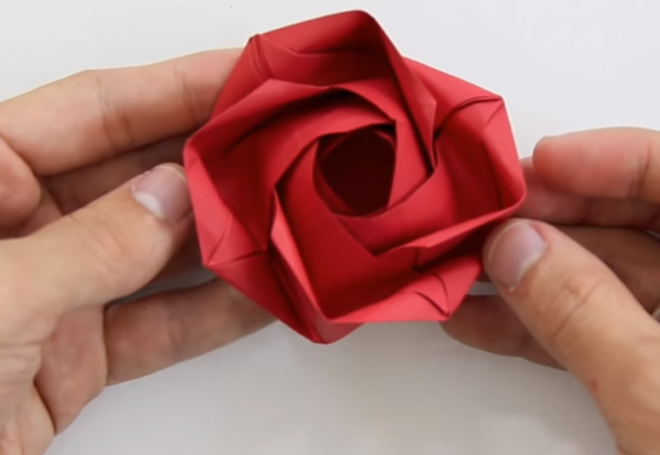
Note: Choose vibrant, colorful paper to create stunning roses.
Good luck, and happy folding!
The Art of Origami Paper Folding
 Origami Paper Folding’>
Origami is a captivating art form that originates from Japan, with a rich history dating back centuries. It involves the intricate process of folding paper to create exquisite designs and shapes. This ancient craft, known as “Origami” in Japanese, has captivated people worldwide with its unique ability to transform a simple sheet of paper into a work of art. The very name, derived from “ori” meaning folding and “kami” meaning paper, hints at the delicate precision and creativity inherent in this traditional art form.


