


The process of creating a vacuum cleaner from a plastic bottle is an innovative and fun project to undertake. In this guide, we’ll take you through the simple steps and tools required to build your very own homemade vacuum cleaner. So, let’s get started!
1 Materials
- 1 empty 1L plastic bottle – the foundation of your vacuum cleaner.
- 1 thin metal sheet (15 x 10cm) – this will be used to create the fan blades.
- Basic tools: scissors, a marker pen, a screwdriver, and a ruler – for measuring and cutting.
- 1 pen refill – an essential component for the motor assembly.
- 1 piece of gauze – acts as a dust filter.
- Adhesives: double-sided tape and a glue gun – for securing various parts.
- A section of flexible conduit – for the suction hose.
2 Creating Your Vacuum Cleaner
Step 1 Prepare Your Materials
Start by gathering your materials. Take your empty 1L plastic bottle and thin metal sheet (15x10cm). Ensure the bottle is clean and dry before proceeding.
 Cut the plastic bottle in half
Prepare your metal sheet by cutting it to size, if necessary.
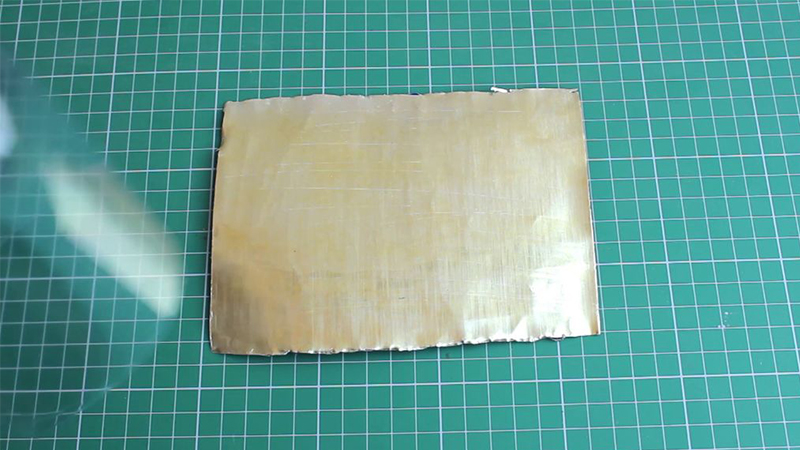 A thin metal sheet is essential
Step 2 Craft Your Fan Blades
Using your ruler and marker pen, carefully draw a circle on the metal sheet that matches the diameter of your plastic bottle. This will be the base of your fan blades.
 Craft a circle from the metal sheet
Divide the circle into 8 equal parts by drawing 4 intersecting lines. This will create the fan blade shape.
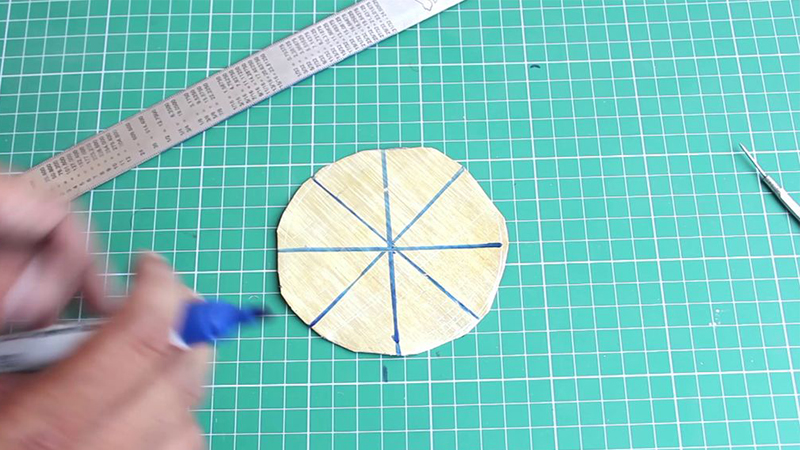 Divide the circle into equal parts
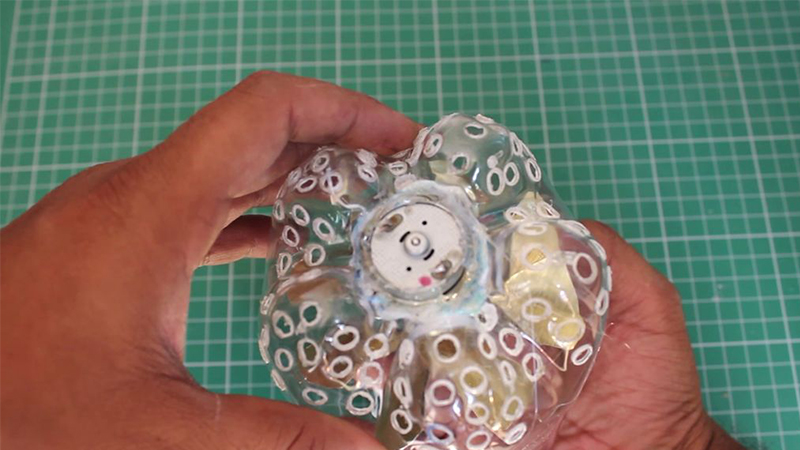
Create a hole in the center of the metal sheet to attach to the motor.
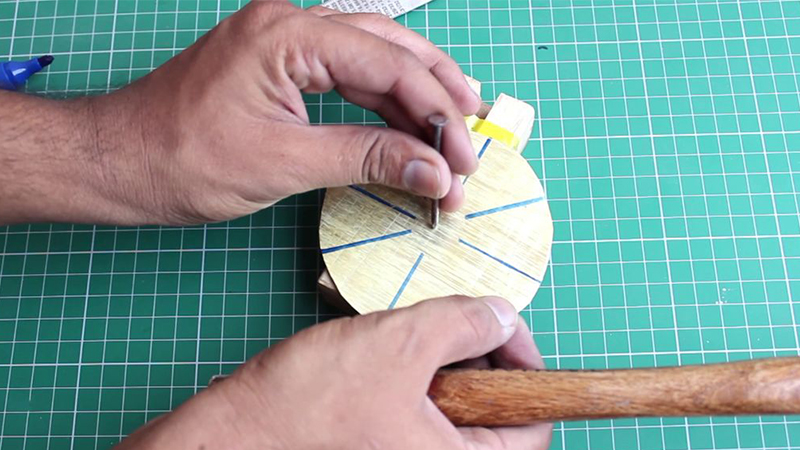 A central hole is essential
Cut along the drawn lines about 1 cm from the center hole to create your fan blades.
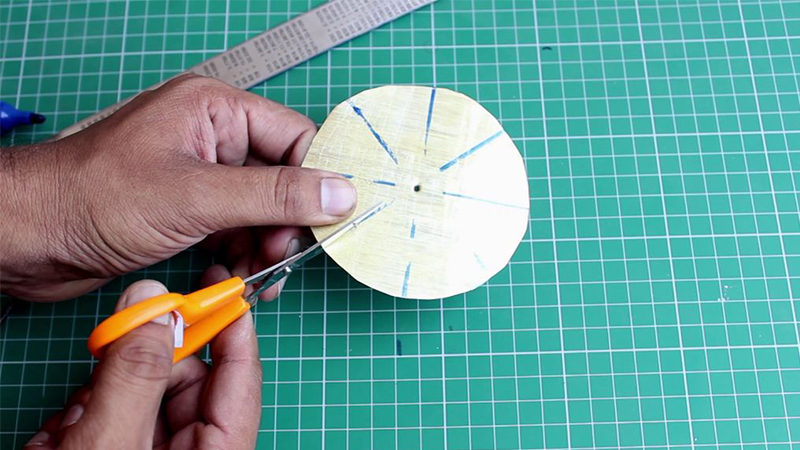 Cutting the fan blades
Bend the fan blades gently as shown in the image to give them a curved shape.
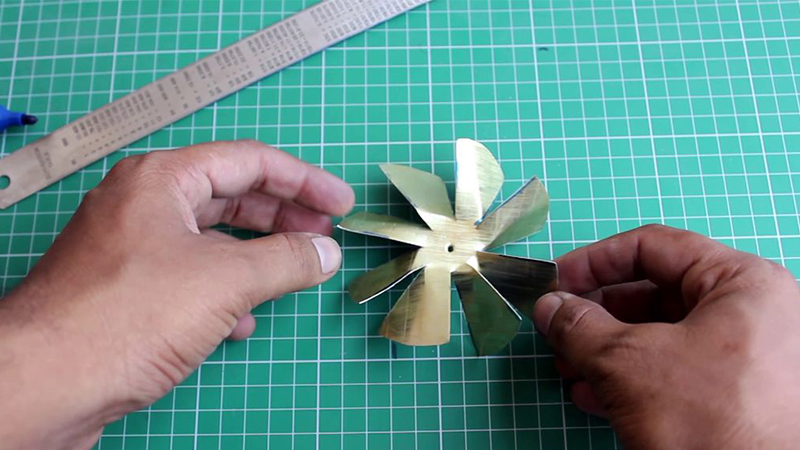 Bend the fan blades with care
Step 3 Assemble the Motor
Take the refill from a disposable pen and attach it to your motor. This will act as the shaft for your fan blades.
 Utilize the pen refill creatively
Cut off any excess pen parts and attach the fan blades to the motor, securing them firmly with glue.
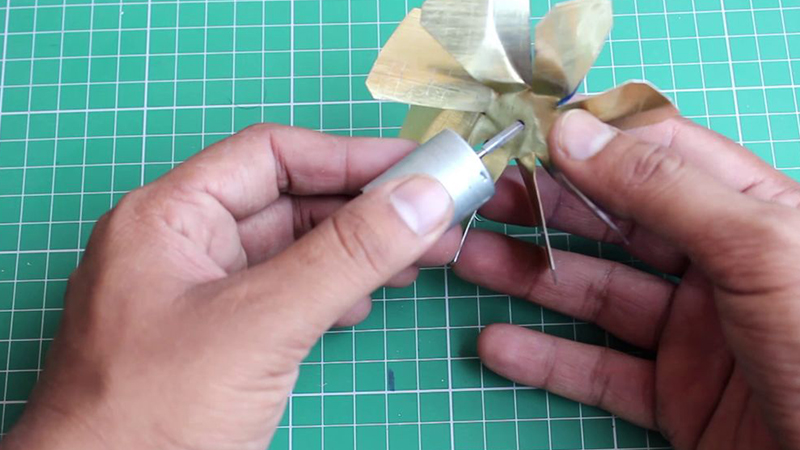 Secure the fan blades in place
Step 4 Attach the Fan Assembly
Draw a circle on the bottle that matches the dimensions of your motor assembly. This will be the cut-out for the fan to sit in.
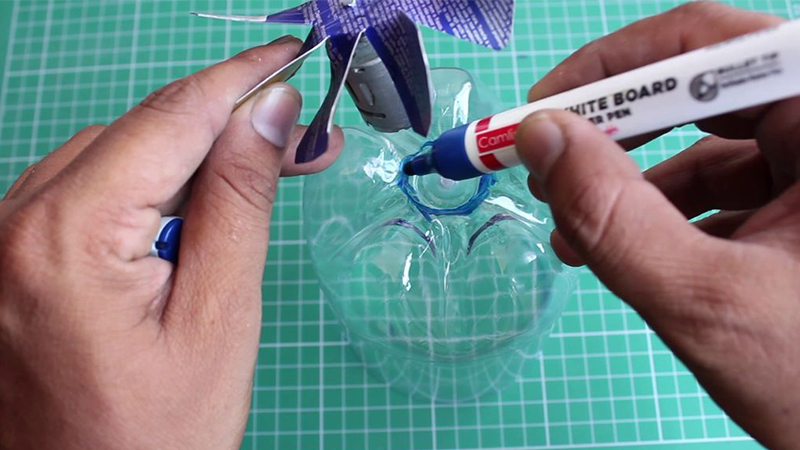 Draw a circle for the motor
Create multiple small holes at the bottom of the bottle to allow for airflow and secure the motor in place.
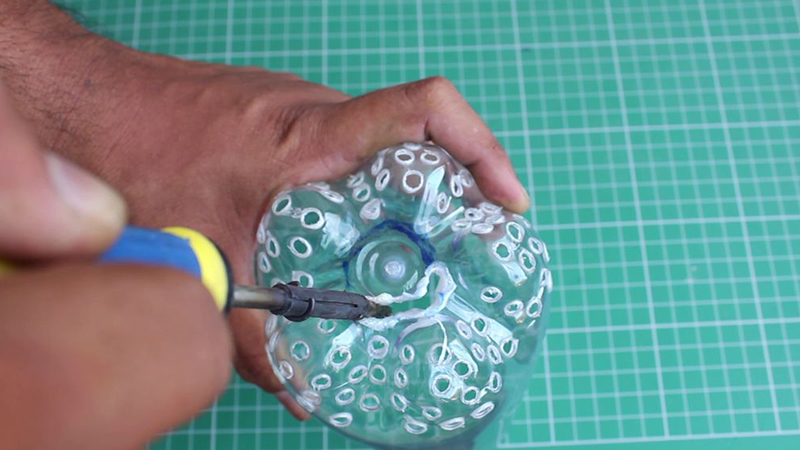 Small holes aid airflow
Carefully cut out the drawn circle and place your motor assembly inside the bottle, securing it with glue.
 Secure the motor assembly
Step 5 Craft Your Dust Filter
Take the remaining top part of the bottle and place it upside down. Using this as a guide, draw a circle on your piece of gauze, about 1-2 cm larger than the bottle’s diameter.
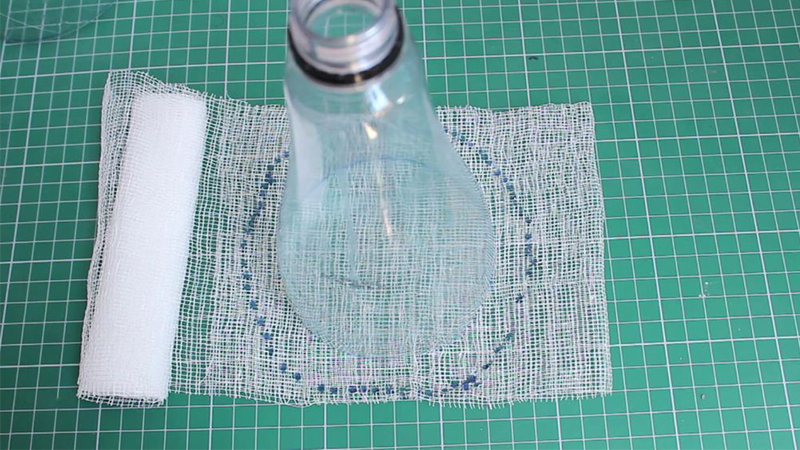 Draw a circle on the gauze
Attach double-sided tape around the rim of the bottle and fix the gauze in place to create your dust filter.
 Secure the gauze with tape
Use your glue gun to secure the two bottle parts together, ensuring a tight seal.
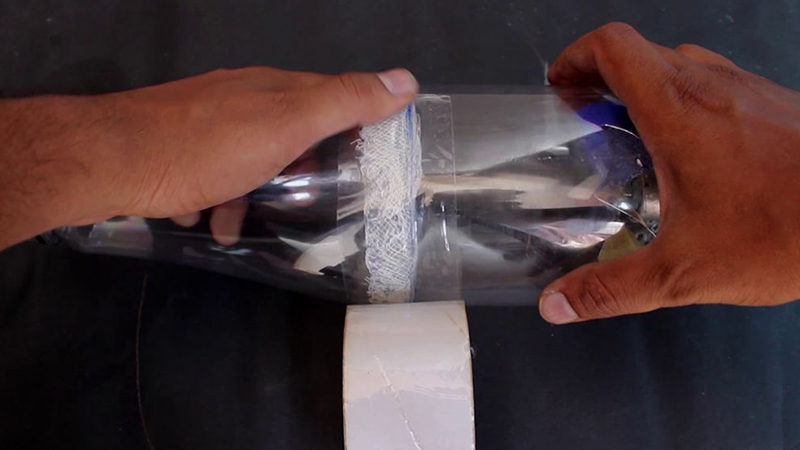 Join the bottle parts
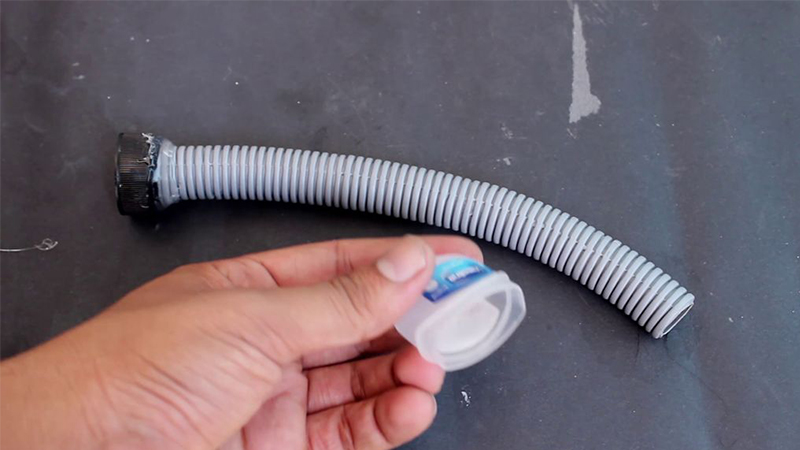
Step 6 Create the Suction Hose
Cut a large circular hole in the bottle cap. This will be the attachment point for your suction hose.
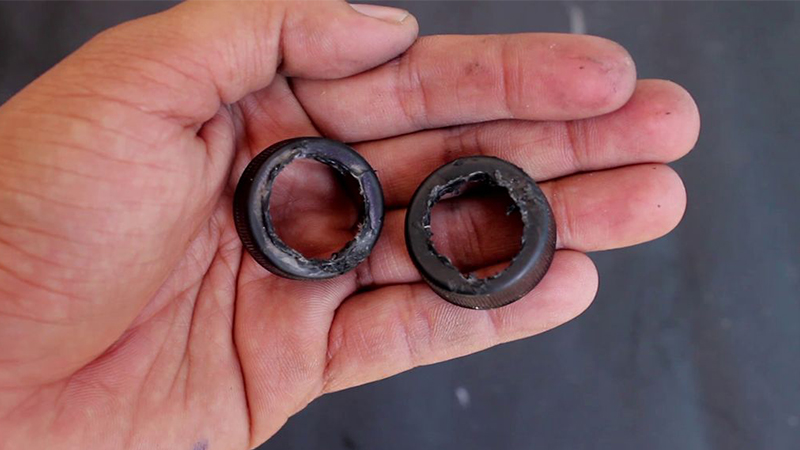 Modify the bottle cap
Secure the capped end of the flexible conduit to the bottle, creating your suction hose.
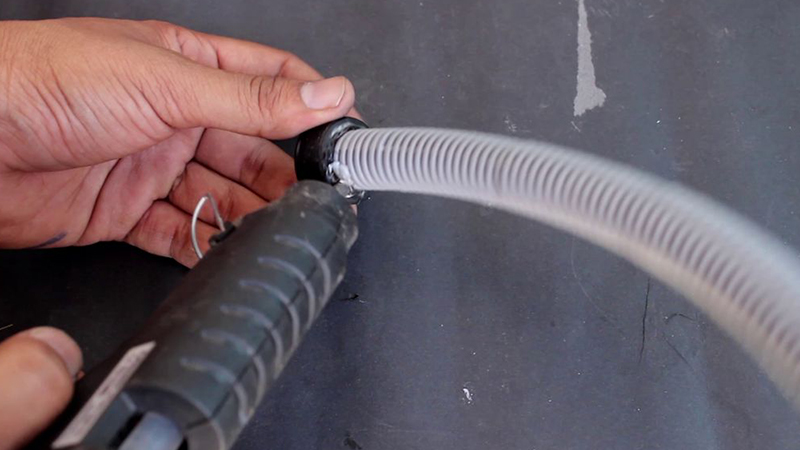 Attach the suction hose
For the suction nozzle, you can use a small plastic bottle or a lip balm container.
 Craft a suction nozzle
Step 7 Final Touches
Decorate your vacuum cleaner as you wish and connect it to a power source. You can now enjoy your very own homemade vacuum cleaner!
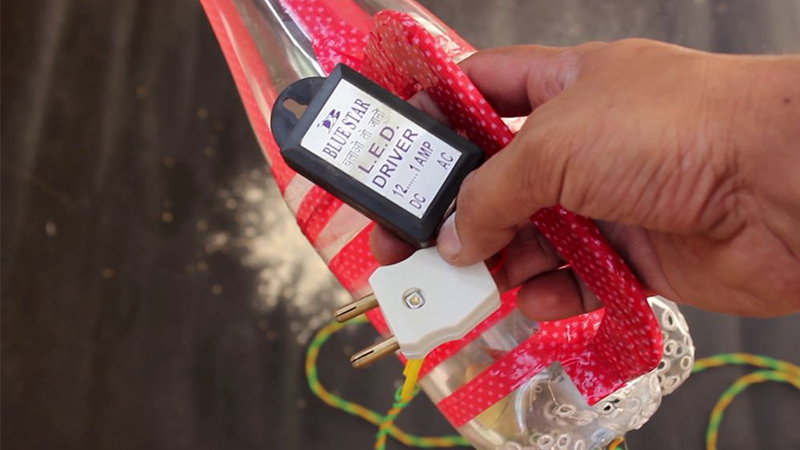 The final product
The Magic of Chopsticks: Unconventional Ways to Save Money.

If your toilet is clogged with toilet paper or debris, you can unclog it yourself with two simple household items: a pair of chopsticks and an empty plastic water bottle.
The Smartest Hack to Reuse Plastic Bottles: Brush It Off

This method is suitable for every family, and it’s worth a try.
Unblocking a Toilet: Hot or Cold Water Flush?

“Pouring boiling water into a clogged toilet may be a widely suggested quick fix, but is it truly effective?”
The Ultimate Guide to Mattress Cleaning: A Hassle-Free Approach

If you’re dealing with a small stain, fret not! You can easily tackle it without resorting to washing your mattress. The best part? The cleaning tools and ingredients are likely already in your home.
The Ultimate Guide to Cleaning Dusty Ceiling Fans: No Need to Dismantle, Just Follow These Easy Steps for a Spotless Finish!

Many people are reluctant to clean their ceiling fans due to the time-consuming process of dismantling and reassembling them. With this innovative method, you can effectively clean your fan without having to remove it from the ceiling or resort to a water wash. A quick and easy solution to keep your fan spotlessly clean!


