


Here are some simple ways to make delicious and plump bean sprouts at home using readily available kitchen tools such as plastic baskets, plastic bottles, milk cartons, and towels.
Making bean sprouts is very easy, so let’s get started and add this healthy and tasty vegetable to our family’s meals.
How to Make Bean Sprouts
- Are Bean Sprouts Good for You?
- 1. Making Bean Sprouts with Paper/Plastic Cups
- 2. Making Bean Sprouts with a Plastic Basket
- 3. Making Bean Sprouts with a Towel
- 4. Making Bean Sprouts with a Milk Carton
- 5. Making Bean Sprouts with a Mesh Bag
- 6. Making Bean Sprouts with a Steamer
- 7. Making Bean Sprouts with a Plastic Bottle
- 8. Making Bean Sprouts with a Glass Jar
- 9. Making Bean Sprouts with a Styrofoam Box
- 10. Making Bean Sprouts with Sand
- 11. Growing Bean Sprouts with Ash
- 12. Making Bean Sprouts with a Sprouter
Are Bean Sprouts Good for You?
Bean sprouts are rich in vitamins (especially vitamin C), minerals, amino acids, protein, and phytochemicals – all essential for plant growth and highly nutritious for humans. As a result, bean sprouts are a popular vegetable among many Vietnamese people. You can eat them raw, drink sprout water, or use them as an ingredient in various dishes such as stir-fried sprouts, sprout soup, or pickled sprouts.
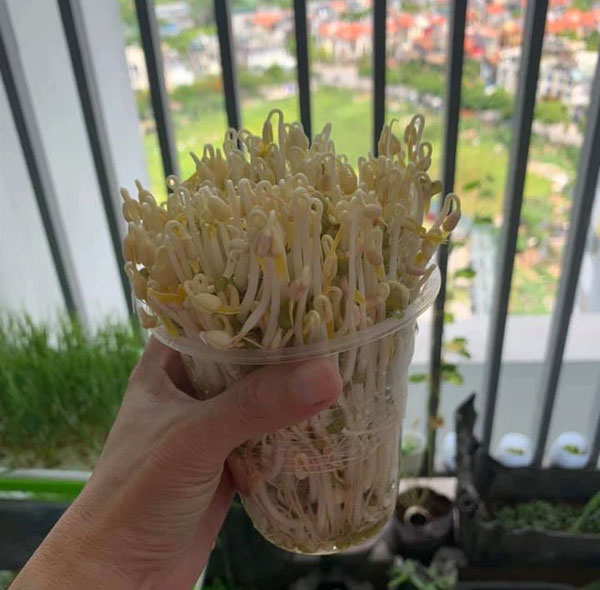
1. Making Bean Sprouts with Paper/Plastic Cups
Ingredients
- 100g of green beans with their shells intact
- Disposable plastic cups
- Skewers and a knife to poke holes
- Clean water
Instructions
Step 1: Soak the green beans with their shells in clean water for about 6-8 hours. You can do this overnight or before you go to work.
Step 2: Rinse the beans gently and drain.
Step 3: Use the skewers and knife to poke holes in the bottom of the plastic cups for drainage.
Step 4: Place the beans in the cups and cover them with a soft paper towel.
Step 5: Submerge the cups in a basin of water.
Step 6: Cover the cups with black plastic bags or place them in a dark place.
Step 7: In the morning, evening, and before going to bed, take out each cup of sprouts and soak them in water for about 5 minutes. After 2-3 days, your bean sprouts will be ready for harvest.
2. Making Bean Sprouts with a Plastic Basket
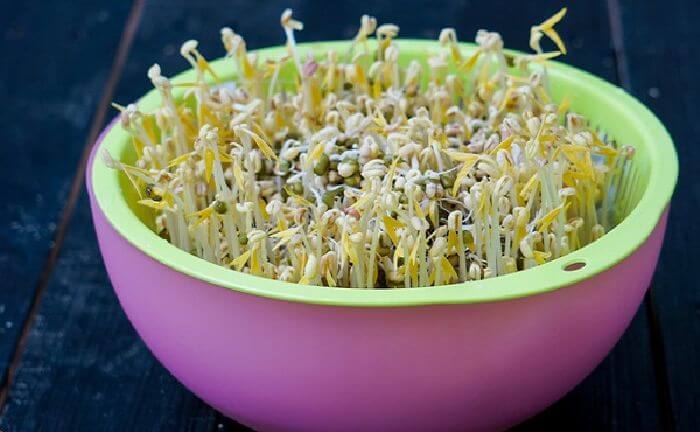
Plastic baskets used for washing vegetables, stacking bowls and plates, etc., are common household items. You can easily use these baskets to make bean sprouts at home!
Preparation
- Green beans: 100g
- Plastic basket, cotton towel, ceramic plate, basin or pot for soaking
Instructions
- Rinse the green beans, remove any damaged or shriveled beans, and soak them in cold water for about 6-8 hours. Then, rinse them again with clean water.
- Wrap the beans in a cotton towel and place them in the basket. Place the ceramic plate on top to weigh it down, and then put the basket in the prepared basin or pot in a dark corner.
- Soak the basket in water twice a day (morning and evening) for 5 minutes each time, then remove it and let it drain before placing it back in the basin or pot.
- After 2-3 days, your bean sprouts will be ready for harvest. Before harvesting, use scissors to cut off the roots that have grown outside the cotton towel for easier collection and cleaning.
Making bean sprouts with a plastic basket is very hygienic, and you don’t have to worry about dirt or sand. The sprouts will be plump, firm, and white. You can confidently use them to prepare delicious dishes for your family.
3. Making Bean Sprouts with a Towel
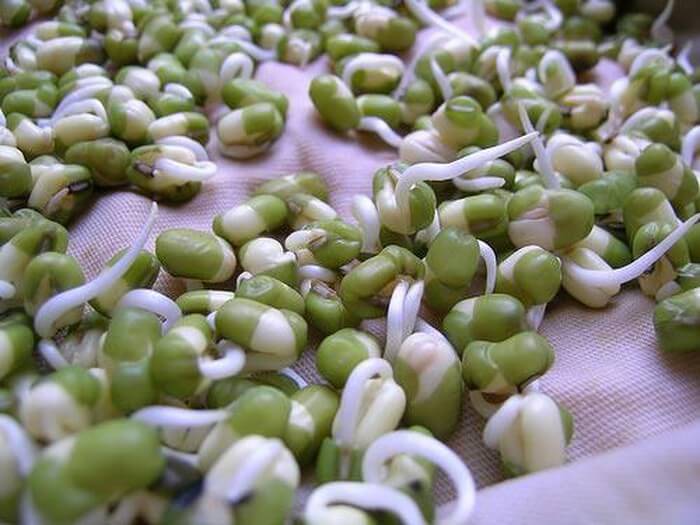
If you have cotton towels, cotton cloths, or mosquito nets at home, don’t miss out on this incredibly simple method of making bean sprouts!
Preparation
- Green beans: 100g
- Cotton cloth/towel or mosquito net, a tray with drainage holes
Instructions
- Rinse the green beans, remove any damaged beans, and soak them in warm water with a ratio of 3 parts boiling water to 2 parts cold water. Change the water every 6 hours, and soak for a total of 12 hours. By then, you will notice that the bean shells have cracked, and the beans have started to sprout.
- Rinse the beans in a gentle stream of water to avoid breaking the sprouts.
- Spread the cloth/towel on the tray and evenly distribute the beans. Then, cover them with another damp cloth.
- Place the tray in a well-ventilated area, away from direct sunlight. Every 4 hours, use a spray bottle to mist the cloth with cold water.
- After 3 days, your bean sprouts will be ready for harvest. Simply lift them gently with your hands.
Making bean sprouts with cotton cloths, towels, or mosquito nets makes harvesting easier because there are fewer roots. Avoid placing the tray in direct sunlight, as it will cause the sprouts to become thin and weak. Also, avoid overwatering the cloth to prevent the sprouts from drowning.
4. Making Bean Sprouts with a Milk Carton
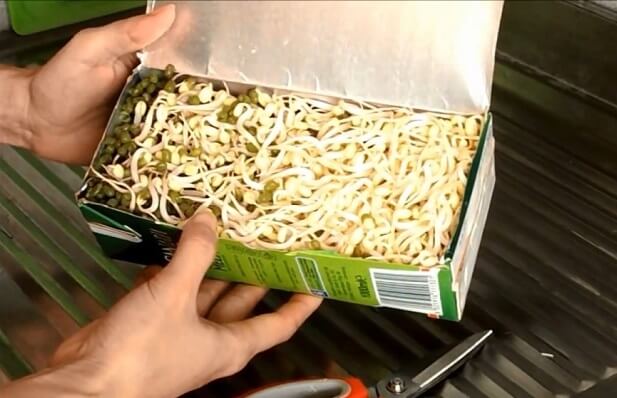
Don’t throw away those empty milk cartons, fruit juice cartons, or other similar containers! You can use them to make bean sprouts conveniently, quickly, and economically.
Preparation
- Green beans: 60g
- Clean 1-liter milk carton (or fruit juice, water, etc.) with holes poked in it for drainage
Instructions
- Rinse and remove any damaged or worm-infested beans, then soak them in warm water until the shells crack. Rinse again with clean water.
- Cut one side of the carton (without removing it completely) and poke a few small holes around it for drainage. Make sure the holes are not too big, so the water can drain while the beans remain inside.
- Place the beans in the carton, close the lid, and store it in a well-ventilated area, away from direct sunlight (such as under the kitchen stove).
- Water the beans twice a day, in the morning and evening.
- When you notice the carton puffing up (usually after 3-4 days), your bean sprouts will be ready for harvest.
This method of making bean sprouts in a milk carton is simple and easy. The sprouts will be white and plump, and the beans will still be attached to the sprouts, giving them a delicious nutty flavor. Additionally, this method is very space-efficient, as the cartons are compact, allowing you to make multiple batches at once or stagger your batches to always have fresh sprouts available.
5. Making Bean Sprouts with a Mesh Bag
If you have mesh bags for fruits or vegetables, shopping bags, or children’s snack bags, you can rinse them and use them to make bean sprouts for your family.
Preparation
- Green beans: 100g
- Mesh bag, pot for soaking
Instructions
- Rinse the green beans, remove any dirt or damaged beans, and soak them in water for about 6-8 hours. Then, rinse them again with clean water.
- Place the beans in the mesh bag and tie the opening loosely. Make sure the bag is not tied too tightly or too loosely, as this can affect the growth of the sprouts.
- Place the bag in the pot, cover it, and store it in a well-ventilated area. If you are making multiple batches, do not stack the bags on top of each other in the pot.
- Water the sprouts every morning by filling the pot with water up to the level of the beans and letting it sit for 5-15 minutes before draining the water and covering the pot again.
- Loosen the bag every day, depending on the growth of the sprouts, but not too much to avoid long roots.
- After 4-5 days, your bean sprouts will be ready for harvest. Simply untie the bag and shake it gently to release the sprouts without sticking.
With this method, watering the sprouts daily is very convenient, and you can easily monitor their growth to harvest them at the right time.
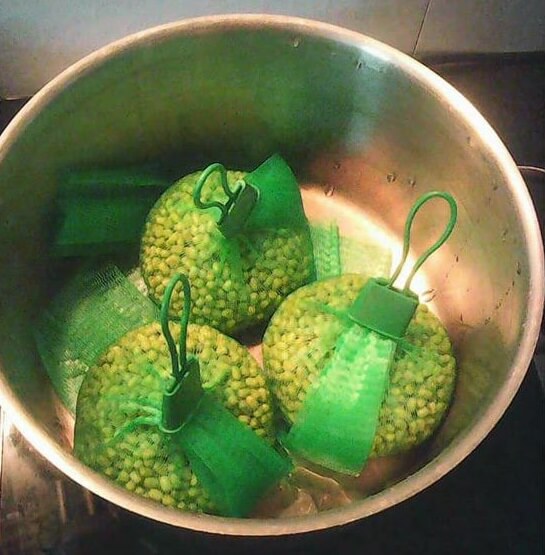
6. Making Bean Sprouts with a Steamer
A steamer is a common household item, and you can easily use it to make bean sprouts as well.
Preparation
- Green beans: 300g
- Steamer, cotton cloth, plate or pickling press
Instructions
- Rinse the green beans and soak them in cool water for about 6-8 hours. When the shells crack, rinse them again with clean water.
- Line the bottom of the steamer with a cotton cloth to prevent the beans from falling through.
- Place the beans in the steamer and cover them with leaves such as bamboo leaves to help the sprouts grow faster. Then, use a plate or pickling press to hold them in place, and you can even add weight with a clean water bottle to make the sprouts plumper. Finally, place the steamer in a well-ventilated area, away from direct sunlight.
- Water the sprouts twice a day, in the morning and evening, for 30 minutes each time, and then drain the water completely.
- After 2-3 days, your bean sprouts will be ready for harvest.
Using a steamer to make bean sprouts will give you plump, white sprouts that are delicious and quick to prepare.
7. Making Bean Sprouts with a Plastic Bottle
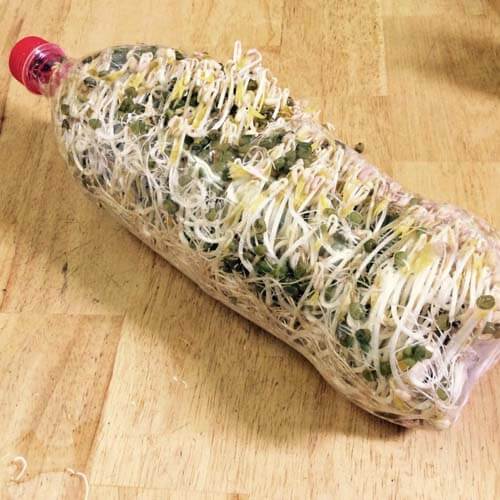
Making bean sprouts with plastic bottles is a popular method used by many people because it is convenient and simple.
Preparation
- Green beans: 100g
- Clean 1.5-liter plastic bottle
Instructions
- Rinse the green beans, remove any damaged beans, and soak them in water (3 parts boiling water to 2 parts cold water) for 1 hour (if using cold water, the soaking time will be longer, about 4-8 hours). Then, rinse them again with clean water.
- Poke small holes around the sides and bottom of the bottle (about 3cm apart) and cut a larger hole (about 3x3cm) on the side for drainage and air circulation to prevent the sprouts from becoming waterlogged.
- Place the beans in the bottle and lay it horizontally to prevent the beans from accumulating in one area. Store the bottle in a dark, well-ventilated area.
- Water the beans 2-3 times a day by soaking the bottle in a basin of water for about 1 minute, then removing it and draining the excess water before returning it to its original location.
- After about 3 days, your bean sprouts will be ready for harvest. Use scissors to cut the bottom of the bottle and gently tilt it to remove the sprouts without breaking them.
This method is very convenient, as most households have plastic bottles. The sprouts will be plump and white, and the beans will still be partially attached, giving them a delicious nutty flavor.
8. Making Bean Sprouts with a Glass Jar

If you embrace a “green” lifestyle and try to minimize the use of plastic in your household, don’t miss out on this method of making bean sprouts in a glass jar!
Preparation
- Green beans
- Sterilized glass jar (boiled in water)
Instructions
- Rinse the green beans, remove any low-quality beans, and soak them overnight to crack the shells. Then, rinse them again with clean water and let them drain.
- Place the beans in the jar, fill it with water, and after a few minutes, drain the water completely. Place the jar in a dark place, away from direct light, to prevent the sprouts from photosynthesizing and becoming weak.
- Water the sprouts twice a day, a few minutes each time. Make sure to drain the water completely and return the jar to a dark place after each watering to prevent waterlogging and promote plump, white sprouts.
- After 3 days, your bean sprouts will be ready for harvest. Simply tilt the jar and shake it gently to remove the sprouts, then rinse them to remove the shells.
Using only
“The Ultimate Guide to Choosing the Right Tomatoes: A Nutrition Showdown”

Shape is a key determinant of a tomato’s taste and quality. Paying close attention to this aspect will ensure you make the right purchase.
What Are the Benefits of Eating Dried Red Apples? How Many Should You Eat Daily?

Red apples are a versatile fruit with a myriad of uses. From being a delicious snack to brew an aromatic tea or a refreshing drink, they offer numerous health benefits.
The Ultimate Way to Lose Weight with Dragon Fruit

Dragon fruit, a tropical superfruit, is the ultimate refreshment with added health benefits. Did you know it’s also a great way to lose weight? Discover how you can harness the power of dragon fruit for effective and healthy weight loss by reading on!
The Secret to Eternal Youth: Unveiling the Power of the Exotic Fruit Loved by Saigon’s Elite

The skin-loving, age-defying fruit that has captivated the attention of Saigon’s elite.
“Summer Skin: Achieving a Natural, Radiant Glow – The ‘Add 5, Subtract 1’ Method”

The scorching summer heat can be a nightmare for your skin. To maintain a smooth, even complexion, follow these six essential steps.


