Inside each card there are hidden meaningful messages, filled with emotions that the sender wants to convey to the recipient. To make this spiritual gift surprising and special, take some time to make your own 3D card with the following VOH methods!
How to make 3D flower vase cards
With the following simple and quick method, you will immediately have a super beautiful, lively 3D card to give as a gift or decorate your space.
Prepare
- Card background cover of any color, white card lining cover, thin white cover to draw flowers
- Painting color
- Paper knife and scissors
- Glue
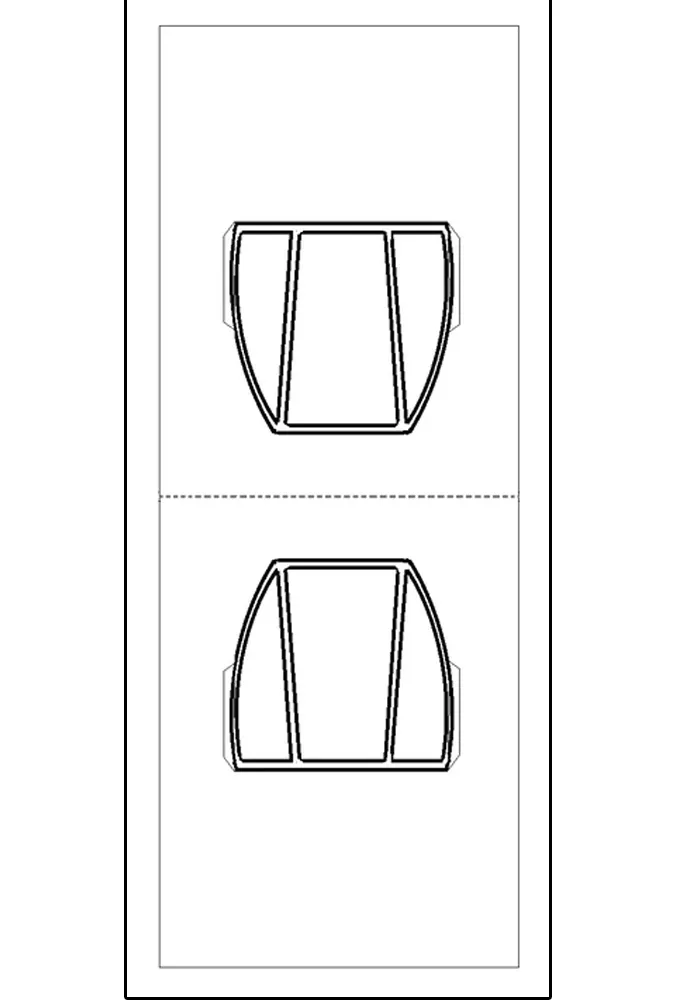
- Print paper sample as shown below.

Making
Step 1:
– Draw flowers including branches and leaves with sizes corresponding to the vase in the printed paper template. Then color both the front and back, then cut along the outline of the shape.
– With lilies, fold the long lower petals upwards if you want to create a clearer 3D shape.

– With roses, draw large, round petals together, then fold them 2 to 3 times to create an inward curl of the petals.

– You should make many flowers, each type of flower has at least 2 similar flowers. This will create a pretty symmetrical look on the card’s embossed flower vase.

Step 2: Use a knife to cut out the cover according to the drawing to get a vase of paper flowers. Glue the card backing cover to the card background cover at the outer edges of the card. The flower vase will be folded up, the two sides of the vase will be bent towards each other.

Step 3:
– Divide the cut flowers evenly into 2 parts, each part is glued to the inner wall of half of the vase.
– Small tip: You should put scratch paper under the vase-shaped cover to avoid sticking it to the cover.

Step 4:
– Then, you combine the two vase parts together, they will intersect at the side wall of the vase. At this point, you need to line up the two parts’ mouths before gluing the outermost small paper edges of the walls together.
– When the glue is stable, fold the card and open it several times to make the folds smoother.
– Decorate the card as you like and you’re done.


Instructions on how to make a 3D house-shaped card
With just a little ingenuity, you can make a unique 3D card for the people you love.
Prepare
House model
- Drag
- Glue
- Dao
- White, colored paper
- Needle, thread
Making
Step 1: Print the house model on paper and then cut it out.
Tip: You can cut out the house shape on white paper, then cut the colored paper into small pieces and paste them on. Inside the card, you can decorate and write content as you like.
Step 2:
– Use a paper knife to cut out 4 window and door panels and gently smooth the folds.
– Cut 2 small diamonds: 1 pink, 1 yellow according to the pattern.

Step 3:
– Thread the thread into the needle and then pierce it through the “+” mark on the card, fold the diamond in half, stick the thread in the middle.
– Then insert the needle back into the previously punctured hole, cut the thread and tie a knot at both ends of the thread to prevent it from slipping.
– Do the same with the yellow diamond, insert the needle through the remaining “+” mark on the card.


Step 5: Cut thin paper to make a card envelope and place the house inside.


How to make simple 3D rose cards
You can make your own beautiful 3D flower-shaped greeting card with just these simple steps.
Prepare
- White, hard cardboard, A4 size
- Pink or red cardboard
- Polka dot ribbon
- Glue, scissors
Making
Step 1: Print the flower petals (sizes from small to large in order as shown below) on white paper and then cut red cardboard according to the printed petal patterns.

Step 2: Fold the petals as shown below, smooth the edges of the petals to create a flower shape, then glue the petal rings together on the card cover in order from small to large, so that the large outer petals hug around. Small flower inside.

Step 3: Cut more leaves to decorate the flower more beautifully and you’re done.

How to make a simple 3D heart-shaped card
Below are 2 suggestions for making 3D heart-shaped cards that you can refer to.
Embossed 3D heart-shaped card
Prepare:
- Paper knife, scissors, ruler (preferably a metal ruler).
- Specialized cutting table or multiple layers of cardboard for lining.
- Milk glue, double-sided glue or regular glue.
- Colored cardboard.

Making:
Step 1: Print the template below on cardboard of your choice of color.

Step 2: Use a paper cutter to cut the black lines, leaving the red lines as shown above.
Step 3: Then, use a ballpoint pen with no ink or the back of a paper cutter to lightly move along the uncut printed lines to create pre-existing breaks on the paper. When constructing the card, it will be accurate, quick, and will not wrinkle or damage the paper.

Step 4: Use one hand to hold the card, with the other hand gently pushing the heart up. Note, face the side without ink up.

Step 5: Fold the card and use a knife or your hand to smooth out the folds. This step will help the card stand firmly and the folds will not be rough.

Step 6: Apply glue to the back of the heart as shown, then stick it on the card cover and you’re done.


3D rainbow heart card
Prepare
- Card cover (7 different colors)
- Felt pen
- Scissors or paper knife
- Glue
- Ruler
Making
Step 1: Cut each type of colored paper into a square measuring 6x6cm.

Step 2:
– Fold the paper in half, use a pen to draw half a heart shape and then cut it out.
– With all paper colors, cut a heart shape the same size as the first heart shape (6x6cm).

Step 3: Cut the cardboard into a rectangular strip of paper measuring 5x20cm.

Step 4:
– Attach the heart to the first edge of the cut paper strip,
– Then, use a ruler to draw a straight line through the two upper vertices of the heart you just pasted.

Step 5:
– From the line you just drew, use a ruler and draw 6 more parallel lines 1cm apart, corresponding to the positions of 7 hearts of 7 colors.

Step 6:
– Then, draw a perpendicular line and pass through the middle of the parallel lines you just drew.
– Fold 7 folds in the same direction down at the line position.

Step 7: Paste the heart shapes onto the paper strip at the lines so that the 2 highest curved edges of the heart coincide with the edge of the lines. Continue stacking the heart layers until the end.

Step 8:
– Fold the paper strip in half at the last line where you glued the 7th heart.
– Turn the heart paper face down. Cut another strip of paper 5x15cm in size and glue it perpendicular to the top edge of the paper. After pasting, turn the paper strip over.

Step 9: Cut colored cardboard into a rectangle measuring 20x30cm to make a card and then fold it in half.

Step 10:
– Paste the heart paper strip on the inside of the card, so that the heart paper strip is perpendicular and in the center of the card.
– Note, at the perpendicular edge of the paper, you do not glue it completely, but only glue the two ends marked with a red X on the image. Leave the middle part to create space for the 3D heart strip to pull back and forth.

Step 11: Pull down the strip of paper containing the rainbow heart. Write the message of congratulation on the exposed strip of paper.

Step 12: Cut 7 more hearts in 7 different colors to decorate the outside of the card or you can decorate according to your preference.

Idea for making 3D gift box cards
The 3D gift box card template will make the recipient go from one surprise to another.
Prepare
- 4 sheets of cardboard, sizes 39x39cm, 38x38cm, 33x33cm, 17.5x 17.5, so choose a harmonious color combination
- 1 regular A4 sheet of paper.
- Glue
- Scissors, paper knife
- Ruler, pencil, eraser
- Photos, decorative cards…
Making
Step 1: To make the box cover, use a pencil to draw lines, dividing the 39x39cm paper into 9 squares, each 13x13cm. Then, fold the paper along the drawn lines to shape the box.

Step 2: Fold the two edges at the corners to form a box shape.

Step 3:
– Use a sheet of regular paper measuring 13x13cm and cut it into a heart shape to make a mold.
– At each edge of the folded paper, use the mold you just created to draw a border for the corners and then cut along to create a heart shape.

Step 4:
– To make the second layer, use a 38x38cm piece of paper and draw a 1cm thick outer border.
– Continue drawing lines dividing the paper into 9 squares, each square is 12x12cm in size.
Step 5: Use scissors to cut the border as shown below.

Step 6: Then cut the paper along the border as shown below.

Step 7: Fold the edges and then use glue to glue as shown to create a photo pocket. Note, tape the bottom edge of the bag too so the photo doesn’t fall out.

Step 8: To make the third layer, divide the 33x33cm paper into 9 squares, each 11x11cm.

Step 9: Cut the paper along the border and fold the paper as shown below.


Step 10:
– To make the lid of the box, use a sheet of paper measuring 17.5×17.5cm, the outer border is 4cm thick.
– Cut the lines as shown and then use glue to glue the edges to form the lid of the box.

Step 11: Finally, use glue to overlap the layers onto the shell and fold the box along the edges to make sure it’s done.

Make 3D embossed I LOVE YOU cards
This love card template is suitable for birthdays or special occasions for your lover!
Prepare
- 3D drawing model
- 1 sheet of white paper
- 2 red sheets of paper
- Carton
- Paper knife, double-sided tape
Making
Step 1: Use the template below to print on white paper.

Step 2: Use a paper cutter to cut solid lines.
Step 3: Take a ballpoint pen with no ink or the back of a paper cutter and lightly move along the folded lines.
Step 4: Next, fold the convex and concave as shown below. Then fold the card in half and smooth out the folds.

Step 5: Glue the white inside to the red cover and decorate as you like.


The above 3D card making ideas are suitable for giving to lovers, friends, relatives, teachers on birthdays, Christmas or other holidays (March 8, October 20, November 20 …). With the above simple ways, you can create a special gift for the person you love.


