Zalo is a popular messaging app in our country. However, issues with deleting, recalling, and restoring messages always make users confused. In today’s article, let’s find out how to restore deleted conversations on Zalo with FPT Shop.
1. How to restore deleted Zalo messages on iPhone
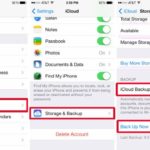
To restore deleted Zalo messages on iPhone, you can use the integration of Zalo and iCloud. Here are the steps:
Step 1: Go to your Zalo profile and select the Settings icon.
/fptshop.com.vn/uploads/images/tin-tuc/164648/Originals/cach-khoi-phuc-cuoc-tro-chuyen-da-xoa-tren-zalo-1(1).jpg)
Step 2: Choose “Backup and Restore“.
/fptshop.com.vn/uploads/images/tin-tuc/164648/Originals/cach-khoi-phuc-cuoc-tro-chuyen-da-xoa-tren-zalo-2(1).jpg)
Step 3: Select the message category.
Step 4: Choose “Backup and Restore“.
Step 5: Continue to select “Backup“. You can also choose “Auto backup” or customize the backup time interval.
/fptshop.com.vn/uploads/images/tin-tuc/164648/Originals/cach-khoi-phuc-cuoc-tro-chuyen-da-xoa-tren-zalo-3(1).jpg)
Step 6: Select “Restore Messages“.
/fptshop.com.vn/uploads/images/tin-tuc/164648/Originals/cach-khoi-phuc-cuoc-tro-chuyen-da-xoa-tren-zalo-5(1).jpg)
Step 7: Continue to select “Restore Messages“.
/fptshop.com.vn/uploads/images/tin-tuc/164648/Originals/cach-khoi-phuc-cuoc-tro-chuyen-da-xoa-tren-zalo-6(1).jpg)
Above are the steps to help you recover deleted Zalo messages on iPhone.
2. How to restore Zalo messages on Android
Restoring deleted Zalo messages on Android is similar to iOS. Here’s what you need to do:
Step 1: Launch Zalo, select “More” and tap on the “Settings” icon.
/fptshop.com.vn/uploads/images/tin-tuc/164648/Originals/cach-khoi-phuc-cuoc-tro-chuyen-da-xoa-tren-zalo-7(1).jpg)
Step 2: Choose “Messages“, scroll down and select “Backup and Restore“, then continue to select “Proceed with Backup“.
/fptshop.com.vn/uploads/images/tin-tuc/164648/Originals/cach-khoi-phuc-cuoc-tro-chuyen-da-xoa-tren-zalo-8(1).jpg)
Step 3: Similar to iOS, select “Auto backup” or “Backup” according to your desired time interval.
Step 4: Choose “Restore Messages“.
/fptshop.com.vn/uploads/images/tin-tuc/164648/Originals/cach-khoi-phuc-cuoc-tro-chuyen-da-xoa-tren-zalo-9(1).jpg)
Step 5: After selecting “Restore Messages“, Zalo system will send a notification when the restore is complete. Press “Continue” to exit the message interface. Check if the messages have been restored.
/fptshop.com.vn/uploads/images/tin-tuc/164648/Originals/cach-khoi-phuc-cuoc-tro-chuyen-da-xoa-tren-zalo-10.jpg)
Above are the steps to help you restore Zalo messages on Android.
3. How to restore Zalo messages on PC, laptop
To restore Zalo messages on laptop or PC, follow these steps:
Step 1: Open the Zalo app, click on the settings icon and then click on Backup/Restore. Continue to choose Backup Data.
Step 2: Select “Settings” > Select “Storage” > “Export Data“.
/fptshop.com.vn/uploads/images/tin-tuc/164648/Originals/cach-khoi-phuc-cuoc-tro-chuyen-da-xoa-tren-zalo-11.jpg)
Step 3: The “Export Data” window will appear, press select for items such as “Messages, Photos, Videos, Files, etc.“, select where to save and then click “Export Data“.
Step 4: Wait for the data export process to complete, then press “Close“.
Step 5: Data file is compressed. You can save it in “My Cloud” for later download if needed. Unzip the file and check the restored messages.
/fptshop.com.vn/uploads/images/tin-tuc/164648/Originals/cach-khoi-phuc-cuoc-tro-chuyen-da-xoa-tren-zalo-12.jpg)
Step 6: To restore messages on Zalo, click “Settings” > select “Data” > Choose “Import Data“.
Step 7: Select the saved file > Select “Import Data”.
Above are the steps to help you restore Zalo messages on laptop or PC.
4. How to recover deleted messages on Zalo without backup
If you want to recover Zalo messages without backup, you can follow these steps:
Step 1: Open Zalo, select “Messages” in the “Settings” section.
Step 2: Choose “Backup and Restore“.
Step 3: Select “Backup“.
Step 4: Choose “Restore Messages“.
Step 5: After completing the restore, select “Continue” and check the messages.
/fptshop.com.vn/uploads/images/tin-tuc/164648/Originals/cach-khoi-phuc-cuoc-tro-chuyen-da-xoa-tren-zalo-13.jpg)
Above are the steps to help you recover deleted Zalo messages without backup.
5. How to restore messages on Zalo after changing phone
If you have recently changed your phone and want to restore messages from your old phone, you can follow the steps below:
Step 1: Log in to your Zalo account.
/fptshop.com.vn/uploads/images/tin-tuc/164648/Originals/cach-khoi-phuc-cuoc-tro-chuyen-da-xoa-tren-zalo-14.jpg)
Step 2: Go to the “Settings” interface.
/fptshop.com.vn/uploads/images/tin-tuc/164648/Originals/cach-khoi-phuc-cuoc-tro-chuyen-da-xoa-tren-zalo-15.jpg)
Step 3: Select “Messages“. Continue to select “Advanced Backup and Restore“.
/fptshop.com.vn/uploads/images/tin-tuc/164648/Originals/cach-khoi-phuc-cuoc-tro-chuyen-da-xoa-tren-zalo-16.jpg)
Step 4: Choose “Restore Messages“.
/fptshop.com.vn/uploads/images/tin-tuc/164648/Originals/cach-khoi-phuc-cuoc-tro-chuyen-da-xoa-tren-zalo-17.jpg)
Step 5: Select the old backup version saved in your account, then select “Restore Messages” > Press “Continue” to restore.
/fptshop.com.vn/uploads/images/tin-tuc/164648/Originals/cach-khoi-phuc-cuoc-tro-chuyen-da-xoa-tren-<a href='https://meo.tips/tips/the-ultimate-guide-to-power-outage-predictions-3-easy-methods-to-stay-informed/' rel='dofollow' class='onpage-seo' >zalo</a>-18.jpg”></p>
<h2><strong>6. How to recover deleted Zalo messages with software</strong></h2>
<p>In addition to the above methods, you can also use third-party software to recover deleted Zalo messages. Some software options you can use are PhoneRescue by iMobile, Tenorshare iPhone Data Recovery, and WonderShare Dr.Fone for iOS.</p>
<p><img decoding=)
7. How to restore recalled messages on Zalo
If you want to recover recalled messages on Zalo that you haven’t read yet, follow these steps:
Step 1: Go to “Settings” > Select “Notifications” > Continue to choose “Advanced Settings“.
/fptshop.com.vn/uploads/images/tin-tuc/164648/Originals/cach-khoi-phuc-cuoc-tro-chuyen-da-xoa-tren-zalo-20.jpg)
Step 2: Choose “Enable Notification History” > select the Zalo app > select the downward arrow.
/fptshop.com.vn/uploads/images/tin-tuc/164648/Originals/cach-khoi-phuc-cuoc-tro-chuyen-da-xoa-tren-zalo-21.jpg)
Step 3: After completing the above steps, the recalled messages will be displayed.
/fptshop.com.vn/uploads/images/tin-tuc/164648/Originals/cach-khoi-phuc-cuoc-tro-chuyen-da-xoa-tren-zalo-22.jpg)
Above are the methods to help you restore deleted Zalo messages on different devices.
Conclusion
Remember that restoring deleted conversations on Zalo is not always simple. Hopefully, through this article, FPT Shop has provided you with useful information on how to restore deleted conversations on Zalo.


