Similar to using a phone to take screenshots, computer users can also use laptop screen capture methods to share information with friends, save important content displayed on the computer screen, and solve technical issues.
By default, Windows provides users with many ways to take screenshots on a laptop, but not everyone knows them. The most common and well-known method to capture a computer screen is by pressing the Prt Sc or Print Scrn button on the keyboard. But what about other integrated laptop screen capture methods on Windows? Let’s explore them.
Compilation of laptop screen capture methods
Before diving into advanced laptop screen capture methods, let’s start with some simple and popular ones that anyone can do.
1. Capture laptop screen using the Print Screen key
The easiest way to capture a laptop screen on Windows is by pressing the Print Screen (Prt Scn) key on the keyboard. This key is usually located in the top row of the keyboard, near the function keys. To capture a computer screen on Windows, follow these steps:
Step 1: Click on the application window you want to capture. Then press the PrtScn key on the top right side of the computer keyboard to accurately capture the screen of the active window of the application or software you want to save.
/fptshop.com.vn/uploads/images/tin-tuc/165404/Originals/printscreen.png)
You can also capture a computer screen image through the keyboard by pressing the Prt Sc or Print Scrn key. Pressing the PrtScn or Print Scrn button will immediately capture the entire active computer screen. The screenshot will be automatically saved to the system Clipboard.
Step 2: To save the computer screen capture image, press the Ctrl + V key combination in any application or program that allows you to insert images, such as Microsoft Word or Microsoft Paint.
2. Capture laptop screen using the Windows + Print Screen key combination
Step 1: Use the Print Screen key to capture the laptop screen, but if you want to capture the entire screen you are working on and automatically save the screenshot. Press the Windows + Print Screen keys. The computer screen will flash to let you know that the computer screen has just been captured.
/fptshop.com.vn/uploads/images/tin-tuc/165404/Originals/printscreen4.png)
Step 2: The captured laptop screen image will be automatically saved to the Pictures > Screenshots folder.
3. Capture laptop screen using the Fn + Print Screen key combination
In addition to the Print Screen key, on some laptop keyboards, you may need to press the Function (Fn) key and the Print Screen key to activate the computer screen capture function, which means pressing the Fn + PrtScn or Print Scrn (Print screen) key combination.
/fptshop.com.vn/uploads/images/tin-tuc/165404/Originals/printscreen1.png)
The Print Screen key will capture the entire screen and save it to the Clipboard. Check the notification at the bottom right corner of your screen to see the saved screen capture.
By default, capturing a computer screen using the Print Screen shortcut on Windows will not save the image as a file. Instead, the screen capture image will be copied to the Clipboard.
You can then paste it by pressing the Ctrl + V key combination or right-clicking and selecting Paste into documents (such as Word, Excel, PowerPoint, or even Google text applications) or image processing applications/software (such as Microsoft Paint or even Photoshop).
4. Capture laptop screen using the Alt + PrtSc combination
Step 1: If you only want to capture the computer screen of an active window (an application or software you are working on), it’s simple. First, select the window by clicking on that window.
/fptshop.com.vn/uploads/images/tin-tuc/165404/Originals/printscreen2.png)
Step 2: Press the shortcut key combination Alt + Prt Sc (Print screen).
Step 3: This action will copy the computer screen capture to the Windows Clipboard, which you can access by pasting it into another supported application.
5. Capture laptop screen using the Snipping Tool
The Snipping Tool has been available since the Windows Vista version. But Windows has been warning in recent years that the Snipping Tool will disappear, but in fact, this application is still available in Windows 11. The Snipping Tool has been removed from the list of applications in the Start menu, but you can still easily access it through the search bar.
If you don’t like to use keyboard shortcuts or the aforementioned shortcuts to take laptop screen captures, Snipping Tool is the best way to capture a computer screen on Windows if you want to customize, add annotations, or share your screen capture images. The main features of the Snipping Tool include:
- Capturing the laptop screen with the entire screen or a rectangular part of the screen.
- Capturing the laptop screen in free-form mode.
Note: When capturing a computer screen using the Snipping Tool, the screen capture image will not be automatically saved as an image file, but there is an option to save it if needed. Here are the steps to use the Snipping Tool application to capture a laptop screen.
Step 1: To open the Snipping Tool, you will have to find the application through the search bar. By clicking on the magnifying glass icon below the taskbar, next to the Start menu, and then typing Snipp in the search box below.
Step 2: Click on the displayed Snipping Tool result to launch the application. From the main working interface of the application, click the New button.
Alternatively, the fastest way to access the Snipping Tool is to press the shortcut keys Windows + Shift + S. This keyboard shortcut is equivalent to clicking the New button in the working interface of the Snipping Tool.
Step 3: From the main working interface of the Snipping Tool, click the Mode button, and in the drop-down menu, it provides you with 4 screen capture options for a laptop screen, including:
/fptshop.com.vn/uploads/images/tin-tuc/165404/Originals/printscreen7.png)
- Rectangular: An option to capture the laptop screen in a rectangular shape. Simply click and hold the left mouse button, then drag to create a rectangular shape around the object you want to capture, and release the left mouse button to capture. The rectangle you create will be the screen capture image.
- Free-form: If you choose to capture the laptop screen freely, you can click and hold the left mouse button, then draw any shape you want. Remember that when you release the left mouse button, the screen capture image will be taken.
- Window: An option to capture the laptop screen with the active application window you are working on. It could be a web browser window reading the news or a Word window editing text.
- Full-screen: An option to capture the laptop screen with everything displayed on the screen.
Customization: Before capturing the laptop screen, you can set a delay to capture the screen after a certain period of time. This is useful to capture menus and tool annotations displayed on the screen.
By clicking the Delay (clock icon) button next to the Mode button, you can select the time (in seconds) you want to wait before the Snipping Tool actually captures the laptop screen.
Step 4: Depending on your chosen laptop screen capture method using the Snipping Tool, select the appropriate screen capture method to use.
Step 5: After capturing the laptop screen, the screen capture image will be displayed in the working window of the Snipping Tool, which provides you with many options, such as:
/fptshop.com.vn/uploads/images/tin-tuc/165404/Originals/how-to-take-screenshots-on-windows-1.jpg)
- Ballpoint Pen: A drawing pen tool for writing annotations on the object.
- Highlighter: A highlighting pen tool to highlight a specific content compared to other contents.
- Eraser: As the name suggests, this eraser tool is used to erase the Pen and Highlighter you used before.
- Ruler: Use the ruler tool (you can rotate it using the mouse scroll) to create annotations at any angle.
- Image Crop: To crop or resize the image.
- Text actions: A very useful tool that can be used to extract text from the captured image.
Save image: You can save the screen capture image as a file by pressing the Ctrl + S key combination or clicking on the floppy disk icon in the top-right corner.
Next, click on the three-dot menu icon in the top-right corner to select the following options:
/fptshop.com.vn/uploads/images/tin-tuc/165404/Originals/cach-chup-hinh-may-tinh-5.jpg)
- Zoom: Perform image zooming.
- Share: Share the laptop screen capture image with social media apps, Mail, Microsoft Teams, Nearby Share, etc.
- Open file: Choose to open an image file on the screen for editing.
- Open Screenshots folder: Open the folder where screen capture images are saved.
- Print: Perform printing of the laptop screen capture image.
6. Capture laptop screen using Snip & Sketch
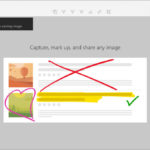
The Snip & Sketch app has replaced the Snipping Tool in Windows 10 and is one of the favorite laptop screen capture methods on Windows 10 due to its customization features such as note-taking, drawing, annotating, etc.
Step 1: To activate Snip & Sketch, you can use the keyboard shortcut Windows + Shift + S or search for the Snip & Sketch app in the search bar.
Step 2: Your screen will be dimmed, and a small menu will appear at the top of the screen, providing you with screen capture options from left to right, including:
/fptshop.com.vn/uploads/images/tin-tuc/165404/Originals/how-to-take-screenshots-on-windows-2.jpg)
- Rectangular: An option to capture the laptop screen as a rectangular shape. Simply click and hold the left mouse button, then drag to create a rectangular shape around the object you want to capture, and release the left mouse button to capture. The rectangle you create will be the screen capture image.
- Free-form: If you choose to capture the laptop screen freely, you can click and hold the left mouse button, then draw any shape you want. Remember that when you release the left mouse button, the screen capture image will be taken.
- Window: An option to capture the laptop screen with the active application window you are working on. It could be a web browser window reading the news or a Word window editing text.
- Full-screen: An option to capture the laptop screen with everything displayed on the screen.
Step 3: Click on one of the options you want to capture the laptop screen with. In fact, the laptop screen capture options available in the Snip & Sketch app are similar to those in the Snipping Tool.
Step 4: After capturing the laptop screen using one of the available options, the image capture by Snip & Sketch will be copied to the Clipboard. You can then paste it (by pressing Ctrl+V or right-click and select Paste) into documents (such as Word, Excel, PowerPoint) or image processing applications/software (such as Paint or even Photoshop).
In case you activate the Snip & Sketch app by using the search bar, you will directly access the working interface of the app like the image below. To capture the laptop screen from here, follow these steps:
Step 1: In the Snip & Sketch app window, click the New button to start capturing the laptop screen or click the dropdown arrow next to it to choose to capture the laptop screen after 3 seconds (Snip in 3 seconds) or 10 seconds (Snip in 10 seconds), depending on your needs.
/fptshop.com.vn/uploads/images/tin-tuc/165404/Originals/printscreen13.png)
Step 2: After selecting one of the options, the computer screen will darken, and a toolbar will appear at the top of the screen. These are the same capture options found in the Snipping Tool. The available laptop screen capture options from left to right are: Rectangular Snip, Freeform Snip, Window Snip, and Full screen.
/fptshop.com.vn/uploads/images/tin-tuc/165404/Originals/printscreen14.png)
Step 3: Choose one of the options to capture the laptop screen that you want to use.
Step 4: After capturing the laptop screen, the Snip & Sketch app will open, and you will see your screen capture image displayed in the main working interface.
/fptshop.com.vn/uploads/images/tin-tuc/165404/Originals/printscreen15.png)
Step 5: Here, you can add annotations with a pen, pencil, or highlighter. You can erase them with an eraser and also use a ruler (which you can rotate using the mouse scroll) to create annotations at any angle. There is also an image cropping option.
/fptshop.com.vn/uploads/images/tin-tuc/165404/Originals/cach-chup-hinh-may-tinh-4.jpg)
Step 6: After editing the screen capture image, you can click on the Save button to save the image, click on the Copy button to copy it to the Clipboard, or click on the Share button to share the image with others via email or other applications.
7. Capture laptop screen using the Game Bar
The last method we introduce related to using the Game Bar app to capture the laptop screen. The Game Bar in Windows 10 allows you to record gameplay, capture videos and screenshots, along with some other features. The interesting thing is that you can capture a laptop screen via the Game Bar even when you are not playing games. Let’s explore how to capture a laptop screen using the Game Bar.
Step 1: To open the Game Bar app, press the keyboard shortcut Windows + G. Before pressing this button, make sure the focused window is the window/screen you want to capture.
/fptshop.com.vn/uploads/images/tin-tuc/165404/Originals/windows-10-game-bar-.png)
Step 2: At the top left corner of the screen, you will see a small window called Capture as shown in the image above. To capture the laptop screen image, click on the Camera icon (the first icon from left to right).
Step 3: This action will automatically capture and save the laptop screen capture image as a PNG file and save it to the C:\Users\Username\Videos\Captures folder. The image captured this way will be a full-screen image.
8. Capture laptop screen using third-party apps
If the laptop screen capture methods provided by Windows cannot capture the screen the way you want, you can use third-party apps. Using third-party apps is essential for screen capture tools in Windows.
Third-party apps will add additional features to the laptop screen capture methods, such as scrolling capture, integrated editing, management, sharing, etc., as well as easy sharing between other apps. Some interesting third-party laptop screen capture apps include ShareX, PicPick, Snagit, Droplr, etc.
So, now you have learned about various laptop screen capture methods with many options to choose from. Most of the methods are already integrated into Windows, ranging from simple methods with just a button press to methods providing additional editing options like the Snipping Tool. Choose the appropriate method based on your needs.
- 3 ways to take screenshots on Windows 11 laptops quickly and easily
- Compilation of the best methods to capture MacBook screen
Capture Screenshots on Windows 8’>How to Capture Screenshots on Windows 8
Looking for the latest and greatest in technological and electronic products? Look no further than , an online platform specializing in offering customers a fantastic selection of items such as mobile phones, laptops, televisions, and much more. Not only do we offer competitive prices, but also a convenient delivery service to ensure you get what you want, when you want it. Shop now at for the best shopping experience.


