


In this article, FPT Shop will share with you quick and easy ways to turn on the touchpad on your Windows laptop, allowing for a smoother experience and avoiding unnecessary obstacles.
Why Do You Need to Know How to Turn on the Touchpad on Your Laptop?
The touchpad is an integrated input device found on all laptop models. It uses sensors to detect the movement of your fingers as you glide them across its surface, enabling you to perform click, drag, and drop actions with ease.
In cases where you forget to bring an external mouse, the touchpad serves as the only “lifesaver,” offering convenience and allowing for more precise and faster operations.

3 Ways to Turn on the Touchpad on a Windows 10 Laptop
Using Keyboard Shortcuts
You can use keyboard shortcuts to turn on the touchpad on a Windows 10 laptop. Here are the specific shortcuts for different laptop brands:
- Asus Laptop: Fn + F9 or F10.
- Acer Laptop: Fn + F7.
- Lenovo Laptop: Fn + F6.
- Dell Laptop: Fn + F3 or F8.
- HP Laptop: Fn + F7.
Using Bluetooth & Devices Settings
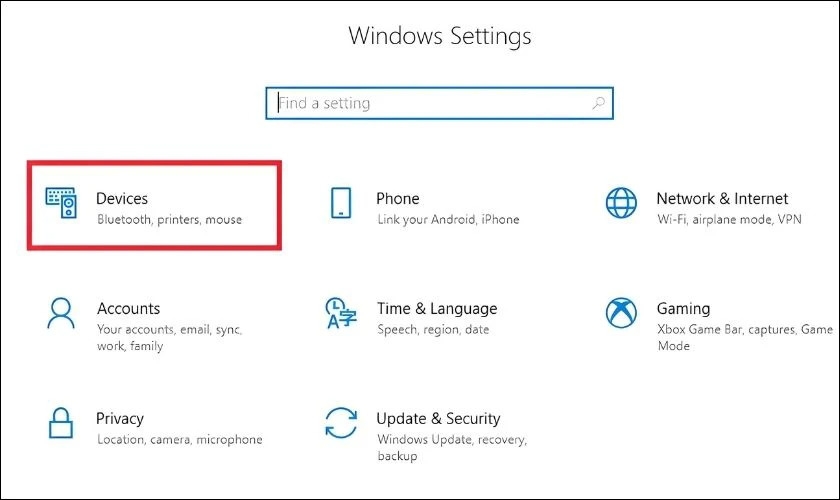
Step 1: Open Settings by pressing Windows + I, then select Devices.
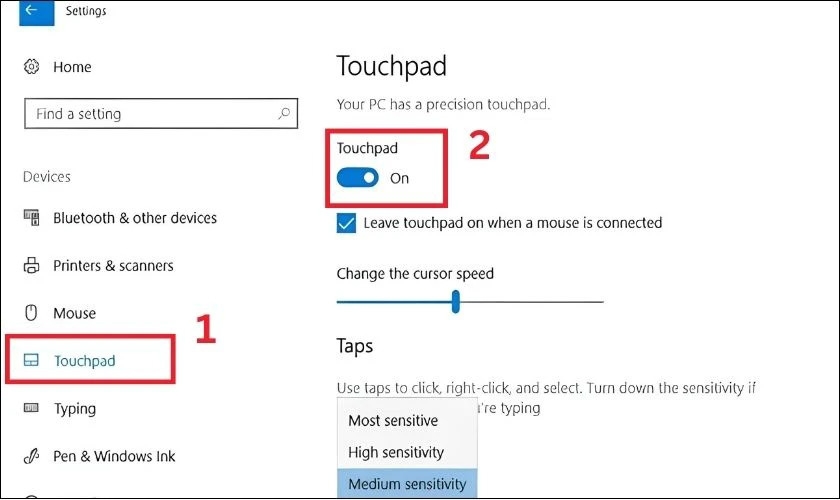
Step 2: Click on Touchpad on the left sidebar, then slide the toggle to the right to turn on the touchpad.
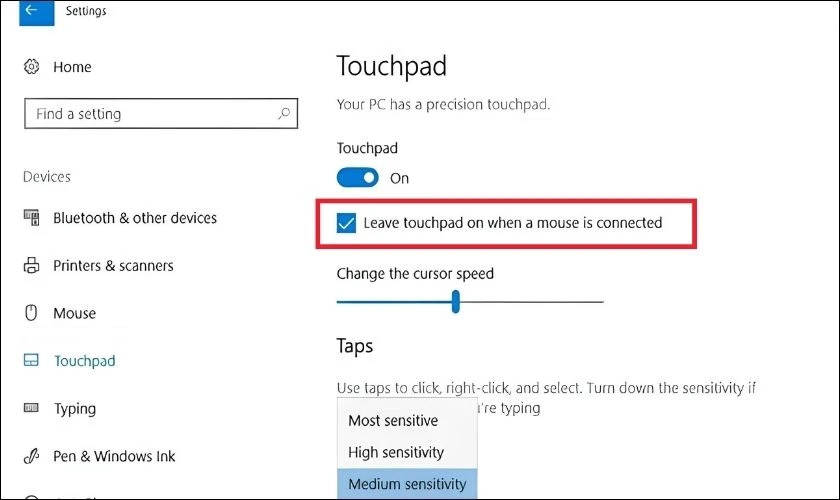
Step 3: Click the box next to Leave touchpad on when a mouse is connected to ensure that the touchpad remains active even when an external mouse is connected to your laptop.
Using the Keyboard
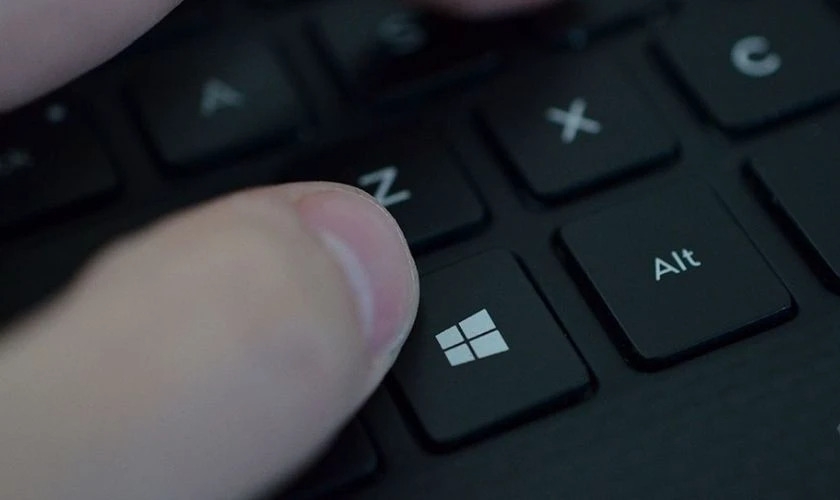
Step 1: Press the Windows key on your keyboard to bring up the Start menu.
Step 2: Type “touchpad” in the search bar and hit Enter to confirm.
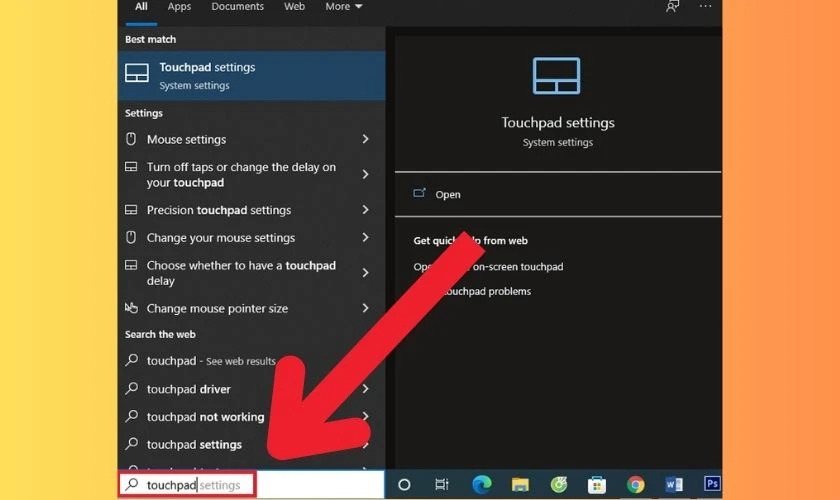
Step 3: Press Spacebar on your keyboard to turn on the touchpad.
3 Ways to Turn on the Touchpad on a Windows 11 Laptop
Similar to Windows 10, there are also three ways to turn on the touchpad on a Windows 11 laptop:
Using Keyboard Shortcuts
The shortcut key to adjust the Touchpad is usually located on the top row of function keys. Each laptop model will have a different key with the Touchpad symbol. The general formula for the shortcut is Fn + the Touchpad symbol key. Specifically, it could be Fn + F6, Fn + F3, Fn + F9, or Fn + F7.
Using Touch Keyboard Service
Step 1: Press Windows + R to open the Run dialog box, then type “services.msc” and click OK.

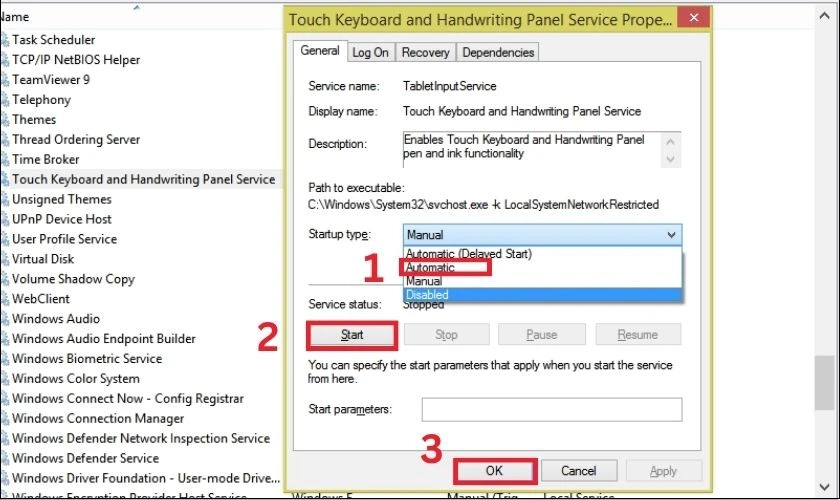
Step 2: In the Services window, scroll down and double-click on Touch Keyboard and Handwriting Panel Service.

Step 3: In the new window, set the Startup type to Automatic, then click Start followed by OK.
Using Mouse Properties in Control Panel
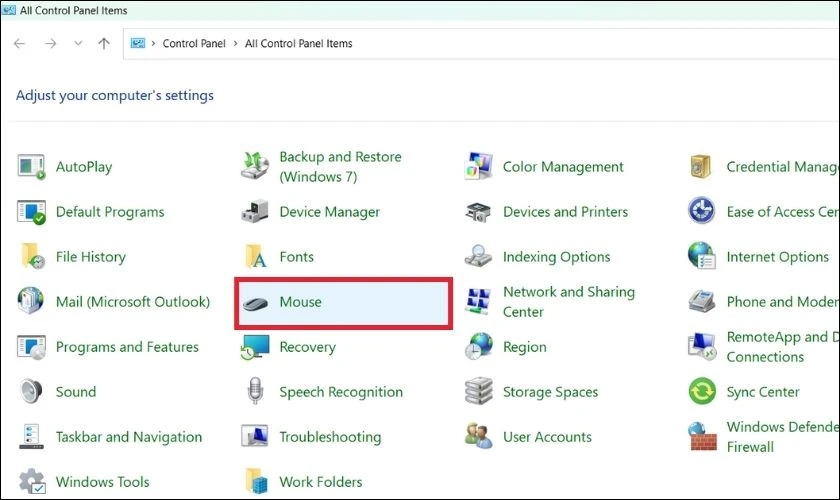
Step 1: Open Control Panel, then click on Mouse to access the Touchpad settings.
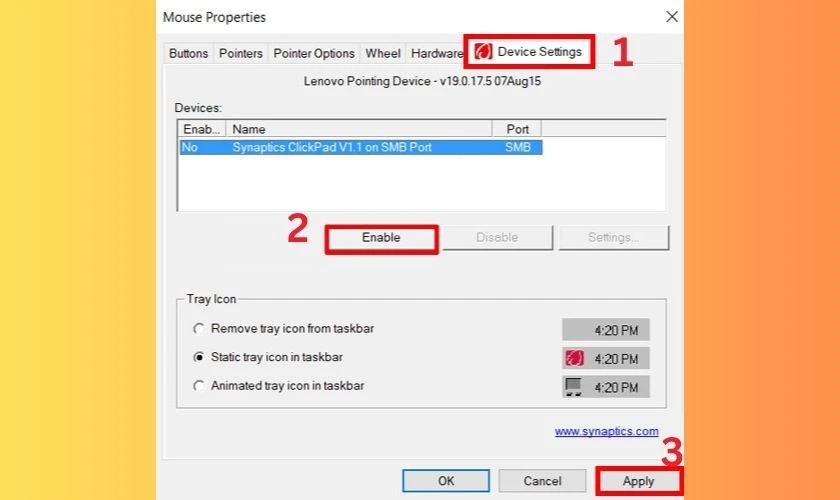
Step 2: In the Mouse Properties window, go to Device Settings, select Enable, and then click Apply.
Why Can’t You Turn on the Touchpad on Your Laptop?
If you’re unable to turn on the touchpad using the methods mentioned above, it’s possible that your laptop has a hardware issue. Here are four steps to help you check the hardware’s functionality:
Step 1: Open the Start menu and click on Settings.
Step 2: Select Updates and Security, then choose Troubleshoot.
Step 3: Run the Hardware and Devices Troubleshooter.
Step 4: Shut down and restart your laptop to check if the issue has been resolved.
In Conclusion
Overall, the methods to turn on the touchpad on Windows 10 and 11 laptops are straightforward and effective. If you found this guide helpful, don’t forget to share it with your friends and family.
- Why Does My Computer Mouse Freeze? A Comprehensive Guide to Troubleshooting
- Why Did My Laptop Touchpad Stop Working? Explore the Reasons and Effective Solutions
FPT Shop is not just a place to shop for genuine tech products; it’s also an ideal destination for those seeking free consultations and reliable services. Through our efforts and commitment, we strive to become your trusted companion on your journey of technology exploration.
Check out the latest laptop models here:
How Much Does It Cost to Repair TrueDepth Camera? Simple and Quick DIY Fixes

How Much Does It Cost to Fix Face ID Camera on iPhone? If your TrueDepth Camera is faulty and preventing you from unlocking your phone using Face ID, you may need to get it repaired. The cost of TrueDepth Camera repair varies depending on your device model and the repair provider.
How to Enable the AssistiveTouch Home Button on iPhone 7 and iPhone 7 Plus the Easy Way

How to enable the virtual Home button on iPhone 7 is simple. After activating this feature, you can access the assistive features of your device right on the home screen without going into the settings. Refer to this article to know how to enable the virtual Home button on iPhone 7.
How to Connect Your Laptop to Ethernet for a Wired Connection: A Guide

When it comes to plugging an Ethernet cable into a laptop for a wired network connection, what do you need to prepare and what do you need to keep in mind? If you don’t know, don’t skip this article because it will help you answer your questions when connecting to the network. Follow along.
Laptop ASUS Touchpad Not Working: Common Causes and Effective Fixes

ASUS touchpad not working issues emerge due to varied reasons and hamper study and work. Especially when you are not used to connect an external mouse, this issue will cause much trouble. If you encounter this problem, do try the solutions provided in this article.
Fix Zoom Meeting Errors from A-Z

When using Zoom Meeting, we often encounter Zoom Meeting errors. If we don’t know how to fix the errors, we won’t be able to join the class or will be interrupted during the learning process. In this article, Meohay.vn has collected common errors of the Zoom Meeting software to share with everyone.


