


MacBooks have been delivering wonderful experiences to users, satisfying customers not only with their sleek designs but also with their superior performance and features. One such notable feature is the ability to record your screen, which has proven to be a highly useful function for many.
However, not everyone knows how to record their MacBook screen using built-in tools or specialized software. Therefore, FPT Shop provides a detailed and easy-to-follow guide on how to do this.
1. Record your MacBook screen with audio using Screenshot Toolbar
MacBooks running macOS Mojave (macOS10.14) and later versions have a built-in Screenshot Toolbar that allows users to record their entire screen or a selected portion with or without audio.
Here’s how you can record your entire screen or just a portion of it:
Record your entire MacBook screen
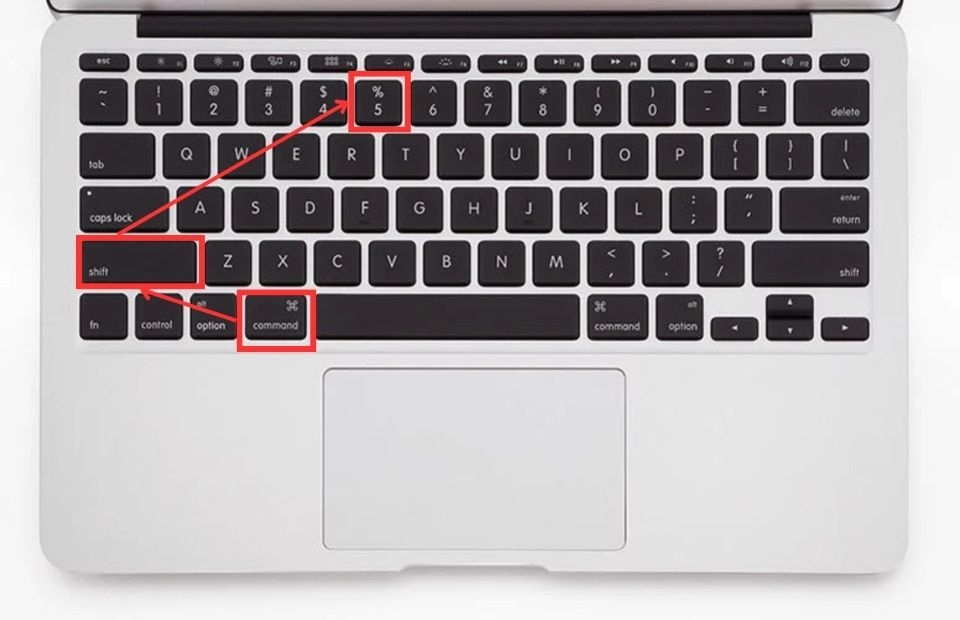
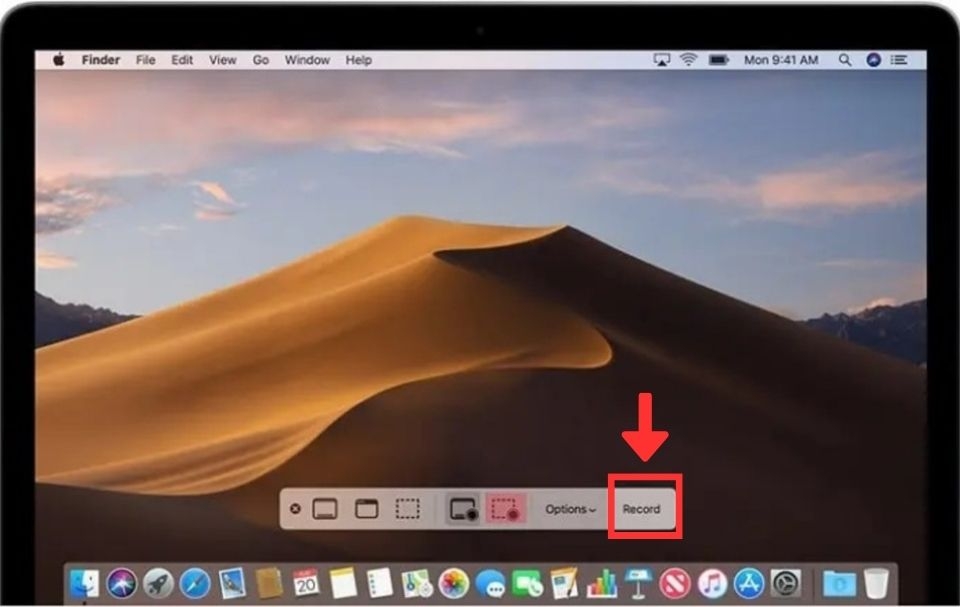
Step 1: Press Command+ Shift+ 5 to open the Screenshot Toolbar.
Step 2: Click the Record Entire Screen icon on the toolbar to start recording your entire screen.
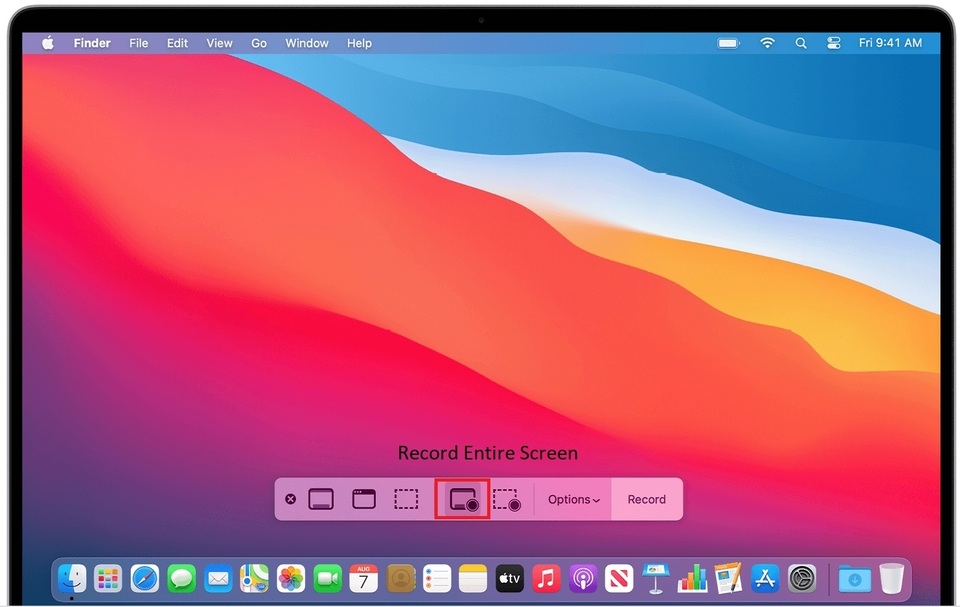
Step 3: Click the Record button on the toolbar or anywhere on the screen to start the recording.
.jpg)
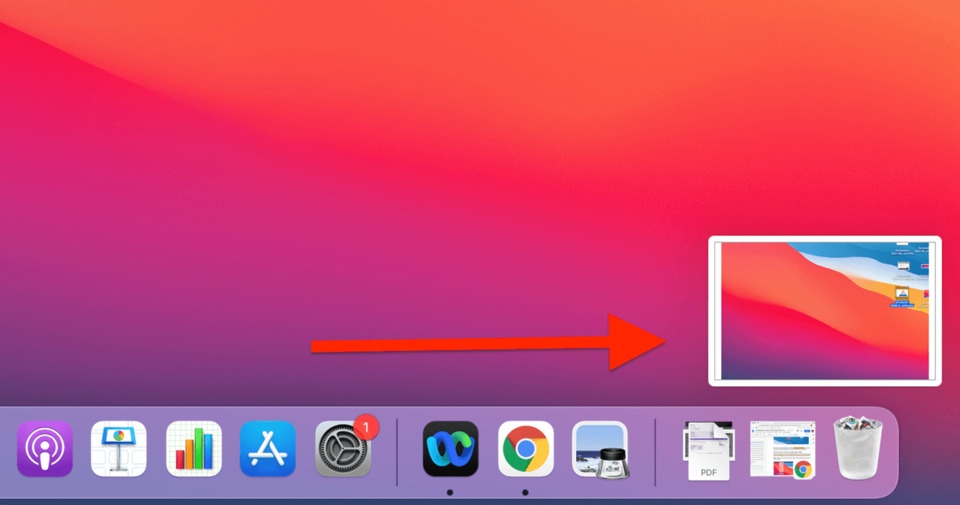
Step 4: Once you’re done, the video will be automatically saved to your device. You can quickly view the recorded video by clicking on the Thumbnail in the bottom-right corner of the screen.
Record a portion of your MacBook screen
Step 1: Press Command+ Shift+ 5 to open the Screenshot Toolbar.
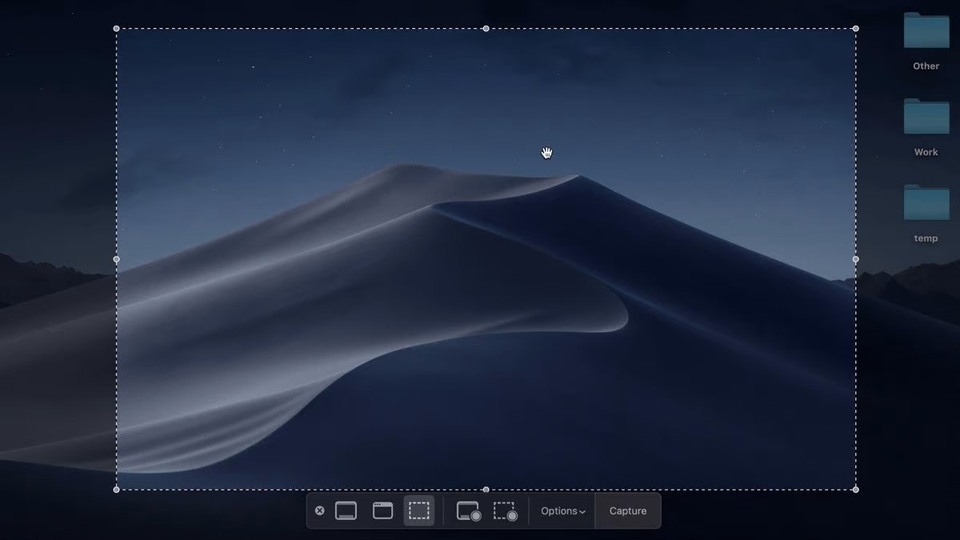
Step 2: Click the Record Selected Portion icon on the toolbar.
.jpg)
Step 3: Use your left mouse button to drag and select the area of the screen you want to record.
Step 4: Click the Record button to start the recording.
Step 5: When you’re done, the recording will automatically stop, and you can view the recorded video on your MacBook screen.
2. Record your MacBook screen with audio using QuickTime Player
QuickTime Player is a built-in feature on MacBooks running macOS Mojave and earlier versions. Here are the steps to record your screen using QuickTime Player:
Step 1: Open QuickTime Player from the Applications folder on your MacBook. Then, go to File > New Screen Recording.
.jpg)
.jpg)
.jpg)
Step 2: Set up your screen recording preferences, such as whether to record audio or show mouse clicks.
-
None: Record the screen without audio.
-
Internal Microphone: Record screen with audio from the microphone.
-
Show Mouse Clicks in Recording: Display mouse clicks during the screen recording.
.jpg)
Step 3: Click the red Record button on the control bar to start recording.
.jpg)
Note: You can choose to record your entire screen or just a portion of it. To record the entire screen, simply click anywhere on the screen. To record a portion, drag your mouse around the area you want to record.
Step 4: To stop recording, press Command-Control-Esc.
.jpg)
Step 5: Your video will be ready, and QuickTime Player will automatically open the recorded video for you to review.
.jpg)
3. Record your MacBook screen with audio using third-party software
Record your MacBook screen with Wondershare DemoCreator
Wondershare DemoCreator is a versatile software that allows you to record your MacBook screen with or without audio. It also provides a convenient video editing feature.
Here are the steps to use Wondershare DemoCreator to record your MacBook screen:
Step 1: Install Wondershare DemoCreator for Mac and launch the software.

Step 2: Set up your screen recording preferences, such as recording mode and audio settings.
.jpg)
Step 3: Click the Record button to start recording.
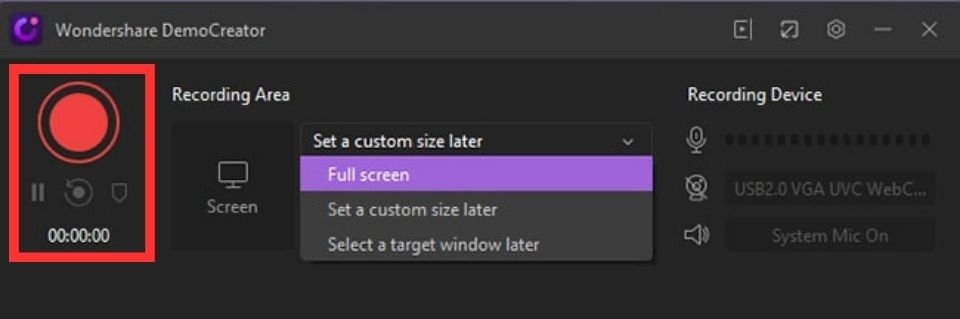
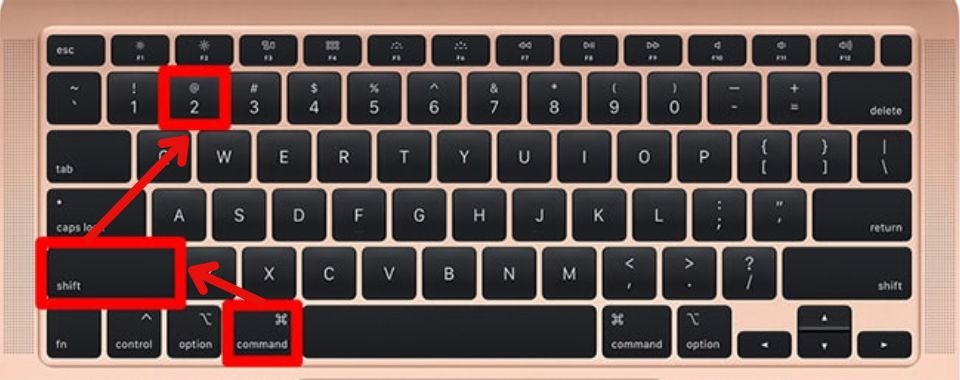
Step 4: To stop recording, press Shift + Command + 2. The recorded video will open in Wondershare DemoCreator’s editing suite.
Record your MacBook screen with Vidmore Screen Recorder
Vidmore Screen Recorder offers a range of options for customizing your screen recordings. Here are the steps to record your MacBook screen using this software:
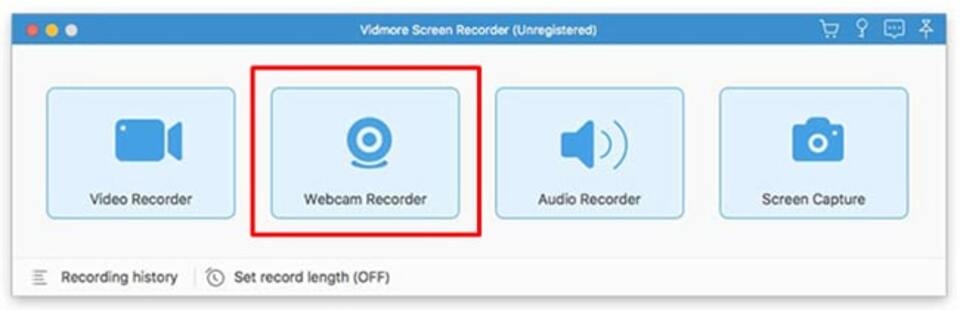
Step 1: Install Vidmore Screen Recorder for Mac and launch the application.

Step 2: Click on Webcam Recorder to access the screen recording feature.
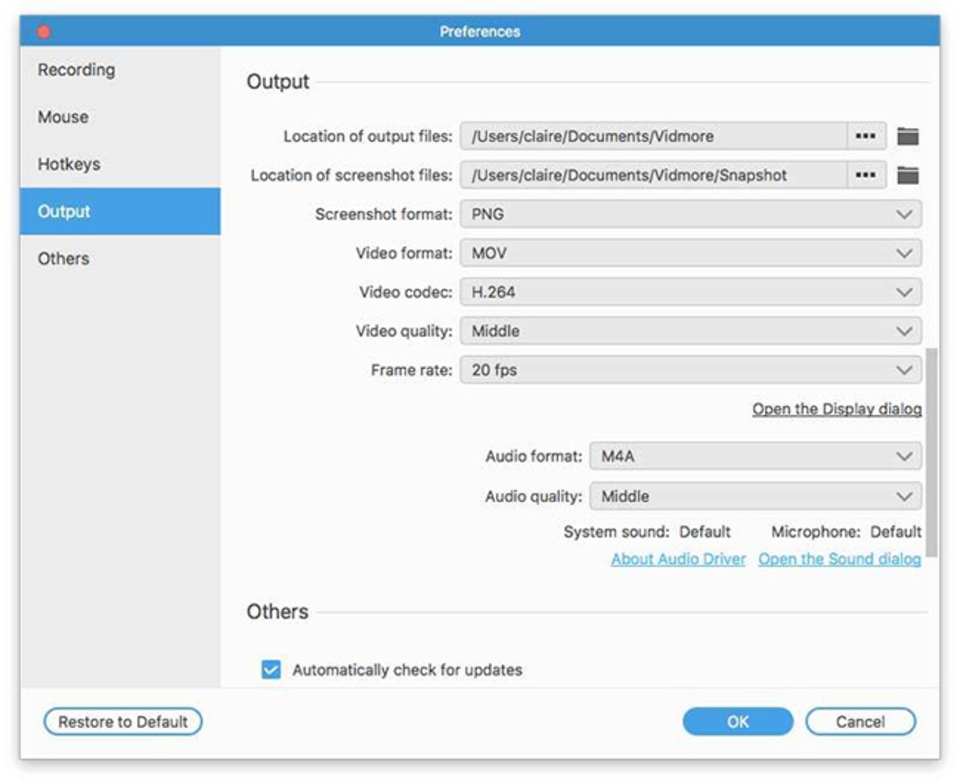
Step 3: Customize your recording preferences in the Preferences section, including file save location, video format, quality, and frame rate.
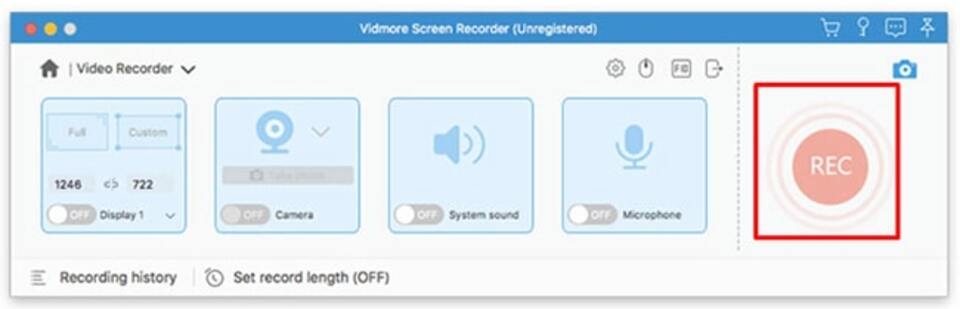
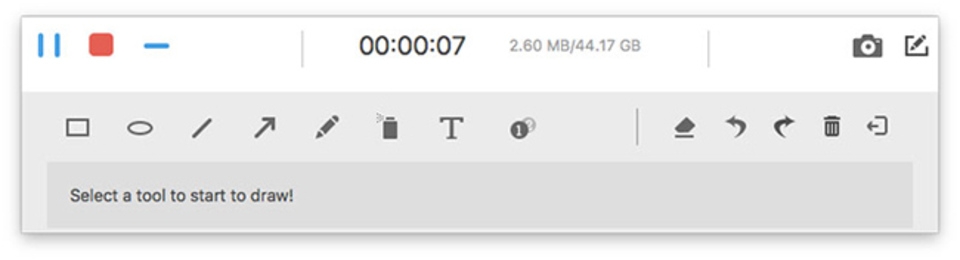
Step 4: Click the REC button to start recording. During the recording, you can use tools like pens, text, and arrows to draw on the video.
4. Important notes when recording your MacBook screen
Your device will automatically save the video once the recording is complete, and the file will be named screen recording day (date) at time (hour).mov.
Press Esc and then select Record to cancel the screen recording.
When using the keyboard shortcut to record your MacBook screen, the Options in the Screenshot Toolbar allow you to set the following preferences:
-
Save to: Choose the location to save the video after recording.
-
Timer: Set a delay for the screen recording to start (5s, 10s, or 15s after clicking Record).
-
Microphone: Enable audio recording during screen recording.
-
Show Mouse Clicks: Display mouse clicks during the screen recording.
Now you know how to use the built-in tools or specialized software to record your MacBook screen with audio. We hope these tips help you create high-quality screen recordings that meet your needs.
Additionally, FPT Shop is an authorized distributor
“The Ultimate Guide to Screen Recording on Samsung Devices: No Software Required”

In today’s digital world, we are all too familiar with the constant pull of our phone screens.
3 Easy and Fast Ways to Download Apps on iPhone Without an Apple ID that You Might Not Know

How to download apps on iPhone without an Apple ID is a question that many users are interested in, especially those who do not have an account. In the following article, FPT Shop reveals to you the three simplest ways to successfully perform this trick.
Easy and Unique iPhone Decorating Ideas with Multiple Themes

If you want to breathe new life into your iPhone, then try out this trick to install unique and eye-catching themes. Transform your iPhone with these unconventional themes and stand out from the crowd. Get ready to experience a whole new look for your device and unleash your creativity. Don’t wait any longer, give your iPhone a fresh and exciting makeover today!


