


The main reason that Windows computers are slow and laggy when booting is that there are too many automatically startup software running in the background.
However, if you do not use these software frequently, or you do not have powerful computers, they will waste the system resources and significantly slow down your computer.
To disable software on Windows 10 startup, you should:
Step 1: Right-click on the taskbar and select Task Manager.
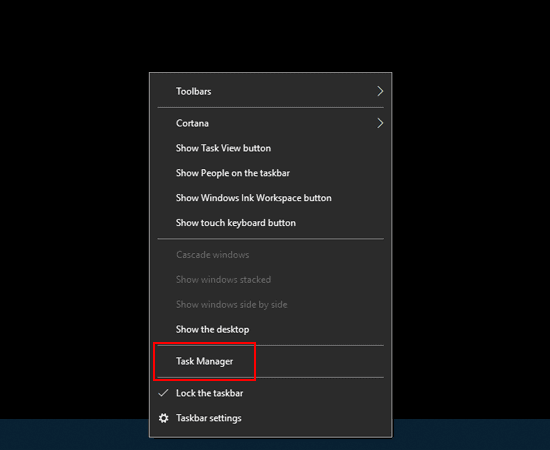
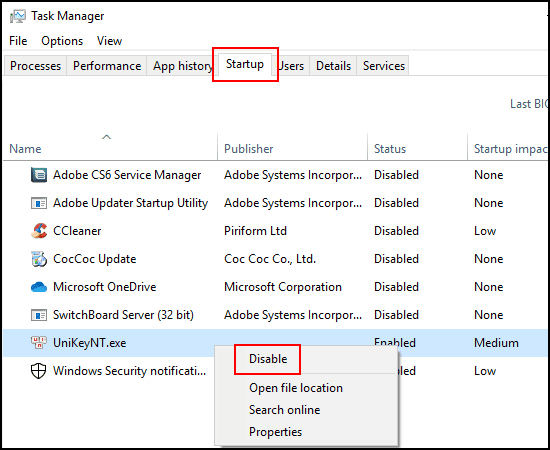
Step 2: Choose the Startup tab. These are the applications that always start with Windows. Right-click on the application and select Disable to turn them off.
Turn off automatic reopening of software when starting up
Windows 10 has a feature that automatically reopens software that was not closed in the previous session.
The purpose of this feature is to make the computer faster each time you reopen the previously used software. However, this feature can unintentionally slow down Win 10. You can turn off this feature as follows:
Step 1: First, click on the Start Menu on your computer. In the left panel, select Settings.
Step 2: In the Settings app, click on Accounts in the various sections.
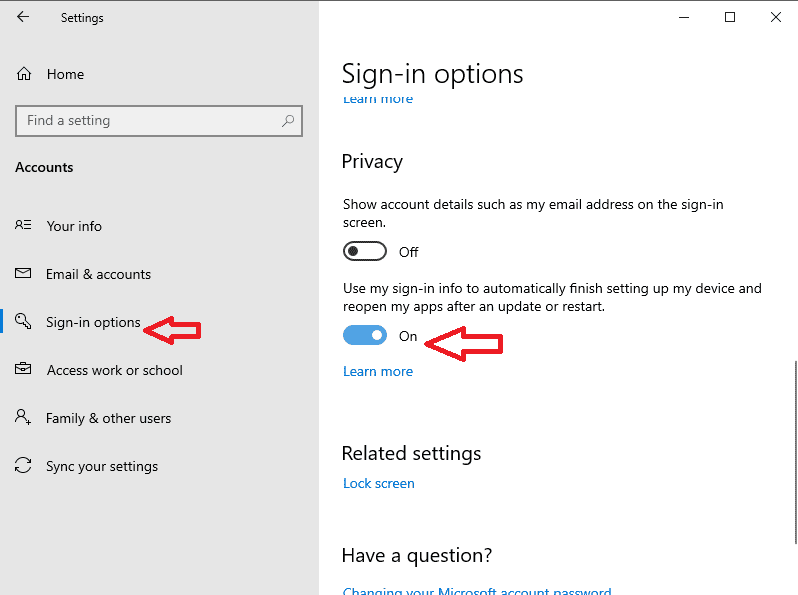
Step 3: When the new page opens, access Sign-in options in the left panel. Click on it to open additional settings in the right panel.
Step 4: Observe the Privacy section and TURN OFF the option “Use my sign-in info to automatically finish setting up my device after an update or restart”.
Now, exit the Settings app and your computer will not automatically reopen the previously opened applications when you restart Windows 10.
Disable background apps on your computer
In addition to the startup applications, the background apps in Windows 10 can also slow down your computer.
If you want to make your computer smoother, you should disable these background apps. you can perform the following steps:
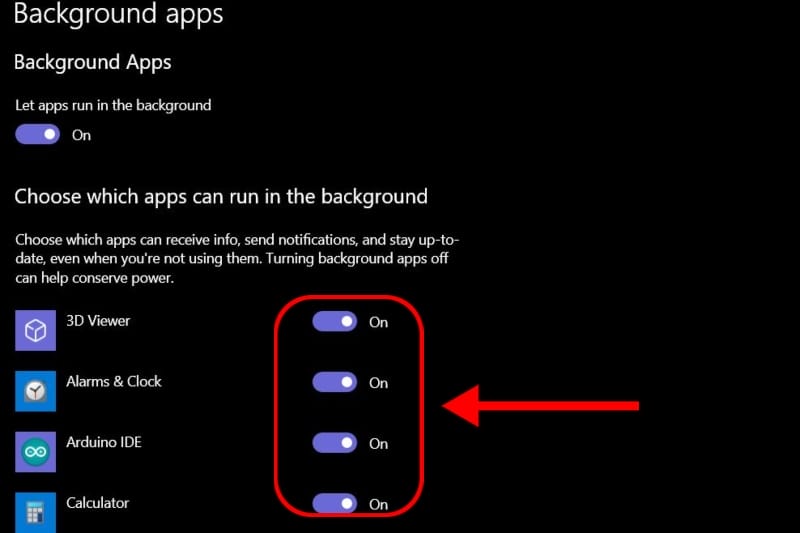
1. Disable background apps using Windows Settings
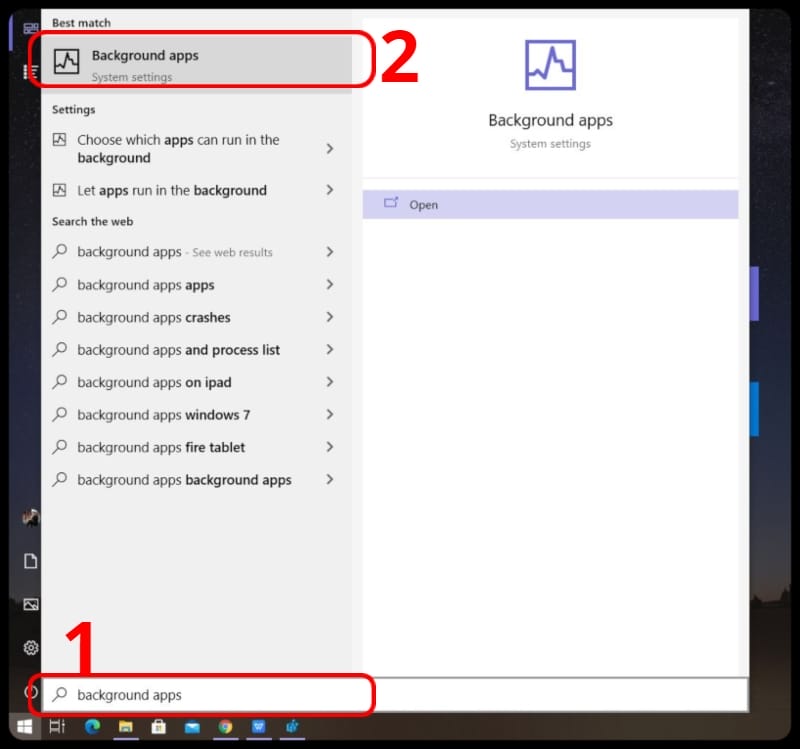
Step 1: You enter the keyword “background apps” in the search bar > Choose “Background apps”.
Step 2: Choose the app you want to turn off by clicking on the on/off status bar of the app.
2. Disable background apps using Task Manager
Step 1: You press the key combination Ctrl + Shift + Esc to open Task Manager.
Step 2: For the first time you open Task Manager, you need to select More details to fully open it.
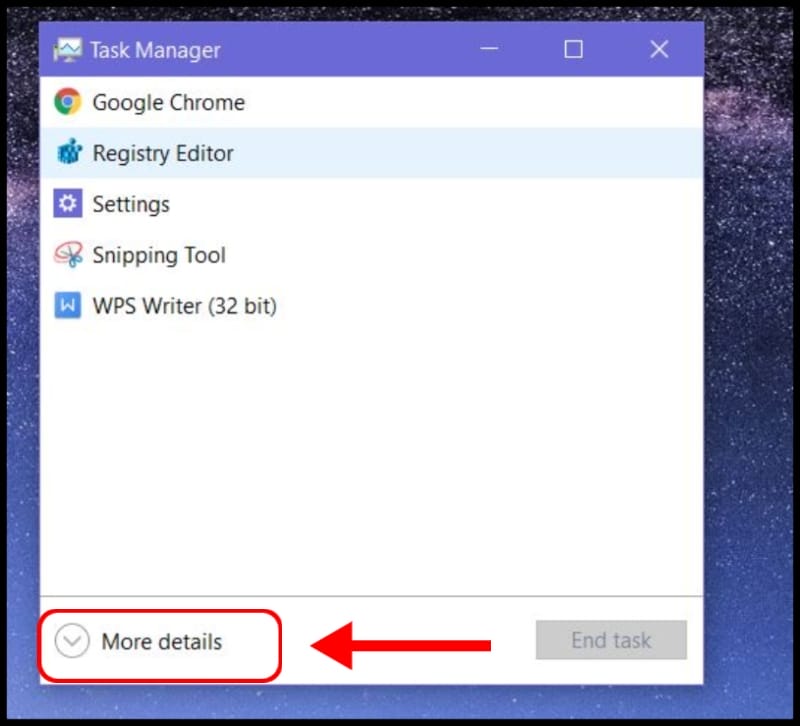
Step 3: Find unwanted background apps in the Backgroud processes section and press the Delete key to turn them off.

Uninstall unused software
Usually, when you buy a new PC or Laptop, there may be pre-installed software that you do not need or use, such as Bloatware or Tools, and they only consume the memory and resources of the computer.
You should uninstall all unused software to improve the computer’s speed. You can do this as follows:
Quick guide:
• On Windows 7/8: You can delete the application by different ways like this:
Press the Windows key > Type “Programs and Features” > Select Programs and Features > Right-click on the software to uninstall > Select Uninstall.
• On Windows 10: You can delete the application by different ways like this:
– Step 1: In the search bar, type Add or remove programs > Select Add or remove programs.
– Step 2: Choose the application to uninstall > Click Uninstall.
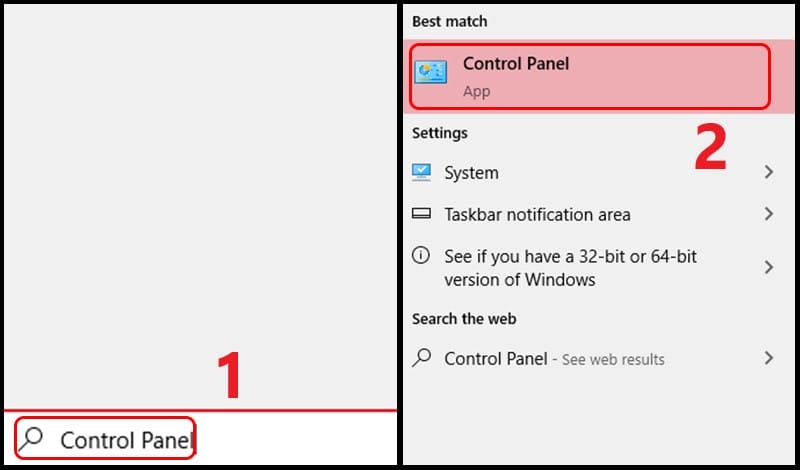
Detailed instructions:
– Step 1: In the search bar (Press the Windows key), type Control Panel > Select the Control Panel app.
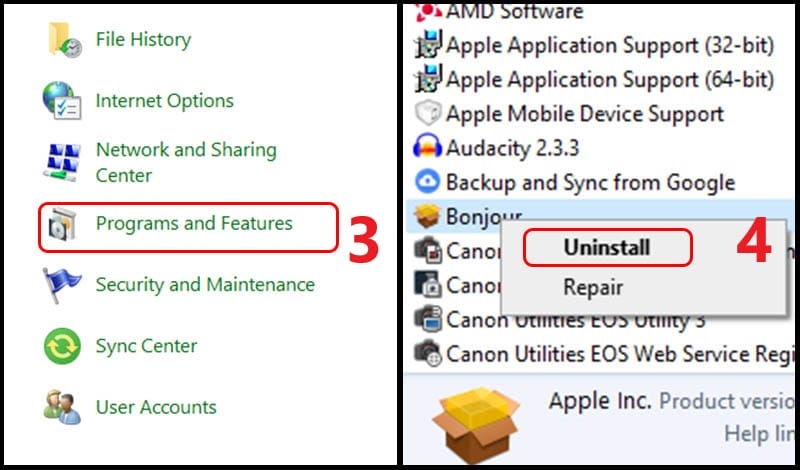
– Step 2: Select Programs and Features > Double-click on the application to uninstall or right-click > Select Uninstall.
Enable ReadyBoost to speed up Windows 10
If you are still using an HDD, enable the ReadyBoost feature to speed up your Windows 10 computer.
ReadyBoost is a long-standing feature that is often used for external memory devices, such as USBs or SD cards, to improve file caching and boost the speed of the computer without the need to upgrade the memory.
Note: The ReadyBoost feature does not work on SSD hard drives.
To enable the ReadyBoost feature on Windows 10, follow these steps:
Step 1: Connect a USB drive to your computer or laptop.
Step 2: Open This PC and right-click on the USB memory. Choose Properties.
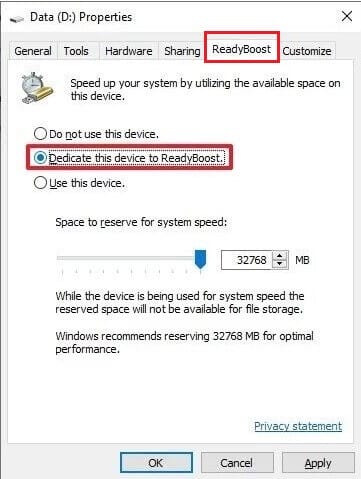
Step 3: Navigate to the ReadyBoost tab. Choose “Dedicate this device to ReadyBoost”. Finally, click OK.
Note: You can only use a newer generation USB to enable this feature. If there is a device that uses ReadyBoost on your computer, Windows 10 will enable this feature for the entire computer.
Disable System Restore
If you do not want to use the System Restore function, you should disable it to free up memory, storage capacity, and limit the background services of Windows 10. To disable System Restore on Windows 10, please follow these steps:
Step 1: Right-click on “This PC” > Select Properties > Advanced system settings > Select the System Protection tab. The default is usually activated (Protection = On)
Click the Configure button, the next window appears, you choose “Disable system protection” to turn off the System Restore function.
Now, check the System Protection tab again, and you will see that the Protection option for drive C is Off, meaning that the backup feature has been successfully turned off.
Disable Windows Defender
Windows Defender is one of the good and stable free antivirus programs, but if you do not want to use it, or you are familiar with using other antivirus applications, you can turn off Windows Defender! You open Control Panel => Windows Defender or right-click on the program icon in the lower-right corner of the screen => Open
You then select Settings in the new interface of Windows Defender
The setting window will appear, there are some options turned on; you switch all to off to disable Windows Defender.
Activate Hibernate mode
What is Hibernate? Hibernate is a useful feature in Windows. We can use this feature in case we do not use the laptop for an extended period but do not want to close the tasks. To activate Hibernate mode, follow these steps.
Step 1. You press Windows + I => then select System.
Step 2. In the Settings window, you select Power & sleep => then select Additional power settings (as shown below).

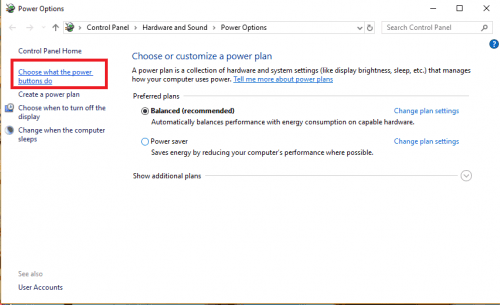
Step 3. A new interface appears, you press Choose what the power buttons do (as shown below).
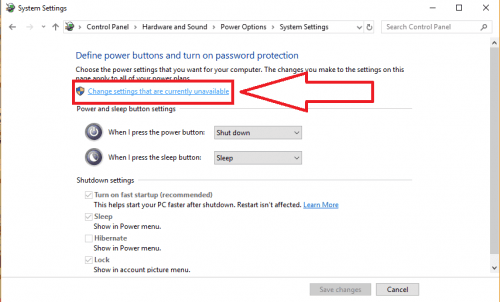
Step 4. Another interface appears, you press Change settings that are currently unavailable.
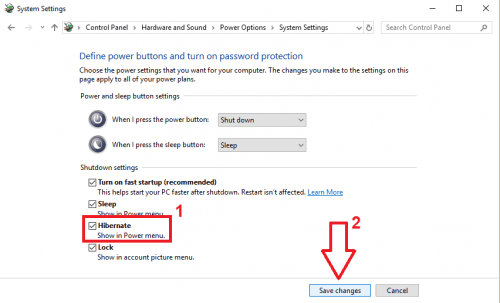
Step 5. Finally, you check Hibernate => then press Save changes to save the settings.
From now on, you can choose Hibernate mode instead of Sleep or Shutdown to put your computer into Hibernate mode and quickly bring it back to operation.
Turn off Search Indexing
If you want to increase the speed of Windows 10 effectively and use the search tool on Windows less often, you should turn off the Search Indexing feature. This feature consumes system resources, making the system performance weaker when running in the background. To turn off or disable the Search Indexing feature on Windows 10, follow these steps:
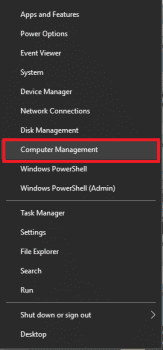
Step 1. Right-click on the Start Menu => then select Computer Management (as shown below).
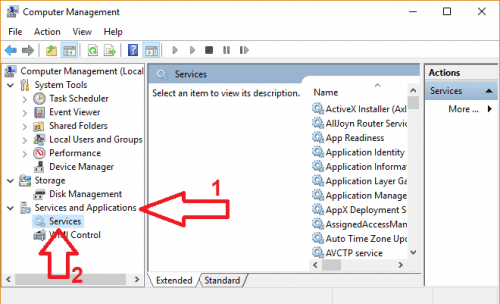
Step 2. In the new window, you double-click on Services and Applications => then select Services.
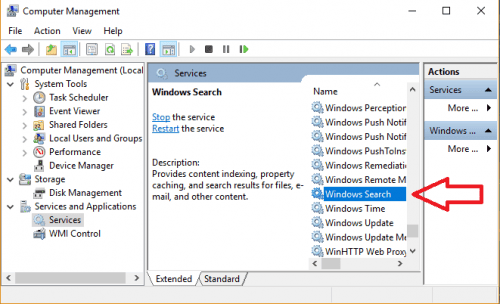
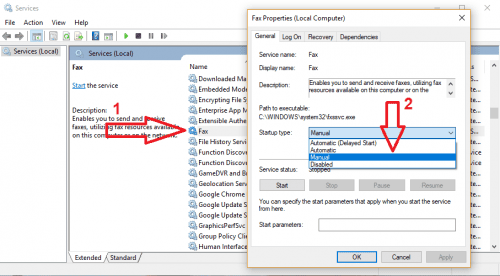
Step 3. In the list of services on the right side of the window => you find and double-click on Windows Search (as shown below).
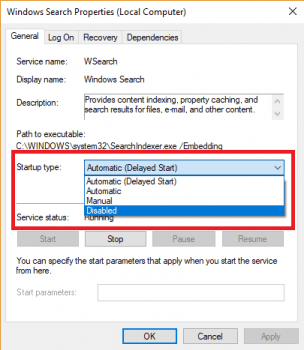
Step 4. A new window appears, you select Manual or Disabled in the Startup type to disable or manually activate the service in the Startup type section.
Disable unnecessary background services
Disabling unnecessary background services will not harm your computer. On the contrary, it will contribute to speeding up Windows 10 as these services consume system resources. To turn off or manually activate background services, follow these steps:
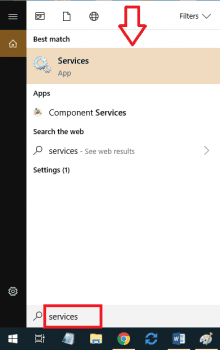
Step 1. Open the search bar on Windows 10 by pressing Windows + S => then enter keywords “services” => select the result that appears.
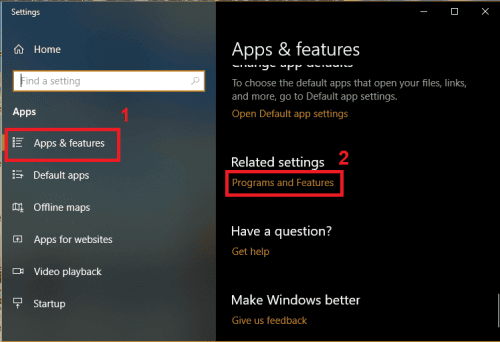
Step 2. In the new window, navigate down to select Programs and Features in the right extension option.
Step 3. Then click on Turn Windows features on or off in the left option of the new window.
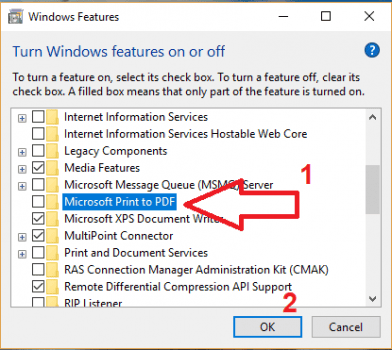
Step 4. In the Windows features window, uncheck the unnecessary features => then click OK.
Disable unnecessary features
On Windows 10, users are supported with various optional features such as .NET, PowerShell, Telnet, Media… However, you may not use or find them useful, but they still occupy system memory. To help speed up your computer, you should disable them.
– How to turn off unnecessary features on Win 10
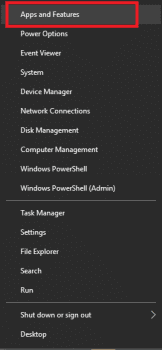
Step 1. Press the Windows key + X => then select Programs and Features/Apps and Features (as shown below).
Step 2. The new window appears, you navigate down and select Programs and Features in the expanded options on the right.
Step 3. Next, click on Turn Windows features on or off in the left option of the new window.

Step 4. In the Windows features window, uncheck the features you don’t use => then click OK.
Simplest way to disable background apps on iPhone

To ensure your phone is always performing at its best, follow these simple steps to disable background apps on your iPhone.


