


It’s not unusual to encounter audio issues on Windows 7, and they can vary in nature. To resolve audio problems on Windows 7/8, start by diagnosing the specific issue. One common problem is intermittent or no sound with no apparent cause.
Step 1: Press Windows + R, then type regedit and hit Enter to launch the Registry Editor.

Step 2: Navigate to the following registry key:
Computer\HKEY_LOCAL_MACHINE\SOFTWARE\Microsoft\Windows\CurrentVersion\MMDevices
Step 3: Click on MMDevices, then select Permissions from the menu.
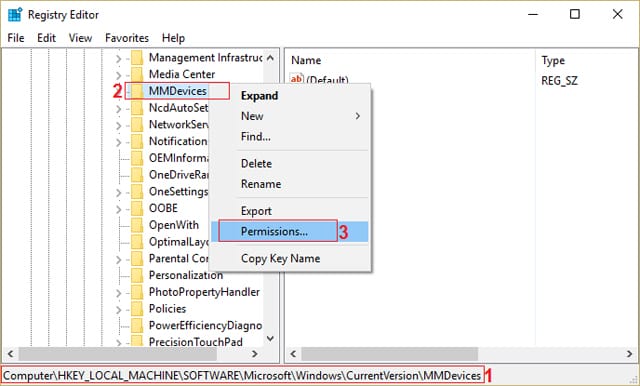
Step 4: In the Permissions window, grant Full Control to SYSTEM, Administrator, and user.

Step 5: Click Apply, followed by OK to save these changes.
Step 6: Now, navigate to this registry key:
Computer\HKEY_LOCAL_MACHINE\SOFTWARE\Microsoft\Windows\CurrentVersion\MMDevices\Audio
Step 7: Repeat Steps 4 and 5 to ensure full control for Admin, user, and SYSTEM.
Step 8: Exit the Registry Editor and restart your computer. This method should resolve the red X issue on the volume icon in Windows 10. If the problem persists, proceed to the next method.
Method 2: Verify and Start Windows Audio Services
Step 1: Press Windows + R, input msc, and press Enter.
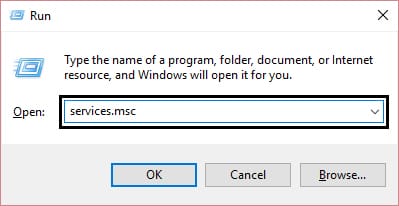
Step 2: Locate Windows Audio Services, right-click, and choose Properties.
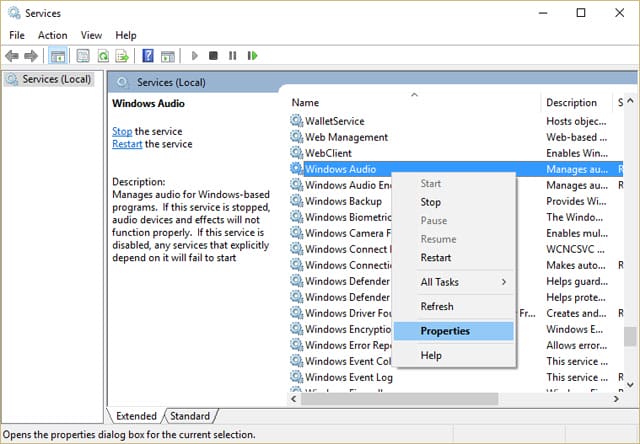
Step 3: Ensure the service is running and set the Startup type to Automatic.

Step 4: Click Apply, then OK.
Step 5: Repeat these steps for the Windows Audio Endpoint Builder service.
Step 6: Close all programs and restart your computer for the changes to take effect.
Method 3: Update Your Audio Driver
Step 1: Press Windows + R, enter msc, and press Enter to open the Device Manager.
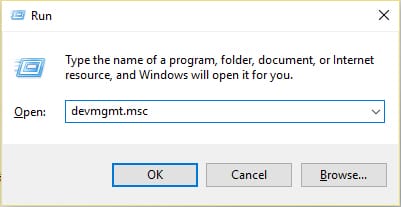
Step 2: Expand Sound, video, and game controllers. Right-click on the Audio Device and choose Enable if it’s disabled. If it’s already enabled, right-click and select Update Driver Software.

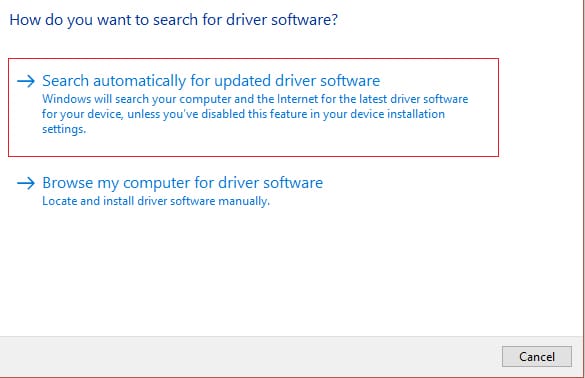
Step 3: Opt to Search automatically for updated driver software and wait for the process to finish.
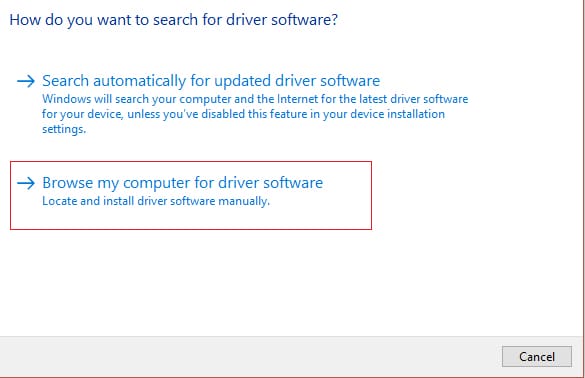
Step 4: If the update fails, select Update Driver Software again.
Step 5: This time, choose to Browse my computer for driver software.
Step 6: Then, select Let me pick from a list of device drivers on my computer.
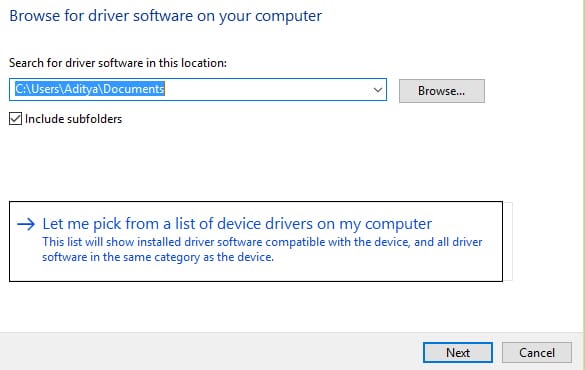
Step 7: From the list, choose the appropriate driver and click Next.
Step 8: Once the process is complete, restart your computer.
Step 9: If you can’t find the right driver, visit the manufacturer’s website to download and install the latest version.
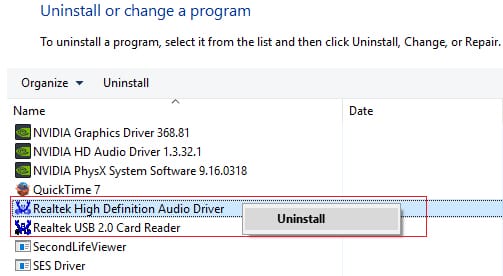
Method 4: Uninstall the Realtek High Definition Audio Driver
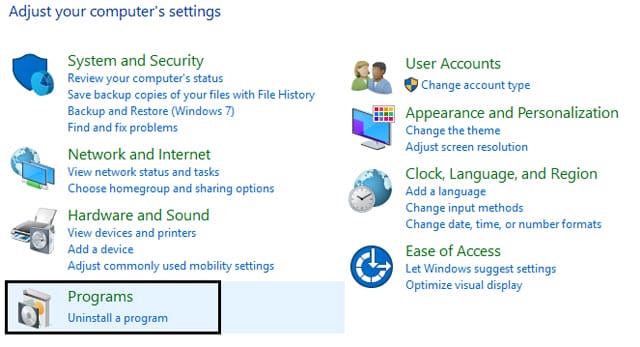
Step 1: Press Windows + X and select Control Panel.

Step 2: Go to Uninstall a Program and locate Realtek High Definition Audio Driver.
Step 3: Right-click and choose Uninstall.
Step 4: After uninstalling, restart your computer and open the Device Manager.
Step 5: Click on Action and select Scan for hardware changes.
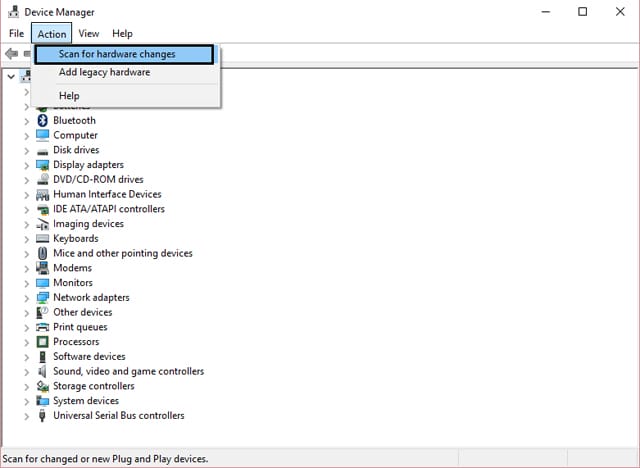
Step 6: The system will automatically resolve the red X issue on the volume icon.
If the issue persists, try the following method:
Go to the Control Panel and select Hardware and Sound. From there, choose Realtek HD Audio Manager. Click on the Information button and uncheck “Display icon in the notification area.” Click OK, then select Connector Setting. Finally, choose “Disable front panel jack detection” and click OK.
We hope this guide helped resolve your audio issues. If you found it useful, please share it with your friends. Good luck!
9 Simple Ways to Turn off Windows 10 Updates

By utilizing the shortcut method to update Windows 10 discussed in this article, you can work and study with peace of mind, as you won’t have to worry about the system unexpectedly upgrading and interrupting your experience at any given time.
How to fix computer not recognizing headphones? Discover the 8 most detailed solutions

There may be several reasons why your computer does not recognize headphones. When encountering this issue, you should check some settings in the computer’s audio system as well as the device’s connectivity. Additionally, in some cases, the inability to connect may be due to a faulty device.
Simple steps to set up a strong computer password, high security

Setting a computer password helps secure your computer data in various situations. So how do you set a computer password? Find the answer in the article below.
Turning Off Write Protection in Windows 11

If you ever encounter the error message “Disk is write protected” when trying to use a storage device, it can be quickly remedied with the help of FPT Shop. Follow their detailed guide to easily remove the write protection feature and get back to using your device.


