


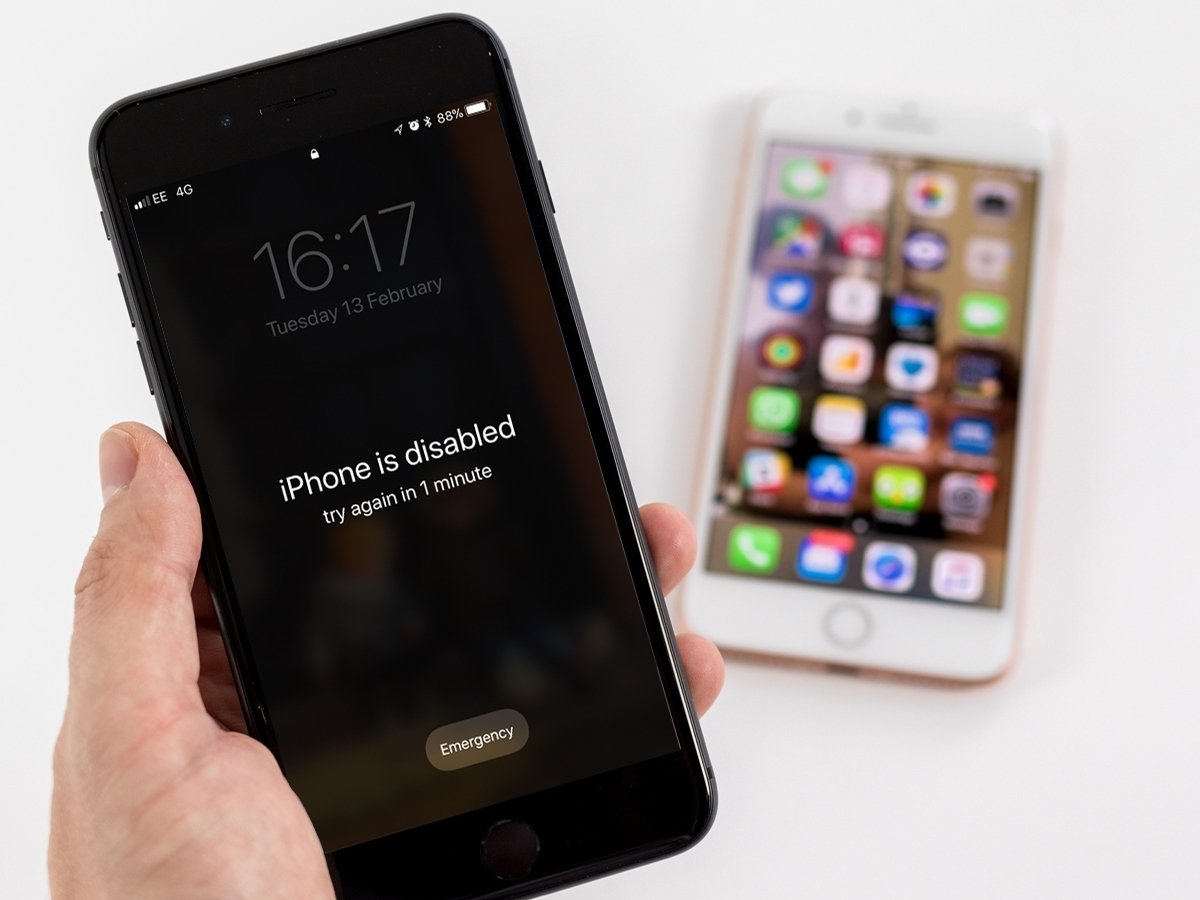
Entering the wrong password seven consecutive times will temporarily lock your iPhone. If you enter the wrong password ten times in a row, your iPhone will automatically erase all data and become “iPhone is disabled.”
Reasons for iPhone Being Disabled
Forgetting your iPhone unlock password and entering it incorrectly multiple times can disable your iPhone. Specifically:
– 5 incorrect attempts – iPhone is disabled for 1 minute.
– 7 incorrect attempts – iPhone is disabled for 5 minutes.
– 8 incorrect attempts – iPhone is disabled for 15 minutes.
– 9 incorrect attempts – iPhone is disabled for 60 minutes.
– 10 incorrect attempts – iPhone is disabled.
Unlocking iPhone via iTunes: A Step-by-Step Guide
Don’t panic if your iPhone is disabled. There are several quick and simple solutions to resolve this issue without visiting a repair center. Below are effective methods to fix the “iPhone is disabled” error.
– Scenario 1: iPhone Never Synced with iTunes on a Computer
+ Step 1: Connect iPhone to Computer
First, connect your iPhone to the computer using a USB-Lightning or USB-Type C cable, then turn off your iPhone.
+ Step 2: Enter DFU Mode and Restore
Next, open iTunes on your computer. You’ll see a notification: “iPhone is disabled.” Press and hold the Power and Home buttons for a few seconds, release the Power button, and continue holding the Home button to enter DFU mode.
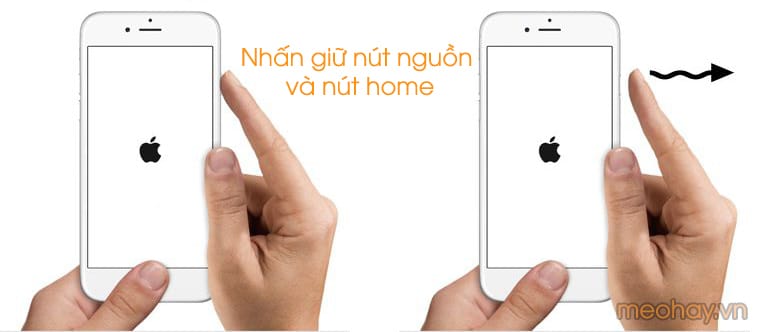
Entering DFU Mode
Wait for iTunes to connect to your iPhone. Once connected, release the Home button. The computer will display: “iTunes has detected an iPhone in recovery mode. Restore your iPhone before using it with iTunes.”
Click OK to proceed.
– Scenario 2: iPhone Regularly Synced with iTunes on a Computer
+ Step 1: Connect iPhone to iTunes
Connect your iPhone to iTunes on the computer > Click Back up now to save iPhone data.
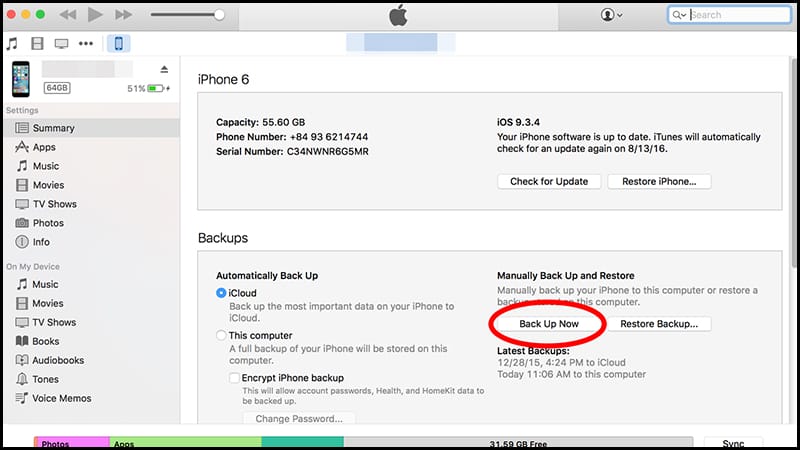
Back up now Button
+ Step 2: Restore Data
Wait for the backup to complete > Click Restore Backup > Select the most recent backup > Confirm your choice.

Restoring iPhone
After restoration, enter your iCloud account to access your iPhone.
Unlocking iPhone via iCloud: A Comprehensive Guide
This method works only if Find My iPhone is enabled.
– Step 1: Access iCloud.com
Visit iCloud.com > Log in with your Apple ID.

Logging into iCloud
– Step 2: Erase Data and Use the Latest Backup
Select Find iPhone.

Find iPhone Feature
Choose All Devices > Select your iPhone.

Select Your iPhone
Choose Erase iPhone to delete all data. After setup, use the latest backup to restore data and unlock your iPhone.
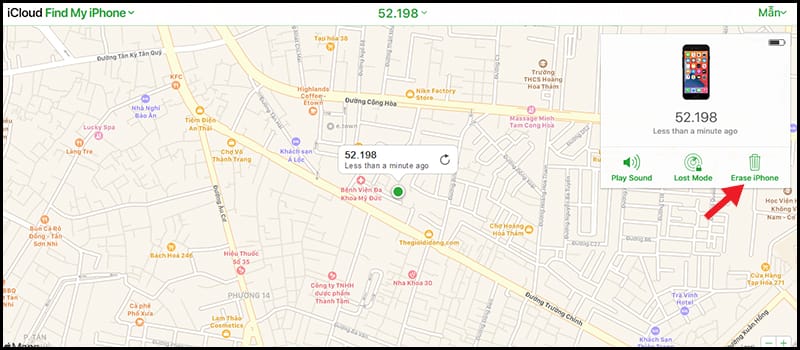
Erasing iPhone to Start Setup
Unlocking iPhone Using Recovery Mode: A Detailed Guide
If the above methods fail, use Recovery Mode. Note: This method will erase all iPhone data.

Step 1: Turn off your iPhone and disconnect it from the computer.
Step 2: Press and hold the Home button, connect the device to the computer. After a few minutes, “Connect to iTunes” will appear on the iPhone screen. Release the Home button.
Step 3: Click OK > Click Restore iPhone > Select the latest backup > Follow the prompts.
Unlocking iPhone with 3uTools: A Simplified Guide
If iTunes restoration fails, use 3uTools, which offers similar functionality with simpler steps.
Step 1: Download the latest 3uTools.
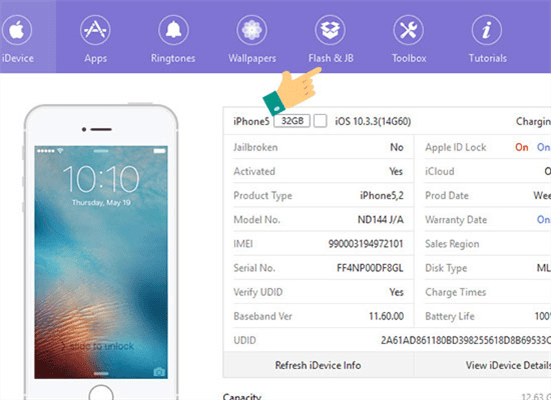
Step 2: Open the app > Select Flash & JB.
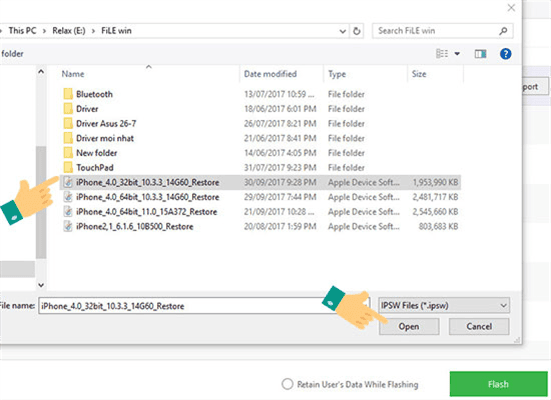
Step 3: In this section, select firmware not locked by Apple. If already downloaded, choose Import.
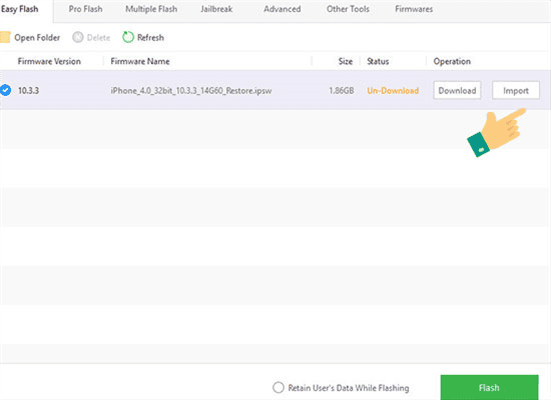
Select the version to restore > Click Open.

If not downloaded, click Download > Click Flash.
Click Download

Click Flash
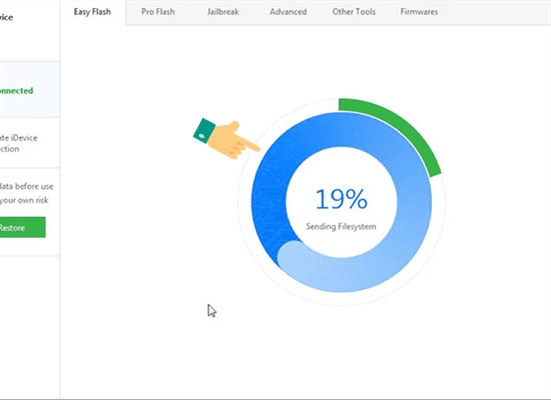
Step 4: The app will display the restoration progress. Wait until it reaches 100%.
Step 5: Completion.
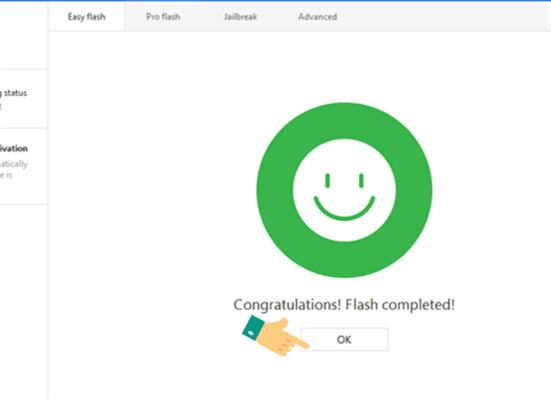
Congratulations! You’ve successfully restored your iPhone. Best of luck!
Note: 3uTools is a third-party app. Proceed with caution. Do not disconnect the cable or close 3uTools during restoration. Log out of iCloud beforehand to avoid issues.
Good luck!

Expert in web design and development with over 15 years of experience. I’ve helped hundreds of businesses develop comprehensive website strategies for sustainable growth and profitability.
iPhone Restore – A Step-by-Step Guide to the 2 iPhone Recovery Methods Every User Should Know

iPhone restoration proves to be one of the means to rectify issues with the iPhone after extensive usage. It is also considered to be the ultimate solution as it may erase everything on the phone. Here are the most detailed 2 ways to restore an iPhone that users cannot help but know.
Restore iPhone with iTunes: The Foolproof Guide for Seamless Success

Restore your iPhone with iTunes to quickly factory reset it, fix common errors, and regain a smooth user experience. For a step-by-step guide on how to restore your iPhone using iTunes, refer to this article.
Unlock Your iPhone with Owner Lock: Quick Fix in No Time!

The iPhone activation lock is a security feature by Apple, designed to protect personal data and prevent unauthorized use of iPhones. When this feature is enabled, the device requires the owner’s Apple ID and password before it can be used or activated again.
Fix Simple Home Method for iPhone Stuck on Apple Logo

One common issue that iPhone users often encounter is the iPhone stuck on the Apple logo. This is an annoying and frustrating error that can result in a poor user experience.
Discover the reasons behind iPhone’s blank screen and try these 4 simple troubleshooting methods now!

White screen error on iPhone can be caused by various reasons such as loose cables, damaged screen, water damage, and even software issues. Many users have encountered this problem but do not know how to fix it. Let FPT Shop guide you now!


