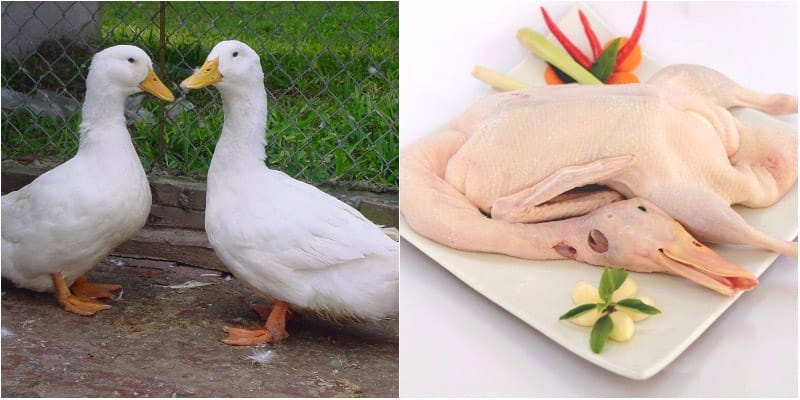
Roast duck is a delicious but intricate dish, and not everyone can master it. As a result, it is often purchased from restaurants at a high price. The most crucial aspect of preparing roast duck is the marination process. The duck must be thoroughly seasoned, and the skin must be dry and crispy for the dish to be tasty and appealing. Today, we will guide you through the process of marinating and roasting a duck, ensuring that you can create a restaurant-quality dish at home. Are you ready to dive into the details? Let’s get started!
Content
Hide
- Guide to Marinating a Duck
- Ingredients
- Instructions
- Step 1: Prepare the Duck
- Step 2: Marinate the Inside of the Duck
- Step 3: Marinate the Outside of the Duck
- Step 4: Roast the Duck
Guide to Marinating a Duck
Ingredients
Duck: 1, weighing approximately 1-1.2 kg
Marinade for the Inside of the Duck:
- Finely minced garlic: 1 tablespoon
- Finely minced shallots: 1 tablespoon
- Dark soy sauce: 2 tablespoons
- Salt or seasoning powder: 1.5 teaspoons
- White sugar: 1 tablespoon
- Ground pepper: 1 teaspoon
- Five-spice powder: 1 teaspoon
Marinade for the Outside of the Duck:
- Maltose: 3 tablespoons
- Boiling water: 1 tablespoon
- Finely minced garlic: 2 teaspoons
- Finely minced ginger: 2 teaspoons
- Soy sauce: 1.5 tablespoons
- Vinegar: 2 teaspoons
- Salt: a pinch
Instructions
Step 1: Prepare the Duck
After cleaning the duck thoroughly, remove any unpleasant odors by crushing a knob of ginger and mixing it with white liquor. Rub this mixture inside and outside the duck to eliminate any unwanted smells. Let it sit for about 20 minutes, then rinse it off and pat the duck dry. Note that if the duck’s skin is torn, use a needle and thread to sew it up. The tighter the skin, the better the roast will be.

Don’t butterfly the duck when making roast duck.
Step 2: Marinate the Inside of the Duck
Combine all the ingredients for the inside marinade and mix well. Using your hands, rub this mixture into the duck’s cavity, ensuring it doesn’t come into contact with the skin. For the outside, mix 2/3 teaspoon of salt and 2/3 teaspoon of five-spice powder, and rub it all over the skin.
Hang the duck on a hook and let it air-dry, or place it on a high shelf or in a well-ventilated area. Allow it to dry and absorb the flavors for at least 6-8 hours. This marination process takes a significant amount of time, so make sure to prepare the duck a day before you plan to cook it.
Step 3: Marinate the Outside of the Duck
Combine all the ingredients for the outside marinade in a deep pan and bring it to a boil. Once it starts boiling, hold the duck by its neck and dip it into the pan. Spoon the mixture over the duck several times to ensure an even coating. This technique gives the duck a beautiful color and makes the skin crispy and shiny. The more thoroughly you apply the mixture, the glossier and more attractive the duck will be.

Maltose is essential in this step to give the duck’s skin a brown color and make it crispy. You can substitute it with honey, palm sugar, or molasses, but maltose yields the best results.
Continue to air-dry the duck, or if the weather is dry, you can sun-dry it for 2-3 hours or even 7-8 hours. The longer it dries, the tastier it will be. Ensure the duck’s skin is completely dry before placing it in the oven.
Step 4: Roast the Duck
Using a specialized roasting oven will ensure even cooking and the best flavor. However, such ovens are not always available. To roast the duck in a conventional oven, preheat the oven and set the temperature to 160-170°C. For a 1 kg duck, roast it for 45-55 minutes. After the first 20 minutes, flip the duck to ensure even cooking. Once the duck is cooked, turn off the oven but leave it inside for a while longer to allow the excess fat to drip out and the skin to dry. Then, remove it from the oven.
Let the duck cool down before carving it into long slices. Serve it with fresh herbs and soy sauce or your choice of dipping sauce.
ST’s Tips
Super easy tips to clean your dirty and moldy broom and make it good as new
Regular cleaning of your broom is crucial to maintain proper hygiene in your home. By keeping your broom clean, you ensure that it effectively sweeps away dirt and debris without spreading them around. Regularly cleaning your broom also helps to extend its lifespan, ensuring that it remains effective for a longer period of time. Remember to remove any trapped dirt or hair from the bristles after each use, and periodically wash the broom with warm soapy water. By taking these simple steps, you can ensure that your broom remains a reliable and hygienic tool for keeping your floors clean.


