


Selecting and Preparing Fish for Frying
The first step to achieving delicious fried fish is to select fresh fish. Look for bright red gills, clear eyes, shiny scales, and a firm body. If buying sliced fish, press your finger into the flesh; it should feel firm and sticky. Avoid fish that feels soft, has an odd smell, cloudy eyes, discolored scales, or dull red gills, as these are signs of spoilage. Depending on your preference, choose from various types of fish such as rohu, pink perch, carp, or grass carp for frying.
Add This to Your Oil for Crispy, Non-Sticky Fried Fish
Once you’ve purchased your fish, it’s time to prepare it for frying. Remove the scales, clean the belly, and scrape away any blood and dark membranes. Rinse the fish thoroughly, including the gills, to remove any fishy odor or slime. There are several methods to achieve this, including rinsing with rice water, using white wine and crushed ginger, or rubbing with lemon and salt before thoroughly washing and drying the fish with a thin cloth or paper towel.
Supporting Ingredients
To create a crispy texture and prevent oil splatter, it’s essential to use familiar ingredients from your kitchen: salt and lemon juice. Salt plays a crucial role in drawing out moisture from the fish, creating a dry surface that won’t cause temperature differences between the hot oil and the fish’s moisture, thus preventing oil splatter. Additionally, salt breaks down protein chains, forming a sticky solution that helps retain moisture, resulting in a crisp exterior and tender interior.
Salt also inhibits bacterial growth by disrupting enzymes and damaging bacterial DNA, keeping the fish fresher for longer before frying. Furthermore, salt aids in saponification, forming sodium salts of fatty acids that create a natural non-stick layer in the pan.
Lemon juice, on the other hand, contains citric acid, which stimulates the coagulation of proteins in the fish, quickly sealing the surface. This acid also contributes to the desirable crispness and fluffiness of fried foods, as seen in spring rolls, where experienced cooks often brush a bit of lemon juice on the outer layer.
Method: Squeeze half a lemon, add a pinch of salt to the juice, and then brush a thin layer of this mixture over the fish’s skin. Pat dry.
Frying the Fish
Fish has a delicate protein structure that can easily break down when exposed to high heat, forming irreversible chemical bonds that cause the fish to stick to the pan. Therefore, it’s crucial to be patient and control the heat and temperature carefully.
Add This to Your Oil for Crispy, Non-Sticky Fried Fish
If you don’t have a non-stick pan, clean your regular pan thoroughly and place it on the stove over medium heat for 3-5 minutes to ensure even heating. Alternatively, you can boil water in the pan, discard it, and then return the pan to the stove. Once the pan is dry, reduce the heat to medium-low and add lard or cooking oil. Test the heat by dipping the tip of a chopstick into the oil; if it sizzles vigorously, the oil is ready.
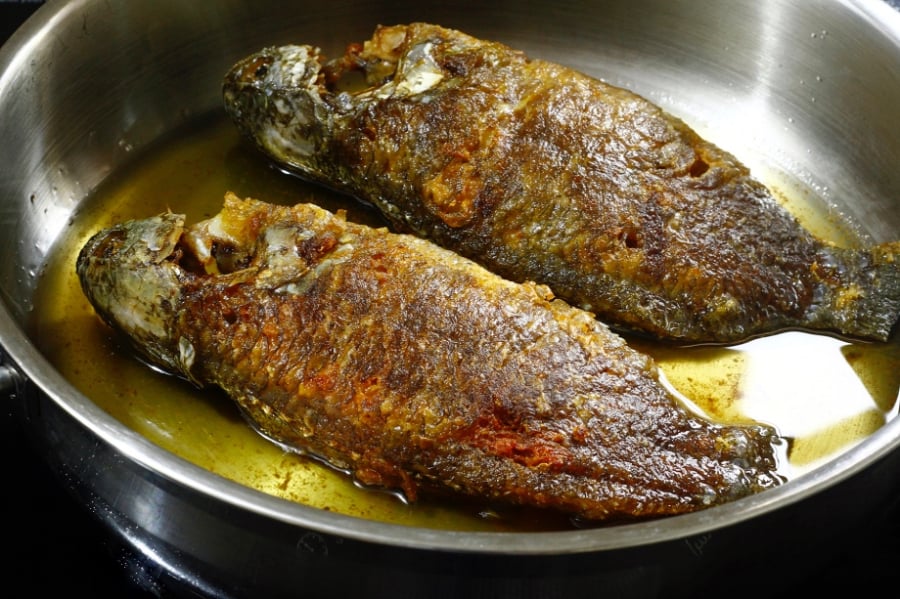
Now, carefully place the fish in the pan and allow it to cook undisturbed so that the underside can set and the skin can crisp. During this phase, avoid tampering with the fish to prevent it from breaking apart. Once the edges of the fish start to curl, and the skin turns golden and lifts off the pan easily, it’s ready to be flipped, which should take about 8-12 minutes, depending on the thickness and size of the fish.
If you prefer your fish with a “crispy outside, tender inside” texture, increase the heat at the end of the cooking process to evaporate any remaining moisture quickly, ensuring a crisp exterior while retaining the moist, buttery interior. Moreover, this high heat will trigger the Maillard reaction between the sugars and amino acids in the fish’s protein, resulting in a golden, crispy, and aromatic crust.
Add This to Your Oil for Crispy, Non-Sticky Fried Fish
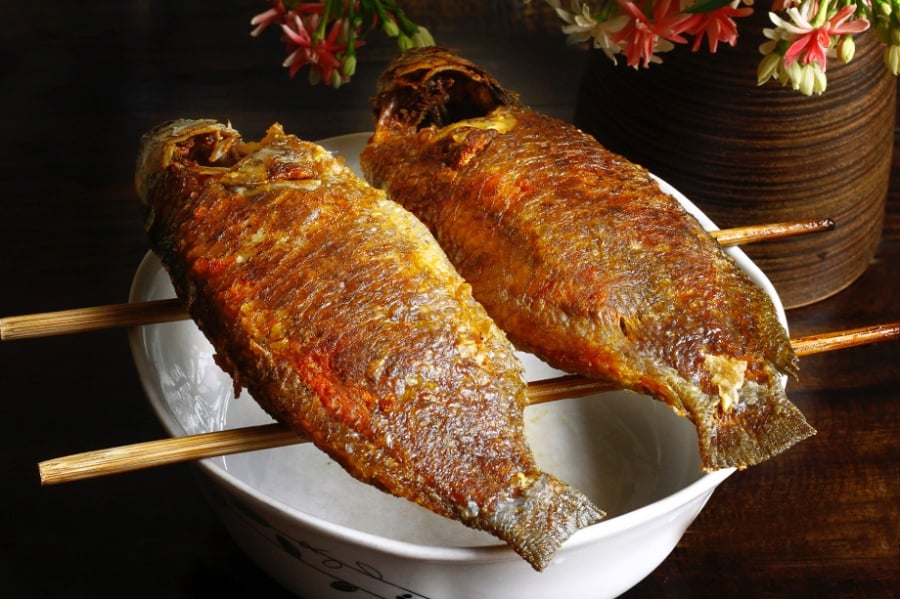
To ensure the fried fish stays crispy for longer, place it on a wire rack or a bed of chopsticks to allow excess oil to drain. This prevents the fish from being steamed, which can make it soggy and less crispy and flavorful.
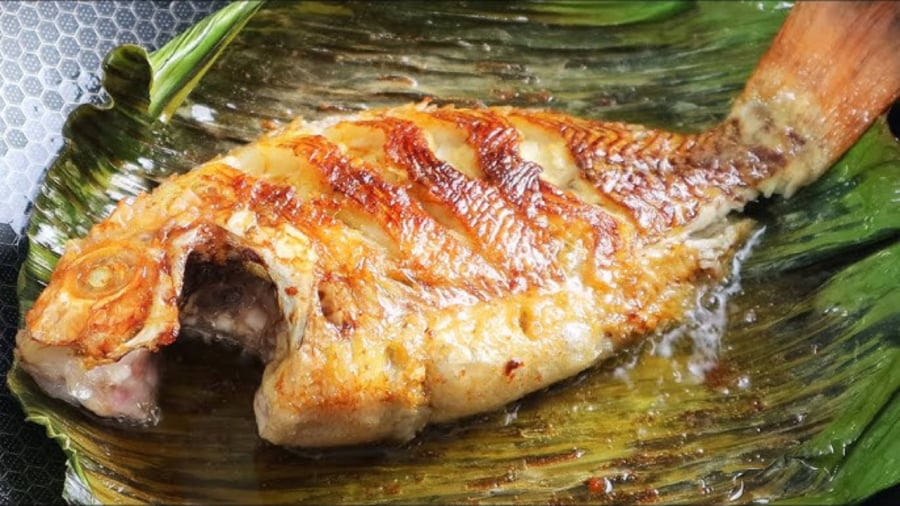
Desired Outcome: Fried fish with a golden, crispy exterior and a tender, moist, and naturally sweet interior. It should remain crispy even after cooling.
The Secret to Perfectly Golden, Crispy Fried Food: Master Chef’s Lemon Juice Trick

Squeezing lemon juice into a pan of frying oil is a nifty trick up many a chef’s sleeve, offering a simple solution to a common problem when frying food.
The Secret to Crisp, Fragrant Fries: A Chef’s Guide to the Perfect Potato Treat

Discover the Secret to Crispy, Delicious Fries: Uncover the Easy Method to Achieve that Perfect Crunch!
Brain Food for Better Grades: Harvard University’s Top 6 Cognitive-Boosting Foods

A healthy diet is the key to unlocking your child’s potential. With the right nutrients, your little one can excel in their studies and beyond. Brain-boosting foods fuel their memory, keep their minds sharp, and set them up for academic success.
The Ultimate Guide to Healthy Fried Delights: 2 Oil-Free Methods for Crispy, Guilt-Free Treats

With this simple trick of frying bánh chưng without oil, you can enjoy a delicious, crispy treat without the grease. This method will ensure your bánh chưng is perfectly golden and crunchy, a delightful twist on a traditional favorite.
The Secret to a Perfectly Crispy Fried Fish: A Tasty Treat You’ll Always Remember

With this simple fried fish recipe, you’ll create a dish that’s incredibly flavorful and crisp. It’s a memorable culinary experience that will leave you wanting more.


