


1. Traditional Spring Roll Ingredients
– 500g of minced pork shoulder
– 1 onion
– 1 turnip, 1 carrot
– 30g of dried glass noodles
– 10 wood ear mushrooms, 10 shiitake mushrooms, 3 eggs
– Fresh scallions, coriander
– Spices, pepper
– Spring roll wrappers
Note:
The ratio of vegetables to meat can be adjusted according to personal preference.
Various types of vegetables can be used, and you may substitute turnips with bean sprouts or jicama.
It is recommended to choose pork shoulder for its tenderness and higher lean meat content.
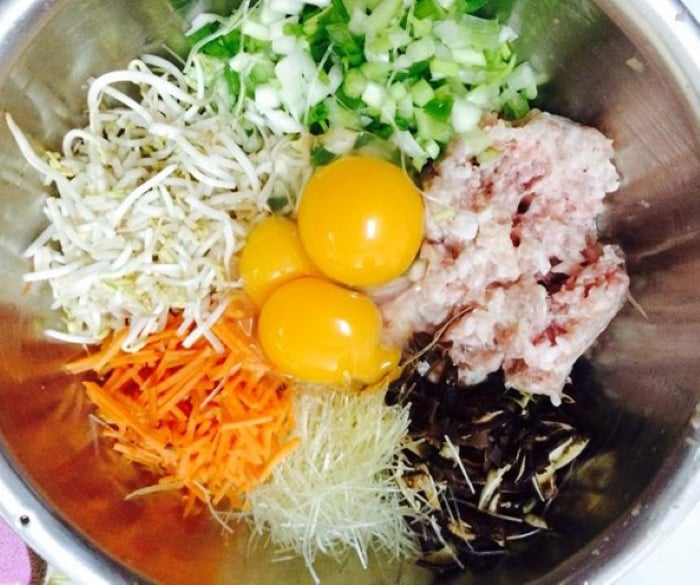
Spring Roll Ingredients
2. How to Make Crispy and Delicious Traditional Fried Spring Rolls
Preparing the Ingredients:
Clean the wood ear mushrooms and shiitake mushrooms, then soak them in hot water. Remove the stems, rinse again, and finely chop them.
For the vegetables: Wash the turnip, carrot, and onion, and cut them into small dice.
Soak the glass noodles in warm water until soft, then drain and cut into smaller pieces.
Wash and finely chop the scallions.
Mixing the Filling:
In a large bowl, combine all the prepared ingredients with the minced pork. Add some spices and pepper, and mix well.
Let the mixture sit for about 5-7 minutes to allow the flavors to infuse. Then, add the eggs and mix again. Avoid using too many eggs, as this can make the filling soggy and difficult to roll.
Wrapping the Spring Rolls:
Spring roll wrappers come in two shapes: round and rectangular. In dry weather, the wrappers tend to become brittle and hard to work with. To counteract this, mix 1 teaspoon of vinegar, 1 teaspoon of sugar, and a little water, and brush this mixture onto the wrappers. This will make them softer, easier to roll, and give them a golden color when fried.
Place a wrapper on a flat surface (a cutting board or a large plate), and add about 1/3 of the filling to the lower third of the wrapper. Roll it up from the bottom, folding in the sides, and then roll it closed.
You don’t need to roll too tightly, as the filling will expand during frying, and the spring rolls may burst.
Frying the Spring Rolls to Perfection:
Heat some oil in a pan. Fry the spring rolls until they are lightly cooked. Then, remove them from the oil and place them on a paper towel to absorb excess oil. For the second round of frying, use fresh oil, and fry the spring rolls again until they are fully cooked. This will give them a beautiful golden color and make them crispy without being soggy.
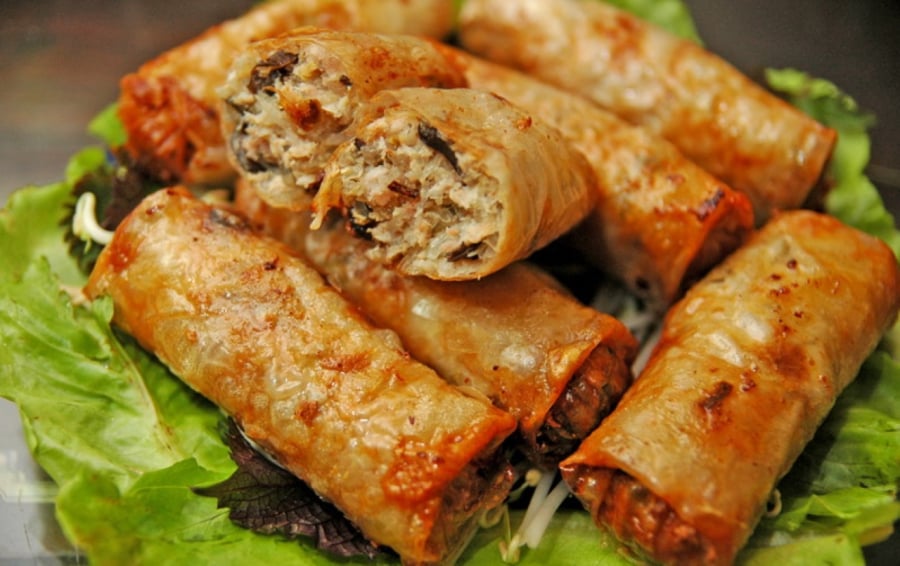
Crispy Spring Rolls Without Breaking
Note: It is recommended to use a clean, regular pan or a non-stick pan to avoid breaking the spring rolls during frying.
If you don’t want to spend time frying the spring rolls twice, you can fry them in a pan with enough oil to submerge them. This will cook them faster and give them an even golden color.
A little trick to make your spring rolls tastier and crispier, without the oil splattering, is to add a few drops of lemon juice to the oil before frying.
For crispier spring rolls with less oil absorption, you can pre-fry them in a pan with oil. Just before serving, re-fry them in an air fryer, paying attention to the time and temperature to avoid burning.
Notes on Making Spring Rolls:
It is advisable to let the vegetables and fruits dry before preparing them, and then keep them separate. Only mix them with the meat, eggs, and spices just before wrapping the spring rolls to ensure the filling remains dry.
You can add a small amount of oil to the filling to prevent it from drying out. Wrap the spring rolls comfortably, without rolling them too tightly, to avoid breakage during frying.
For crispier spring rolls, brush the wrappers with a layer of beer or lemon juice, or for a golden color, brush them with a mixture of sugar and water.
Additionally, adding some chopped shrimp to the ingredients will enhance the aroma and flavor of the spring rolls.
2. Storing Fried Spring Rolls in the Fridge
To enjoy spring rolls over an extended period, it is common to prepare them in advance and store them in the fridge. The following are some tips on how to store fried spring rolls in the fridge to maintain their crispness, taste, and integrity:
Method 1: Storing Pre-Fried Spring Rolls
After wrapping the spring rolls, pre-fry them in oil with a piece of ginger. Let them cool completely, then arrange them in a container, separating each layer with paper towels to absorb any excess oil. When placing the spring rolls in the container, avoid packing them too tightly.
If you plan to consume them within a short period, you can store the container in the cool part of the fridge. For long-term storage, it is best to keep them in the freezer. When you’re ready to eat, simply take them out and fry them.
Note: Ensure the oil is sufficiently hot before adding the spring rolls. Alternatively, you can use an air fryer to fry the spring rolls.
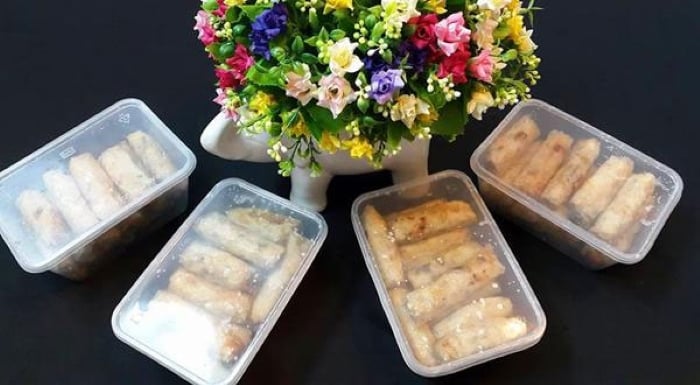
Storing Pre-Fried Spring Rolls in the Cool Part of the Fridge
Method 2: Storing the Filling
After chopping the filling ingredients, mix them without adding the eggs. Then, transfer the mixture to an airtight container and store it in the freezer.
Note: For ingredients like turnips, jicama, and onions, squeeze out the excess water after chopping to ensure the filling stays dry and can be stored for a longer period.
When needed, take the filling out of the freezer and let it thaw in the cool part of the fridge for 8-10 hours. Then, add the eggs and mix before wrapping the spring rolls as usual.
This method ensures that the spring rolls remain intact and fresh, compared to frying and then freezing them.
3. Dipping Sauce for Spring Rolls
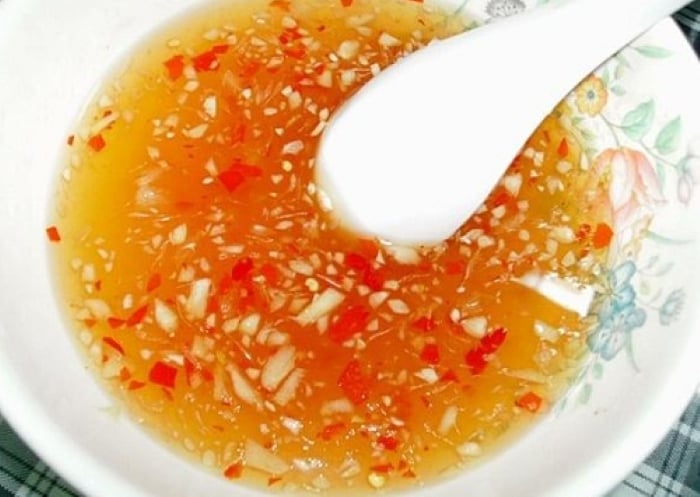
Spring Roll Dipping Sauce
A crucial component that determines the taste of fried spring rolls is the dipping sauce. Here is a recipe for a delicious sweet and sour dipping sauce:
Finely chop some garlic and chili peppers, and place them in a small bowl. Mix 1 teaspoon of vinegar, 1 teaspoon of fish sauce, 1 teaspoon of sugar, and 4 teaspoons of warm water. Finally, add the garlic, chili, and a pinch of pepper to the mixture.
Note: Depending on the saltiness of the fish sauce and your personal preference, you can adjust the amount of salt and sugar accordingly.
The Ultimate Guide to Crispy Spring Rolls: A Secret Technique for the Perfect Crunch This Lunar New Year

“Learn how to make delicious and crispy fried spring rolls with this easy recipe, perfect for the upcoming traditional Tet holiday. Impress your family and friends with this tasty treat, a must-have dish for any festive celebration.”
“The Ultimate Guide to Rolling Perfect Summer Rolls: A Step-by-Step Tutorial”

With a keen eye for detail and a knack for crafting words, I can help elevate your nem-making skills to the next level. Imagine being able to create mouth-watering nem dishes that will impress your family and friends. By paying attention to every step in this nem-making guide, you’ll be able to master the art of creating delicious, crispy nem that will have everyone asking for more. It’s time to take your nem game to the max!
The Ultimate Guide to the Perfect Fried Spring Rolls: A Secret Technique for Consistent Results

To create perfectly wrapped, crisp fried spring rolls that don’t burst, there’s a secret technique that not many know.
The Secret to Crispy, Moreish Spring Rolls: A Tasty Frying Technique

Here is a mouth-watering introduction to a delicious fried spring roll recipe that will have your readers rolling up their sleeves and ready to dive into the kitchen!
“Crispy, golden, and packed with flavor – these fried spring rolls are an addictive treat! With this detailed recipe, you’ll be able to create these delicious appetizers with ease. Imagine biting into that perfect, crispy exterior, revealing a burst of savory flavors. It’s a taste sensation that will keep you coming back for more. Get ready to impress your taste buds and become the ultimate spring roll master!”
The Ultimate Guide to Storing Fried Spring Rolls: A Tasty Treat for the Lunar New Year

With this unique preservation method, your fried spring rolls will remain crisp and fragrant even after two weeks in the fridge. They’ll emerge golden and freshly made, a true delight for the senses!


