


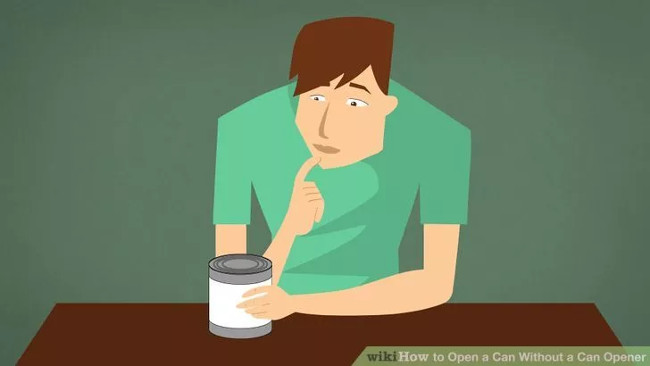
How to Open a Can Without a Can Opener: Tips and Tricks
This article will teach you how to open canned pate and other canned goods without a can opener.
Don’t panic if you don’t have a can opener! The lid of a can is made of thin metal and can be easily pierced without contaminating the food inside. With a few simple tools and a bit of effort, you’ll be able to access the delicious contents within. Read on to discover the easiest and most effective ways to open a can without a can opener.
What You Need to Know
- The easiest and safest way to open a can without a can opener is to rub a metal spoon around the top rim of the can until you puncture the thin metal.
- Rubbing the top of the can on a rough surface (such as a rock or concrete slab) can also work in an emergency to wear down the seal and release your food.
- You can also use a sharp object like a knife or screwdriver to puncture the lid of the can multiple times until you can pry it open. Be extremely careful when using sharp objects to avoid injuring yourself.
Method 1: Using a Pocket Knife
1. Place the can on a sturdy surface.
An ideal height for the surface is waist-level, so you can stand above the can and work more easily.
2. Place the tip of the knife on the edge of the can’s lid.
Hold the knife vertically, rather than at an angle. Grip the knife firmly to avoid slipping, which could cause injury. Avoid pointing the blade towards yourself.
- This method is much more effective than using the blade of the knife, as it can chip the blade and cause metal fragments to fall into your food.
- Make sure to hold the knife firmly and vertically to prevent slipping.
- This method can also be done with a chisel or any similar tool that is hard, thin, and sharp like a pocket knife.
3. Tap the knife handle gently.
With one hand holding the knife, use the other hand to tap the top of the handle. This force will puncture the can’s lid.
- Don’t tap too hard, or you might lose your grip and cause the knife to slip.
- Use the palm of your hand to tap, as it gives you more control over the force you’re applying.
4. Lift the knife and slide it to the side to create a new hole.
Place the tip of the knife a few centimeters away from the previous hole along the rim of the lid and repeat the technique.
5. Continue to puncture the lid to create a circle of holes.
Keep going until you’ve made a complete circle of holes around the lid, similar to what a can opener would do. Then, you can open the lid.
6. Lift the lid.
Insert the tip of the knife into one of the holes and pry the lid up.
- If needed, use a smaller knife to cut the connections between the punctured holes.
- Wear gloves or wrap a cloth around your hand to protect yourself, as the lid can be sharp.
Method 2: Using a Spoon
1. Place the can on a flat, sturdy surface.
Hold the can steady with one hand and the spoon with the other.
2. Place the tip of the spoon on the inner edge of the can’s lid.
All can lids have an inner edge where the manufacturer seals the metal to the can to keep the food enclosed.
- Hold the spoon so that the concave part of the spoon faces the can’s lid.
- Use a metal spoon, as a spoon made of other materials won’t be effective.
3. Rub the spoon back and forth in a small area.
The friction between the spoon and the lid will thin the metal. Continue rubbing until you puncture the lid.
4. Lift the spoon and rub it into the next spot, next to the previous hole.
As you continue, you’ll notice the initial hole getting bigger.
5. Do the same around the rim of the lid.
Move the spoon around the rim, puncturing the lid until you’ve made a complete circle. At this point, the lid has been cut. Be careful not to push down on the lid, or the food will spill out.
6. Open the lid.
Insert the spoon under the rim of the lid and pry it up, causing the lid to bend and reveal the food inside.
- If the spoon seems too big to fit into the gap when prying up the lid, try using a knife instead. You can also use the knife to cut any remaining connected metal from the lid.
- The lid will be sharp after cutting, so be careful not to cut yourself. Use gloves or a cloth to protect your hands if needed.
Method 3: Using a Kitchen Knife
1. Place the can on a flat, sturdy surface.
Ideally, the surface should be at waist height. Do not place the can in your lap or between your legs, as the knife could slip and cause injury.
2. Hold the knife close to the handle.
Place your thumb on the handle and grip it tightly at a safe distance from the blade.
- Hold the knife tightly, as this method can be dangerous if your hand or the knife is slippery.
- Do not use this method with any knife smaller than a kitchen knife. A kitchen knife is preferable because it is larger and heavier than a paring or steak knife. You need a knife with enough weight to effectively puncture the can.
3. Place the heel of the knife (the widest part of the blade, opposite the tip) on the inner edge of the can’s lid.
The heel of the knife should be right under your hand, ensuring that it is firmly placed and pushed straight down on the inner edge of the lid to prevent slipping.
4. Press the knife handle down on the lid to create a small puncture.
If it feels uncomfortable, stand up, holding the knife with one hand and placing the other hand on top of the handle. Use the strength of both hands to press down until the lid is punctured.
- Don’t shake the can while pressing down, or the knife might slip and cause injury. Instead, press down slowly until you puncture the lid.
- Do not try to use the tip of the knife to puncture the can, as the heel is less likely to slip and is more secure. Additionally, you could chip the blade if you use the tip to puncture the lid.
5. Move the knife to the next spot to create a second puncture.
The new puncture should be a few centimeters away from the previous one along the rim of the lid. Use the same technique to puncture the lid again, right next to the initial puncture.
6. Continue until you’ve made a complete circle by puncturing the lid along the rim, just like you would with a can opener.
7. Open the lid.
Insert the tip of the knife into one of the punctures and pry the lid up. Be careful with the blade to avoid injury, as the knife could slip. Then, discard the lid.
- If needed, use a smaller knife to cut the connections between the punctures.
- You can use gloves or a cloth to wrap your hand when lifting the lid. Both the lid and the knife are sharp. Protect yourself from unnecessary injuries.
Method 4: Using a Rock
1. Find a flat rock or a piece of concrete.
It’s best to find a rock or concrete slab with a rough surface. A smooth pebble won’t be rough enough to wear down the can’s lid.
2. Place the can upside down on the rock.
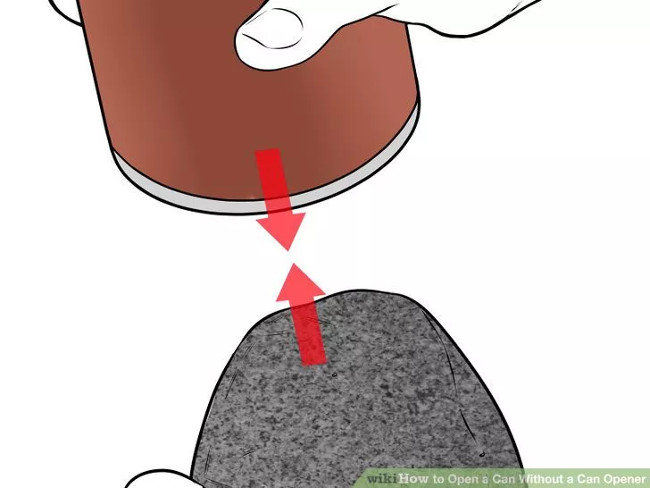
Placing the can upside down on the rock helps you easily wear down the metal seal between the lid and the can.
3. Rub the can on the rock to create friction.

Continue rubbing the can on the rock until you see water on the rock or the lid.
- Regularly turn the can over to check. Stop as soon as you see signs of water. This means that the lid is thin enough to be pierced.
- Don’t rub too hard, or the lid might suddenly puncture, causing the food to spill out.
4. Use a pocket knife to puncture the lid.

The metal seal between the lid and the can is now thin enough to be pierced with a pocket knife. You can easily cut and pry the lid open.
- If you don’t have a pocket knife, try using a spoon, butter knife, or something similar.
- Alternatively, find a rock to knock the lid off. This is a last resort, as it might contaminate the food inside the can.
- Don’t forget to protect your hands with gloves or a cloth to avoid unnecessary injuries when removing the lid.
Here’s a video demonstrating how to open a can of food without a can opener:
- Measures to deal with and treat food poisoning at home
- Revealing the secret recipe for KFC’s legendary fried chicken from 1940
- 12 common cooking mistakes to avoid
- 10 ways to open a wine bottle without a corkscrew
Have fun!


