


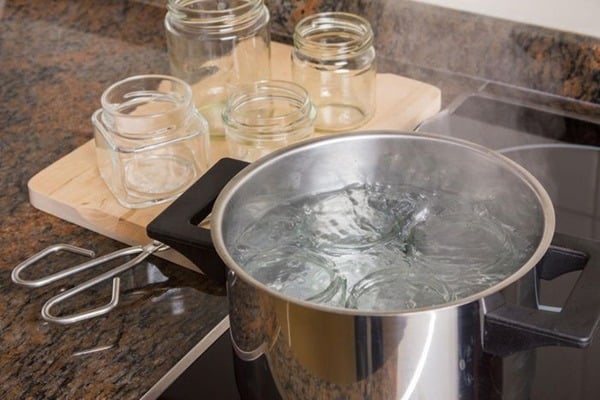
Boiling water is an effective way to kill bacteria, and many people choose this method to sterilize their eating utensils at home. However, to be truly effective, this process must be done correctly, ensuring two critical factors: temperature and exposure time to boiling water.
**Two Prerequisites:**
– **Water Temperature Must Reach Boiling Point:**
– Boiling water, which is at 100°C, can kill most bacteria due to the high temperature. At this temperature, the heat denatures bacterial proteins, rendering them inactive. High temperatures not only kill common bacteria but also help eliminate dangerous pathogens, thus reducing the risk of infection.
– **Sufficient Exposure Time:**
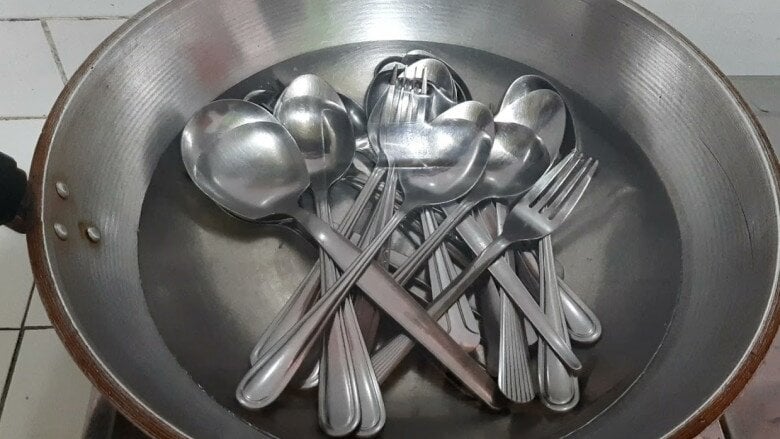
– In addition to temperature, the time utensils are exposed to boiling water is equally crucial. Briefly dipping utensils in boiling water may not be enough for the heat to penetrate all surfaces, especially areas with stains, grease, or food residue. Moreover, some bacteria may hide in small crevices, so adequate soaking time is necessary to ensure their eradication.
Exposure time to boiling water is a critical factor in effective sterilization.
**Two Common Mistakes That Render Sterilization Efforts Futile:**
– **Insufficient Water Temperature:**
– One of the most common errors when sterilizing with hot water is failing to ensure a high enough temperature to kill bacteria and viruses. Using water that is not hot enough will not destroy the structure of microorganisms. Boiling water at 100°C (212°F) can kill most bacteria and viruses, but if the temperature is not high enough, these microorganisms can survive and remain a threat.
– Reasons for insufficient water temperature may include water not being boiled thoroughly or an inadequate heat source. For effective sterilization, water should be maintained at a temperature of at least 75-80°C throughout the process. If the temperature drops too low, bacteria can survive and easily reinfect the utensils. Therefore, using warm water or water that is not hot enough will not properly sterilize the utensils, rendering the entire process ineffective.
– **Inadequate Exposure Time:**
– The second mistake people often make when sterilizing with hot water is not allowing the utensils to be exposed to the hot water for a long enough period. Both temperature and exposure time are critical factors in killing bacteria and viruses. Even if the temperature is extremely high, a brief exposure may not be sufficient to eradicate disease-causing agents.
– The required sterilization time will vary depending on factors such as the type of bacteria, the material and size of the object being sterilized, and the water temperature. Typically, for effective sterilization using boiling water, a minimum of 5 to 10 minutes is necessary. If you only rinse or briefly soak the utensils in hot water, microorganisms may not be completely eliminated, leading to the risk of infection or bacterial presence on the surfaces.
– Therefore, when sterilizing objects with hot water, ensure that each item is exposed to the hot water for an adequate duration. Avoid rushing through the process, as it may compromise the optimal sterilization effect.
Ensure proper exposure time when sterilizing objects with hot water.
**Four Steps for Effective Sterilization:**
To ensure optimal results when sterilizing with boiling water, follow these four steps:
– **Boil the Water Thoroughly:**
– Before starting the sterilization process, ensure that the water has reached a high temperature of approximately 100°C. This temperature is crucial for killing bacteria and pathogens that may be present on the utensils. Do not use warm water, as the lower temperature will not effectively kill bacteria.
– **Soak the Utensils in Boiling Water for a Sufficient Time:**
– For effective sterilization, soak the utensils in boiling water for at least 5 minutes. This allows the heat to penetrate all crevices of the utensils, ensuring the destruction of all bacteria and pathogens. For larger or thicker items, you may need to allow for a longer soaking time to achieve the best results.
– **Rinse the Utensils with Pure Water After Soaking:**
– After removing the utensils from the boiling water, rinse them with clean water to eliminate any remaining dirt or bacteria. This step not only ensures the cleanliness of the utensils but also prevents the re-growth of bacteria due to residual dirt.
– **Dry the Utensils with a Clean Cloth:**
– After rinsing, dry the utensils with a clean cloth to remove any remaining water droplets and reduce the risk of bacterial regrowth.
The Ultimate Flu-Fighter: Nurture Your Lungs, Clear Mucus, and Boost Your Immune System

In this fickle weather, boost your family’s health and immunity with these nourishing recipes. Clear phlegm, strengthen lungs, and speed up recovery with these delicious dishes.
“The Ultimate Guide to Boiling Chicken: Avoid These 3 Mistakes for Tender, Flavorful, and Juicy Meat”

With this simple boiled chicken recipe, you’ll be able to create a mouth-watering, tender dish that will leave your taste buds tantalized. This easy-to-follow guide will ensure a flavorful and juicy meal that your family and friends will surely devour. Don’t miss out on this delicious treat!
The Ultimate Guide to Reviving Your Burnt Pan: Transform it into a Shining, Non-Stick Champion Once More

It’s common to encounter burnt or damaged non-stick pans during cooking endeavors. Many assume that once the non-stick coating is compromised, the pan must be discarded. However, there is a way to effectively clean and restore these pans, giving them a new lease of life.
“The Great Veggie Debate: To Lid or Not to Lid?”

“To lid or not to lid when boiling vegetables?” That’s the question on everyone’s mind. Let’s delve into this curious conundrum and uncover the secrets to perfectly boiled veggies!
Why Are Dehumidifiers So Good at Absorbing Water? Watch Out for These Risks!

The importance of dehumidifiers in enhancing our quality of life is undeniable, as they effectively reduce moisture in the air. However, it is crucial to acknowledge that improper usage can lead to potential drawbacks.


