


Using a water heater is as simple as flipping a switch and waiting for 10-20 minutes to have hot water ready for a bath. However, if not used properly, it can lead to increased electricity bills.
This issue is often overlooked, but over time, problems will accumulate, leading to noticeable spikes in electricity bills and reduced appliance lifespan. In reality, there is a small “switch” on the water heater that, when occasionally pressed, can make the water heating process faster and more cost-effective.
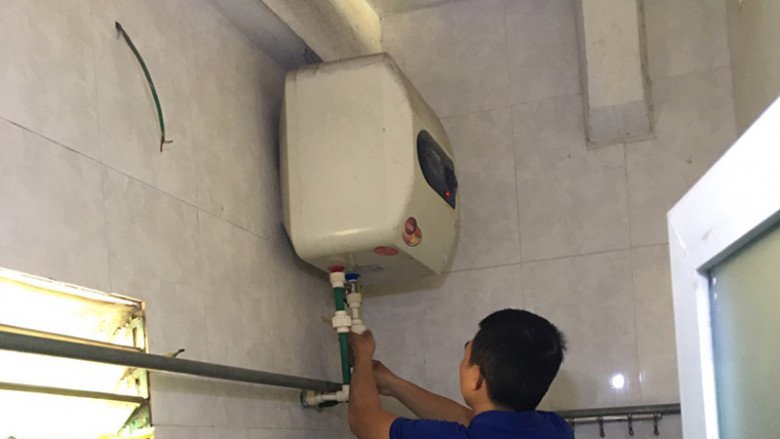
Regular maintenance of the water heater is essential for safety and energy efficiency. (Illustrative image)
The “Switch” to Lower Your Electricity Bill
This switch is actually the sediment drain valve, located at the bottom of the water tank, right where the water heater’s drain pipe is placed. The sediment drain valve is usually attached to the magnesium rod (scale remover) inside the water heater.
The rod is made of magnesium compounds, which can react with various impurities and dirt during the water heating process, reducing corrosion and rust formation inside the enameled water tank. This helps prevent the tank from puncturing or leaking, which could lead to electrical short circuits.
Additionally, the magnesium rod reduces dirt buildup on the burner, speeding up the water heating process and improving the appliance’s performance. It also ensures cleaner water for daily use and enhances safety for users.
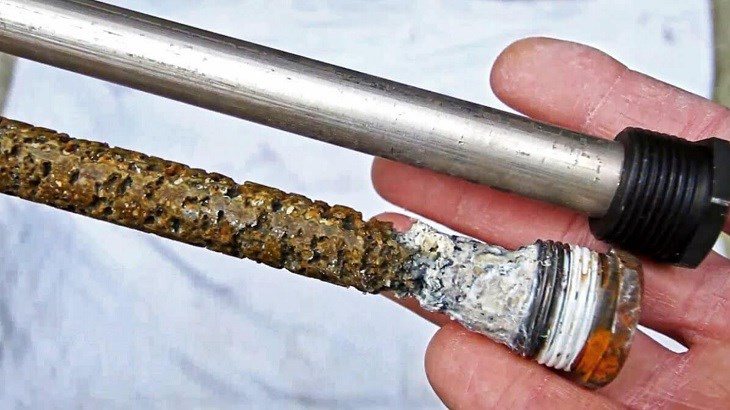
Magnesium rods in water heaters: one is new, and the other is corroded. (Illustrative image)
However, over time, the magnesium rod will erode and dissolve, affecting the quality of the heating element and burner, resulting in reduced performance and safety concerns.
The durability of the magnesium rod depends on the quality of the water supply and the purity of the magnesium used. The more impurities in the water, the faster the magnesium rod will erode. If the magnesium rod itself contains impurities, the erosion process will be accelerated. Therefore, periodic replacement of the magnesium rod is necessary.
How to Replace the Magnesium Rod in Your Water Heater Without a Technician
Manufacturers recommend replacing the magnesium rod approximately every two years. However, the replacement frequency also depends on the quality of the water supply and how often you use the water heater.
To save costs, it is advisable to inspect the magnesium rod every 6-12 months, especially before the cold season, as the usage of the water heater tends to increase during this period. This inspection will help you decide if a replacement is necessary.
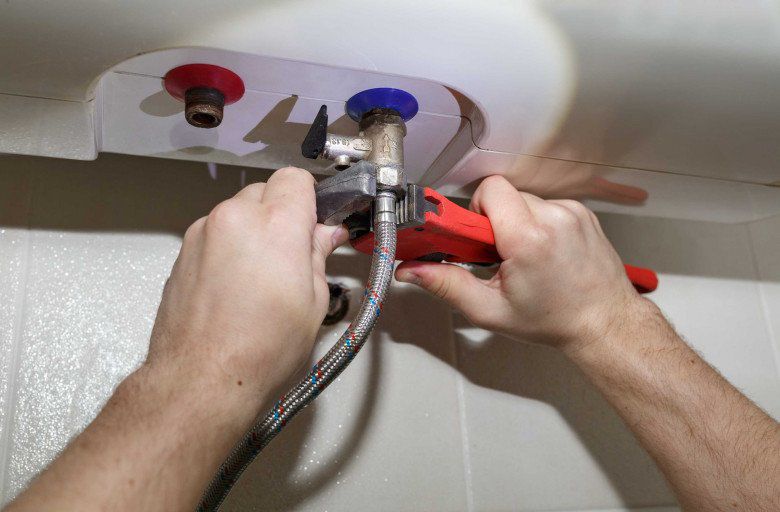
When inspecting the magnesium rod, it is recommended to clean the water heater as well. (Illustrative image)
Note: When opening the sediment drain valve to inspect the magnesium rod, it is advisable to clean the water heater simultaneously. This will help extend the life of the magnesium rod and ensure clean water for users, preventing allergies, itching, and skin irritation caused by impurities and dirt.
Inspecting or replacing the magnesium rod is straightforward, but it is crucial to cut off the power supply to the water heater before touching the “switch” on the water heater, which is the sediment drain valve. Failure to do so could result in a high risk of electric shock, endangering your life.
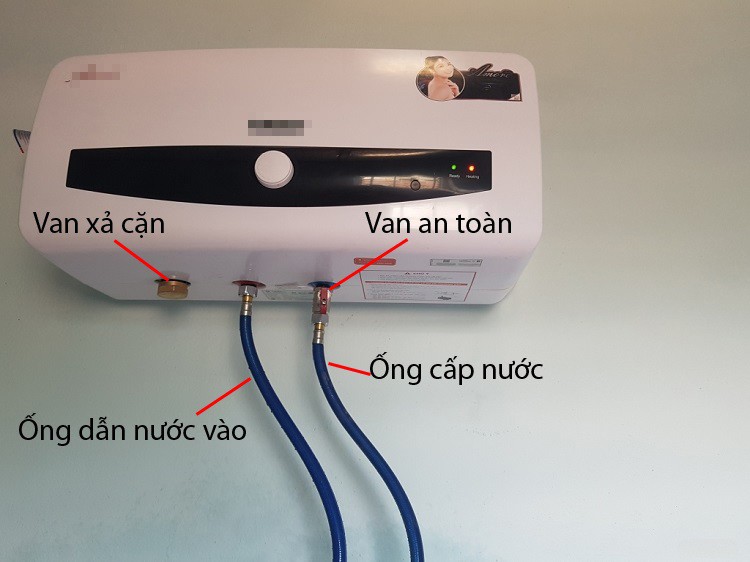
Location of the pipes on the water heater.
To inspect or replace the magnesium rod in your water heater, follow these steps:
– Step 1: Drain the Water
First, cut off the power and water supply to the water heater. Then, sequentially remove the water supply line, the outgoing water pipe, and the safety valve to drain the water.
Once the water in the water heater has drained completely, turn the sediment drain valve. Note that the sediment drain valve is connected to the magnesium rod, so handle it gently when removing it.
Step 2: Clean the Water Heater
Attach the water supply line to the outgoing water pipe, open the water supply valve to let water flow into the water heater for cleaning. The dirt inside the tank will be flushed out through the sediment drain valve.
After cleaning for about 1-2 minutes, remove the water supply line from the incoming water pipe and reinstall the water pipes as they were initially.
Step 3: Clean the Magnesium Rod
If the magnesium rod still looks new and does not need replacement, clean it before reinstalling it. If the magnesium rod is corroded by more than 60%, purchase a new one immediately.
After reinstalling the magnesium rod and other components, check the appliance’s operation before concluding the process.
The Soaring Cost of Electricity: 10 Tips to Keep Your Bills Down and Enjoy Guilt-Free Power Usage

These handy tips will not only help you optimize the energy consumption of your household appliances but also significantly reduce your monthly electricity bills.
The Ultimate Guide to Air Conditioner Usage: Avoid These Common Mistakes to Save Money and Protect Your Family’s Health

This is a common issue that many households face when using air conditioning on a daily basis.
3 Things You Should Regularly Check to Avoid Future Headaches

It is imperative that certain home appliances and utilities are regularly inspected and maintained. Given their frequent daily use, neglecting regular check-ups can lead to issues that, if left unattended, may result in costly and inconvenient repairs or replacements.
The Power-Hungry Four: Unplug These Devices ASAP to Keep Energy Bills at Bay

In today’s tech-driven world, it’s inevitable that we rely on multiple electronic devices in our homes. However, it’s important to be mindful that some devices, even when not in use, continue to draw power if they remain plugged into electrical outlets.
Turn Off These 3 Devices Before Leaving the House to Keep Your Energy Bills in Check

“Reducing your home’s energy consumption is simple – just remember to switch off these power-hungry devices before heading out. By paying attention to these simple steps, you can lower your electricity bills and reduce your carbon footprint.”


