


- Inspect all products and accessories, ensuring they are complete and not damaged
- Refer to the installation instructions provided by the manufacturer, ensuring that all steps are followed without cutting or modifying the installation process
- Check the size of the dishwasher compared to the kitchen cabinet. For freestanding dishwashers, check the size of the machine and place the back of the machine against the cabinet or against the wall. For built-in dishwashers, the device can be placed in the appropriate size space in the kitchen cabinet.
- Determine the placement of the dishwasher, if the floor is uneven, adjust it to achieve maximum balance, with an inclination angle of no more than 2 degrees. Incorrect dimensions will cause the machine to vibrate, create noise, and not be good for the lifespan of the product
- The dishwasher should be placed in a position that facilitates the drainage pipe, not higher than 60cm, which affects the drainage process.
- Place the machine on a hard surface. Do not place the machine on long carpets or similar surfaces. Do not place equipment on electrical cables.
- DO NOT install built-in dishwashers near high temperatures: Stove, oven, microwave,…
- During installation, do not connect the device to the power source to ensure safety.
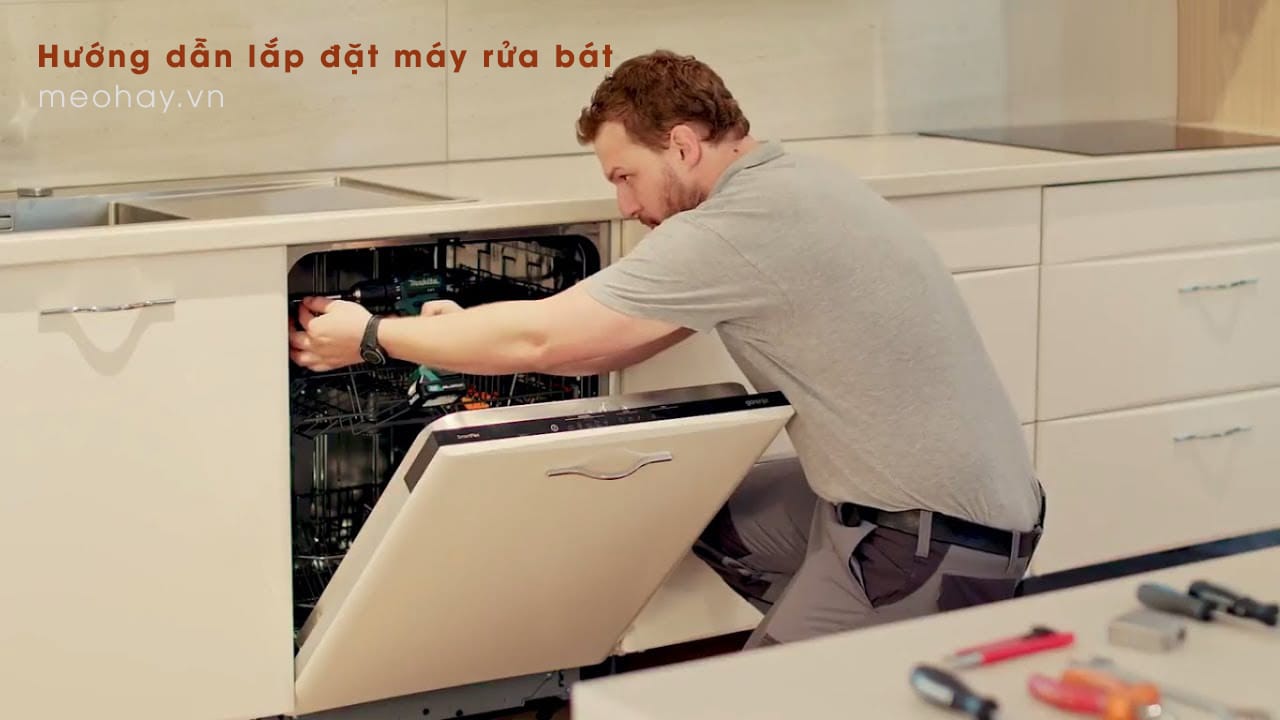
Proper installation instructions for dishwashers
Here, meohay.vn would like to guide you on how to properly install both built-in dishwashers and freestanding dishwashers.
Proper installation instructions for built-in dishwashers
1. Prepare the cabinet and water supply lines for the machine
Step 1: Calculate the cabinet space: The built-in dishwasher is designed with American standard measurements, with a width of 61cm and is placed next to the sink. Make sure the location you plan to install the dishwasher is suitable for the machine’s specifications. If not, you will have to spend extra money to adjust and rearrange the kitchen cabinets.
Step 2: If necessary, drill a hole in the side of the cabinet near the sink. If your family has never used a dishwasher, you will have to drill about 3 holes just enough to pass the electrical wires, water supply pipes, and drain pipes. If you have installed a machine before, you can find these 3 holes and reuse them.
– If you drill new holes, remember to consult the instructions to determine the exact location and diameter of the holes. Use a drill with a hole saw to cut the holes.
– If the dishwasher’s wires do not need to pass through the sink cabinet, only 2 holes are needed.
Step 3: Make sure you have turned off the power at the installation location. If you are replacing and installing a new dishwasher, check the electrical control panel to make sure the power is turned off. Generally, with modern electrical control panels, just turn off the corresponding switch to turn off the power.
– Unless you are able to install the machine yourself, if not, please contact the installation department to assist you.
– To ensure that there is no electricity in the surrounding wires, buy a current tester at the centers. Some models require you to touch each wire to test, others only need to hold the tester near the wire.
Step 4: Set up the installation process based on the position of the wires on the dishwasher. Many types of dishwashers, especially newer models, design the power, water supply, and drain connections below and in front of the machine. Some other types, set them up behind. Read the user manual to determine what type of dishwasher you have, as it will affect the installation of your dishwasher.
– For machines with front-facing wires, you will need to position the machine correctly before connecting the wires. For machines with rear-facing wires, you need to connect first before positioning the machine.
2. Connect the wires to the sink
Step 1: Turn off the hot water supply line. Dishwashers are usually connected to the hot water line under the sink. Turn off the valve counterclockwise, then open the faucet to drain excess water.
– Some dishwasher models can be connected to cold water lines, but hot water lines are still a better option. Check the detailed information in the user manual.
Step 2: Connect the dishwasher water supply line to the hot water line. If you have installed a front-fitting dishwasher before, you will definitely have a double outlet valve connected to the hot water line under the sink. One end is connected to the faucet, the other end is connected to the dishwasher supply line. Wrap Teflon tape clockwise around the threads of the connection. Then, hand-tighten the cable into the threaded socket and use a wrench to tighten the cable another 1/4 or 1/2 turn.
– If a double outlet valve is not available, you will need to install an additional one. Disconnect the water line from the sink faucet. Then, attach the double outlet valve to both the hot water line and the line connected to the faucet. Next, do the same as above.
– Do not connect the remaining end to the dishwasher supply line immediately.
Step 3: (If not available) Attach the hose joint of the dishwasher to the sink drain pipe. If you have connected to an old dishwasher or your sink is designed to accommodate a dishwasher, it already has a hose joint. This is a short piece of pipe with a diameter smaller than that of the drain pipe and sticks out of it. If not available, you have to install it separately.
– To install the hose joint, first loosen and remove the U-shaped part of the drain pipe. You can do it by hand if this pipe is made of PVC. Buy a replacement U-shaped pipe that has an integrated hose joint and install it in the right place. Then hand-tighten it again.
Step 4: Fix the dishwasher drain pipe to the sink drain pipe. Make sure to insert one end of the drain pipe into the hose joint, use a screwdriver to tighten the screw and secure the hose clamp at the end of the drain pipe. This will ensure that the drain pipe does not slip out of the hose joint.
– Do not connect the remaining end of the drain pipe to the dishwasher immediately.
Step 5: Wrap the drain pipe under the sink so that it is lifted to the top of the hose joint. Wrap a small piece of wire around the drain pipe. Then, tighten the wire to the bottom of the cabinet under the sink with screws or nails. By doing so, the water pipe forms an inverted arc shape and connects to the hose joint, preventing water from flowing back into the dishwasher.
– In addition, each place will have different construction designs. Some may require an air gap to prevent water from flowing back up. This is a complex process so it is best to have a professional do it for you.
3. Place the dishwasher in position.
Step 1: Secure the wires under the machine.
For dishwashers with front-facing wires, insert the water hose. Bring the drain pipe, electrical wires along the floor and cabinet from behind the machine to the front, place it in the middle underneath the machine. Make sure each pipe runs more than 15cm longer than the front of the dishwasher, then use tape to secure them under the floor where the dishwasher will be placed.
– For dishwashers with rear-facing wires, do not fix the water lines to the floor. Instead, make sure each line is long enough for you to tie them to the rear of the dishwasher before you place the dishwasher in the cabinet space.
Step 2: Adjust the feet to the appropriate height for the countertop. The built-in dishwasher is designed to fit perfectly in the kitchen cabinet space, with a distance from the bottom to the countertop of 88cm according to US standards. Use adjustable feet to adjust the height, but leave a small gap – recommended by the manufacturer. This way, you can fix the dishwasher in the cabinet below.
– Turn the feet counterclockwise to increase the height and clockwise to decrease it.
– In the US, the standard height of the lower cabinet is standardized at 88cm, so the countertop will be approximately 91 cm from the floor.
Step 3: Push the dishwasher into the cabinet and adjust the height and position.
Move the machine into the cabinet until the front of the dishwasher fits snugly with the front of the cabinet. When it is in the correct position, check to see if the device is horizontal with the underside of the countertop and at the right height. Use the foot screws to make minor adjustments if necessary
4. Complete wire connection and dishwasher installation
Step 1: Connect the water supply hose to the dishwasher. Read the user manual to determine the location of the water inlet hook at the front or back of the device. Wrap Teflon tape around the hose connection, then tighten the U-shaped joint with the hose end by hand. Next, tighten another 1/4 turn with a wrench. Wrap tape and tighten the connection between the U-shaped joint and the water supply line in the same way.
The U-shaped joint prevents the water supply pipe from protruding from the front of the dishwasher. You can buy one that comes with your dishwasher or you need to buy one from an appliance store. Find out if there are other places that sell water pipes for dishwashers.
This installation process (except for the location) is the same for dishwashers with front-facing hooks and dishwashers with rear-facing hooks.
Step 2: Secure the drain pipe to the dishwasher with a pipe clamp.
Identify the appropriate hook position for the drain pipe, then press the soft tube onto the hook. Use a screwdriver to crank the screw and tighten the pipe clamp at the end of the drain pipe.
Once again, this process (except for the location) is the same for machines with front-facing hooks and machines with rear-facing hooks.
Step 3: Connect the wires to the dishwasher. Check again to make sure the power line is turned off, then connect the wires to the labeled electrical box inside the dishwasher. Again, this process is the same for machines with front-facing hooks and machines with rear-facing hooks. So please check the instructions if you need help determining the location of the electrical box. Some dishwashers can be set up so that you just need to clamp the wires inside the cable to the right place. If not, do the following:
– Connect the black wire (hot wire) to the black wire in the electrical box by twisting them together with wire nuts.
– Connect the white wire (neutral wire) to the white wire in the electrical box with a connector.
– Wrap the green grounding wire tightly around the grounding screw in the electrical box, then tighten the screw on the wrapped wire.
Insert the safety connections into the dishwasher electrical box and close it. It may have a screw to keep it securely closed.
Step 4: Secure the dishwasher to the cabinet with the supplied clamps. Check one last time if the device is still level and in the correct position, then attach the brackets at the end of the dishwasher to the underside of the countertop. Mark the drill points before screwing the screws into the correct position.
If you have a stone countertop or a solid surface, check the manufacturer’s instructions for proper fixing methods. Now you are ready to turn on the water, check for leaks. If the machine does not leak, start your built-in dishwasher!
Proper installation instructions for freestanding dishwashers
Installation of freestanding dishwashers is simple and does not require much attention to dimensions like built-in devices. You just need to choose the right type of machine and install it in a convenient space for use and ensure the safety of the water and power sources.
The steps for installing freestanding dishwashers are similar to the built-in type.
-
Adjust the device: Choose a stable position with a flat and solid surface and adjust the machine feet firmly into the groove
-
Connect the water supply hose to the water source is the most important thing for a secure connection to avoid leakage
-
Connect the drain pipe to the drain line or sink drain with a maximum height of 60 cm
-
Connect the grounding wire and power supply to ensure the electrical safety requirements, as notes in part 1.
The most important thing is the safety of electricity, water, and the installation and use process must meet the standards to prove that we know how to install the dishwasher according to the manufacturer’s standard for both freestanding and built-in types. However, it is best to have technicians help you, which will be the fastest and most effective solution.
On that note, we hope that you have been able to successfully install your dishwasher using these guidelines. Good luck with your choice!
Explore 12 Amazing Destinations for Biking Trips

Unlock Vietnam in a brand new way with an exciting biking tour! Discover the stunning beauty of the country with Dien May XANH’s top 12 must-see destinations. From sweeping plains to clear blue beaches and mountainous vistas – experience all the sights with your own personal cycling tour. Find your ideal route and set out for an adventure today!
How to Properly Use and Maintain a Blender

In the summer heat, cool smoothies can be quickly prepared with the help of a blender. To ensure it works well and lasts for many years, with good maintenance and regular cleaning, the blender should be well-taken care of.
“How to Avoid Common Mistakes while Charging Your Phone Battery”

Are you sure you’re charging your phone correctly? Learn about the 10 most common mistakes people make when trying to keep their phones powered up and how to avoid them with this informative article. Check it out now!
How to Cut Down on Fuel Usage When Cooking

Families across the nation are striving to find ways to maximize their cost savings while still guaranteeing safety when utilizing a gas stove.
Securing Home and Family with Rolling Shutters

If you are a homeowner with a rolling door, it is important to take the necessary steps to keep your family safe. Here we will look at how you can maintain the functionality and safety of your rolling door through proper use and care.


