A Step-by-Step Guide to Cleaning Your Ceiling-Mounted Air Conditioner at Home
Administrator
1 Why You Should Clean Your Ceiling-Mounted Air Conditioner
Improve cooling efficiency, increase longevity, stabilize performance, and optimize energy savings.
Provide clean, dust-free air, preventing skin and respiratory issues.
Maintain the unit’s new condition, promptly addressing potential faults and risks.
Before proceeding with air conditioner cleaning, XANH Electrical Appliance Store recommends taking the following precautions for your safety and to avoid damage to the unit:
Always unplug the ceiling-mounted air conditioner from the power outlet before cleaning.
Avoid using flammable cleaning agents or toxic solutions. Opt for mild alternatives like dish soap, diluted vinegar, or specialized cleaning products.
Refrain from using harsh chemicals, such as bleach, or solvents like gasoline or oil, as they can damage the unit’s paint finish.
Use soft sponges or dry cloths to wipe away moisture, preventing liquids from seeping into electrical components and causing short circuits.
2 Simple Steps to Clean Your Ceiling-Mounted Air Conditioner at Home
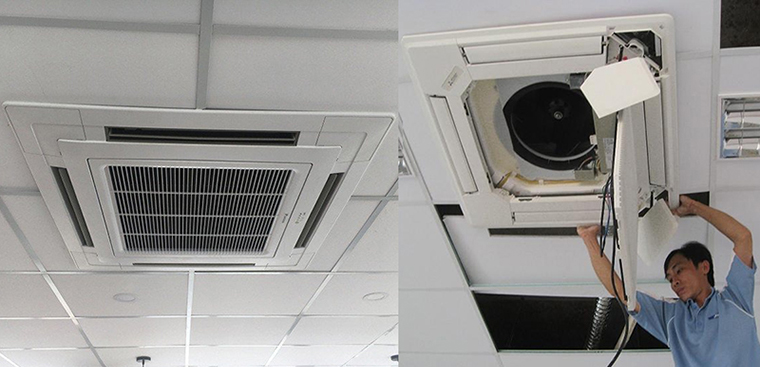
Step 1: Clean the Outdoor Unit (Condenser)
Prioritize safety by disconnecting the power supply to your ceiling-mounted air conditioner before beginning the cleaning process. This can be done by simply unplugging the unit.
Begin by removing the front grille to access the internal components. Use a hose to spray and rinse the condenser coils, fan, and grille, effectively removing accumulated dust and dirt. Reassemble the parts in the correct order once cleaned.
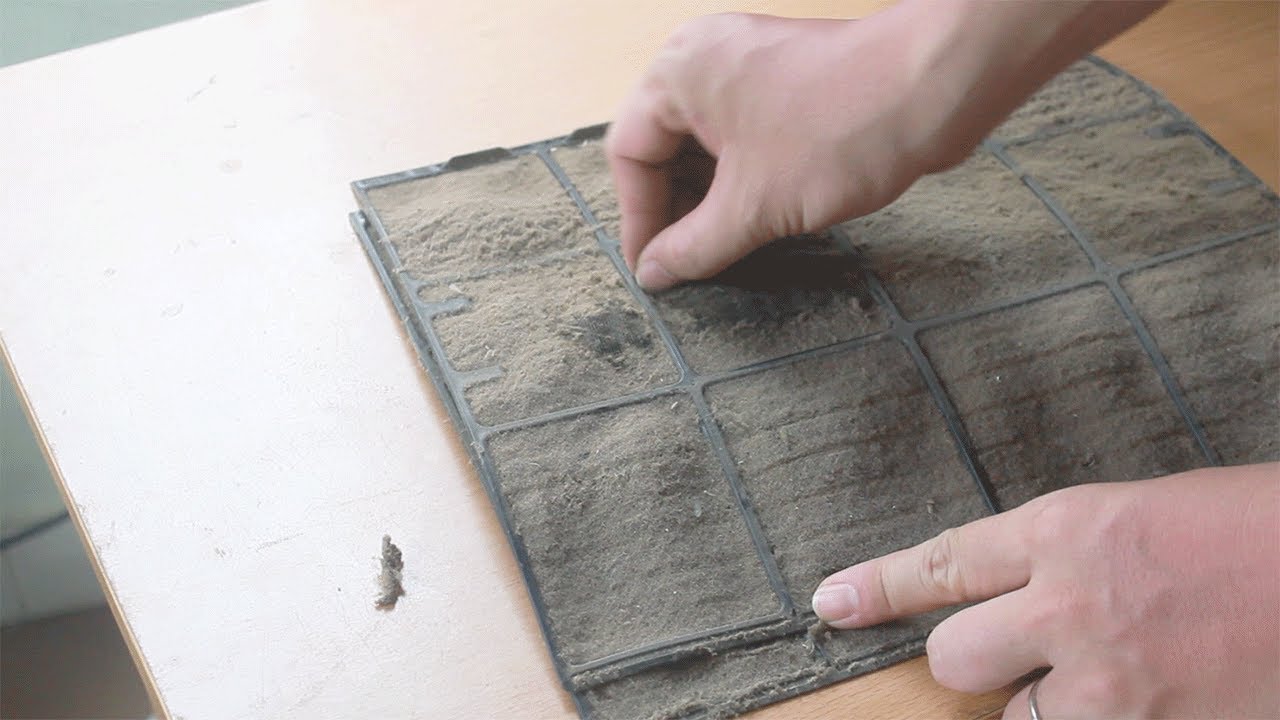
Step 2: Clean the Air Filter
The air filter can be cleaned using a vacuum cleaner or by washing it with warm water and a mild detergent. Ensure you dry it thoroughly afterward and place it back in a position avoiding direct sunlight.
A clean air filter ensures the unit can effectively remove dust and pollutants, providing you with fresh, clean air.
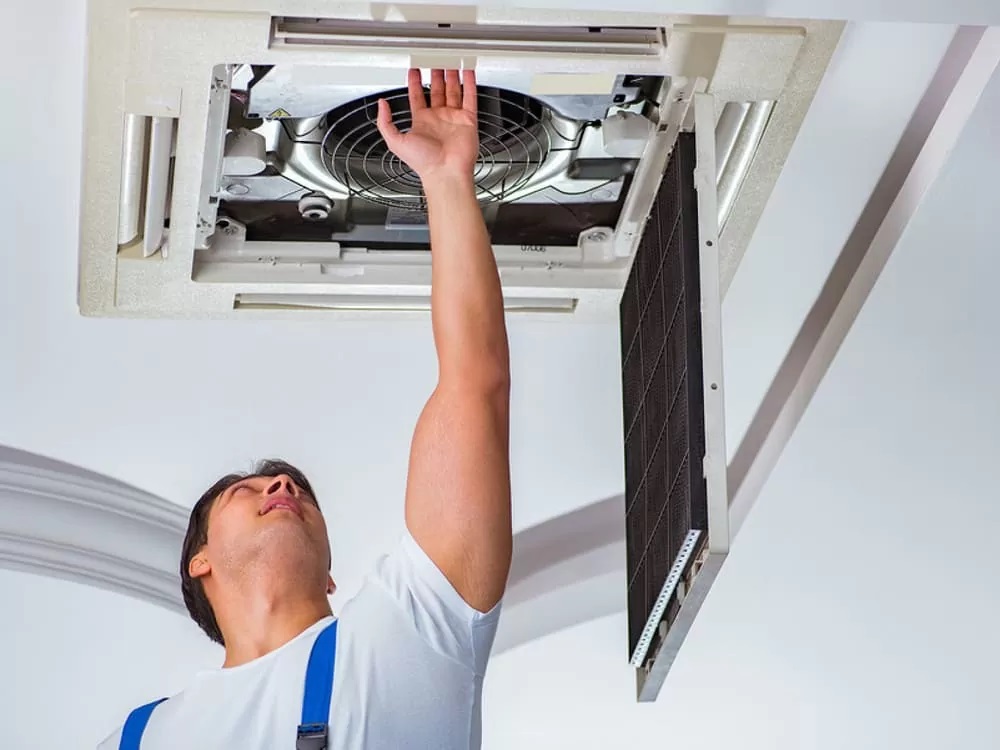
Step 3: Clean or Replace the Plasma Filters
The plasma filters, located just behind the air filter, can be cleaned by soaking them in a mild detergent solution. This will remove dust and mold, ensuring the unit promotes better health, skin, and respiratory well-being.
Step 4: Check for Leaks and Unnecessary Noises
After thoroughly cleaning both the indoor and outdoor units, perform a test run to check for any electrical leaks or water dripping. If the unit emits unusual noises, turn it off and contact your nearest service center for assistance.
3 Signs That Your Ceiling-Mounted Air Conditioner Needs Cleaning
One telltale sign is when your air conditioner blows warm air, indicating reduced cooling capacity. This is often due to a buildup of dirt and grime over time.
Another sign is a spike in your electricity bill. A dirty air conditioner struggles to function efficiently, leading to increased energy consumption as it works harder to cool the space.
Additionally, if your air conditioner emits unpleasant odors, it’s definitely time for a thorough cleaning.
To maintain optimal performance and prolong the life of your ceiling-mounted air conditioner, it’s recommended to schedule a professional cleaning at least once every six months.
This article has provided a simple guide to cleaning your ceiling-mounted air conditioner. If you have any further questions or concerns, feel free to leave a comment below, and we’ll get back to you promptly!
Frequently asked questions
Regular cleaning of your ceiling-mounted air conditioner is important for maintaining the efficiency of the unit and ensuring optimal performance. Over time, dust, dirt, and debris can build up on the filters, coils, and fans, which can restrict airflow, reduce cooling capacity, and even lead to breakdowns. Additionally, a dirty air conditioner can circulate dust and allergens throughout your home, affecting indoor air quality and potentially causing respiratory issues.
It is recommended to clean your ceiling-mounted air conditioner at least once a year, preferably before the start of the cooling season. However, the frequency of cleaning may vary depending on factors such as the amount of use, the presence of pets or smokers in the household, and the level of air pollution in your area. In particularly dusty or polluted environments, you may need to clean your air conditioner more frequently, possibly twice a year or even quarterly.
To clean your ceiling-mounted air conditioner, you will need a few basic tools and materials, including a vacuum cleaner with a soft brush attachment, mild detergent or air conditioner coil cleaner, clean cloths or sponges, a screwdriver, and a step ladder or small stepladder. It is also recommended to wear protective gear such as gloves and a face mask to avoid direct contact with dust and chemicals.
The step-by-step process for cleaning a ceiling-mounted air conditioner includes: turning off the power supply to the unit, removing the front grill and filters, vacuuming and cleaning the filters, cleaning the coils and fans with a mild detergent or coil cleaner, rinsing and drying all components, reassembling the unit, and finally, turning the power back on and testing the air conditioner.
For tough dirt and stains on the air conditioner coils and fans, you can use a mild detergent or air conditioner coil cleaner. Soak a clean cloth or sponge in the detergent solution and gently wipe down the coils and fans. For more stubborn stains, you can use a soft-bristled brush to gently scrub the affected areas. Rinse the coils and fans with clean water and ensure they are completely dry before reassembling the unit.
While cleaning your ceiling-mounted air conditioner, it is important to take certain precautions for your safety and to avoid damage to the unit. Always turn off the power supply before beginning any cleaning work. Wear protective gear, including gloves and a face mask, to avoid direct contact with dust and chemicals. Use a step ladder or small stepladder to safely reach the unit, and be careful not to apply excessive force when removing or reassembling components.
To maintain your ceiling-mounted air conditioner between cleanings, regularly vacuum or dust the external surfaces and grills to prevent dust buildup. Check and replace the air filters as recommended by the manufacturer, typically once every one to three months. Keeping the area around the air conditioner clean and free of clutter can also help maintain its efficiency and performance.