


1. Identify the type of touchscreen on your device
Not all smartphones, tablets, and styluses are compatible with each other. Therefore, please refer to the specifications of your device to determine if it supports the use of a stylus.
In addition, styluses are divided into two groups based on compatibility with different screen characteristics: pens for capacitive touch screens and pens for resistive (or infrared) screens.

2. 3 ways to make a simple stylus from common materials
You can easily create a stylus using one of the three methods provided by Dien May XANH. Follow these simple steps:
Method 1: Using a sponge (for capacitive touch screens)
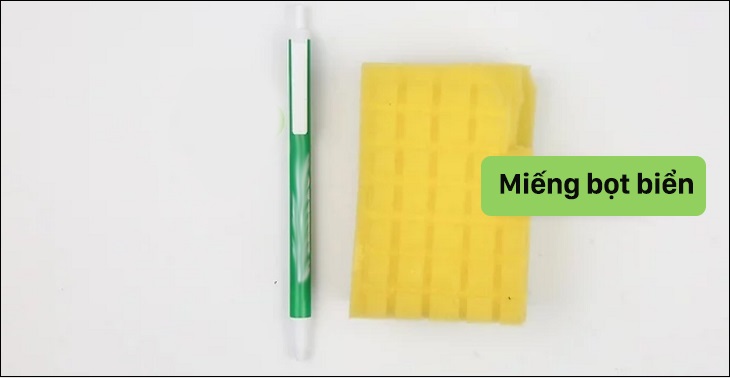
Step 1: Gather the necessary materials:
- 1 clean sponge
- 1 ballpoint pen with a removable tip and clear plastic
- A small knife
Step 2: Follow these implementation steps:
- Cut a piece of sponge slightly larger than the diameter of the ballpoint pen tip.
- Rinse the sponge in warm water and pat it dry.
- Disassemble the ballpoint pen to remove the internal parts.
- Insert the sponge into the tip of the pen, leaving a small portion exposed for direct contact with the screen.
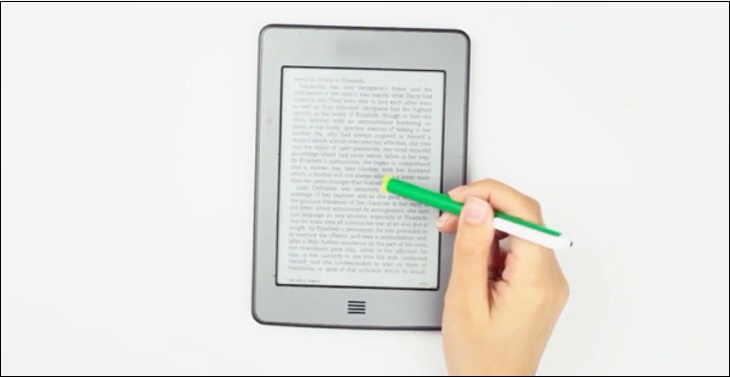
- Test the stylus on your device’s screen.
Method 2: Using aluminum foil (for capacitive touch screens)
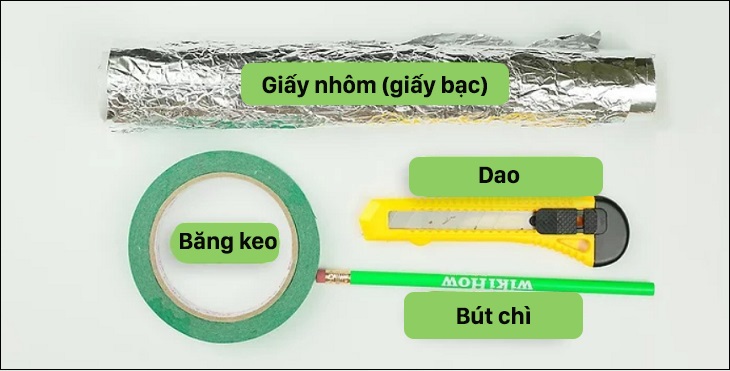
Step 1: Gather the necessary materials:
- 1 roll of aluminum foil (length corresponding to the length of a pencil)
- 1 roll of tape (silver or rough surface)
- 1 pencil
Step 2: Follow these implementation steps:
- Sharpen the tip of the pencil to make it blunt and flat.
- Wrap the pencil with aluminum foil, ensuring at least two layers.
- Smooth the wrapped end of the pencil to create a rounded and smooth surface.
- Secure the aluminum foil with tape in the middle of the pencil.
- Wrap the tip of the pencil with tape, ensuring the wrapped part will be in direct contact with the screen when in use.
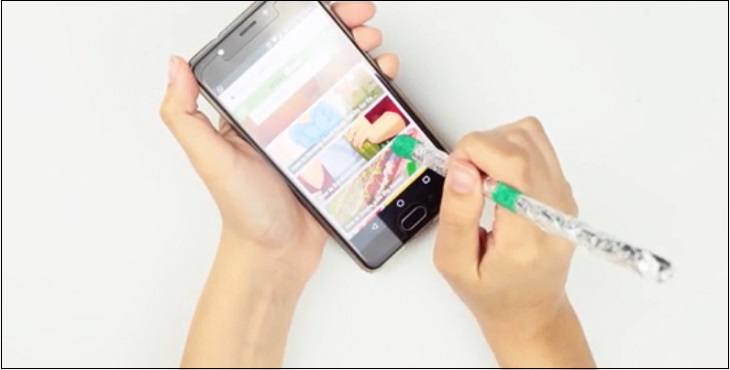
- Test the newly made stylus on your device.
Method 3: Using wooden chopsticks (for infrared or resistive touch screens)
Step 1: Gather the necessary materials:
- 1 wooden chopstick
- 1 small piece of sandpaper (5 x 10cm)
- 1 roll of tape
- 1 small knife
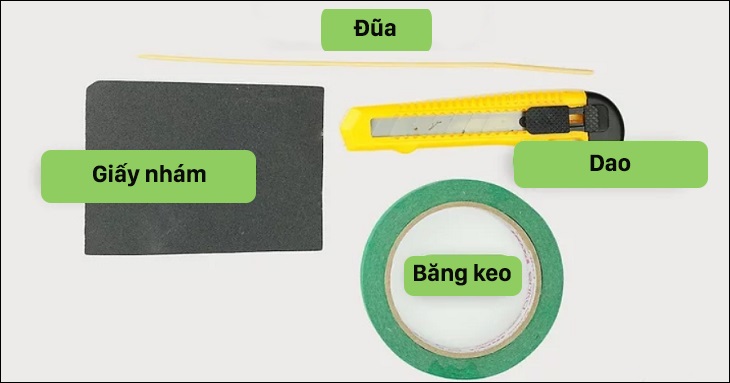
Step 2: Follow these implementation steps:
- Sharpen the tip of the chopstick using a knife to make it blunt.
- Use sandpaper to smooth the top of the chopstick.
- Wrap tape around the chopstick for a comfortable grip (optional).
- Test the stylus on your device.

(*Reference information from Wikihow.)
With these three methods, you can easily create a simple stylus at home using common materials. Good luck!
Create Your Own Handmade Smartphone Stylus with Foil and Cotton Swabs

Are you looking for an easy way to make your own handmade stylus? Dien May XANH will take you through a few simple steps to make a genuine stylus for your smartphone or tablet – no complex ingredients or methods required!
Stylus Pen for Tablets and Phones’>How to Easily Create a Stylus Pen for Tablets and Phones

Are you trying to find an affordable way to use a stylus with a tablet or phone? Look no further – here are 3 simple ways to make your own stylus!


