


What Are the Benefits of Cleaning Your Headphones?
Over time, headphones tend to accumulate dirt, including earwax, oil, and dirt that get trapped in the small crevices. Unfortunately, many users neglect cleaning them before using them again.

Regularly cleaning your headphones is essential to ensure proper hygiene and prevent the risk of ear infections. Sharing headphones without proper cleaning can increase the transmission of bacteria between individuals. Moreover, inadequate cleaning practices can lead to decreased sound quality and damage to the headphones. To properly clean your headphones, follow these guidelines.
How to Clean Headphones: Step-by-Step Guide
Step 1: Clean the head of the headphones
- To maintain the cleanliness of your headphones, we recommend using a soft brush, preferably a child’s toothbrush, to gently clean the steel mesh at the head of the headphones. This will effectively remove any dirt that may have accumulated in this area.

- First, mix soap with warm water to create a mild cleaning solution. Next, prepare a soft, non-fibrous cloth and dampen it with the cleaning solution. Gently wipe the surface of the headphone head using the cloth.
Step 2:
Clean the earbud
- IEM earbuds typically come with silicone earbuds. To properly clean the earbuds, it is necessary to remove these silicone earbuds and soak them in warm water with soap for a recommended duration of 5 minutes or longer.
How to Clean Earbuds

- Please rinse the earbuds thoroughly, wipe them clean, and allow them to dry completely on a paper towel before reattaching them.
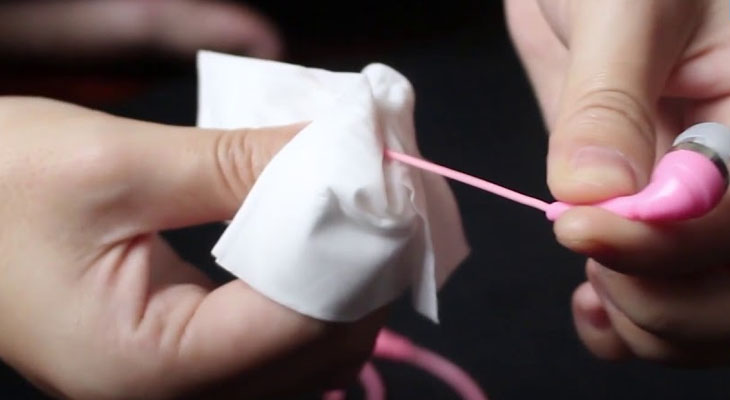
Step 3: Clean the cable
- To effectively clean the most susceptible part of the headphones, follow these simple steps. First, prepare a solution by combining dishwashing liquid or acetone with water. Take a soft cloth and dip it into the solution, ensuring it is moist but not dripping. Next, delicately wipe the headphone cable in a linear motion, from one end to the other, using the cloth. By following these uncomplicated instructions, you can easily clean this vulnerable component of your headphones.
Comparing Over-ear Headphones: Which are the Top Models?
When cleaning over-ear headphones, it can be more challenging. This is due to the design of these headphones, which often include ear cushions made of leather or foam that are susceptible to tearing when exposed to moisture. To prevent the need for purchasing new ear cushions, please follow the instructions below.
")
- Gather the necessary ingredients for the headphone cleaning mixture.
- Mix the ingredients together in a small bowl.
- Make sure the mixture is well combined.
Step 2: Clean the exterior of the headphones
- Dampen a microfiber cloth with the cleaning mixture.
- Gently wipe the exterior of the headphones with the cloth.
- Pay special attention to areas with dirt or grime.
Step 3: Clean the ear pads
- Remove the ear pads from the headphones if possible.
- Dampen a cotton swab with the cleaning mixture.
- Gently clean the ear pads with the swab, taking care not to saturate the padding.
- If the ear pads cannot be removed, dampen a cloth with the cleaning mixture and gently wipe the pads.
Step 4: Clean the headphone cable
- Dampen a cloth or cotton swab with the cleaning mixture.
- Gently wipe the headphone cable, avoiding any connectors or ports.
- Pay attention to areas with dirt or debris.
Step 5: Allow the headphones to dry
- Place the headphones in a well-ventilated area.
- Allow them to air dry completely before using them again.
Note: It is essential to follow the manufacturer’s instructions and guidelines for cleaning your specific headphones.
- The ear cushions are highly sensitive to strong cleaning solutions. Therefore, it is recommended to mix a mild soap with water to create a diluted solution.

Step 2: Clean the Ear Cushion
- To effectively clean the ear cushion, it is recommended to use a soft cloth that has been dampened with a small amount of cleaning solution. Gently wipe both the ear cushion and the mesh inside to ensure a thorough cleaning.

Exploring Alternative Ways to Combat Climate Change
If you’re looking for more advanced methods to clean your headphones, consider using a vacuum cleaner. This method will provide optimal cleaning results. However, please note that purchasing a vacuum cleaner specifically designed for cleaning headphones can be costly.

“3 Easy Ways to Maintain Clean Headphones”
Tips for Regularly Cleaning a Plug Jack
As time passes, it is inevitable for dirt to accumulate in your plug jack. This can lead to a decline in sound quality while using headphones.

To clean the plug jack, a simple method involves using a cotton swab to gently clean inside the jack. Alternatively, a toothpick wrapped with double-sided tape can be used, with gentle rotations inside the jack.
It is recommended to use covers that are equipped with plug jack covers to prevent the entry of dust.

Protect your Headphones: Prevent Moisture Damage to Prolong Longevity
After extended use, in-ear headphones and earbuds may experience moisture absorption in their ear cushions, leading to a higher likelihood of dirt buildup and providing a favorable environment for bacteria growth.
To mitigate this issue, consider utilizing moisture-absorbing packets commonly found in food packaging. Place these packets on the ear cushions of your headphones to prevent moisture buildup and potential damage. This precaution will effectively maintain the dryness of your headphones, preserving their longevity.

If the ear cushions of your headphones have been used for an extended period, it is advisable to replace them in order to experience optimal sound quality.
Maintaining Ear Hygiene for Better Hearing
To maintain optimal hygiene for your headphones and ears, it’s important to prioritize cleanliness. For the headphones, regular cleaning is necessary. When it comes to your ears, there are various options available for cleaning. Consider utilizing specifically designed ear cleaning tools or specialized ear cleaning solutions to ensure a thorough and effective cleanse.

Here are some effective methods to maintain the cleanliness of your headphones. If you have any further queries, please feel free to leave them in the comment section below!
5 Tips for Speedy Cleaning of Your Phone Earphones and Headphones

Are you one of the many who regularly use headphones on their mobile device, but are unsure how to clean them properly? Fret not! You’ve come to the right place, as this article is dedicated to giving you helpful tips and advice on how to effectively clean your headphones to ensure their longevity and protect your ears.
Protect Your Hearing: The Ultimate Guide to Earphone Hygiene

Headphones are a common accessory for many people, and for some, they are an essential part of daily life. They allow you to enjoy music to the fullest without disturbing others around you. However, after a while, headphones can get dirty and bacteria can build up, which can affect your hearing. Therefore, it is important to clean your headphones regularly, about once a month, to extend their lifespan and protect your hearing.


