


Peanuts, or “lac rang muoi” as they are known in Vietnam, are a simple yet beloved part of the country’s cuisine. While they may seem straightforward, achieving the perfect crispy texture and salty flavor that lasts can be a challenge. Read on to discover the secrets to making delicious peanats that stay fresh and tasty until the very last bite.
1. Choosing the Right Peanats: The Foundation of Flavor
-
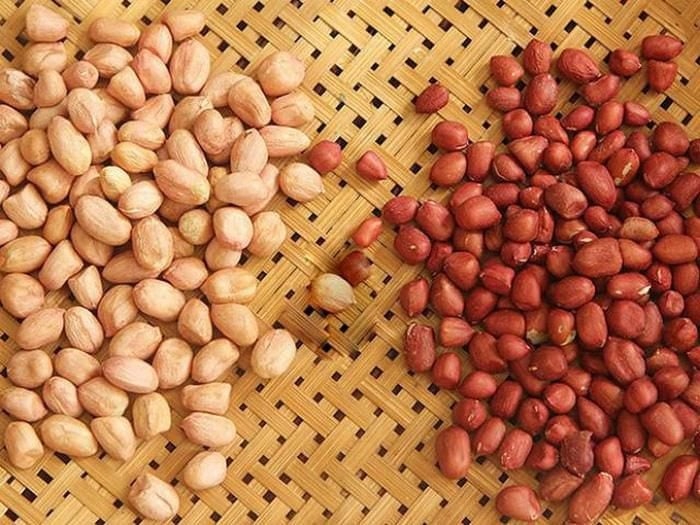
Opt for peanats that are uniform in size, firm, and free from mold. Local Vietnamese peanats, known as “lac ta,” are a great choice. They have a pinkish hue, small size, and a deliciously buttery taste. Avoid peanats that have been stored for too long, as they may be moldy, rancid, or infested with pests.
-
Freshly harvested peanats offer a natural sweetness and nuttiness that older peanats can’t match.
-
Sun-dry your peanats for 1-2 hours to reduce moisture content. This step ensures faster and crispier frying.
2. Traditional Frying Methods: Achieving Long-Lasting Crispiness
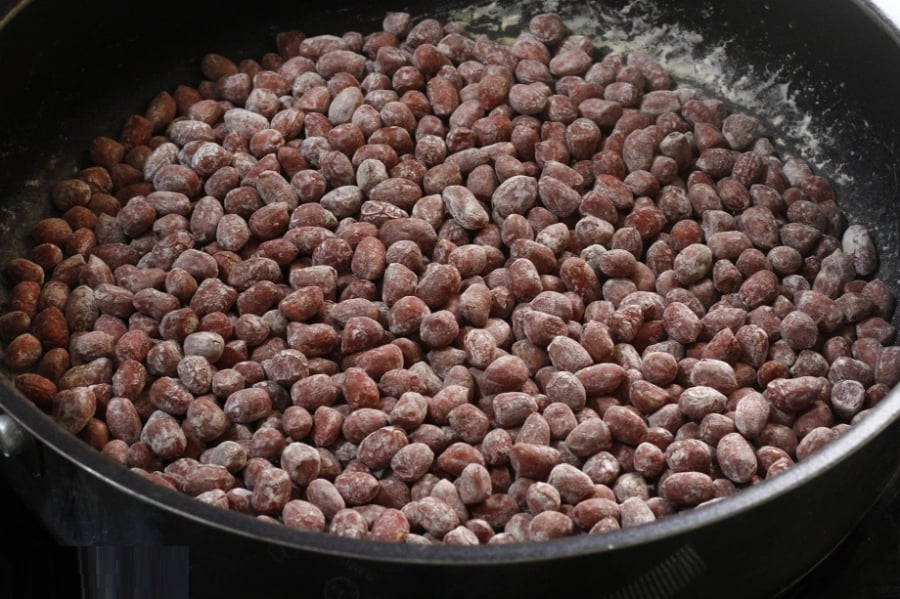
Frying with Sand or Coarse Salt
-
Step 1: Heat a pan and add about a large bowl’s worth of clean sand (or coarse salt) to it. Heat the sand or salt evenly.
-
Step 2: Pour in the peanats and continuously stir them over medium heat for 10-15 minutes. The hot sand or salt ensures even cooking, preventing burnt shells while maintaining crispiness.
-
Step 3: Listen for the peanats to make a gentle popping sound and release their aroma. When their shells start to crack, they’re ready. Scoop them out with a slotted spoon and sift out the sand/salt.
3. Frying Peanats Without Sand or Salt: Still Crispy and Delicious
If you don’t want to use sand or salt, you can still achieve crispy peanats with this method:
-
Step 1: Heat a dry pan, ensuring it’s completely free of moisture.
-
Step 2: Add the peanats and fry over low heat, stirring continuously. Start with slow stirring, and as the peanats begin to pop, increase the speed to ensure even cooking.
-
Step 3: After 10-15 minutes, test one peanat by peeling it. If the inside is evenly cooked and aromatic, they’re ready.
4. Salt Seasoning Secrets: Balancing Saltiness Without Burning
Once your peanats are fried, it’s time to season them with salt. Here are two methods to choose from:
Method 1: Dry Salting
-
Place the hot fried peanats in a large bowl.
-
Sprinkle in fine salt (or dry-roasted salt) and mix well while the peanats are still hot, ensuring an even coating.
Method 2: Salt, Seasoning Powder, and Sugar (for a Sweet and Salty Kick)
-
Mix 1 tablespoon of salt with 1/2 tablespoon of seasoning powder and 1/2 tablespoon of sugar (add a pinch of garlic powder if desired).
-
Sprinkle this mixture over the freshly fried peanats, stirring quickly while they’re still hot.
5. Keeping Your Peanats Crispy for a Week: No Soggy Surprises
-
Let the peanats cool completely before transferring them to an airtight jar or container. Never seal the container while the peanats are still hot, as this will cause moisture buildup and sogginess.
-
Store them in a dry, cool place, away from direct sunlight.
-
If your peanats start to soften, simply pop them in the oven or fry them for a few minutes to restore their crispness.
6. Serving Suggestions: Elevate Your Meals and Snacks
-
Peanats make a fantastic side dish to plain rice, pickled vegetables, and savory soups.
-
They’re an excellent beer or wine snack and a great evening treat.
-
Use them as a topping for sticky rice, rice rolls, or grilled pork and vermicelli.
Preparing the perfect peanats may seem like a simple task, but it requires attention to detail at every step, from ingredient selection to frying techniques. By following these tips, you’ll be able to enjoy crispy, flavorful peanats that stay fresh and tasty for a week. So, why wait? Try making them today and take your meals to the next level!
The Ultimate Guide to Cleaning Pork Innards: A Secret Spice Revealed for a Fresh, Odor-Free, and Tender Delight

When it comes to preparing pork offal, there’s a special technique to ensure you remove any impurities and odours, whilst retaining its delicious flavour.
The Ultimate Guide to Wooden Chopstick Care: Keep Them Mold-Free and Pristine All Year Round

Introducing the ultimate guide to ensuring your chopsticks remain mold-free and in pristine condition. Uncover the secrets to proper chopstick care and maintenance, ensuring a hygienic and enjoyable dining experience every time. Learn how a simple step can make a world of difference, elevating your culinary adventures to new heights of perfection.
8 Immune-Boosting Foods for Your Child’s Health This Fall and Winter

A balanced and tailored nutrition plan is key to a child’s overall health and well-being. By focusing on the right foods and nutrients, we can boost their immune system, making them stronger and healthier.
Why You Should Avoid Eating Raw Wood Ear Mushrooms: A Word of Caution for Home Cooks

Dried mushrooms are a culinary staple, known for their intense flavor and versatility. While most fresh produce is prized for its peak freshness, the shiitake mushroom is an exception, requiring a unique drying process to unlock its full potential. This transformative step enhances its flavor, making it a beloved ingredient in countless dishes worldwide.
The Ultimate Guide to Making Delicious and Nutritious Sesame Salt: Elevate Your Meals, From Rice to Sticky Rice.

“Unleash the magic of sesame salt with this effortless homemade recipe. Impress your taste buds and elevate your culinary creations with just a few simple steps. It’s time to bring a burst of flavor to your kitchen!”


